Phone Battery Teardown Shows Outer Casing Carries Positive Charge
bigclivedotcom
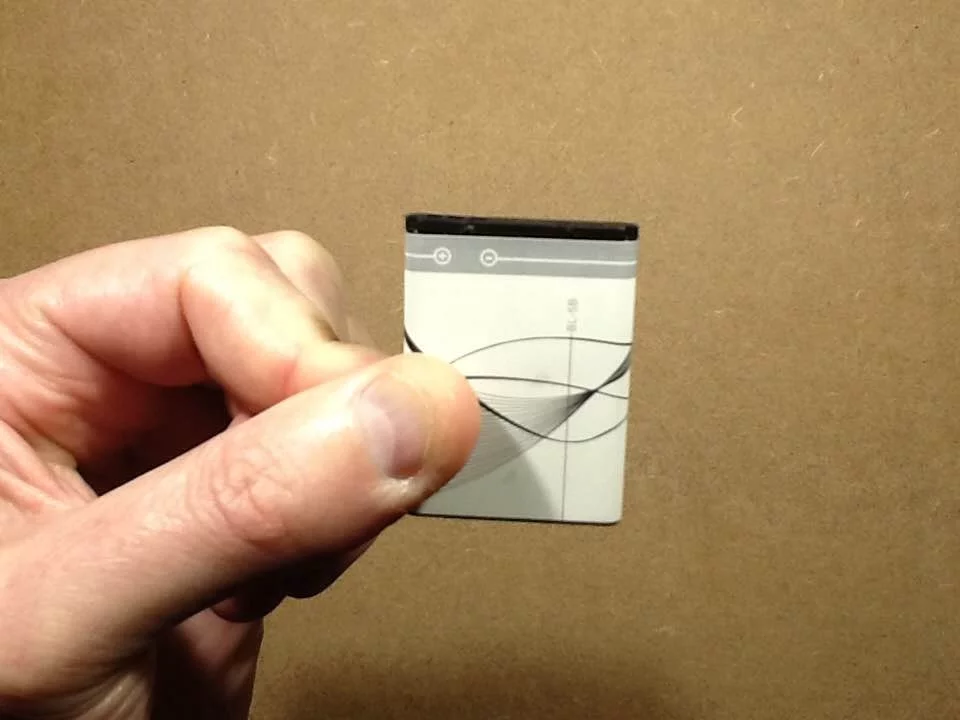
A thin external sticker provides the only insulation between a phone battery's live positive metal shell and adjacent electronics, creating immediate short-circuit risks if breached.
AI-assisted summary of TOTAL teardown of a lithium phone battery. — original source. Check the original for full context.
Source published:
Key ideas
- A total teardown of a lithium-ion phone battery reveals an integrated DW01 protection IC and dual-MOSFET arrangement embedded directly into the plastic top cap to manage overcharge and over-discharge cutoffs. (8:22)
- Mechanical breaches of the outer casing can easily pinch the feedthrough tab, causing an immediate internal short circuit and chemical thermal runaway accompanied by strong pear-drop solvent vapors. (1:56)
- The rigid metal outer casing of this phone cell is electrically tied directly to the positive terminal rather than ground, posing a severe short-circuit hazard if pressed against project enclosures or PCBs with only a plastic label as insulation. (14:34)
- Despite packing substantial phone battery capacity, the active internal jelly-roll assembly unrolls to a surprisingly modest length of approximately 420 millimeters. (16:48)
Detailed notes
## Background Published on YouTube by bigclivedotcom on October 18, 2015, this video documents a complete physical teardown of a lithium-ion mobile phone battery. Prompted by viewer inquiries regarding whether phone cells feature built-in charge and discharge protection, Clive sets out to inspect the mounted circuit board, the hermetic metal enclosure, and the internal chemical roll, noting that dismantling a partially charged cell led to an unexpectedly hazardous bench experiment.
## TL;DR Clive sets out to expose the internal overcharge and discharge protection circuitry of a phone battery, but accidentally shorts the cell when his snips breach the hermetic metal casing, triggering intense heat, swelling, and sweet pear-drop electrolyte fumes. After discovering the partially shorted cell had merely burned clear and still carried an alarming 3.9 volts, he pauses the destructive work to safely bleed off the remaining charge through an external load. Under the microscope, he identifies the standard DW01 protection IC and cautions makers that the battery's outer metal jacket is live positive rather than ground. Once fully discharged, Clive completely unrolls the 420-millimeter flattened jelly-roll sandwich across his bench, inspecting the porous polymer separator, coated copper and aluminum foils, and crimped tab terminations.
## Atmosphere & style The video carries Clive's trademark dry, unflappable British humor, blending relaxed maker-bench curiosity with sudden, genuine workshop peril. The atmosphere shifts abruptly from methodical disassembly into tense, smoke-filled bench drama when the pinched casing begins hissing and bubbling with pungent solvent vapors, only for Clive to casually downplay the mishap with self-deprecating commentary. Watching it feels intimate and mildly nerve-wracking, juxtaposing the real hazards of live chemical short-circuits against measured, pragmatic explanations and tongue-in-cheek jokes about rubber gloves and workshop safety.
## Bulletin - [08:22](https://www.youtube.com/watch?v=uI1eRy0uBI8&t=502s) A total teardown of a lithium-ion phone battery reveals an integrated DW01 protection IC and dual-MOSFET arrangement embedded directly into the plastic top cap to manage overcharge and over-discharge cutoffs. - [01:56](https://www.youtube.com/watch?v=uI1eRy0uBI8&t=116s) Mechanical breaches of the outer casing can easily pinch the feedthrough tab, causing an immediate internal short circuit and chemical thermal runaway accompanied by strong pear-drop solvent vapors. - [14:34](https://www.youtube.com/watch?v=uI1eRy0uBI8&t=874s) The rigid metal outer casing of this phone cell is electrically tied directly to the positive terminal rather than ground, posing a severe short-circuit hazard if pressed against project enclosures or PCBs with only a plastic label as insulation. - [16:48](https://www.youtube.com/watch?v=uI1eRy0uBI8&t=1008s) Despite packing substantial phone battery capacity, the active internal jelly-roll assembly unrolls to a surprisingly modest length of approximately 420 millimeters.
## Key takeaways - [00:00](https://www.youtube.com/watch?v=uI1eRy0uBI8&t=0s) Lithium phone batteries feature integrated protection circuitry that halts charging at ~4.2 V and disconnects loads around 3.0 V during bench testing. - [01:56](https://www.youtube.com/watch?v=uI1eRy0uBI8&t=116s) The battery housing consists of a hermetically sealed metal can with a pass-through terminal at the top and an external plastic collar. - [01:56](https://www.youtube.com/watch?v=uI1eRy0uBI8&t=116s) Cutting into the metal enclosure can deform the top assembly, accidentally shorting the internal tab to the casing and triggering rapid thermal runaway. - [05:01](https://www.youtube.com/watch?v=uI1eRy0uBI8&t=301s) Rupturing a lithium cell releases a distinctive sweet, pear-drop solvent aroma characteristic of volatile organic liquid electrolytes. - [05:01](https://www.youtube.com/watch?v=uI1eRy0uBI8&t=301s) Protection electronics are potted into an injection-molded plastic end cap assembly secured to the cell body with heavy double-sided tape. - [08:22](https://www.youtube.com/watch?v=uI1eRy0uBI8&t=502s) Microscopic examination confirms the presence of the industry-standard DW01 protection monitor chip driving high-side or low-side switching MOSFETs. - [10:48](https://www.youtube.com/watch?v=uI1eRy0uBI8&t=648s) Partial thermal events may only burn away thin internal foil bridges rather than fully draining the cell, leaving dangerously high residual voltages (~3.9 V). - [10:48](https://www.youtube.com/watch?v=uI1eRy0uBI8&t=648s) Indoor destructive testing of charged lithium-ion cells poses severe fire hazards, requiring controlled external resistive discharge prior to complete teardown. - [14:34](https://www.youtube.com/watch?v=uI1eRy0uBI8&t=874s) The external metal can is tied to the positive (+) terminal, making the battery label the only barrier preventing shorts against adjacent project circuitry. - [16:48](https://www.youtube.com/watch?v=uI1eRy0uBI8&t=1008s) The internal architecture utilizes a continuous, flattened jelly-roll sandwich of coated aluminum and copper foils separated by a porous plastic membrane. - [16:48](https://www.youtube.com/watch?v=uI1eRy0uBI8&t=1008s) The complete unrolled active jelly-roll strip spans a length of only roughly 420 mm. - [16:48](https://www.youtube.com/watch?v=uI1eRy0uBI8&t=1008s) The translucent separator ribbon is engineered to prevent physical electrode contact while permitting ion transfer, though it melts under runaway temperatures. - [18:25](https://www.youtube.com/watch?v=uI1eRy0uBI8&t=1105s) Sharp radius corners inside the rolled battery can induce mechanical stress that flakes active chemical coatings away from the copper substrate. - [18:25](https://www.youtube.com/watch?v=uI1eRy0uBI8&t=1105s) Internal electrical connections use a mix of pierced, folded mechanical stapling wrapped in Kapton tape and direct compression or spot-welded tabs. - [20:25](https://www.youtube.com/watch?v=uI1eRy0uBI8&t=1225s) When the DW01 cuts off under high discharge current, internal chemistry relaxation causes the open-circuit terminal voltage to rebound back toward 3.0 V.
## Detailed walkthrough ### [00:00](https://www.youtube.com/watch?v=uI1eRy0uBI8&t=0s) Testing Phone Cells for Protection and Starting the Teardown
Big Clive explains that a viewer had asked whether lithium phone batteries actually include built-in charge and discharge protection. Based on his prior bench tests of a solar-powered device, he confirms they do: during charging on a bench power supply, the cell’s voltage would rise to approximately 4.2 volts, after which current draw tapered off and abruptly cut out; similarly, upon discharging, voltage dropped to just under 3 volts before suddenly cutting off entirely. To see the physical implementation of this circuitry, he sets out to dismantle the battery pack.
The battery features a rigid metal outer shell with plastic trim glued to the bottom. Clive checks for an external seam, finds none, and determines the internal cell assembly must be pried out from the top. He keeps a flame containment dish close by on his bench in case the cell shorts out. While peeling off the bottom plastic trim, he observes that the metal container is completely enclosed, remarking that the metal jacket is likely meant to contain flames if something goes wrong. At the top end, gold-plated external battery contacts are integrated into an end cap assembly, which he assumes shares a circuit board with the protection components.
- Charging behavior observed: Climbs to ~4.2 V, current tapers and drops abruptly. - Discharging behavior observed: Runs down to just under 3.0 V, then cuts off cleanly. - Safety setup: Flame containment dish stationed directly on the workbench.
[01:56](https://www.youtube.com/watch?v=uI1eRy0uBI8&t=116s) Breaching the Hermetic Can and Inadvertent Short Circuit
Attempting to slide the internal cell out of the metal casing proves difficult. Clive finds that the metal container has an insulated feedthrough terminal and appears to be fully hermetically sealed, possibly featuring spot welds or a pressure vent. Lacking an obvious opening for his snips, he cuts directly into the metal casing near the top contacts.
```mermaid flowchart TD accTitle: Internal Cell Short Circuit Mechanism accDescr: Diagram showing how cutting into the battery casing mechanically bridged the positive terminal and the outer case, initiating thermal runaway.
subgraph Casing["Battery Enclosure"] A["External Casing / Can (Connected to Positive)"] B["Insulated Central Feedthrough Pin"] end
subgraph Damage["Prying / Cutting Action"] C["Side Snips Force Casing Inward"] end
subgraph Result["Thermal Event"] D["Direct Short Between Can and Terminal Tab"] E["Localized Fizzing, Pear-Drop Solvent Odor, and Heat"] end
C --> A A -->|"Contact forced across separator"| B B --> D D --> E ```
As the metal shears pinch into the top assembly, the cell immediately begins heating up. Clive realizes one terminal is spot-welded directly to the inner surface of the exterior metal can while the other terminal runs through the feedthrough. Deforming the casing bridges the terminals, causing an internal short. As Clive puts it, “Oh yes, this is now in the category of foolish things that I've done.”
- The metal enclosure is completely sealed with a pass-through terminal at the top cap. - Mechanical cutting inadvertently pinched the feedthrough lead against the can body. - The cell begins fizzing, swelling, and heating rapidly on the bench.
[05:01](https://www.youtube.com/watch?v=uI1eRy0uBI8&t=301s) Thermal Runaway, Electrolyte Odors, and Inspecting the Cap
The battery grows intensely hot and begins to fizz and leak hot electrolyte fluid. Clive pauses to wipe the expelled chemical residue from his fingers, noting that while no open flames have erupted, a heavy, hot vapor fills the air. The smell is instantly recognizable as the sweet, pungent "pear-drop" (ester-like solvent) scent characteristic of ruptured lithium-ion cell electrolytes.
He sets the smoking cell body aside in the flame dish to monitor it while turning his attention to the clipped-off top cap assembly. The circuit board is embedded in its own rigid plastic carrier frame, secured to the can with double-sided adhesive tape. Clive struggles to pry the plastic apart, suspecting the delicate electronics are potted directly into the injection-molded housing to keep the battery footprint as thin and compact as possible.
- Physical symptoms: Intense surface heat, audible fizzing, dripping liquid electrolyte. - Distinct odor: Strong pear-drop solvent aroma released from the evaporating electrolyte. - Packaging method: Plastic terminal frame secured with heavy industrial double-sided adhesive tape and structural potting.
[08:22](https://www.youtube.com/watch?v=uI1eRy0uBI8&t=502s) Exposing the DW01 Protection Circuitry
While Clive chips away at the plastic molding around the terminal board, the damaged cell body gradually cools down, having burned off a portion of its stored energy without erupting into open flame. Clive admits a touch of self-deprecating humor about the lack of fireworks: “I think that's controlled it. I think it's probably shorted most of what energy was in it. It wasn't fully charged, but it was charged a modest amount because I like to keep these things topped up a little bit. So, I think it may have failed in a relatively safe manner. I mean, okay, that's slightly disappointing that it failed in a relatively safe manner.”
Examining the mangled circuit board under a digital bench microscope, Clive finds several tiny surface-mount components, some of which sheared off during the mechanical struggle. He spots a 6-pin integrated circuit alongside traces that previously held a companion package (likely a dual-MOSFET switch). Under microscopic magnification, he reads the part marking on the surviving 6-pin chip as a "DW01" (specifically visible as `DW1`), confirming it is indeed the industry-standard single-cell lithium battery protection IC designed to drive switching MOSFETs for overcharge and over-discharge cutoff.
- Protection IC identified: DW01 series 6-pin lithium-ion protection monitor. - Associated circuitry: Paired MOSFET package (sheared during de-molding), passive filtering, and battery feed tabs. - Cell status: Temporarily stabilized after partial internal discharge.
[10:48](https://www.youtube.com/watch?v=uI1eRy0uBI8&t=648s) Assessing Residual Charge and Cell Structure
With the cell appearing quiet, Clive takes snips back to the can to peel open the outer metal wall. The moment the cutting tool bites into the layers, it creates fresh internal bridging, producing a shower of bright electrical sparks and sudden puffs of smoke.
Testing the open terminals with a multimeter, Clive discovers the cell is still reading an astonishing 3.9 volts. The short circuit had simply burned clear the thin foil bridge rather than fully depleting the battery's chemical capacity. Acknowledging the extreme danger of cutting into an energized 3.9 V pouch on an indoor workbench, Clive remarks: “So despite the fact you guys want me to blow this up and you deeply do want me to blow this up, doing it indoors at my bench is probably an absolutely terrible idea.”
He strips back enough of the outer shell to reveal the construction: a classic tightly wound jelly-roll consisting of stacked layers of coated metal foil, separator membranes, and organic liquid electrolyte, compressed flat to fit into the rectangular phone battery form factor. A rubber grommet seals the top feedthrough. Clive decides to halt destructive work until he can safely discharge the cell in a controlled manner via a resistive load, unwilling to risk a workshop fire overnight.
- Measured voltage: ~3.9 V remaining on the cell after multiple shorting events. - Failure mechanism: Localized foil vaporization ("burning clear") prevented total discharge. - Construction style: Flattened jelly-roll winding with foil tabs and insulating rubber top grommets.
[14:34](https://www.youtube.com/watch?v=uI1eRy0uBI8&t=874s) Controlled Discharge and Unwinding the Jelly-Roll
Returning to the project later, Clive dons rubber protective gloves and lays down kitchen towel across his bench, joking that the new gear makes the video look like a cheap porn film. He cautions viewers never to search for bizarre adult internet memes like "cake farts," before getting straight to his key safety finding: after stripping the casing, he discovered that the outer metal can is connected to the battery's positive (+) potential, not ground/negative. Clive strongly emphasizes this warning for hobbyists: “The outer metal casing, I thought it might be connected to negative, but it was actually connected to positive. Keep that in mind if you're using these cells, these lithium batteries out of phones, in a project. The only thing between the positive body of this and your project, basically if you've got it pressed against a circuit board, is the sticky label on the surface.”
Now that the battery has been fully and safely discharged externally, Clive begins peeling apart the jelly-roll layers to expose their physical anatomy. He unrolls the continuous sandwich of coated aluminum current collector foil, porous polymer separator film, and dark active electrode material, noting that even an empty cell can occasionally hiss if minor pockets of chemical charge remain.
- Polarity alert: The rigid exterior metal enclosure of typical phone cells is tied directly to POSITIVE (+), separated from circuits only by a thin label wrap. - Safety prep: Full resistive bench discharge down to 0 V before unrolling. - Internal materials revealed: Coated metallic foils (including an aluminum substrate) interleaved with polymer separator sheets.
[16:48](https://www.youtube.com/watch?v=uI1eRy0uBI8&t=1008s) Unrolling the Jelly Roll and Examining the Separator
Unrolling the inner assembly of the lithium phone battery reveals a simple wound sandwich: an electrode foil layer, a thin plastic separator film, and the opposing electrode on the other side. As Clive unrolls the tightly wrapped structure across his bench, strong volatile solvent fumes immediately escape into the room. Commenting on the distinct chemical odor, Clive observes, “That is very fumy. It smells kind of It doesn't smell unpleasant. Probably is unpleasant.” The electrode foil shows a double-sided coating, though Clive questions whether its darkened color is typical or the result of extreme thermal stress caused by accidentally shorting the cell while opening the casing.
The separator itself is a translucent, milky plastic ribbon permeable to the liquid electrolyte. Clive points out its critical safety role: during a thermal runaway event, this thin plastic membrane melts away, allowing the opposing positive and negative plates to make direct physical contact and trigger a dead short with catastrophic current flow. Pulling out a tape measure, Clive is genuinely surprised by how short the assembly actually is, finding that the entire active strip measures only around 420 millimeters long. Considering the substantial energy density and storage capacity packed into modern phone batteries, the physical dimensions and structural simplicity of the core components seem remarkably modest.
```mermaid flowchart LR accTitle: Lithium Cell Layer Architecture accDescr: Diagram showing the layered sandwich structure rolled into the phone battery cell. subgraph JellyRoll["Wound Cell Structure (~420 mm Length)"] direction TB E1["Coated Aluminium / Cathode Foil"] SEP["Milky Plastic Separator Film"] E2["Coated Copper / Anode Foil"] end E1 --- SEP --- E2 ```
- **Active strip length**: Approximately 420 mm in total length, easily fitting across the video bench view. - **Separator construction**: Porous, milky plastic film designed to prevent physical electrode contact while permitting ion transfer. - **Electrolyte odor**: Strong, noticeable aroma released as soon as the airtight seal is compromised.
---
[18:25](https://www.youtube.com/watch?v=uI1eRy0uBI8&t=1105s) Foil Substrates, Bending Stress, and Tab Terminations
Examining the unrolled foil strip up close, Clive notices an iridescent, rainbow-like sheen across the surface, interspersed with visible copper showing through along the fold creases where the strip wrapped around the tight corners of the roll. He ponders whether the exposed bare metal stems from inconsistent surface contact during manufacturing or mechanical bending stress shearing the active chemical coating away from the copper substrate at sharp radius bends. He reflects on how impressive it is that such intricate, layered chemical cells can be manufactured with extreme consistency at mass scale for very little money.
Clive then inspects how the electrical tabs connect to the thin foil collectors inside the cell:
1. **Crimped / Stapled Tab**: Joined to what appears to be an aluminium electrode. The tab is secured by piercing through the foil, punching tabs, and folding the metal over itself like a mechanical staple, before being wrapped and insulated with a folded strip of amber Kapton tape. Clive notes this explains why he struggled to solder to it during earlier disassembly. 2. **Surface / Welded Tab**: Positioned against the opposing electrode. This connection appears to rely heavily on being laid directly against the active surface and held under compression by tape, though a tiny indentation suggests it may have received a light ultrasonic or spot weld through the material.
Reflecting on the sheer economy of the design, Clive remarks, “And yet they're so mass-produced and so cheap. It's just surprising.”
---
[20:25](https://www.youtube.com/watch?v=uI1eRy0uBI8&t=1225s) Protection Circuitry and the DW01 Cutoff Characteristics
Turning to the miniature protection circuit board removed from the top plastic cap of the cell, Clive discusses the integrated DW01 battery protection chip. While he searches his notes for the precise datasheet parameters, he recalls its dual-threshold voltage protection mechanism. The chip monitors both overcharging and over-discharge conditions, shutting off the integrated MOSFET switches if the cell deviates outside safe operating boundaries.
Clive points out an interesting behavior regarding the low-voltage cutoff threshold. He had originally assumed the under-voltage protection would kick in at just under 3.0 volts, but the datasheet indicates the DW01 allows cell voltage to drop considerably lower before completely opening the circuit. He explains the practical dynamics of this discharge curve: under a heavy electrical load, the cell voltage is depressed until it hits the trip threshold, but the instant the DW01 cuts the circuit and the discharge current ceases, the internal cell chemistry rebounds, causing the open-circuit terminal voltage to float back up to a normal resting discharged level. With the internals fully dismantled and analyzed, Clive concludes his complete teardown of the cell.
- **Protection controller**: DW01 battery management IC integrated into the pack collar. - **Voltage rebound**: Once the low-voltage cutoff disconnects the load, terminal voltage naturally creeps back up above the trigger threshold.
## Mentioned DW01, Big Clive, Kapton, YouTube, Patreon
## Video description You can now buy me cake and things to take apart at:- https://www.patreon.com/bigclive
So this started off as just trying to see how the circuitry was mounted in a lithium cell. I should really have discharged it first as it got a bit freaky at times. But this is a total teardown. Not just cracking out the circuit board, but the whole case and then the guts of the cell too.
[Source](https://www.youtube.com/watch?v=uI1eRy0uBI8)