Color Maximite 2 Adds ARM Chip to Outrun 1980s Assembly Code
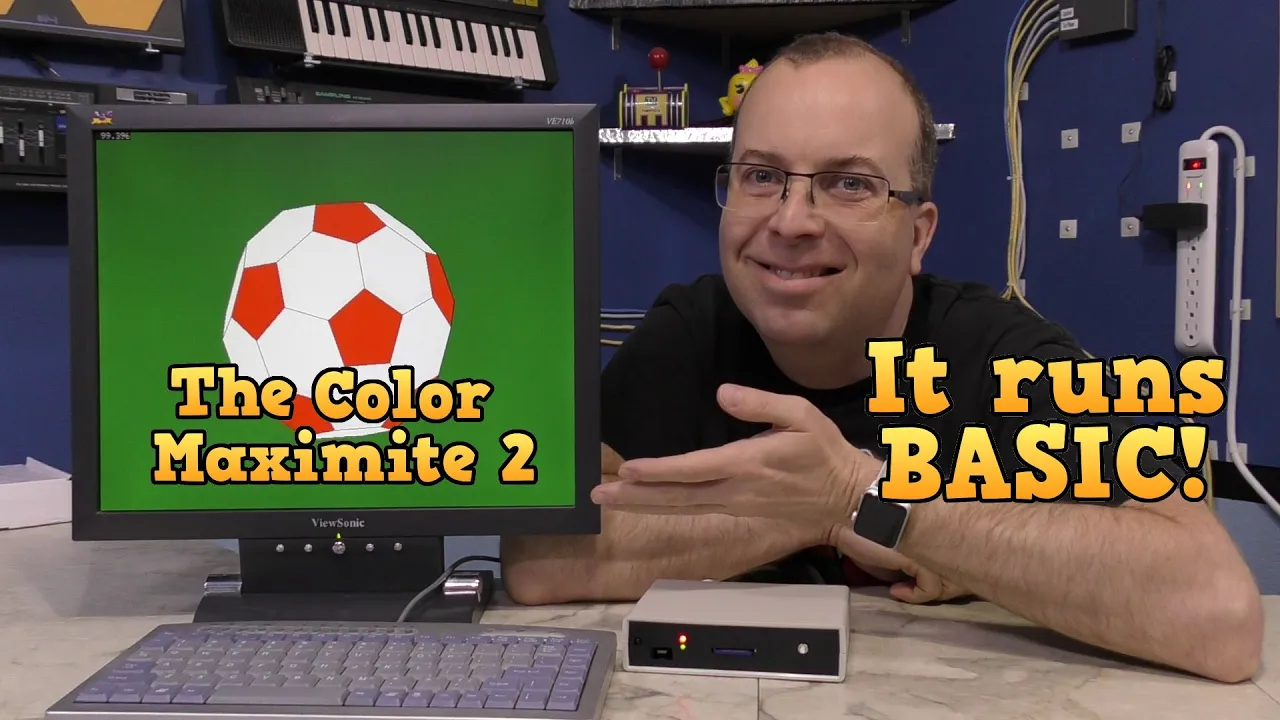
Color Maximite 2 - ARM CPU that runs BASIC! — The 8-Bit Guy

The 8-Bit Guy

By pairing a 480 MHz ARM processor with on-device BASIC interpretation, the Color Maximite 2 runs complex graphics and arcade games without requiring modern compiler toolchains.

AI-assisted summary of Color Maximite 2 - ARM CPU that runs BASIC! — original source. Check the original for full context.

Source published:

Key ideas

  • The Color Maximite 2 upgrades its core processing engine from a PIC32 to a 480 MHz ARM Cortex-M7, enabling it to execute interpreted BASIC at approximately 270,000 lines per second. (0:00)
  • Visual output leaps from an 8-color maximum to 16-bit color displaying up to 65,536 colors at an 800×600 default VGA resolution, completely abandoning composite NTSC. (0:00)
  • Priced around $99, the device uses an off-the-shelf Waveshare core module soldered to a carrier board to simplify small-run manufacturing. (0:00)
  • The hardware integrates a 40-pin GPIO header matching the Raspberry Pi pin layout, allowing real-time I/O control directly from interpreted BASIC without an external compiler toolchain. (7:49)

Detailed notes

## Background Published on YouTube by The 8-Bit Guy (David Murray) on July 1, 2020, this video reviews the Color Maximite 2, an ARM-powered hobbyist computer that boots directly into BASIC. The video description directs viewers to David's website and Patreon, highlights an in-depth video by Debuglive, and provides links to download firmware, manuals, and Gerber files from Geoff Graham's website.

## TL;DR David Murray explores the Color Maximite 2, highlighting its hardware leap from a PIC32 microcontroller to a 480 MHz ARM Cortex-M7 capable of processing 270,000 lines of interpreted BASIC per second. After demonstrating setup, media playback, and legacy compatibility fixes for his older Tetris port, he showcases ambitious community projects including real-time 3D rendering, a full *Gauntlet* arcade conversion, and a *Wolfenstein 3D* proof of concept. He then uses the 40-pin GPIO header to wire up an infrared sensor and drive a floppy disk stepper motor using quick BASIC routines. Concluding with a comparison to his own Commander X16 project, David praises the platform as an accessible, friction-free gateway to coding that eliminates the need for complex modern toolchains.

## Atmosphere & style The presentation carries a casual, hands-on maker vibe fueled by David's down-to-earth delivery and genuine curiosity. Watching him strip IDE ribbon cables to hook up breadboard components and point his camera directly at a CRT monitor gives the demonstration an unpretentious, workbench intimacy. The mood is both instructional and nostalgic, capturing David's quiet astonishment as interpreted BASIC powers fluid arcade conversions and simple hardware control loops right before the viewer's eyes.

## Bulletin - [00:00](https://www.youtube.com/watch?v=IA7REQxohV4&t=0s) The Color Maximite 2 upgrades its core processing engine from a PIC32 to a 480 MHz ARM Cortex-M7, enabling it to execute interpreted BASIC at approximately 270,000 lines per second. - [00:00](https://www.youtube.com/watch?v=IA7REQxohV4&t=0s) Visual output leaps from an 8-color maximum to 16-bit color displaying up to 65,536 colors at an 800×600 default VGA resolution, completely abandoning composite NTSC. - [00:00](https://www.youtube.com/watch?v=IA7REQxohV4&t=0s) Priced around $99, the device uses an off-the-shelf Waveshare core module soldered to a carrier board to simplify small-run manufacturing. - [07:49](https://www.youtube.com/watch?v=IA7REQxohV4&t=469s) The hardware integrates a 40-pin GPIO header matching the Raspberry Pi pin layout, allowing real-time I/O control directly from interpreted BASIC without an external compiler toolchain.

## Key takeaways - [00:00](https://www.youtube.com/watch?v=IA7REQxohV4&t=0s) The 480 MHz ARM Cortex-M7 processor allows interpreted BASIC code to execute as fast as or faster than 1980s assembly language. - [00:00](https://www.youtube.com/watch?v=IA7REQxohV4&t=0s) The platform transitions from legacy PS/2 keyboards to modern USB keyboard support while retaining standard VGA output. - [00:00](https://www.youtube.com/watch?v=IA7REQxohV4&t=0s) Using a Waveshare ARM core module on a custom carrier board circumvents the manufacturing challenge of hand-soldering high-density surface-mount chips. - [02:50](https://www.youtube.com/watch?v=IA7REQxohV4&t=170s) The system boots instantly to a command prompt with native support for SD card navigation, 16-bit graphics, MP3 playback, and Amiga MOD tracker audio. - [02:50](https://www.youtube.com/watch?v=IA7REQxohV4&t=170s) Backward compatibility with older PIC32 Maximite code requires toggling 'OPTION LEGACY ON' and updating video mode parameters. - [04:30](https://www.youtube.com/watch?v=IA7REQxohV4&t=270s) Complex real-time software, including 3D texture mapping and full arcade conversions like Gauntlet, runs entirely inside readable, interpreted BASIC. - [04:30](https://www.youtube.com/watch?v=IA7REQxohV4&t=270s) A proof-of-concept raycasting engine for Wolfenstein 3D demonstrates that 3D game mechanics can run at playable frame rates within the interpreter. - [07:49](https://www.youtube.com/watch?v=IA7REQxohV4&t=469s) A Raspberry Pi-compatible 40-pin GPIO header allows direct hardware control of peripherals, such as an infrared receiver and a floppy drive stepper motor, using simple BASIC loops. - [09:58](https://www.youtube.com/watch?v=IA7REQxohV4&t=598s) Keyboard responsiveness can be tuned down to a 25-millisecond repeat rate for rapid input handling. - [09:58](https://www.youtube.com/watch?v=IA7REQxohV4&t=598s) David Murray clarifies that the Color Maximite 2 overlaps functionally with the Commander X16, Arduino, and Raspberry Pi, despite differing hardware goals. - [10:52](https://www.youtube.com/watch?v=IA7REQxohV4&t=652s) The self-contained BASIC environment lowers the programming barrier to entry by removing the need for compilers, IDEs, and serial driver setups. - [10:52](https://www.youtube.com/watch?v=IA7REQxohV4&t=652s) The original PIC32 Maximite remains a more cost-effective choice for dedicated microcontroller tasks, whereas the Color Maximite 2 is tailored for gaming and complex projects.

## Detailed walkthrough ### [00:00](https://www.youtube.com/watch?v=IA7REQxohV4&t=0s) Introduction to the Color Maximite 2 and Hardware Upgrades

In 2018, David Murray (The 8-Bit Guy) showcased the original Color Maximite, a hobbyist machine built around a PIC32 microcontroller running an integrated operating system. That original platform allowed users to hook up a monitor and keyboard to write and run software in BASIC. It was remarkably fast for its class, easily outperforming line-drawing routines on vintage 8-bit Commodore computers and even running David's custom port of Tetris. Now, an upgraded version has arrived: the Color Maximite 2. While channels like Debuglive had already released extensive coverage, David takes the machine apart to show the physical board and dive into its technical improvements over the previous generation.

The most dramatic leap is the processor. The PIC32 has been replaced by an ARM Cortex-M7 running at a blistering 480 MHz, capable of crunching through 270,000 lines of interpreted BASIC code every second. As David points out, “This thing can literally run interpreted BASIC as fast or faster than a computer from the 80s can run assembly language.” Peripheral support and visuals also received massive overhauls. The system has shifted from legacy PS/2 keyboards to modern USB keyboard support. Visually, the evolution is striking: while the first Maximite was strictly monochrome and its immediate successor topped out at 8 colors, the Color Maximite 2 provides 16-bit color, displaying up to 65,536 colors simultaneously across five distinct video modes with a default resolution of 800×600.

Unlike the previous version, which offered a monochrome NTSC television mode alongside 2-, 4-, and 8-color configurations, the Color Maximite 2 completely drops composite NTSC output in favor of standard VGA. It retains two legacy resolutions specifically to preserve backward compatibility with software created for older Maximites. The board sells for around $99 and is built as a carrier board mated to an off-the-shelf Waveshare core module, chosen because soldering the high-density ARM chip by hand is too difficult for small-run manufacturing. David explains that the new unit is not necessarily a direct replacement for the PIC-based predecessor, which remains cheaper and well-suited for simpler microcontroller tasks.

| Specification | Original Maximite | Color Maximite (1) | Color Maximite 2 | |:--- |:--- |:--- |:--- | | **Processor** | PIC32 microcontroller | PIC32 microcontroller | ARM Cortex-M7 @ 480 MHz | | **BASIC Execution Speed** | Baseline interpreted | Baseline interpreted | ~270,000 lines per second | | **Color Support** | Monochrome (1-bit) | 8 colors (3-bit) | 65,536 colors (16-bit) | | **Keyboard Interface** | PS/2 | PS/2 | USB | | **Default / Max Video** | Monochrome VGA / NTSC | 8-color VGA / NTSC | 800×600 VGA (up to 16-bit depth) | | **Price Point / Role** | Low-cost DIY microcontroller | Low-cost DIY microcontroller | ~$99 advanced retro-style micro |

---

[02:50](https://www.youtube.com/watch?v=IA7REQxohV4&t=170s) Setup, File Management, and Legacy Compatibility

Hooking up the Color Maximite 2 requires only standard desktop peripherals: power from an ordinary 5-volt USB phone charger, a VGA monitor, a USB keyboard, and powered external desktop speakers plugged into the 3.5 mm audio jack. Upon powering on, the machine boots almost instantly into a minimalist command prompt. Typing the `FILES` command brings up an interactive file browser that displays the contents of the SD card, complete with subdirectories. The interface highlights executable BASIC programs in yellow, but it can also natively open multiple media types. It decodes standard image formats directly into 16-bit color and plays background audio streams, including MP3s and Amiga MOD tracker files, without any clutter or playback indicators intruding on the screen.

```mermaid flowchart TD accTitle: Legacy BASIC Compatibility Flow accDescr: Flowchart showing the troubleshooting steps required to adapt an older Color Maximite BASIC game to run on the Color Maximite 2.

subgraph LegacyCode["Legacy CMM1 BASIC File"] A["Load Tetris.bas"] end

subgraph ErrorHandling["Syntax & Command Corrections"] B["Fails on modern draw syntax"] --> C["Add 'OPTION LEGACY ON'"] C --> D["Runs in screen corner, crashes on MODE"] D --> E["Manually update MODE command to CMM2 resolution"] end

subgraph Result["Working Execution"] F["Game executes smoothly with minor top-text clipping"] end

A --> B E --> F ```

To test backward compatibility, David loads the Tetris clone he originally programmed for the PIC32 version. At first, the program crashes immediately because several graphic and screen-drawing commands were overhauled for the new architecture. However, the system includes a backward-compatibility toggle: entering `OPTION LEGACY ON` at the top of the program forces the BASIC interpreter to emulate the command behavior of earlier firmware. Running it again shows progress—the playfield appears, although it is constrained to a small corner of the screen—before it halts on another error. The `MODE` command cannot be translated automatically and must be updated by hand to match one of the new display modes. Once that single line is updated, the game runs completely, showing only minor cosmetic text clipping at the very top. As David observes, “So that’s good news, it means you can write code on the older Maximite and it should work on the newer one with very little modification.”

- Powers directly from a standard 5V USB charger. - Onboard media capabilities include displaying 16-bit graphic images and playing MP3 and Amiga MOD tracker audio files. - Older BASIC software functions reliably once `OPTION LEGACY ON` is appended and the video `MODE` statement is manually adapted.

---

[04:30](https://www.youtube.com/watch?v=IA7REQxohV4&t=270s) Software Demos: Gauntlet, Final Fight, Wolfenstein 3D, and the Demoscene

To illustrate what the ARM Cortex-M7 can achieve when pushed, David highlights several community creations. The first is an interactive demo of a 3D textured soccer ball spinning in real-time at an 800×600 resolution. The rendering calculations run entirely in interpreted BASIC rather than pre-compiled binaries. Hitting `Ctrl+C` immediately breaks the execution, dropping the user into the built-in editor to browse the raw mathematical routines making the animation possible.

Even more impressive is a full-featured arcade conversion of *Gauntlet*. Because David lacks an external VGA capture device compatible with the non-standard video timings, he films the CRT monitor directly while capturing line-level audio. The game begins with an arcade copyright disclaimer, prompting David to joke: “Let’s just hope Warner Brothers isn’t as evil as Nintendo is and hopefully there won’t be any cease and desist letter sent out over this.” The port features a configuration menu where players can select between 8-bit chip melodies or full 16-bit audio, and pick controller inputs—including keyboard control or a Nintendo Wii Nunchuk connected directly to a front-panel port. Once gameplay starts, the scrolling dungeons, enemy generators, and character classes look and play identical to the arcade original. Hitting `Ctrl+C` once again proves the entire game is running as transparent, human-readable BASIC code that anyone can study and alter.

```mermaid flowchart LR accTitle: Color Maximite 2 Software Capabilities accDescr: Breakdown of community software demonstrations running under the interpreted BASIC engine.

subgraph Demos["Community Creations"] A["3D Soccer Ball<br/>(800x600 Real-Time)"] B["Gauntlet Arcade Port<br/>(Wii Nunchuk + 16-bit Sound)"] C["Final Fight Engine<br/>(Sprite Combat Demo)"] D["Wolfenstein 3D Engine<br/>(Raycasting Proof of Concept)"] E["90s Demoscene Demo<br/>(Music & Visual FX)"] end

subgraph Interpreter["MMBASIC Engine"] F["480 MHz ARM Cortex-M7<br/>Real-Time Line Interpretation"] end

A --> F B --> F C --> F D --> F E --> F ```

David demonstrates several other projects in active development: - A side-scrolling beat-'em-up engine based on *Final Fight*, showcasing fluid multi-frame character animations and attack moves. - A raycasting proof-of-concept engine running *Wolfenstein 3D* at playable frame rates, which David admits he never expected to see written inside an interpreted BASIC environment. - A classic 1990s-style demoscene showcase featuring synced raster-style effects, scrollers, and tracker music.

Reflecting on the system's broader appeal, David explains: “I think this is an excellent way for somebody to get an introduction to programming as the barrier to entry here is very low compared to learning to code on modern systems.”

---

[07:49](https://www.youtube.com/watch?v=IA7REQxohV4&t=469s) Microcontroller Projects: GPIO, Infrared Sensing, and Floppy Control

Turning away from gaming, David explores the hardware interfacing capabilities of the Color Maximite 2. The rear edge of the computer features a 40-pin GPIO expansion header mapped to the standard Raspberry Pi pin layout. To wire up circuits without dedicated breakout boards, David modifies a standard 40-pin IDE ribbon cable by lopping off one connector and splitting the ribbon wires into individual strands.

```mermaid flowchart LR accTitle: GPIO Interfacing Setup accDescr: Hardware wiring layout for the infrared sensor test through the 40-pin header.

subgraph CMM2["Color Maximite 2"] Header["40-Pin GPIO Header<br/>(Raspberry Pi Layout)"] end

subgraph IDE["Stripped 40-Pin IDE Cable"] Pwr["Red Wire (+5V / VCC)"] Gnd["Black Wire (GND)"] Data["White Wire (Data Pin)"] end

subgraph Sensor["Infrared Receiver"] IR["IR Sensor Module<br/>(Active-Low Logic)"] end

Header --- Pwr Header --- Gnd Header --- Data Pwr --> IR Gnd --> IR IR --> Data ```

His first experiment uses an infrared sensor receiver connected via alligator clips. After writing a small custom BASIC oscilloscope routine in just a few minutes, the screen begins graphing the logic level of the pin in real time. By default, the input pin registers a high logic level; pulling it to ground brings the plotted trace down to zero. Hooking up the sensor module—powered via the 5V and ground pins—allows it to pull the line low whenever it senses modulated IR light. While there is minor stray electrical noise on the line that could be cleaned up with a pull-up resistor or filtering capacitor, pointing an infrared remote control at the sensor clearly draws incoming digital data packets across the monitor. David adds a single line of code to trigger a speaker beep whenever incoming signal packets arrive, creating audible feedback for each unique button press and demonstrating the repeat codes sent when holding a remote key down.

For his final hardware test, David wires the GPIO lines directly to an old 3.5-inch floppy disk drive to control its stepper motor. Floppy drive logic is straightforward: sending 5V pulses to the drive's step pin moves the read/write head by one track, while asserting a second pin alters the direction of the movement. Writing a quick BASIC loop to toggle the appropriate output pins quickly has the floppy drive stepping its head back and forth across the carriage on command.

[09:58](https://www.youtube.com/watch?v=IA7REQxohV4&t=598s) Keyboard Repeat Tuning and Commander X16 Comparison

David tests out a quick tweak to speed up responsiveness on the Color Maximite 2 by lowering the keyboard repeat rate down to 25 milliseconds, showing off the significantly faster results on screen with an enthusiastic reaction to how well it performs. Anticipating viewer feedback, he directly tackles an obvious question: “Hey David, why are you showing this, doesn’t it directly compete with the Commander X16 that you are helping develop?” His response is nuanced: “Well, yes and no. There is certainly some overlap with the Maximite and the Commander X16, as well as other products like the Raspberry Pi or Arduino.” He explains that while all these platforms are designed with distinct goals, there is natural functional crossover where several of them can accomplish the same tasks.

Taking advantage of the segue, David shares a brief project update on the Commander X16. Fresh unpopulated system boards from PCBWay had arrived just a few days prior, along with a couple of expansion cards intended specifically for hardware development. While he had not yet had the opportunity to solder components onto the boards to verify that they work, he remains optimistic about testing them in the near future before pivoting back to the Maximite.

```mermaid flowchart TD accTitle: Overlapping computing and development ecosystems accDescr: Diagram illustrating how the Color Maximite 2 overlaps with Commander X16, Arduino, and Raspberry Pi.

subgraph RetroStyle["Direct BASIC & Retro Focus"] CM2["Color Maximite 2<br/>(ARM-based BASIC)"] X16["Commander X16<br/>(Modern 8-bit Computer)"] end

subgraph MakerModern["General Maker & Microcontroller"] ARD["Arduino<br/>(Microcontroller Dev)"] RPI["Raspberry Pi<br/>(SBC / Linux)"] end

CM2 <-->|"Functional Overlap"| X16 CM2 <-->|"Hardware Control"| ARD CM2 <-->|"Standalone Computing"| RPI ```

- Keyboard repeat rate was lowered to 25 ms to demonstrate how it handles rapid-fire input. - New Commander X16 motherboards and hardware development expansion cards were manufactured and delivered by PCBWay.

[10:52](https://www.youtube.com/watch?v=IA7REQxohV4&t=652s) Accessibility of BASIC and Final Verdict on the Color Maximite 2

David makes a case for the platform as an exceptionally friendly gateway into computer programming. Even though BASIC has largely disappeared from modern commercial software development, it dramatically reduces friction for beginners. Unlike standard modern workflows, users do not need to install complex compilers, learn integrated development environments, or troubleshoot stubborn serial port drivers just to upload a test build to an Arduino. With the Color Maximite 2, anyone can write code directly on the screen and immediately witness the results. Summarizing the pedagogical advantages and raw performance of the machine, David states: “BASIC is one of the easiest languages to master. And obviously the speed is not much of a concern with the horsepower you have in this thing.”

Weighing the new hardware against its predecessor, David points out that if someone merely requires a microcontroller for basic I/O tasks, sticking with the older PIC32-powered Maximite makes more sense because it is cheaper and sufficiently fast. However, for anyone aiming to write games, the upgraded Color Maximite 2 is the clear choice. He concludes the video by teasing upcoming hardware reviews, including an all-in-one Android-based mini computer equipped with HDMI, Ethernet, and USB ports, as well as the Mini PET—a Commodore PET replica constructed entirely out of brand-new, off-the-shelf components.

- **No Toolchain Overhead:** Bypasses external toolchains, driver installation, and serial upload cycles entirely by running self-contained code on-device. - **Hardware Selection Trade-offs:** The original PIC32 Maximite remains budget-friendly for basic microcontroller applications, whereas the Color Maximite 2 provides the processing power required for gaming. - **Upcoming Project Previews:** - An all-in-one Android computer featuring rear HDMI, Ethernet, and USB ports. - The Mini PET, a fully functional Commodore PET rebuild utilizing modern off-the-shelf parts.

## Notable quotes > [09:58](https://www.youtube.com/watch?v=IA7REQxohV4&t=598s) There is certainly some overlap with the Maximite and the Commander X16, as well as other products like the Raspberry Pi or Arduino. — David Murray

## Mentioned David Murray, The 8-Bit Guy, Color Maximite, Color Maximite 2, PIC32, ARM Cortex-M7, Waveshare, Commander X16, Raspberry Pi, Arduino, PCBWay, Mini PET, Debuglive, Tetris, Gauntlet, Final Fight, Wolfenstein 3D, Nintendo Wii Nunchuk, Commodore PET, Warner Brothers, Nintendo

## Video description Support The 8-Bit Guy on Patreon: https://www.patreon.com/8BitGuy1

Visit my website: http://www.the8bitguy.com/

Check out Debuglive's more in-depth video on the Color Maximite 2: https://youtu.be/lzrX72aB7zg

Gerbers, manuals, firmware etc. are all available on http://geoffg.net/maximite.html

[Source](https://www.youtube.com/watch?v=IA7REQxohV4)

中文简报

Color Maximite 2引入ARM芯片,性能超越1980年代汇编代码 通过将480 MHz ARM处理器与设备端BASIC解释器相结合,Color Maximite 2无需现代编译器工具链即可运行复杂的图形和街机游戏。 David Murray对Color Maximite 2进行了深入探索,重点介绍了其硬件从PIC32微控制器到480 MHz ARM Cortex-M7的巨大跨越,后者每秒能够处理27万行解释型BASIC代码。在演示了安装设置、媒体播放以及针对其旧版《俄罗斯方块》移植作品的向下兼容性修复后,他展示了令人瞩目的社区项目,包括实时3D渲染、完整的《步步惊心》(Gauntlet)街机移植版以及《德军总部3D》(Wolfenstein 3D)概念验证。随后,他利用40针GPIO排针接入红外传感器,并通过简短的BASIC例程驱动软驱步进电机。最后,David将其与自己的Commander X16项目进行了对比,称赞该平台是一个易于上手、毫无阻碍的编程入门途径,彻底免除了使用复杂现代工具链的繁琐流程。 Color Maximite 2将其核心处理引擎从PIC32升级为480 MHz ARM Cortex-M7,使其能够以每秒约27万行的速度执行解释型BASIC代码。 (0:00) 画面输出从最多8色飞跃至16位色,在800×600的默认VGA分辨率下可显示多达65,536种色彩,并完全舍弃了复合NTSC接口。 (0:00) 该设备售价约99美元,采用焊接在底板上的现成微雪(Waveshare)核心模块,以简化小批量制造。 (0:00) 硬件集成了与树莓派引脚布局一致的40针GPIO排针,无需外部编译器工具链即可直接通过解释型BASIC实现实时I/O控制。 (7:49)

Detailed notes — zh

## Background 该视频由知名复古科技博主 The 8-Bit Guy 于 2020 年 7 月 1 日在 YouTube 频道发布。视频简介提供了其个人网站、Patreon 赞助链接,并附带了 Debuglive 关于该设备的深度评测推荐以及 Color Maximite 2 的 Gerber 文件、手册和固件下载地址。 ## TL;DR 本期视频全面评测了升级版复古单板计算机 Color Maximite 2。相比初代基于 PIC32 的设计,新机型换装了 480 MHz 的 ARM Cortex-M7 处理器,支持 16 位真彩色并具备每秒执行 27 万行 BASIC 代码的强劲算力。The 8-Bit Guy 演示了旧版《俄罗斯方块》的移植流程,展示了社区制作的高水准 3D 旋转球体、街机移植版《Gauntlet》等演示程序,并利用其兼容树莓派的 40 针 GPIO 成功捕获红外遥控信号并驱动软驱磁头步进电机。最后,他还探讨了该设备与自家 Commander X16 的定位区别,阐释了即时 BASIC 环境在编程启蒙中的独特优势。 ## Atmosphere & style 视频洋溢着创客与复古极客特有的探索兴奋感与纯粹乐趣。David 的讲解平实沉稳且条理清晰,从徒手剪开 IDE 排线做硬件实验,到直接在屏幕上敲代码调优游戏,处处流露出亲历亲为的工匠气质。整期内容既有对 80 年代即开即用编程哲学的怀旧与致敬,又饱含对现代微控制器算力赋能复古生态的惊叹与乐观。 ## Bulletin - [00:00](https://www.youtube.com/watch?v=IA7REQxohV4&t=0s) Color Maximite 2 将核心处理器升级为 480 MHz ARM Cortex-M7,每秒可运行 27 万行 BASIC 代码,色彩深度提升至 16 位 65,536 色,默认分辨率达 800x600。 - [02:50](https://www.youtube.com/watch?v=IA7REQxohV4&t=170s) 系统无需依赖现代 IDE 或外接主机,支持即插即用的开机编程,并原生具备 MP3、Amiga MOD 音频播放及 16 位图像解码能力。 - [07:49](https://www.youtube.com/watch?v=IA7REQxohV4&t=469s) 背部配备兼容树莓派定义的 40 针 GPIO,可通过编写简单的 BASIC 脚本实时捕获红外信号并驱动软驱磁头步进电机。 - [00:00](https://www.youtube.com/watch?v=IA7REQxohV4&t=0s) 当前设备售价约 99 美元,若未来实现规模量产成本有望降至树莓派级别;虽然与 Commander X16 存在部分生态重叠,但两者产品定位与实现路径截然不同。 ## Key takeaways - [00:00](https://www.youtube.com/watch?v=IA7REQxohV4&t=0s) Color Maximite 2 放弃了前代的 PIC32 微控制器,转向 480 MHz ARM Cortex-M7,让解释型 BASIC 的运行速度超越了 80 年代计算机的汇编语言。 - [00:00](https://www.youtube.com/watch?v=IA7REQxohV4&t=0s) 图形显示由原本的单色/8 色跃升至 16 位真彩色(65,536 色),键盘接口由 PS/2 全面过渡至现代通用 USB 接口。 - [00:00](https://www.youtube.com/watch?v=IA7REQxohV4&t=0s) 显示系统移除了对单色 NTSC 电视输出的支持,默认工作在 800x600 分辨率,同时保留兼容模式以平滑迁移老系统软件。 - [02:50](https://www.youtube.com/watch?v=IA7REQxohV4&t=170s) 设备通过 USB 接口即可完成供电,内置原生文件浏览器,并直接支持 MP3 音频与 Amiga MOD 音乐文件的后台解码播放。 - [02:50](https://www.youtube.com/watch?v=IA7REQxohV4&t=170s) 旧版程序在新架构上运行时,只需在代码首行加入 OPTION LEGACY ON 并微调 MODE 视频模式参数,即可实现向下兼容。 - [04:30](https://www.youtube.com/watch?v=IA7REQxohV4&t=270s) 凭借 ARM 架构的充沛算力,社区已实现纯解释型 BASIC 开发的 800x600 3D 旋转球体、街机版《Gauntlet》移植及《德军总部3D》射线投射引擎。 - [04:30](https://www.youtube.com/watch?v=IA7REQxohV4&t=270s) 主板集成了任天堂 Wii Nunchuk 手柄插孔,支持外接复古外设并提供 8 位与 16 位两种音频风格切换。 - [07:49](https://www.youtube.com/watch?v=IA7REQxohV4&t=469s) 背部兼容树莓派标准的 40 针 GPIO 支持底层硬件控制,仅凭几行 BASIC 代码就能构建出基础数字示波器并读取红外脉冲信号。 - [07:49](https://www.youtube.com/watch?v=IA7REQxohV4&t=469s) 通过向 GPIO 发送高低电平脉冲,Color Maximite 2 能精确控制老式软盘驱动器的磁头步进电机实现机械寻道。 - [09:58](https://www.youtube.com/watch?v=IA7REQxohV4&t=598s) 将键盘连击重复率缩短至 25 毫秒可极大提高人机交互与光标响应速度,使打字与控制更加敏捷。 - [09:58](https://www.youtube.com/watch?v=IA7REQxohV4&t=598s) 尽管 Color Maximite 2 与 Commander X16、树莓派及 Arduino 存在功能重叠,但各自的设计初心与面向人群各有侧重。 - [10:52](https://www.youtube.com/watch?v=IA7REQxohV4&t=652s) 免去编译器、庞大 IDE 与串口驱动配置的零阻碍即时编程体验,让搭载高性能 CPU 的 BASIC 机器成为绝佳的编程教育载体。 - [10:52](https://www.youtube.com/watch?v=IA7REQxohV4&t=652s) 对于纯粹的硬件控制与简单 I/O 实验,旧款 PIC32 设备性价比更高;若目标是图形化游戏开发,二代设备则是必然选择。 ## Detailed walkthrough ### [00:00](https://www.youtube.com/watch?v=IA7REQxohV4&t=0s) 从 PIC32 到 ARM Cortex-M7:Color Maximite 2 的硬件升级 The 8-Bit Guy 回顾了自己在 2018 年制作的一期介绍 Color Maximite 计算机的视频。当年的机器核心基本上是一颗 PIC32 微控制器,搭载了允许用户直接外接显示器和键盘并使用 BASIC 进行编程的操作系统。那台机器在当时就相当迅捷,他甚至做过在 Commodore 8 位电脑与 Color Maximite 上绘制线条的速度对比,并为其编写了一套专属的《俄罗斯方块》(Tetris)。如今,新一代的 Color Maximite 2 正式登场。虽然 Debuglive 已经制作了一期详尽的评测视频展示其能力,但他仍想分享自己的第一手印象并补充一些细节。 为了展示硬件变化,他将外壳拆开露出了内部主板。上一代基于的 PIC32 微控制器已被彻底淘汰,取而代之的是一颗运行在 480 MHz 的 ARM Cortex-M7 处理器。这颗 CPU 每秒能够执行高达 270,000 行 BASIC 代码。关于这一性能表现,The 8-Bit Guy 惊叹道:“This thing can literally run interpreted BASIC as fast or faster than a computer from the 80s can run assembly language.”(这家伙运行解释型 BASIC 的速度,简直比 80 年代的电脑运行汇编语言还要快,甚至更快。) ```mermaid flowchart TD accTitle: Color Maximite 硬件架构演进对比 accDescr: 对比初代 Color Maximite 与 Color Maximite 2 在处理器、色彩、外设接口和视频输出上的巨大硬件提升。 subgraph CM1["初代 Color Maximite (2018)"] CPU1["PIC32 微控制器"] COLOR1["单色 / 升级后 8 色"] KB1["PS/2 键盘接口"] VIDEO1["5 种显示模式 (含专用单色 NTSC)"] end subgraph CM2["Color Maximite 2 (2020)"] CPU2["ARM Cortex-M7 @ 480 MHz<br/>(270,000 行 BASIC 代码/秒)"] COLOR2["16-bit 真实色彩 (65,536 色)"] KB2["现代通用 USB 接口"] VIDEO2["默认 800x600 模式 (支持多重色深,保留兼容分辨率)"] end CM1 -->|"核心与外设全方位升级"| CM2 ``` 色彩与接口同样迎来了飞跃。最初的 Maximite 仅支持单色显示,随后的 Color Maximite 升级到了 8 色,而 Color Maximite 2 则直接提供了完整的 16 位色深,能够显示 65,536 种颜色。键盘接口也顺应潮流,从早已边缘化的 PS/2 接口更换为现代普及的 USB 接口。在视频输出模式方面,旧版具有 5 种模式(前 3 种分辨率相同但分为 2 色、4 色或 8 色,另有用于游戏的 8 色低分辨率模式及专为 NTSC 电视/监视器设计的单色模式);新版同样提供 5 种模式,但默认分辨率提升到了 800x600,且所有模式均可自由定义色深(最高达 16 位真彩),完全移除了 NTSC 视频输出,同时保留了两种旧分辨率以确保对老软件的向后兼容。 - **价格与定位**:Color Maximite 2 目前售价约 99 美元,并非为了直接替代前代产品而设计;由于使用了便于原型开发的微雪(Waveshare)核心板(因为手工焊接 ARM 芯片极其困难),成本相对较高。但如果未来实现大规模量产,其制造成本完全有望降低至与树莓派(Raspberry Pi)相当的水平。对于某些成本敏感或简单的场景,老款 PIC32 设备依然有存在价值。 --- ### [02:50](https://www.youtube.com/watch?v=IA7REQxohV4&t=170s) 开机测试、多媒体支持与旧版《俄罗斯方块》的兼容移植 连接与启动过程非常直观:系统通过 USB 供电,只需普通手机充电器即可点亮,随后接上 VGA 显示器、USB 键盘以及一套电脑音箱用于音频输出。开机后屏幕虽然没有繁琐的界面,但输入熟悉的 `FILES` 命令即可呼出文件浏览器,支持层级目录浏览,并将所有 BASIC 程序高亮标记为黄色。令人意外的是,该系统原生具备丰富的多媒体支持,不仅能直接解码并呈现 16 位色彩的常见图片格式,还能在后台直接流畅播放 MP3 音频以及来自 Amiga 平台的 MOD 音乐文件。 为了验证兼容性,他尝试加载两年前为旧版机器编写的《俄罗斯方块》游戏。然而程序在首次运行时报错闪退,原因是底层诸多屏幕绘图指令已经变更。好在系统提供了一个向后兼容指令:只要在 BASIC 代码开头加上 `OPTION LEGACY ON`,解释器就会以贴近老版本的方式运行。 ``` Tetris 启动报错 │ ├─► 在代码首行加入: OPTION LEGACY ON │ └─ 游戏可在屏幕一角渲染,但再次遇到报错崩溃 │ └─► 手动修改视频模式指令: MODE <新模式编号> └─ 画面正确铺开,除顶部文字略微被切边外,游戏完美可玩 ``` 再次启动后,画面虽然挤在屏幕的一个角落,但基本逻辑开始生效。紧接着游戏在执行时再次报错,经过排查,`MODE` 分辨率切换指令是必须手动干预的地方。The 8-Bit Guy 进入源码将其改为与原游戏最为接近的新显示模式后,游戏瞬间正常运行。尽管顶行文本由于缩放略有裁切,但整体逻辑和操作毫无破损。这证明老机器上的代码只需微小改动就能顺利迁移到新架构上。 --- ### [04:30](https://www.youtube.com/watch?v=IA7REQxohV4&t=270s) 震撼的 BASIC 游戏与演示程序生态 社区开发者已经为 Color Maximite 2 编写了一批令人瞠目结舌的演示代码。首先登场的是一个在 800x600 高分辨率下实时旋转的 3D 足球。最不可思议的地方在于,这完全是用解释型 BASIC 编写的,而不是经过预编译的二进制代码;按下 Ctrl+C 暂停后,便可直接翻看背后清晰的数学计算与绘图源码。随后展示的则是一款 100% 完整移植的街机名作《步步惊心》(Gauntlet)。 游戏启动界面包含了一长串针对雅达利(Atari)和中途岛(Midway)的非商业版权免责声明。The 8-Bit Guy 借此调侃道:“Let’s just hope Warner Brothers isn’t as evil as Nintendo is and hopefully there won’t be any cease and desist letter sent out over this.”(但愿华纳兄弟不会像任天堂那么凶狠,希望不会因为这个而收到任何侵权停终信件函件。)主板前面板配备了一个任天堂 Wii Nunchuk 手柄插孔,游戏内菜单甚至允许切换输入设备与 8 位/16 位声音风格。 ``` Color Maximite 2 社区运行演示项目概览: ┌─────────────────────┬───────────────────┬────────────────────────────────────────┐ │ 项目名称 │ 完整度 │ 技术特点 / 视觉亮点 │ ├─────────────────────┼───────────────────┼────────────────────────────────────────┤ │ 3D 旋转足球 │ 演示完成 │ 800x600 分辨率,纯实时解释型 BASIC 绘制 │ │ Gauntlet (街机移植) │ 100% 完整可玩游戏 │ 支持 16-bit 音效与 Wii 手柄,可 Ctrl+C │ │ 快打旋风 (Final Fight)│ 动作原型概念验证 │ 包含行走与搏击动作帧,无敌人判定 │ │ 德军总部3D (Wolf3D) │ 3D 射线投射概念验证│ 可玩流畅帧率,在纯 BASIC 下实现 3D 迷宫│ │ 90年代风 Demoscene │ 视听特效演示 │ 经典复古视觉特效与音乐同步,门槛极低 │ └─────────────────────┴───────────────────┴────────────────────────────────────────┘ ``` 面对以流畅速度跑在屏幕上的《Gauntlet》、《快打旋风》(Final Fight)概念演示,甚至是实时 3D 射线渲染的《德军总部3D》(Wolfenstein 3D)和经典的 90 年代 Demoscene 特效演示,The 8-Bit Guy 认为这正是教育与复古爱好者的绝佳载体。他在总结这些演示时评价道:“I think this is an excellent way for somebody to get an introduction to programming as the barrier to entry here is very low compared to learning to code on modern systems.”(我认为这是初学者接触编程的极好途径,因为与在现代系统上学习编码相比,这里的准入门槛非常低。) --- ### [07:49](https://www.youtube.com/watch?v=IA7REQxohV4&t=469s) 探索 GPIO 微控制器功能:红外信号捕获与步进电机控制 除了充当复古电脑,Color Maximite 2 的背部还搭载了一个 40 针的扩展引脚排针。该引脚定义与树莓派(Raspberry Pi)的标准 40-pin GPIO 布局保持一致。为了方便引线,他找来一根闲置的老式 40 针 IDE 数据线插上,并将排线另一端剪断、剥开单股导线以接入测试器件。 他的第一个实验是连接一个红外线接收传感器: 1. 红线与黑线分别连接主板提供的电源与接地,白线作为数据输入引脚。 2. 他用几分钟时间在 BASIC 中敲出了一个简易的数字示波器程序。 3. 默认状态下该引脚为高电平;将白线碰触接地端时,屏幕波形即刻下落为低电平。 4. 接入红外传感器后,当传感器捕获到对应频率的红外线时便会拉低信号线。尽管由于没有加装电阻或滤波电容而存在微小的杂讯脉冲,但对着传感器按下遥控器按钮时,屏幕上清晰地刷新出起伏的数字数据流脉冲。 5. 他随后在代码中追加了一行逻辑,让设备在检测到脉冲时发出蜂鸣声。长按遥控器按键时,可以清晰听到并看到引导码与不断重复的数据片段。 紧接着,他尝试用它来控制外部物理机械部件。手头最唾手可得的硬件是一个老式软盘驱动器(Floppy Drive)。软驱磁头步进电机的控制原理非常简洁明了:只需向特定引脚发送 5V 脉冲即可让磁头沿一个方向步进,而同时向两个对应控制引脚发送高电平时,磁头便会反向移动。测试程序启动后,软驱步进电机精准响应代码中的信号指令,带动磁头流畅地来回往复寻道,验证了该平台作为硬件控制器的高易用性。 ### [09:58](https://www.youtube.com/watch?v=IA7REQxohV4&t=598s) 键盘连击提速与对标 Commander X16 的思考 为了探索系统的响应极限,David 尝试通过将键盘连击重复率(repeat rate)缩短至 25 毫秒来加快操作节奏,屏幕上的绘制与光标反馈随即变得极其迅捷流畅。展示完这一效果后,他主动谈起许多观众可能会产生的疑问:既然他自己正在主导开发复古电脑项目 Commander X16,为什么还要在频道中大张旗鼓地推荐 Color Maximite 2?这二者之间难道不存在直接的商业竞争吗? David 对此给出了“可以说是,也可以说不是”的解答。他指出,Color Maximite 2 与 Commander X16 之间确实存在一定的重叠区间,正如它们与 Raspberry Pi(树莓派)或 Arduino 等单板电脑和微控制器开发板之间的关系一样。David 总结道:“These are all different products with different goals, but some of them can certainly do the same job.”(这些产品各自有着截然不同的设计目标,但其中某些产品确实能够胜任同样的工作。) 在谈及自家项目时,David 顺带展示了最新的进展:就在几天前,团队刚刚收到了由 PCBWay 代工打样的全新 Commander X16 主板。虽然当时还没来得及焊接元器件并上电测试,但他满怀期待地希望这批板子能顺利点亮。与此同时,他还向镜头展示了两块专门用于硬件开发与调试的原型扩展卡,并预告后续会带来更多关于 X16 的详细进展。 - **键盘参数调整**:将键盘重复率降至 25 毫秒后,交互响应速度有了肉眼可见的飞跃。 - **生态定位**:Color Maximite 2、Commander X16、Raspberry Pi 和 Arduino 各自侧重不同,但都具备微控制器或复古编程的学习与开发能力。 - **X16 进度更新**:PCBWay 制造的最新批次 Commander X16 空板及多款硬件开发扩展卡已寄达工作室,正处于元器件贴装前夕。 ### [10:52](https://www.youtube.com/watch?v=IA7REQxohV4&t=652s) BASIC 的入门优势与未来设备展望 David 坚信像 Color Maximite 2 这样的系统是绝佳的编程启蒙工具。虽然在当今的商业软件开发环境中,BASIC 几乎已经退出了主流舞台,但它在降低编程门槛方面有着不可替代的价值。与现代开发环境相比,用户完全不必在电脑上繁琐地安装配置编译器或庞大的 IDE,也不用像折腾 Arduino 那样先去排查串口驱动故障才能把代码刷写进板子;坐在 Color Maximite 2 前,插上键盘和显示器就能直接在屏幕上敲代码,按下回车就能立刻看到运行结果。正如 David 所评价的那样:“BASIC is one of the easiest languages to master.”(BASIC 是最容易掌握的编程语言之一。)加之该机 ARM 处理器提供的充沛算力,传统解释型 BASIC 运行缓慢的弊端也荡然无存。 关于新旧两代设备的选购建议,David 坦言,如果单纯只为了利用微控制器的 GPIO 引脚去控制外设或做传感器实验,那么搭载 PIC32 单片机的旧版 Maximite 其实更为经济实惠,其性能也足够应付日常控制需求;但如果核心目标是制作并运行复杂的图形化游戏,那么算力与图形处理大幅跃升的 Color Maximite 2 则是绝对的首选。在视频末尾,David 还预告了频道接下来的评测计划,包括一台机身自带 HDMI、以太网口与 USB 接口的小巧一体式 Android 电脑,以及一款完全采用全新市售现成元器件复刻的 Commodore 经典电脑——MINI PET。 ```mermaid flowchart TD accTitle: Color Maximite 2 与其他平台的定位关系 accDescr: 对比 Color Maximite 2、初代 Maximite、Arduino 及 Commander X16 的典型应用场景 subgraph Hardware["硬件平台对比"] A["Color Maximite 2\n(ARM 核心)"] B["初代 Maximite\n(PIC32 核心)"] C["Arduino 等单板"] end subgraph Usage["核心适用场景"] D["复古游戏开发\n即时屏幕编程"] E["低成本微控制器 I/O 实验"] F["需要配置驱动/IDE 的嵌入式开发"] end A --> D B --> E C --> F ``` - **免配置开发体验**:开机即用,零驱动、无编译器安装依赖,彻底消除初学者从代码到执行的摩擦力。 - **算力保障**:ARM 架构彻底消除了旧时代解释型 BASIC 的性能瓶颈。 - **代际选购差异**:纯粹做底层控制选便宜的 PIC32 旧版;开发游戏则必须选择具备高性能图形与算力的二代。 - **后续预告设备**: - 后置 HDMI、以太网与 USB 接口的小型一体化 Android 主机。 - 完全由全新现代元器件拼装复刻的 MINI PET(Commodore PET 复刻方案)。 ## Notable quotes > [10:52](https://www.youtube.com/watch?v=IA7REQxohV4&t=652s) BASIC is one of the easiest languages to master. — David (The 8-Bit Guy) ## Mentioned The 8-Bit Guy, Color Maximite, Color Maximite 2, PIC32, Commodore, Tetris, Debuglive, ARM Cortex-M7, Raspberry Pi, Waveshare, Gauntlet, Atari, Midway, Warner Brothers, Nintendo, Wii Nunchuk, Final Fight, Wolfenstein 3D, Commander X16, Arduino, PCBWay, MINI PET, Commodore PET ## Video description Support The 8-Bit Guy on Patreon: https://www.patreon.com/8BitGuy1 Visit my website: http://www.the8bitguy.com/ Check out Debuglive's more in-depth video on the Color Maximite 2: https://youtu.be/lzrX72aB7zg Gerbers, manuals, firmware etc. are all available on http://geoffg.net/maximite.html [Source](https://www.youtube.com/watch?v=IA7REQxohV4)

Source quotes

[10:52] David (The 8-Bit Guy): BASIC is one of the easiest languages to master.

Source quotes

[9:58] David Murray: There is certainly some overlap with the Maximite and the Commander X16, as well as other products like the Raspberry Pi or Arduino.

Original transcript

[0:00] Back in 2018 I made a video showcasing the Color Maximite computer. [0:15] This was basically a PIC32 micro controller with an operating system that allowed you [0:19] to connect up a monitor and keyboard and program it directly in BASIC. [0:23] It was actually pretty darned fast, as I made a comparison between drawing lines on a Commodore [0:27] 8-bit computer versus on the Color Maximite. [0:30] And I also wrote my own version of Tetris for it. [0:33] But now there is a new version, called the Color Maximite 2. [0:36] Debug live already did a great video showcasing what the new one can do. [0:40] But, I thought I’d give you my impressions as well and maybe fill in some of the gaps. [0:45] First of all, I’d like to talk about some of the upgrades over the last version. [0:48] First and foremost, let me take this thing apart and I’ll show you the board. [0:51] Gone is the PIC32 micro controller and now we have an ARM Cortext M7 running at 480 mhz. [0:58] This CPU is capable of executing 270,000 lines of BASIC code every second. [1:06] This thing can literally run interpreted BASIC as fast or faster than a computer from the [1:10] 80s can run assembly language. [1:13] Another upgrade is the color. [1:15] The original Maximite was monochrome only, then the color maximite was an upgrade to [1:19] 8 colors. [1:20] Now we have a full 16-bit color, which is 65,536 different colors. [1:25] And one other important change is that it no longer uses a PS/2 keyboard, but rather [1:29] a USB, which are more common these days. [1:33] The previous version had 5 different video modes. [1:35] The top 3 were the same resolution, with the only difference being either 2, 4 or 8 colors. [1:40] Then there was a low resolution mode with 8 colors for games, and last a special mode [1:45] just for NTSC televisions and monitors that was monochrome. [1:48] So, let’s see what video modes the new one has. [1:51] As you can see, the modes are very different with the default mode being 800x600. [1:56] And all 5 of these modes have many color depths you can define, going all the way up to 65,536 [2:02] colors, so a true 16-bit color display. [2:05] The special NTSC mode is gone since this unit doesn’t even output NTSC video. [2:09] And these two resolutions here have been kept in order to increase compatibility with software [2:13] written on the older maximize. [2:15] The Color Maximite 2 isn’t necessarily meant as a replacement for the previous models, [2:19] as it will cost significantly more than the previous one. [2:22] You can see right now they are going for $99. [2:25] This particular board is somewhat of a prototype design. [2:27] It’s built using a waveshare board, which is designed to make it easier to prototype [2:31] with the ARM chip since it is pretty tough to solder one of those chips by hand. [2:35] However, realistically, there’s no reason these should cost any more than a comparable [2:39] Raspberry Pi with mass production, so cost could come down. [2:42] Anyway, the point is it exists along side the previous models, and for some applications [2:47] the older model based on the PIC might make more sense. [2:50] Let’s go ahead and connect this thing up. [2:52] It’s powered by USB so I’ll just use one of these phone chargers. [2:55] Next I’ll connect the VGA monitor, and a USB keyboard, and finally some computer speakers [3:00] for sound. [3:01] And now let’s power it on. [3:02] It starts up with not much on the screen. [3:04] But, like the older version you can type the command FILES for the file browser. [3:07] This will let you browse what is on the SD card, including sub directories. [3:11] It highlights any BASIC programs in yellow. [3:13] But, surprisingly it can handle some other formats, for example this picture file. [3:18] Now you can see that 16-bit color! [3:20] It can display several popular picture formats. [3:23] Also it can play several types of audio formats including MP3 files and Amiga MOD tracker [3:28] files like this one. [3:29] The music plays in the background and there is no real indication on screen that anything [3:33] is happening, though. [3:35] And of course, if you select a BASIC program, it will automatically run it. [3:39] I thought we’d try out the Tetris program I wrote a couple of years ago and see if it [3:42] will still work on this one. [3:44] And well, it doesn’t. [3:45] Many of the commands have changed to handle screen drawing. [3:48] However, all is not lost. [3:49] Apparently there is this command you can add to the start of your BASIC code called “option [3:53] legacy on” which will cause BASIC to work more similar to the previous version. [3:57] So, let’s try starting it now. [4:00] Well, it sort of works but it is confined to a small corner of the screen. [4:03] Let’s see if it plays. [4:05] And nope. [4:06] We get another error. [4:07] So, it turns out the MODE command is the one command that will simply have to be changed [4:11] manually. [4:12] So, I’ll go in here and change that to the new graphics mode that most closely matches [4:15] what this game was designed for. [4:17] And guess what? [4:18] Now it works! [4:19] The top line of text is partially cut off, but otherwise everything else in the game [4:23] works. [4:24] So that’s good news, it means you can write code on the older maximite and it should work [4:27] on the newer one with very little modification. [4:30] Now I would write something to show off the capabilities of the new one, but there’s [4:33] really no need. [4:34] There have already been a few really impressive pieces of code written for this, so I’ll [4:38] start by showing you this spinning soccer ball. [4:41] The fact that this is written in BASIC, and I don’t mean compiled BASIC, but interpreted [4:45] BASIC, running in real-time, in a resolution of 800x600 is quite amazing. [4:50] You can even do a control-C to stop the code and then have a look at the code that makes [4:54] it possible. [4:55] But, if you find this at all amazing, then prepare to have your mind blown. [4:59] I’m going to show you a 100% complete game conversion here. [5:03] This is the game known as Gauntlet. [5:04] Now I’ll go ahead and take this moment to apologize that I don’t have a VGA capture [5:08] device that is compatible with these resolutions, so hopefully it is okay to see this on the [5:12] monitor. [5:13] But I am capturing the sound directly from the source. [5:15] So, this screen is basically a big disclaimer that this game is trademarked by Atari and [5:19] Midway and so forth and this is a non-commercial product. [5:22] Let’s just hope Warner Brothers isn’t as evil as Nintendo is and hopefully there [5:26] won’t be any cease and desist letter sent out over this. [5:29] Anyway, here it is in all of its 80s glory. [5:35] There are several menu options here including the ability to change controllers. [5:40] This computer has a Nintendo Wii Nunchuck port on the front, but I don’t have one [5:44] handy at the moment so I’ll just stick with keyboard control. [5:47] You can also change the sound to 16-bit era sound. [5:51] I think I actually prefer the melody from the 8-bit era, but since the point here is [5:55] to see what the hardware is capable of, let’s stick with the 16-bit. [5:58] And now we get to pick our character, just like the original. [6:02] Now, on the surface, there shouldn’t be anything exciting about seeing this sort of [6:07] game playing on a 480 Mhz arm cortex. [6:11] But, what is absolutely amazing is that this is running as interpreted BASIC code. [6:16] In fact, just like every thing I’ve shown so far, I can press control-C, which will [6:20] stop the game. [6:21] And then I get go into the editor and see the actual basic code that makes this game [6:25] work. [6:26] It’s pages and pages of code. [6:27] It’s much easier to read than assembly language, of course. [6:29] And, you know, anyone could make changes to this code. [6:32] So, I have a few more little demos for you. [6:34] This is a partially working game. [6:36] I think this is called “Final Fight.” [6:38] All you can do is walk around and do some various fight moves, but there are no enemies [6:41] to fight and nothing else to really do. [6:43] But it does certainly show what is possible. [6:46] And the last game concept I’ll show is Wolfenstein 3D. [6:50] This is also not a complete game, at least not yet. [6:52] It’s just a proof of concept. [6:54] But you can see it works at a playable speed. [6:56] I never thought I’d see Wolfenstein 3D written in BASIC. [6:59] I don’t have any more games, but I do have one more demo to show, and it is just that. [7:03] A demo. [7:04] As in demo-scene style demo. [7:06] This is written very much in the style of the demo scene from the 90s. [7:10] And again, the only part of this that blows me away is that it is all written in BASIC. [7:15] I think this is an excellent way for somebody to get an introduction to programming as the [7:19] barrier to entry here is very low compared to learning to code on modern systems. [7:24] And clearly there is enough horsepower behind this chip that, despite running interpreted [7:28] BASIC, it is powerful enough that your imagination is probably the only limit to what you could [7:43] create. [7:49] But what I want to do now is play around with this as a micro controller. [7:53] The 40-pin connection here on the back is supposed to be the same layout as a Raspberry [7:56] Pi. [7:57] And fortunately, a standard old 40-pin IDE cable will fit in here just fine. [8:01] I’ll chop off the other end so I can get easier access to the wires. [8:05] It does help to separate them out a bit. [8:11] So, I have this little infrared sensor I’m going to test out. [8:17] I’ll just connect this up with some alligator clips, but first I need to bend the pins out [8:22] a little. [8:23] So, I whipped up this little test program here in a few minutes. [8:25] And what it does is works like an oscilloscope. [8:27] So, right now it’s showing a high signal, which is the default state of the pin. [8:31] As you can see, the white wire here is the actual data pin, and red and black is power [8:36] and ground. [8:37] So, if I touch the white wire to ground, you’ll see the signal on the screen go low for a [8:40] moment. [8:41] Now, I’ll connect the white wire to the sensor output. [8:43] If the sensor detects infrared light of the correct frequency, it will pull the line low. [8:49] You can see there is just a slight bit of noise coming in like little blips. [8:52] I could probably eliminate this with a resistor or maybe a capacitor. [8:55] But it’s fine for what I want to show. [8:57] Watch what happens when I press some buttons on the remote control. [9:01] You can definitely see a digital stream of data flowing there. [9:04] So, then I thought, “wouldn’t it be interesting to add some sound to this?” [9:09] So, this one extra line will turn a beep on or off when it hears something from the remote. [9:13] So, let’s test it out. [9:19] OK, so now let’s try it with the remote. [9:24] Very neat. [9:25] Each button has a stream of data. [9:28] Even more interesting is if I hold a button down, it will keep repeating part of it. [9:33] I also wanted to try controlling something. [9:35] The simplest thing I had laying around was an old floppy drive. [9:38] I wanted to see if I could wire it up and write a small program to move the head back [9:42] and forth. [9:43] Floppy drives are pretty simple to operate, you only need to send 5 volt pulses to this [9:46] pin to move the head in one direction, then send to both of these pins if you want to [9:50] move the other direction. [9:52] And let’s test it out. [9:55] As you can see, it works. [9:58] I thought it might be interesting to speed this up some, so I changed the keyboard repeat [10:01] rate down to 25 milliseconds to see how that might affect things. [10:05] And check it out now. [10:13] Pretty neat huh? [10:15] So, some people might be asking, “Hey David, why are you showing this, doesn’t it directly [10:20] compete with the Commander X16 that you are helping develop?” [10:23] Well, yes and no. [10:25] There is certainly some overlap with the Maximite and the Commander X16, as well as other products [10:30] like the Raspberry Pi or Arduino. [10:32] These are all different products with different goals, but some of them can certainly do the [10:36] same job. [10:37] Speaking of, we just got in the new Commander X16 boards from PCBWay a few days ago. [10:42] Haven’t had a chance to populate them yet and see if they work, but hopefully they will. [10:47] Here’s also a couple of expansion cards designed for hardware development as well. [10:51] Anyway, more on this later. [10:52] I definitely think something like this is a good introduction to programming. [10:56] Granted, BASIC isn’t really used very much in commercial environments anymore, but it [11:00] definitely lowers the barrier to entry. [11:03] I mean, for example there’s no compilers or development environments to have to install [11:07] or understand how they work. [11:09] There’s no drivers to get your serial port working on your Arduino or anything to get, [11:13] you know to get the files transferred over to the Arduino so that you can test them, [11:17] you can just program right here on the screen and immediately see the result. [11:21] BASIC is one of the easiest languages to master. [11:23] And obviously the speed is not much of a concern with the horsepower you have in this thing. [11:27] Having said that, I think if I were just wanting to use the micro-controller aspect of this, [11:31] I’d probably stick with the older version, Simply because it’s cheaper with the PIC32 [11:35] and it’s probably plenty fast for that. [11:38] But, I think that if you were trying to develop games, the new one is the one you need to [11:41] use. [11:42] And, if you liked this there are a few other little computer products I plan to do reviews [11:45] I’m planning to do really soon, like this little all-in-one based android computer. [11:48] It’s got HDMI, ethernet, and USB on the back of it. [11:52] We’re going to have a look at that in a future episode. [11:54] As well as the little MINI PET, which is basically a Commodore PET made from all brand new off-the-shelf [12:01] components. [12:02] And I plan to do a review on that shortly as well. [12:04] So, stick around for those, and as always, thanks for watching!