Polyend Tracker Revives 1980s Interface to Speed Hardware Sequencing
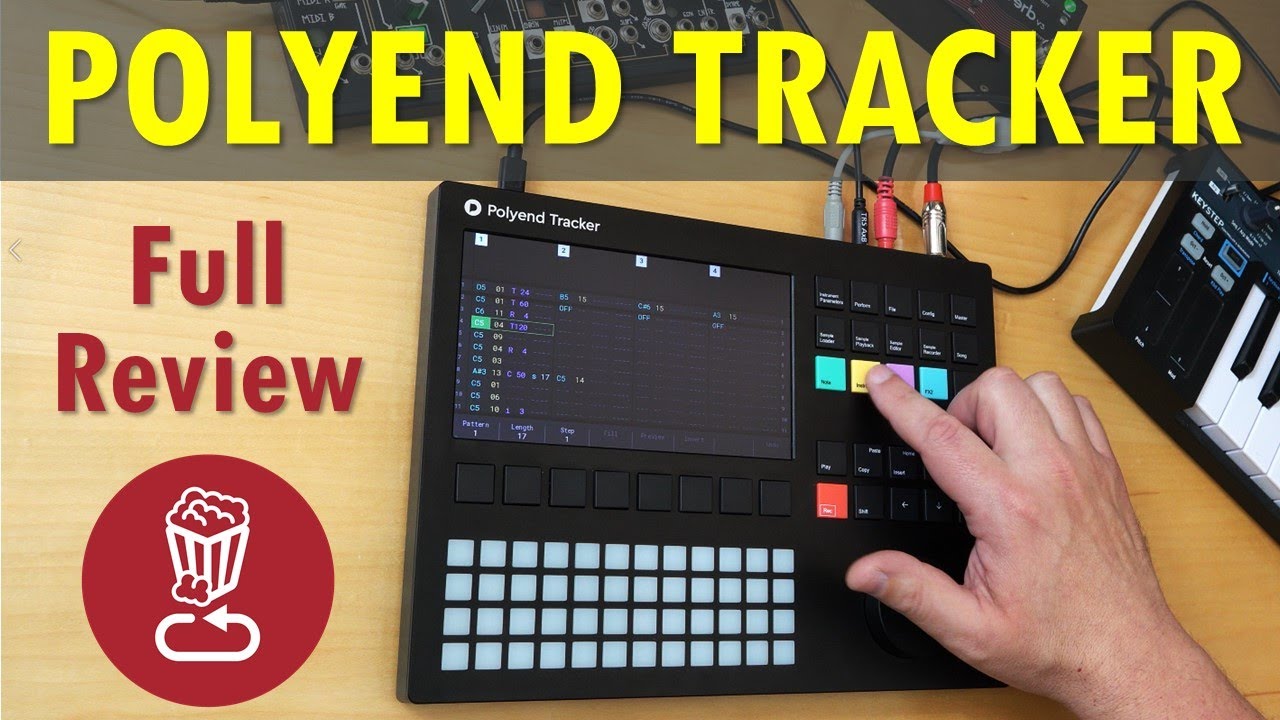
Polyend Tracker // Review and Full Tutorial from Sample to Song — loopop

loopop

While the vertical spreadsheet workflow outpaces traditional step sequencers in speed and automation, a strict 90-second RAM ceiling and rudimentary synthesis curtail its standalone depth.

AI-assisted summary of Polyend Tracker // Review and Full Tutorial from Sample to Song — original source. Check the original for full context.

Source published:

Key ideas

  • The Polyend Tracker translates traditional 1987 Amiga tracker workflow into a standalone hardware groovebox featuring 8 tracks with four parameter lanes per step (Note, Instrument, FX1, FX2). (0:00)
  • Project memory is strictly limited to approximately 90 seconds of total audio RAM at 44.1 kHz, with all imported stereo files automatically summed to mono. (2:40)
  • Beyond one-shot sample playback, the internal sound engine integrates auto-slicing, single-cycle wavetable synthesis (1024 or 2048 frame sizes), and single-grain granular playback. (28:25)
  • Sequencing features unquantized live input with automatic micro-timing population, chord spilling across adjacent tracks, and an algorithmic Fill tool for rapid scale-constrained pattern generation. (14:00)
  • Hardware connectivity relies entirely on 3.5 mm TRS jacks (using MIDI TRS Type B) and USB-C power, incorporating a built-in FM radio that uses attached audio cables as an antenna. (5:05)

Detailed notes

## Background Published on YouTube by educational electronic music channel loopop on March 18, 2020, this video provides an in-depth review and complete tutorial of the Polyend Tracker standalone hardware groovebox. The video's show notes provide a comprehensive timeline breaking down the workflow from sample capture to song arrangement, alongside equipment references and community support links.

## TL;DR The video provides a detailed examination of the Polyend Tracker, a standalone hardware groovebox that reimagines the classic top-to-bottom spreadsheet sequencing format pioneered on vintage Commodore Amiga computers. Host Ziv walks through every stage of the creative workflow, demonstrating live audio sampling, offline destructive sample editing, pattern entry via manual steps or the algorithmic Fill tool, and song construction. The guide also details the unit's modulation architecture, single-cycle wavetable and granular playback engines, and outbound MIDI control, concluding with an objective assessment of its strengths and hardware limitations alongside finished musical demonstrations.

## Atmosphere & style The presentation is quintessential loopop: calm, analytical, and meticulously organized, devoid of rushed commentary or internet hype. Demonstrations are captured with steady overhead shots and deliberate tactile navigation, transforming what could seem like an intimidating wall of alphanumeric tracker data into an intuitive, elegant creative environment. The viewing experience feels like a focused, serene masterclass that steadily builds from bare audio snippets into rich, polyphonic electronic compositions.

## Bulletin - [00:00](https://www.youtube.com/watch?v=MQufJBVvAtY&t=0s) The Polyend Tracker translates traditional 1987 Amiga tracker workflow into a standalone hardware groovebox featuring 8 tracks with four parameter lanes per step (Note, Instrument, FX1, FX2). - [02:40](https://www.youtube.com/watch?v=MQufJBVvAtY&t=160s) Project memory is strictly limited to approximately 90 seconds of total audio RAM at 44.1 kHz, with all imported stereo files automatically summed to mono. - [28:25](https://www.youtube.com/watch?v=MQufJBVvAtY&t=1705s) Beyond one-shot sample playback, the internal sound engine integrates auto-slicing, single-cycle wavetable synthesis (1024 or 2048 frame sizes), and single-grain granular playback. - [14:00](https://www.youtube.com/watch?v=MQufJBVvAtY&t=840s) Sequencing features unquantized live input with automatic micro-timing population, chord spilling across adjacent tracks, and an algorithmic Fill tool for rapid scale-constrained pattern generation. - [05:05](https://www.youtube.com/watch?v=MQufJBVvAtY&t=305s) Hardware connectivity relies entirely on 3.5 mm TRS jacks (using MIDI TRS Type B) and USB-C power, incorporating a built-in FM radio that uses attached audio cables as an antenna.

## Key takeaways - [00:50](https://www.youtube.com/watch?v=MQufJBVvAtY&t=50s) The tracker sequencing paradigm displays musical events scrolling vertically from top to bottom across eight tracks rather than horizontally on a traditional timeline. - [01:20](https://www.youtube.com/watch?v=MQufJBVvAtY&t=80s) Each step across all eight tracks contains four dedicated lanes: Note pitch, Instrument slot (1 to 48 or MIDI channels 1 to 16), and two independent FX automation lanes. - [02:40](https://www.youtube.com/watch?v=MQufJBVvAtY&t=160s) The hardware uses a 7-inch color non-touch screen, mechanical jog wheel, clicky function buttons, and a grid of silicone pads for data entry and chromatic play. - [08:10](https://www.youtube.com/watch?v=MQufJBVvAtY&t=490s) Sampling can be performed directly from Line In, dynamic microphone inputs, or an integrated FM radio receiver that uses connected audio cables as an antenna. - [09:10](https://www.youtube.com/watch?v=MQufJBVvAtY&t=550s) The offline Sample Editor provides destructive processing—including amplification, compression, cropping, and modulation effects—that render directly into project RAM without modifying the SD card source. - [11:29](https://www.youtube.com/watch?v=MQufJBVvAtY&t=689s) The sequencer offers dual display perspectives: a detailed 4-track view showing all four parameter lanes, and a condensed 8-track overview showing one chosen lane per channel. - [12:28](https://www.youtube.com/watch?v=MQufJBVvAtY&t=748s) Configurable Step intervals enable rapid rhythmic entry, while up to 20 levels of undo protect against mistakes during step-by-step editing. - [14:00](https://www.youtube.com/watch?v=MQufJBVvAtY&t=840s) The Fill utility automates batch lane generation, allowing instant velocity randomization and scale-constrained melodic scatter across designated pattern sections. - [17:20](https://www.youtube.com/watch?v=MQufJBVvAtY&t=1040s) Live manual recording handles polyphonic chords by automatically spilling additional voices across adjacent monophonic tracks and preserving human timing via automatic micro-timing parameters. - [18:00](https://www.youtube.com/watch?v=MQufJBVvAtY&t=1080s) FX lanes support over 25 modulation commands per step, including ratcheting rolls, portamento glide, sample slice triggers, filter cutoff shifts, and mid-pattern BPM alterations. - [24:50](https://www.youtube.com/watch?v=MQufJBVvAtY&t=1490s) Perform mode turns the pad matrix into a live remix station featuring quantized track swapping across patterns and momentary latches for up to 12 configurable performance parameters. - [27:40](https://www.youtube.com/watch?v=MQufJBVvAtY&t=1660s) The master output stage incorporates a hardware-modeled limiter, an integrated digital bit-depth reducer, track mute/solo toggles, and master reverb. - [30:45](https://www.youtube.com/watch?v=MQufJBVvAtY&t=1845s) Wavetable playback supports standard 1024 and 2048 frame formats, modulating position via envelopes or tempo-synced LFOs, but displays audible digital aliasing in upper pitch octaves. - [35:45](https://www.youtube.com/watch?v=MQufJBVvAtY&t=2145s) Each of the 48 instrument slots includes a 5-destination modulation matrix, allowing an ADSR envelope or tempo-synced LFO to modulate volume, panning, filter cutoff, or synth position. - [39:42](https://www.youtube.com/watch?v=MQufJBVvAtY&t=2382s) External MIDI sequencing addresses channels 1 through 16 via instrument slots 51 through 66, sending clock, transport, program changes, and five assignable CC output lanes. - [41:30](https://www.youtube.com/watch?v=MQufJBVvAtY&t=2490s) The Tracker cannot stream long audio files directly off the SD card, causing audio playback to interrupt when loading new project files into RAM. - [42:50](https://www.youtube.com/watch?v=MQufJBVvAtY&t=2570s) The device excels at lightning-fast algorithmic sequencing and multi-mode sound shaping, though it is limited by its 90-second RAM ceiling, absence of an internal battery, and lack of dedicated delay and macro knobs.

## Detailed walkthrough ### [00:00](https://www.youtube.com/watch?v=MQufJBVvAtY&t=0s) Introduction to Tracker Sequencing

The Polyend Tracker is a standalone hardware groovebox built around the classic tracker sequencing workflow first introduced on Commodore Amiga computers back in 1987. Unlike conventional modern hardware drum machines or workstations that mimic analog step sequencers or digital audio workstation piano rolls, tracker interfaces represent musical compositions as vertical data tables. The unit is fully digital and sample-based, augmenting traditional sample playback with wavetable and granular synthesis engines, alongside deep algorithmic sequencing tools.

As Ziv (loopop) points out right at the start:

> “Tracker is digital and sample based it has basic wavetable and granular synthesis capabilities with few interesting sequencing tricks up its sleeve in this video we'll take a look at what it can and can't do its workflow in detail.”

[00:50](https://www.youtube.com/watch?v=MQufJBVvAtY&t=50s) The Tracker Paradigm and Screen Columns

Most hardware sequencers and software DAWs display musical events moving horizontally from left to right across a piano roll or a row of sixteen step buttons. Tracker flips this axis completely on its head:

> “Trackers work differently here you sequence events from top to bottom giving you more room to see what happens in every step.”

As the project plays, rows of alphanumeric data scroll vertically up the screen across eight parallel tracks. Each track is subdivided into four dedicated color-coded columns that define the step parameters:

```mermaid flowchart TD accTitle: Polyend Tracker Column Structure accDescr: Visual breakdown of the four lanes that make up each of the eight individual tracks on the Polyend Tracker.

subgraph Track["Single Track (1 of 8)"] A["Note Lane<br/>(Turquoise / Green)"] B["Instrument Lane<br/>(Yellow)"] C["FX1 Lane<br/>(Purple)"] D["FX2 Lane<br/>(Blue)"] end

A -->|"Pitch & Octave (e.g., D5, C6)"| Track B -->|"Pool Sample 1-48 or MIDI Channel"| Track C -->|"Automation / MIDI CC / Parameter"| Track D -->|"Second Independent Automation Slot"| Track ```

- **Note Lane (Turquoise/Green):** Displays note pitch and octave information (such as D5, C5, or C6) triggered on that precise step. - **Instrument Lane (Yellow):** Specifies which instrument sound source triggers the note. Every project holds a sample pool of up to 48 individual samples, which also feed the onboard wavetable and granular synthesis engines. Because this assignment happens step by step, every single row within a track can trigger a completely different sample. Scrolling below sample number 1 routes the track out to external MIDI channels, allowing the tracker to sequence outboard synthesizers. - **Effects Lanes (Purple FX1 and Blue FX2):** Trackers define effects differently than guitar pedals or aux sends. As loopop explains: “Effects in trackers aren't necessarily effects as you'd probably be used to seeing them with other instruments but rather more like automation information like how loud to play a note panning micro timing ratchets all in all about 25 different automation options currently plus five MIDI CC commands that even a program change command.” Each effect is assigned a letter identifier and a numerical value. Pressing the physical Description button opens an on-screen breakdown displaying precisely what each effect does and its valid parameter range. Because each track offers two independent FX lanes, any step can execute two distinct automations simultaneously.

[02:40](https://www.youtube.com/watch?v=MQufJBVvAtY&t=160s) Hardware Architecture, Layout, and Project Limits

The hardware centers around a crisp, matte 7-inch color display. It is explicitly not a touchscreen; all navigation is handled through dedicated tactile controls. Directly beneath the screen sits a horizontal row of eight function buttons whose roles shift dynamically based on software labels displayed along the lower screen margin (handling tasks such as Undo, Pattern Swapping, and Track Length adjustment).

Beneath the function buttons sits a large mechanical jog wheel paired with an expansive grid of silicone pads. The pads serve multiple roles: they act as a value-selection grid (for instance, jumping directly to pattern numbers 1, 4, or 5 as you turn the jog wheel), double as a chromatic keyboard for playing synth and drum patches, and convert into a full alphanumeric keyboard for naming projects, folders, and recorded samples. To the right, a column of dedicated utility keys covers clipboard and editing actions—Copy, Paste, Insert, Delete, and Backspace—alongside traditional transport controls (Play and Record). A dedicated cluster of screen-navigation buttons jumps immediately into core operating modes, including the Pattern Editor, Sample Editor, Sample Playback, Song Mode, Mute/Master control, and Configuration settings. When a mode contains multiple layers (such as Instrument Parameters), an on-screen indicator denotes screen 1 of 2 or 2 of 2.

The chassis itself is remarkably slim, lightweight, and housed in solid metal. The silicone grid pads are not velocity- or pressure-sensitive, while the operational buttons are clicky plastic with positive tactile feedback. Projects are stored entirely on the included 16 GB micro SD card slot on the rear panel. Each project holds up to 255 patterns, with each pattern containing 8 tracks. However, working RAM has specific limitations:

> “Total sample memory per project is around 90 seconds so don't expect to load or stream full song stems.”

All incoming stereo samples are automatically summed to mono upon import or capture to conserve RAM, though tracks can still be placed freely within the stereo field using track panning automation.

[05:05](https://www.youtube.com/watch?v=MQufJBVvAtY&t=305s) Hardware Connectivity and Built-In FM Radio

The Tracker relies on modern compact jacks across its rear panel rather than full-sized audio and 5-pin DIN ports:

- **Power & USB:** Powered entirely over a rear USB-C port. While the device does not contain an internal rechargeable battery, it can run effortlessly from a basic 1-amp phone charger or standard USB power bank. The USB connection transfers bidirectional MIDI to and from a computer host, though it does not carry USB audio streaming. - **Hardware MIDI:** Bidirectional MIDI communication is handled over 3.5 mm TRS jacks. Polyend adopted the MIDI TRS Type B standard for this machine. Interfacing with TRS Type A devices requires an inline converter cable (such as a Retrokits TRS-A to TRS-B adapter), whereas direct TRS Type B connections require only a regular 3.5 mm stereo mini-jack cable. Polyend bundles 5-pin DIN female breakout dongles inside the box for connecting traditional MIDI hardware. - **Audio Inputs & Outputs:** Audio output is provided on a single 3.5 mm stereo jack. For audio capture, the hardware offers two dedicated inputs: a 3.5 mm microphone input and a 3.5 mm line input. - **Built-in FM Radio:** Hidden inside the casing is an internal FM radio receiver designed for live sampling. Because the unit lacks a dedicated telescoping aerial, it clever utilizes whatever cable is plugged into the audio output jack as an impromptu FM radio antenna.

[06:10](https://www.youtube.com/watch?v=MQufJBVvAtY&t=370s) The Sample Loader and Managing Project RAM

When initializing a fresh project, the pattern sequencer is blank and the 48-slot sample pool is empty. Importing sounds from the micro SD card is done inside the Sample Loader menu. Users can traverse through nested card directories using either the directional arrow keys or the jog wheel.

The system natively requires uncompressed WAV audio files sampled at 44.1 kHz, though it accepts bit depths of 16-bit, 24-bit, or 32-bit (loopop notes that standard commercial packs, such as Native Instruments sound expansions, match these specifications natively). Highlighting any folder reveals its contained samples. Tapping the Preview button auditions the file directly from disk. Once a sound is chosen, pressing Add copies it into the project's internal RAM pool, while pressing the "Add Next" shortcut loads sequential files across consecutive sample slots automatically.

As samples load into the project, a white horizontal gauge visually fills up to indicate the remaining share of the 90-second total RAM pool. Short drum hits like kicks and snares barely move the meter, whereas long rhythm loops consume substantial memory blocks. Beyond standard one-shots and drum loops, this browser imports single-cycle waveforms and multi-frame wavetables for the synthesizer engines. From this same screen, users can preview the 48 active project slots and delete unwanted entries to free up memory.

[08:10](https://www.youtube.com/watch?v=MQufJBVvAtY&t=490s) Live Audio Sampling via the Sample Recorder

Beyond disk imports, new audio is captured directly using the built-in Sample Recorder utility. The hardware provides four distinct record sources:

1. Line In (stereo mini-jack for external synthesizers, phones, and drum machines) 2. Internal FM Radio (allowing spontaneous broadcast rips) 3. Microphone with Low Gain 4. Microphone with High Gain

Plugging a standard dynamic microphone (demonstrated using a beat-up SingStar microphone) into the mic input, loopop dials in the internal pre-gain, toggles live monitoring on to check levels, and taps record to capture a vocal test phrase: *"Testing 1 2 3 this is Polyend Tracker."* Immediately following the take, an on-screen waveform appears. The user can perform a rough crop directly on the capture screen, discard the recording, or accept it.

To save the take, the user can let the unit generate an automatic title or pull up the on-screen keyboard to enter an alphanumeric tag (such as "Test 1 2 3") using the pad matrix. Files can either be archived straight to the micro SD card for later sessions or loaded immediately into the active song's 48-slot pool for immediate composition.

[09:10](https://www.youtube.com/watch?v=MQufJBVvAtY&t=550s) The Sample Editor and Destructive Audio Processing

Once an audio file resides in the project sample pool, pressing the dedicated Sample Editor button opens an offline audio suite. This environment features deep editing and processing tools that permanently alter audio data:

> “Destructive means that they actually change the physical sample in the project they don't by the way change the sample on the SD card so you could always take the [original back].”

Because operations edit the file resident in project memory rather than processing through real-time DSP inserts, effects must be rendered and written into the waveform. Loopop demonstrates this workflow step-by-step:

- **Amplify & Dynamics:** The raw microphone recording is quiet, so opening the Amplify tool, boosting the gain parameter, and hitting "Process" generates a processed preview. Hitting "Apply" permanently commits the louder gain stage to the file. - **Compressor:** To tame dynamics and plosives, loopop enters the onboard compressor, dials down the threshold, shortens the attack time, renders the audio, auditions the result, and hits apply to squash the dynamic peaks. A secondary Amplify pass is then layered on top to bring the newly compressed signal up to full volume. - **Trimming and Zooming:** Spinning the jog wheel adjusts start and end crop markers. The display allows deep zooming into transient zero-crossings to slice away room noise, lead-in silence, and dead air before applying the trim. - **Time/Modulation FX & Pitch Auditioning:** The offline menu features effects like Chorus, Flanger, and Overdrive. These offline treatments require processing and previewing before committing since they cannot be tweaked on the fly via performance knobs. Finally, hitting the grid pads in this screen triggers an instant chromatic transposition check, demonstrating how cleanly the recorded voice pitches across musical octaves.

[11:29](https://www.youtube.com/watch?v=MQufJBVvAtY&t=689s) Pattern Editor Architecture and Display Views

After explaining that offline sample processing operations take time to render rather than working in real time, loopop shifts focus to the sequencing engine. Sequencing on the Polyend Tracker is handled entirely through the Pattern Editor, which provides two primary visual perspectives to balance horizontal and vertical information density on the screen. The first layout displays four tracks simultaneously, exposing all four parameter sub-lanes per track: Note, Instrument number, FX1, and FX2. The alternative layout fits all eight tracks on screen at once, but condenses each track down to display only a single selected parameter lane at a time. Users toggle between these views by tapping the Pattern button alongside either the Note, Instrument, or FX lane buttons.

Patterns can span anywhere from a single step up to 128 steps, adjustable in increments using dedicated navigation keys or the large stepped jog wheel. Across an entire project, the Tracker provides 255 pattern slots. Within a given pattern, all eight tracks are strictly locked to the same length and playback tempo, although loopop notes that tracks of differing lengths can be freely mixed and matched later in Perform mode. To populate notes and automation into the grid, the sequencer offers three distinct workflows: traditional tracker step editing, live manual recording via the pads or external MIDI, and batch population using the algorithmic Fill tool.

```mermaid flowchart TD accTitle: Pattern Editor Display Modes accDescr: Diagram illustrating the two display layouts available in the Polyend Tracker pattern editor.

subgraph Views["Pattern Editor Layouts"] V1["4-Track Detailed View<br/>(4 Tracks visible, all 4 parameter lanes shown per track)"] V2["8-Track Condensed View<br/>(All 8 Tracks visible, 1 chosen parameter lane shown per track)"] end

subgraph Lanes["Per-Track Column Structure"] L1["Note Lane"] L2["Instrument Lane"] L3["FX1 Lane"] L4["FX2 Lane"] end

V1 --> Lanes ```

- **Track Capacity:** 8 monophonic audio/MIDI tracks per pattern. - **Pattern Memory:** 255 patterns per project, each configurable up to 128 steps. - **Track Length Parity:** All tracks within an active pattern share an identical length and running speed during standard playback.

---

[12:28](https://www.youtube.com/watch?v=MQufJBVvAtY&t=748s) Step Sequencing and Cursor Navigation

To alter grid data, the Tracker must be placed into Record mode; without active recording, the cursor remains green and the grid is protected from accidental edits. Pressing the Record button turns the cursor red. loopop demonstrates step entry using a four-track detailed view to monitor all parameters simultaneously. Entering a note is straightforward: select an instrument from the project sample pool (such as a kick drum) and strike a pad on the lower grid.

A central mechanic of tracker step entry is the configurable "Step" jump parameter. When Step is set to 1, the cursor automatically advances downward by one row after each note entry. Setting Step to 0 keeps the cursor pinned in place, enabling rapid overwriting or testing of different pitches on the same row. Setting Step to 4 enables rapid entry of standard dance rhythms: pressing the pad four times instantly lays down a four-on-the-floor kick pattern across a 16-step grid. Playback visualization also adapts to the recording state:

> “If you're in record mode the grid will stick around the step you're editing if you exit record mode the good will scroll along as tractors tend to do now I could put any instrument that I wanted in any one of these steps I don't necessarily need to use a different track so let's go into record let's say that I wanted to change this instrument to something else that's as easy as this let's say maybe this snare and there are up to 20 levels of undo which is obviously very convenient so naturally the next step would be to add high hats here how do I fill this up quickly well I could go into step mode and then go up to the top choose a hi-hat say this one and then fill it like this but that is pretty time-consuming”

Because trackers associate sample instruments on a per-step basis rather than dedicating an entire channel to a single sound, any step on Track 1 can trigger a kick drum, a snare, or a melodic stab seamlessly. To mitigate mistakes when experimenting with per-step assignments, the system includes 20 sequential levels of undo.

---

[14:00](https://www.youtube.com/watch?v=MQufJBVvAtY&t=840s) The Fill Function: Velocity Grooves and Scale Generation

Manually punching repetitive triggers like continuous sixteenth-note hi-hats step by step is inefficient, so loopop demonstrates the Fill utility. To use Fill, the user highlights a target range. Navigating to the top of a lane and pressing Shift + Up immediately selects that entire column from top to bottom. Tapping Fill opens a contextual setup menu where the target parameter (Note, Instrument, or Effect) and distribution logic are defined. Specifying Instrument 11 and confirming with Fill instantly populates every row of the selected column with hi-hat triggers.

To turn a rigid, static hi-hat stream into an expressive groove, loopop selects the FX1 column across the entire track, sets the effect type to Volume, and chooses random value generation. By dialing in a minimum and maximum volume range and applying Fill, the Tracker generates organic velocity variations along the sequence without requiring manual value tweaking on each row.

```mermaid flowchart LR accTitle: Fill Function Workflow accDescr: Step-by-step procedure for batch populating parameter columns using the Tracker Fill tool.

A["Select Range<br/>(e.g., Shift+Up for column)"] --> B["Press Fill Button"] B --> C["Select Target Lane<br/>(Note, Instrument, or FX)"] C --> D["Choose Distribution Logic<br/>(Constant, Range, Random, Scale)"] D --> E["Execute Fill<br/>(Instant pattern generation)"] ```

Moving beyond percussion, loopop loads synth samples into the instrument pool from Native Instruments expansion libraries (noting that while his pre-launch beta unit lacked final factory content, the retail version includes dedicated demo songs). He sets up a melodic bassline using Fill's pitch generation. Instead of populating every step, Fill can be set to scatter notes randomly across vacant slots, constrained strictly to a selected musical scale—such as a minor scale bounded within a specific pitch interval:

- **Selection Shortcut:** Move to the first step and press `Shift + Up` to select the full vertical lane. - **Velocity Randomization:** Generating random volume effect values within an adjustable floor and ceiling creates immediate rhythmic dynamic variation. - **Scale-Constrained Melodic Fill:** Constrains random pitch entry to user-selected musical scales across predefined octave ranges. - **Polyphonic Chord Samples:** Although each track engine is fundamentally monophonic, loading pre-sampled chords allows individual steps to trigger dense polyphonic harmonies.

---

[17:20](https://www.youtube.com/watch?v=MQufJBVvAtY&t=1040s) Live Recording, Chord Spilling, and Micro-Timing

The third method for data entry is live manual performance, executed either directly on the Tracker’s silicone pad grid or via an external MIDI keyboard like the Arturia KeyStep. Recording live into an empty channel in parallel with the rhythm tracks reveals how the Tracker handles polyphony and human groove. When a multi-note chord is played into a single monophonic channel, the firmware intelligently splits the notes, spilling the additional chord voices horizontally into adjacent tracks:

> “The nice thing here if I go into note mode if you play chords the notes will spill into the adjacent track so even though each track is monophonic you could record polyphonic sequences you just use you have different tracks”

Live recording on the Tracker is unquantized by default. When loopop captures a loose live take, the sequencer does not forcibly pull note hits to strict sixteenth-note grid boundaries. Instead, it places the note event on the nearest step row and automatically inserts micro-timing values into the FX lane for that step. This captures natural human swing and pocket while retaining standard vertical tracker layout readability. Alongside micro-timing offsets, the Tracker automatically registers note-off events when keys are released. Users can swap these off messages for Cut commands (which silence the voice instantly) or Fade commands (which apply an envelope release tail).

- **Track Voice Spilling:** Entering polyphonic chords automatically distributes simultaneous note events across neighboring tracks to bypass the single-voice-per-track limitation. - **Automatic Micro-Timing:** Unquantized live input calculates sub-step timing discrepancies and populates micro-timing parameters into FX lanes. - **Note Termination Modes:** Steps support explicit Note Off markers, hard Cut commands, or smooth Fade transitions to shape sample playback duration.

---

[18:00](https://www.youtube.com/watch?v=MQufJBVvAtY&t=1080s) FX Lanes and Per-Step Modulation

Every step on all eight tracks contains two dedicated effect lanes (FX1 and FX2), enabling radical parameter modulation on a per-step basis. loopop surveys the available effect types, demonstrating their real-time sonic results. Stereo placement can be manipulated instantly by assigning Panning commands across steps to push hi-hats left or right.

For modern electronic and trap percussion, the roll effect offers a wide array of ratcheting subdivisions, allowing rapid note repeats within a single row. Beyond simple rolls, the effect roster features pitch micro-tuning, variable glide (portamento) between consecutive notes, and deep parameter randomization. Any parameter—including sample start positions, slice indices, filter cutoff frequencies, and envelope stages—can be locked to an FX lane. Furthermore, FX lanes can transmit external MIDI CC commands and Program Change messages to outboard gear, or issue a Pattern Break command to terminate a sequence early before it reaches step 128.

| Effect Name | Primary Function / Scope | Typical Creative Application | |:--- |:--- |:--- | | **Micro-Timing** | Shifts step trigger point ahead or behind grid boundary | Natural live feel, groove humanization | | **Volume / Pan** | Step velocity levels and stereo field position | Drum dynamics, ping-pong percussion | | **Roll** | Subdivides a single step into repeated bursts | Trap hi-hat rolls, glitch stutter effects | | **Glide** | Portamento pitch transition into the current step | Smooth 303-style bass slides | | **Slice / Position** | Modulates active sample start point or slice marker | Breakbeat chopping, granular-style offsets | | **Filter Cutoff** | Adjusts per-step filter frequency | Dynamic frequency sweeps, per-hit dampening | | **MIDI CC / PC** | Transmits control change and program change over MIDI | Dynamic automation of external hardware synths | | **Pattern Break** | Truncates pattern playback at the assigned step | Creating odd time signatures and short loop resets |

---

[20:15](https://www.youtube.com/watch?v=MQufJBVvAtY&t=1215s) Grid Editing Shortcuts, Bouncing, and Mid-Pattern Tempo Changes

Editing tracker data relies on a collection of clipboard, transposition, and arrangement shortcuts that function much like an electronic spreadsheet. Highlighting a pattern section allows the user to invert data values across the selection, or transpose entire melodic passages up and down in semitone increments by holding Shift. Entire patterns can be duplicated into higher pattern slots using Pattern + Shift + Copy and Paste, or expanded: loopop selects a 16-step block, extends pattern length to 32 steps, and pastes the block to duplicate the sequence. Arbitrary multi-column rectangular blocks can also be grabbed, copied, and dropped anywhere on the grid to create chaotic rhythmic shifts.

To audition specific parts of an arrangement without running the entire song from step zero, users can highlight an isolated block of cells and press Preview:

> “Preview again super useful function I haven't seen I don't think anywhere else”

loopop highlights a feature confirmed by Polyend for upcoming firmware: internal rendering and bouncing. This functionality will allow users to highlight a chord sequence spread across multiple tracks, or an entire dense drum groove, and render it down to a single unified audio sample directly on the device, immediately freeing up polyphony and tracks for further overdubbing.

```mermaid flowchart TD accTitle: Internal Stem Bouncing Concept accDescr: Diagram showing how multiple monophonic tracks are bounced internally into a single sample to free up track resources.

subgraph Tracks["Multitrack Source (Pattern Grid)"] T1["Track 1: Root Note"] T2["Track 2: Third"] T3["Track 3: Fifth"] end

subgraph InternalBounce["Upcoming Internal Render Function"] B["Render / Bounce Selection to Sample"] end

subgraph Result["Consolidated Voice"] S["Single Compound Sample<br/>(Freed-up tracks for new arrangement layers)"] end

T1 --> B T2 --> B T3 --> B B --> S ```

Finally, loopop demonstrates per-step tempo automation by loading an example project programmed by Ben Jordan (The Flashbulb). In the middle of the pattern, tempo automation parameters are inserted directly into the FX lane on specific steps. When playback crosses these rows, the playhead visibly lingers on the modulated steps, radically warping the groove mid-pattern before snapping back to the nominal BPM. With individual patterns constructed, edited, and automated, loopop transitions to structuring completed blocks via Song mode and Perform mode.

[22:55](https://www.youtube.com/watch?v=MQufJBVvAtY&t=1375s) Song Mode and Destructive Grid Arranging

Song mode on the Polyend Tracker allows the user to chain patterns together in an arrangement. Playback can be triggered for the currently highlighted step by pressing Play, or the entire chained song can be auditioned from the beginning using Shift + Play. While patterns can be queued in sequence (such as Pattern 1, then Pattern 2, then looping back to Pattern 1), Tracker also provides an unconventional method for building arrangements directly on the grid.

Empty patterns of an identical length can be populated into subsequent song slots and filled using the device's copy-and-paste functions. Once blank destination patterns are established, individual tracks or selections—such as hi-hat lines, kick drums, or basslines—can be copied out of one pattern and pasted directly into another pattern on the song grid. However, this workflow differs significantly from clip-launching environments like Ableton Live. As loopop explains: “these are actual notes that were moved from place to place so these are quote unquote destructive as opposed to say in Ableton Live style grid please should be aware of what you're doing here but this is a really nice function of tracker.”

- **Playback Controls:** Pressing Play auditions the current pattern/step; Shift + Play starts playback for the entire chained song sequence. - **Data Handling:** Pasting track data directly across the arrangement grid writes actual note and parameter data into target pattern slots rather than referencing non-destructive clips.

---

[24:50](https://www.youtube.com/watch?v=MQufJBVvAtY&t=1490s) Perform Mode

Perform mode introduces hands-on improvisation capabilities for active tracks and patterns. With recording turned off, the interface allows real-time track swaps: specific tracks from different patterns can be brought in seamlessly (such as pulling an alternate chord track from Pattern 2 into the active playback) with automatic musical quantization. Additionally, tracks can be muted or unmuted instantaneously by holding Shift.

```mermaid flowchart TD accTitle: Perform Mode Operational States accDescr: Shows the distinction between Perform Mode with Record Off for playback and Record On for parameter manipulation.

subgraph RecOff["Record Off: Structure Control"] A["Track Swapping Across Patterns (Quantized)"] B["Instant Track Muting (Shift + Pad)"] end

subgraph RecOn["Record On: Parameter Override Grid"] C["Select 12 Custom Parameters"] D["Assign 3 Step Values per Column"] E["Hold Pad for Momentary Override"] F["Release Pad to Return to Default (Top Row)"] end ```

When Record is enabled, the 48 pads transform into an interactive performance matrix. Users can select 12 live performance parameters from a larger pool of options (including step repeats, tuning, filtering, and volume) and map them across the grid columns. For each parameter column, three rows of pads provide stepped value overrides, while the topmost row represents the default value. Holding a pad applies that parameter change to the selected track or across multiple tracks simultaneously using the jog wheel; releasing the pad snaps the parameter back to its original value. Demonstrating this with tuning shifts of down 2 semitones, down 7 semitones, and down a full octave, loopop notes how dynamic and punchy these momentary overrides feel during live play.

- **Track Remixing:** Live quantized track swapping allows tracks from different patterns to be combined freely on the fly. - **Customizable Macro Grid:** Users configure up to 12 active performance parameters simultaneously. - **Momentary Latches:** Values apply while a pad is held down and immediately revert upon release.

---

[27:40](https://www.youtube.com/watch?v=MQufJBVvAtY&t=1660s) Master Section and Sound Design Overview

The Tracker’s Master page includes global mixing controls alongside overall project volume. It features a secondary tab offering dedicated mute and solo controls for every track. The master output stage is equipped with a hardware-modeled limiter featuring adjustable attack and release controls, as well as an integrated digital bit-depth reducer capable of dialing audio resolution down from standard playback into 12-bit, 8-bit, or even lower vintages. A master reverb engine with adjustable room size is accessible here, though loopop notes that the reverb implementation on the review beta unit was not yet finalized.

Transitioning from sequence arrangement to sound creation, loopop clarifies that Tracker’s sample playback modes operate non-destructively: “now we're talking about taking the sample and adjusting the way that we play it back.” Unlike the destructive sample editor, these playback engines determine how raw audio from the 48 instrument slots gets interpreted and re-triggered.

- **Master Effects:** Includes a global limiter (attack/release), Bit-Depth reducer (scalable down to 12-bit, 8-bit, and below), and master reverb send. - **Track Isolation:** Dedicated Mute and Solo states can be managed across all 8 tracks on page two of the Master menu.

---

[28:25](https://www.youtube.com/watch?v=MQufJBVvAtY&t=1705s) Playback Modes, Looping, and Slicing

Within the playback setup, audio samples can be configured into multiple playback styles: standard One-Shot, Forward Loop, Backward Loop, Slicing, Wavetable, and Granular. In Forward and Backward loop modes, start and end points can be tailored to cycle indefinitely through selected portions of the waveform.

The Slicing engine divides audio loops or vocal phrases into distinct playable elements:

```mermaid flowchart LR accTitle: Slicing Workflow accDescr: Diagram illustrating sample slicing from auto-detection to pattern playback.

A["Load Audio Sample"] --> B["Slice Detection"] subgraph B["Slice Detection"] B1["Manual Slice Markers"] B2["Auto-Slice Detection"] end B --> C["Playback in Patterns"] subgraph C["Playback in Patterns"] C1["Trigger Note"] C2["Slice FX Command"] C3["Randomize FX Command"] end ```

Slices can be added manually across the waveform or populated automatically via the Auto Slice transient-detection feature, which can be fine-tuned by deleting rogue markers. To trigger specific slices inside a pattern, the user places a note on the grid and inputs the Slice FX command, specifying the exact numerical slice index to fire. Alternatively, slices can be triggered semi-generatively by combining the slice trigger with Tracker's Randomize FX command.

- **Looping Styles:** Supports classic One-Shot triggering, forward boundary looping, and reverse boundary looping. - **Slice Control:** Requires attaching the dedicated Slice effect command to a pattern row to target specific slice numbers.

---

[30:45](https://www.youtube.com/watch?v=MQufJBVvAtY&t=1845s) Wavetable Engine

The Polyend Tracker incorporates an onboard single-cycle wavetable synthesis engine. While any audio sample can technically be loaded into the engine, standard samples do not morph smoothly because the engine does not interpolate between frames. For best results, properly formatted wavetables with defined window sizes—specifically 1024 or 2048 samples per frame—should be used.

When a wavetable sample (such as a 2048-sample pulse-width modulation file) is loaded, the jog wheel allows manual navigation through the individual wave frames. Applying an LFO to modulate the Wavetable Position parameter inside the Instrument Parameters menu produces authentic, moving pulse-width modulation. The synth engine tracks accurately across chromatic pitches and external MIDI keyboards, though higher octaves reveal noticeable aliasing artifacts in the beta firmware.

- **Wavetable Frame Sizes:** Accommodates standard 1024 and 2048 samples-per-cycle tables. - **Modulation Integration:** Dynamic movement requires mapping the wavetable position parameter to an internal LFO or envelope generator. - **High-Register Response:** Noticeable digital aliasing occurs in upper pitch registers without anti-aliasing filtering.

---

[33:15](https://www.youtube.com/watch?v=MQufJBVvAtY&t=1995s) Granular Synthesis and Reverb

The Granular playback engine isolates small grains from an audio sample, looping within an ultra-tight window while letting the user travel across the waveform using the position control. Even though the engine operates with a single grain rather than the high grain-count clouds found in more complex desktop granular synthesizers, it produces lush textures when modulated.

To maximize the sonic impact of the granular engine, loopop emphasizes pairing the Tracker with an outboard reverb unit: “I definitely recommend pairing a reverb with tracker regardless but especially for the granular ones.” Running atmospheric pads and speech samples through an external GFI Specular Reverb transforms basic single-grain sweeps into expansive, ambient soundscapes.

- **Single-Grain Engine:** Traverses audio files using microscopic loop regions with adjustable position scanning. - **Outboard Enhancement:** loopop notes that the ambient quality of the granular engine benefits significantly from external stereo effects like the GFI Specular Reverb.

---

[35:45](https://www.youtube.com/watch?v=MQufJBVvAtY&t=2145s) Instrument Parameters and Modulation Architecture

The Tracker features 48 slots that function as complete instrument definitions rather than simple sample placeholders. Each slot links a sample to distinct playback engines, envelope settings, filters, and routing options. The first page of the Instrument Parameters menu provides core voice architecture: overall volume level, stereo panning, coarse and fine tuning, a multimode filter with low-pass filtering and adjustable resonance, and an auxiliary reverb send.

```mermaid flowchart LR accTitle: Tracker Modulation Matrix Routing accDescr: Routing overview showing available mod sources targeting five destinations.

subgraph Sources["Modulation Sources (Choose 1 per Dest)"] S1["Off"] S2["ADSR Envelope"] S3["LFO"] end

subgraph Targets["Modulation Destinations"] D1["Volume"] D2["Panning"] D3["Cutoff Frequency"] D4["Wavetable Position"] D5["Granular Position"] end

Sources --> Targets ```

The second page houses a 5-destination modulation matrix. Mod destination options cover Volume, Panning, Filter Cutoff Frequency, Wavetable Position, and Granular Position. For each destination, the user can select either an ADSR envelope or an LFO as the mod source; the engine does not allow combining an envelope and an LFO on the same destination simultaneously. The ADSR envelopes provide traditional controls: Attack dictates the time needed to hit peak amplitude, Decay governs the fall to the Sustain level, and Release determines the decay tail after note-off.

- **48 Hybrid Instrument Slots:** Each slot stores pitch tuning, filter mode, playback style, and dedicated mod routing along with the underlying sample. - **Filter Section:** Resonant multimode filter including low-pass with dedicated resonance amount. - **Exclusive Source Assignment:** Modulation routing allows either an envelope or an LFO per destination, but cannot combine both sources onto a single target parameter.

[37:58](https://www.youtube.com/watch?v=MQufJBVvAtY&t=2278s) Instrument Modulation: Envelopes, LFOs, and Destinations

Modulation options inside the Tracker allow traditional envelopes to be swapped for low-frequency oscillators across several core instrument parameters. Applying an LFO to amplitude creates rhythmic tremolo or pulsing textures, though currently the LFO must sync to the project tempo because free-running, non-tempo-synced operation is not an option. Panning can be modulated either with a dedicated ADSR envelope or an LFO to drift or bounce audio between the left and right stereo channels. The filter cutoff frequency also accepts either an ADSR envelope or an LFO. Testing the snappiness of the envelope on a low-pass filter with the cutoff pulled low demonstrates a snappy, percussive attack, though loopop highlights an omission in the filtering architecture: “There's no option to have the filter cut off track the frequency or the pitch of the keys you play that would be nice if they could add that.”

```mermaid flowchart LR accTitle: Polyend Tracker Modulation Flow accDescr: Modulation sources routing into instrument engine destinations. subgraph Sources["Modulation Sources"] ENV["ADSR Envelope"] LFO["Tempo-Synced LFO"] end subgraph Targets["Target Destinations"] AMP["Volume / Amplitude"] PAN["Stereo Panning"] FILT["Filter Cutoff"] WAVE["Wavetable Position"] GRAN["Granular Position"] end Sources --> Targets ```

Wavetable position and granular playhead position can also be modulated by an envelope or an LFO. Sweeping the wavetable position with an envelope produces classic pulse-width modulation effects, while applying modulation across the granular position scans through audio grains across the sample to achieve a pseudo-timestretch effect directly on the Tracker.

- Modulation destinations include volume, panning, filter cutoff, wavetable position, and granular playhead position. - Each destination chooses between an ADSR envelope or a tempo-synced LFO. - Desired future modulation features include a sample-and-hold/random waveform, unlinked LFO speeds, slower rates, and filter key tracking.

---

[39:42](https://www.youtube.com/watch?v=MQufJBVvAtY&t=2382s) MIDI In and Out Sequencing

The Tracker functions as both an external sound module and a dedicated hardware sequencer for outboard gear. Inbound MIDI supports note input, external clock, and transport controls over USB or traditional DIN connections via 3.5mm TRS jacks. However, inbound MIDI CC messages cannot currently map to or control internal instrument parameters. For outbound control, the unit sends clock, transport, note data, and program changes over USB, TRS MIDI, or both simultaneously. It provides five assignable CC output slots labeled A through E, which are defined within the CC Outs settings menu. loopop points out an ergonomic improvement for future firmware: “It would be nice in a future firmware update if you could also rename these so that when you went ahead and got into the menu over here you'd see which parameter you're changing.”

Sequencing outboard hardware alongside internal tracks is straightforward. In a pattern where internal tracks are running, external hardware like a Make Noise 0-Coast can be targeted simply by changing the track's instrument assignment to a MIDI channel. Internal MIDI instruments occupy instrument slots 51 through 66, corresponding directly to MIDI channels 1 through 16. By selecting an entire column and applying the Fill command with instrument 51, all triggers instantly route outward to MIDI channel 1, driving external analog synthesizers and outboard effects in tight synchronization with the Tracker’s internal playback engine.

- Inbound MIDI handles note data, transport, and MIDI clock, but cannot modulate internal parameters via CC. - Outbound MIDI sends clock, transport, program changes, and up to 5 user-assigned MIDI CC lanes (A through E). - MIDI output channels are addressed through instruments 51 to 66 (instrument 51 corresponds to MIDI channel 1). - Outbound sequencing operates in parallel with internal sample, wavetable, and granular playback tracks.

---

[41:30](https://www.youtube.com/watch?v=MQufJBVvAtY&t=2490s) Community Q&A: MOD Files, Volume Shortcuts, and Stem Export

Addressing viewer questions submitted prior to the review, loopop clarifies several operational aspects of the Tracker's firmware and hardware design. On the topic of legacy Amiga `.MOD` tracking formats, Polyend indicated that support for importing MOD files is planned in a limited fashion—primarily importing raw note data and sample files without the legacy tracker effect commands—though the feature was not yet implemented at the time of testing. For everyday operation, adjusting master volume does not require menu diving: holding down the physical Master button while spinning the jog wheel acts as a global master volume shortcut.

Seamless live performance between full songs is constrained by the hardware architecture. While switching between patterns within an active project happens instantly without interrupting playback, opening a completely new project file forces the audio engine to stop completely while samples reload into RAM. loopop demonstrates loading the demo song "Lightpaths" to illustrate the noticeable pause required before playback can resume. Additionally, the unit does not operate as a continuous live audio looper and cannot stream long audio files directly from the SD card. However, file management does allow full export versatility: complete songs or individual patterns can be bounced down to stereo mixes, exported as individual audio stems per track, or exported into MOD project files.

- `.MOD` file import is planned to bring in notes and sample data, excluding proprietary legacy effects. - Global output volume shortcut: hold the **Master** button and turn the jog wheel. - Project loading stops audio playback while reading new assets into RAM, whereas pattern changes occur instantaneously. - The Tracker cannot stream long tracks or loop live audio streams directly off the micro SD card. - Export options include master stereo audio, individual track stems for entire songs or individual patterns, and `.MOD` export.

---

[42:50](https://www.youtube.com/watch?v=MQufJBVvAtY&t=2570s) Pros, Cons, and Final Verdict

The primary barrier to entry for the Polyend Tracker is whether a musician is willing to adopt the vertical spreadsheet tracker interface. While it represents a radical departure from traditional grid-based grooveboxes, the workflow proves remarkably rapid once understood. Explaining his experience with the interface, loopop remarks: “Personally I have to say I found it very intuitive and fast it didn't take me a long time to learn this at all.” Although users accustomed to classic step sequencers may occasionally miss dedicated one-button-per-step hardware, the Tracker provides unique software conveniences like Step interval programming, algorithmic Fill functions, instant section previewing, and arbitrary multi-track block copying that outclass conventional grooveboxes. In loopop's assessment: “On the sequencing side I think tracker is top-notch nothing about this feels old or from the 90s.”

Assessing the instrument engine and hardware features yields a more nuanced verdict. Because audio cannot stream from the SD card, memory is strictly constrained by internal project RAM. While the wavetable and granular capabilities place it ahead of basic one-shot sample playback boxes, sound design remains elementary compared to grooveboxes featuring dedicated subtractive or FM synthesizer engines. The two FX parameter lanes per step can feel restrictive, though this is mitigated by the ability to swap which parameter is targeted on every individual line. On the audio effects side, having only a master reverb send makes the absence of a built-in delay send noticeable. Physically, the hardware lacks dedicated macro knobs for spontaneous parameter sweeps, and the lack of an internal rechargeable battery means portable use requires an external USB power bank or high-output mobile phone charger.

| Category | Strengths | Limitations & Compromises | |:--- |:--- |:--- | | **Sequencing** | Lightning-fast Step and Fill entry; block-copy across multiple tracks; selective looped pattern previewing. | Vertical spreadsheet format requires a learning curve; lacks dedicated one-button-per-step layout. | | **Sound Engines** | Multi-mode architecture (Sample, Slicing, Wavetable, Granular). | No audio streaming from SD card; synth engines lack deep synthesis parameters compared to dedicated synths. | | **Automation** | Independent FX parameter assignments per step allow arbitrary modulation over time. | Limited to two FX lanes per step. | | **Effects** | Master spatial reverb engine included. | No built-in delay send effect; limited real-time performance audio processors. | | **Hardware** | Large crisp display; premium jog wheel; lightweight footprint. | No integrated rechargeable battery; lacks multi-parameter macro knobs for quick live tweaking. |

---

[45:20](https://www.youtube.com/watch?v=MQufJBVvAtY&t=2720s) Audio Demos and Full Track Playback

The video concludes with a succession of full musical performances produced entirely on the Polyend Tracker, demonstrating its dynamic range across multiple genres. The compositions highlight intricate rhythmic programming made possible by the tracker layout, including high-speed breakbeat drum chops, rapid pitch-glides, and stutter effects driven by the Fill tool and granular playback engine. Atmospheric pads morph beneath rolling basslines, demonstrating the evolving textures of the wavetable engine alongside sliced acoustic percussion and synchronized outboard synthesizer sequencing.

## Notable quotes > [02:40](https://www.youtube.com/watch?v=MQufJBVvAtY&t=160s) Total sample memory per project is around 90 seconds so don't expect to load or stream full song stems. — loopop

> [42:50](https://www.youtube.com/watch?v=MQufJBVvAtY&t=2570s) On the sequencing side I think tracker is top-notch nothing about this feels old or from the 90s. — loopop

> [00:50](https://www.youtube.com/watch?v=MQufJBVvAtY&t=50s) Trackers work differently here you sequence events from top to bottom giving you more room to see what happens in every step. — loopop

## Mentioned Polyend Tracker, loopop, Ziv, Commodore Amiga, Arturia KeyStep, Make Noise 0-Coast, GFI Specular Reverb, Retrokits, Adam A8X, MeldaProduction, Native Instruments, Ben Jordan (The Flashbulb), Ableton Live

## Video description For plenty of synth and electronic music tip and ideas check out my ever expanding book, available to the awesome people who support this channel on Patreon:

► Patreon: https://patreon.com/loopop

Check out Tracker prices here (affiliate links help the channel): ► Sweetwater: https://imp.i114863.net/Qqmg3 ► Thomann: https://www.thomann.de/gb/polyend_tracker.htm?offid=1&affid=369

Other gear in the video (some of these are affiliate links that help the channel): ► Arturia KeyStep: https://amzn.to/2IX0X9i ► Make Noise 0-Coast: https://amzn.to/2WplxHs ► GFI Specular Reverb: http://bit.ly/GFI-Specular-Reverb ► Retrokits TRS A to TRS B cable: http://bit.ly/Retrokits-TRSA-to-TRSB-cable ► Adam A8X Monitors: https://reverb.grsm.io/Adam-A8X (affiliate link) ► Scopes by Melda: https://www.meldaproduction.com/

Other places I hang out:

► Instagram: https://www.instagram.com/loopopmusic ► Facebook: https://www.facebook.com/loopopmusic ► Twitter: http://www.twitter.com/loopopmusic ► Web: https://loopopmusic.com

My music: ► Bandcamp: https://loopop.bandcamp.com ► Spotify: http://bit.ly/LoopopOnSpotify ► Apple Music:http://bit.ly/LoopopOnAppleMusic

TIMELINE: 0:00 Intro 0:50 Tracker basics 2:40 Overview 5:05 Connectivity 6:10 Sample loader 8:10 Sampling 9:10 Sample Editor 11:30 Sequencing 14:00 Fill 17:20 Recording live 18:00 FX1 & FX2 20:15 Grid tips 22:50 Song mode 24:50 Perform mode 27:40 Master controls 28:25 Sample playback 29:15 Slicing 30:45 Wavetable 33:15 Granular 35:45 Instrument params 37:05 Modulation 39:45 MIDI Sequencing 41:30 Misc Q&A 42:50 Pros and cons 45:20 A few songs

Want to email me personally?

► Ziv (at) loopopmusic.com

NOTE: Occasionally I’ll try out affiliate marketing and include affiliate links. This means that I may earn a commission when you click on or make purchases via affiliate links. The content of this clip is entirely my opinion, and was not paid for or dictated in any way by the company creating the gear. Without addressing the particulars of products shown here as they might be under NDA, gear shown on this channel may be either sent by the manufacturer, on loan for review or bought at a discount.

[Source](https://www.youtube.com/watch?v=MQufJBVvAtY)

中文简报

Polyend Tracker 重拾 1980 年代经典界面以加速硬件编曲 尽管垂直表格工作流在速度与自动化上超越了传统步进音序器,但其严苛的90秒内存上限与初级的合成能力限制了独立使用的深度。 本视频详细评测了 Polyend Tracker,这是一款独立的硬件音乐工作站,重新构想了最初由老式 Commodore Amiga 电脑开创的自上而下垂直表格编曲格式。主持人 Ziv 演示了创作流程的各个阶段,涵盖实时音频采样、离线破坏性采样编辑、通过手动步进或算法填充(Fill)工具进行 Pattern 输入,以及整曲制作。该指南还详述了该设备的调制架构、单周期波表与粒子回放引擎,以及外发 MIDI 控制,最后结合完整的音乐演示客观评估了其优势与硬件局限。 Polyend Tracker 将 1987 年传统的 Amiga tracker 工作流转化为独立的硬件工作站,提供 8 个轨道,且每步具有四个参数通道(音符、乐器、FX1、FX2)。 (0:00) 工程内存被严格限制在 44.1 kHz 下总计约 90 秒的音频 RAM,且所有导入的立体声文件均会自动混缩为单声道。 (2:40) 除单发采样回放外,内部声音引擎还集成了自动切片、单周期波表合成(1024 或 2048 帧大小)以及单颗粒粒子回放功能。 (28:25) 音序功能支持自动填充微时值(micro-timing)的无量化实时输入、跨相邻轨道展开和弦,以及用于快速生成受限于音阶的 Pattern 的算法填充工具。 (14:00) 硬件连接完全依赖 3.5 毫米 TRS 接口(采用 MIDI TRS Type B 规格)与 USB-C 供电,并内置了利用外接音频线作为天线的调频收音机。 (5:05)

Reading summary

The Polyend Tracker modernizes vintage vertical-table sequencing into a standalone hardware groovebox, combining fast algorithmic data entry with sample-based synthesis. In this review, loopop argues that while its spreadsheet paradigm and hardware limits carry a learning curve, its sequencing speed and deep modulation outclass conventional step sequencers. Vertical Architecture and Step-Sequencing Mechanics (0:50) Instead of scrolling horizontally across a piano roll, the Polyend Tracker organizes musical events vertically from top to bottom across eight monophonic tracks. Each track row contains four dedicated lanes: Note (pitch), Instrument (selecting from a 48-slot sample pool or external MIDI channels 1–16), and two independent effect lanes (FX1 and FX2) that handle automation commands like volume, panning, micro-timing, and rolls. Because instrument numbers are assigned per step rather than per track, a single channel can interleave different sounds like kicks and snares on consecutive rows, backed by 20 levels of undo. Data entry is managed through step jumps, live performance, or algorithmic generation. Setting a Step jump value allows immediate entry of rhythmic patterns—such as a four-on-the-floor kick—by advancing the cursor by defined row intervals. Unquantized live playing directly records sub-step offsets into the FX lane as micro-timing values and automatically spills polyphonic chord voices across adjacent tracks. For automated population, the Fill tool rapidly inserts continuous triggers, randomized velocity ranges, or scale-constrained melodic lines across user-selected blocks. Hardware Ergonomics and Sample Management (2:40) Housed in a slim metal chassis, the Tracker features a non-touch 7-inch color display, an expansive grid of silicone pads for keyboard and alphanumeric entry, clicky navigation buttons, and a stepped jog wheel. Rear connectivity includes USB-C for power and computer MIDI, 3.5 mm TRS Type B MIDI ports with bundled 5-pin DIN breakouts, a stereo line input, a dedicated microphone input, a stereo line output, and an internal FM radio receiver that uses the output cable as an antenna. The hardware lacks an internal battery and does not stream USB audio. Project memory relies on an included 16 GB micro SD card, but operational memory is strictly capped at roughly 90 seconds of total sample time per project. Incoming audio files—whether imported via the SD browser in 44.1 kHz uncompressed WAV format or captured directly from the line in, mic, or radio—are automatically summed to mono to preserve RAM. While switching patterns within a project occurs seamlessly, loading a new project interrupts playback while samples transfer into internal RAM. Dual Audio Engines: Offline Processing and Real-Time Playback (9:10) The Tracker handles audio through two distinct operational environments. The Sample Editor is an offline, destructive processing suite where tools like gain amplification, compression, transient cropping, flanging, and overdrive are permanently rendered into the project's working RAM file without modifying the original SD card asset. Because these edits must be rendered, they cannot be manipulated in real time. In contrast, the playback section applies non-destructive interpretations to the 48 instrument slots. Modes include standard One-Shots, forward and reverse loops, a transient-detecting Slicing engine addressed via per-step FX commands, single-cycle Wavetable synthesis (optimized for 1024 or 2048 samples per frame), and single-grain Granular synthesis. Each instrument profile includes tuning, an aux reverb send, a multimode filter, and a 5-destination modulation matrix where Volume, Panning, Filter Cutoff, Wavetable Position, or Granular Position can each be targeted by an ADSR envelope or a tempo-synced LFO. Arrangement, Live Performance, and Outbound Sequencing (22:55) Arrangements are built in Song mode by chaining patterns or destructively copying and pasting rectangular multi-track cell blocks directly across pattern slots, supporting up to 255 patterns of up to 128 steps each. For hands-on improvisation, Perform mode enables real-time, musically quantized track swapping across different patterns alongside instant muting. Enabling Record transforms the pad matrix into a 12-column parameter override grid with momentary latching for dynamic tuning, filtering, and repeat manipulations during live playback. Beyond internal sound generation, the Tracker sequences external gear through five assignable MIDI CC output lanes (A through E), clock, transport, and program changes. Patterns or complete projects can be exported as stereo master audio, individual track stems, or Amiga .MOD project files, while master bus shaping includes dedicated mutes, a hardware-modeled limiter, and a digital bit-depth reducer scalable down to 12-bit or 8-bit resolution. The Polyend Tracker delivers exceptional sequencing agility and spreadsheet-style convenience, though it is constrained by a 90-second mono sample RAM limit, an absence of onboard delay, the lack of an internal battery, and two FX lanes per step. loopop concludes that for users willing to adapt to vertical data entry, the Tracker feels modern, deep, and remarkably fast.

精炼阅读摘要

Polyend Tracker 将源自 1987 年 Commodore Amiga 的经典纵向数据表音序逻辑移植至独立硬件中,融合了采样剪辑、波表与颗粒合成引擎。测评者 loopop 指出,该设备在步进编排与算法生成方面极具效率,但其声音架构受限于单项目约 90 秒的单声道 RAM 容量,且缺乏实时控制旋钮与内置电池。 纵向数据结构与步进音序逻辑 (0:50) Tracker 抛弃了传统 DAW 或步进音序器的横向时间轴,将 8 条音轨以纵向数据表格自上而下滚动呈现。每个音轨细分为 4 个色彩编码列:音符列(Note)、乐器列(Instrument)以及两个效果自动化列(FX1 与 FX2)。该架构允许在单条音轨内每一步触发完全不同的样本,亦可指定外部 MIDI 通道。FX 列并非传统意义上的音频总线效果,而是步进参数自动化,涵盖音量、声像、微时序(Micro-Timing)、滚奏(Roll)、滑音以及 5 组 MIDI CC 控制等约 25 种指令。 音序录入提供三种主要方式:传统步进输入(支持配置步长跳跃值 Step 与 20 级撤销)、算法填充工具(Fill Tool)以及实时演奏录音。Fill 工具支持在选定列中批量生成踩镲随机动态力度,或在预设调式音阶内随机散布旋律音符。当用户通过打击垫或外接键盘实时弹奏和弦时,系统会自动将超出单音轨发音限制的多余声部横向溢出分配至相邻音轨(Chord Spilling),并在 FX 列中自动记录微时序偏移,完整保留未经量化的自然演奏律动。 硬件架构接口与采样内存限制 (2:40) 硬件主体采用超薄金属机身,配备 7 英寸哑光彩色非触摸屏幕、大型机械飞轮与硅胶打击垫矩阵(打击垫不支持力度与触后响应)。设备后置接口全面采用小型化规格,包括用于供电和双向 MIDI 传输的 USB-C 接口、3.5mm TRS Type B MIDI 接口、3.5mm 麦克风与线路输入,以及单孔 3.5mm 立体声输出;机身内置 FM 收音机,依靠插入音频输出孔的音频线作为临时天线接收广播进行现场采样。 设备在采样内存管理上存在明确限制:所有工程均存储于随附的 16 GB micro SD 卡中,但每个项目的活动运行内存仅约 90 秒,且立体声音频在导入或录入时会自动混缩为单声道,无法直接从卡端流式播放整曲音轨。采样编辑环境采用破坏性离线处理逻辑,在 Sample Editor 中执行音量放大、动态压缩、零交叉点剪裁或离线调制效果(如合唱、沙哑失真)时,需要等待系统计算并直接改写项目内存中的波形文件。 采样回放合成引擎与调制矩阵 (28:25) 在乐器回放层面,Tracker 支持非破坏性处理,每个项目拥有 48 个乐器槽位,可分配为单次触发、正反向循环、切片(Slicing)、波表(Wavetable)及颗粒(Granular)五种引擎。切片模式支持瞬态自动识别并通过步进中的 Slice FX 指令精准定位触发;波表引擎适配 1024 或 2048 采样帧宽的文件,但在高音区存在数字走样现象;颗粒引擎采用单颗粒循环窗口,loopop 认为其非常依赖外接立体声混响(如 GFI Specular Reverb)来营造饱满的环境质感。 乐器参数界面包含多模共振滤波器与 5 目标调制矩阵,可将音量、声像、截止频率、波表位置与颗粒游标分别映射至 ADSR 包络或 LFO。然而,该系统限制每个调制目标只能在包络或 LFO 之间二选一,LFO 仅支持速度同步而无法自由运行,且滤波器目前缺乏键盘音高跟踪(Key Tracking)功能。 工程编排演奏模式与外部扩展 (22:55) 编排界面提供两种视图:显示 4 轨完整参数的详细视图与显示全 8 轨单一参数的紧凑视图。每个 Pattern 最多包含 128 步,全项目可容纳 255 个 Pattern。在歌曲模式(Song Mode)下,用户除按顺序串联 Pattern 外,还可在网格中直接复制粘贴特定音轨片段,以破坏性写入真实数据的方式构建曲式架构。 演奏模式(Perform Mode)为现场即兴提供了两套机制:录音关闭时,用户可在播放中无缝且音乐性量化地替换不同 Pattern 中的单条音轨或快速静音;录音开启时,48 个打击垫化身为 12 个实时宏参数控制网格,按住打击垫可临时触发预设的调音、滤波或滚奏变化,松手即恢复基准值。对于外部硬件,设备将乐器槽位 51 至 66 映射为 MIDI 通道 1 至 16,不仅能同步驱动外部合成器,还可通过 A 至 E 共 5 个可分配 CC 通道发送自动化包络。 Polyend Tracker 成功将复古 Tracker 流程转化为现代硬件编排环境,其步进输入效率、算法填充工具与单步微时序控制在节奏与电子音乐制作中表现优异。然而,其短板同样显著:项目 RAM 限制阻碍了长音频流式回放,缺少发送延迟效果器、无内置电池且缺乏物理旋钮削弱了即兴操控体验;此外,加载新工程时音频引擎会中断以重载样本。对于能够适应纵向数据表逻辑的创作者而言,该设备展现了出色的工作流优势,但在深层合成控制与现场无缝衔接方面仍存在妥协。

Detailed notes — zh

## Background 该视频由知名硬件合成器与音乐制作频道 loopop 于 2020 年 3 月 18 日发布在 YouTube 平台上。视频简介指出,这是一篇关于 Polyend Tracker 的深度评测与完整全流程教学,详细覆盖了从采样导入、声音塑形到最终成曲编排的全部功能细节与优缺点分析。 ## TL;DR 视频系统性地解析了 Polyend Tracker 这款致敬 80 年代 Commodore Amiga 追踪器逻辑的独立硬件 Groovebox。loopop 详细拆解了其纵向滚动的四列音序结构、采样录制与破坏性编辑,以及结合波表和粒子的双重合成引擎,展示了如何通过功能强大的 Fill 填充、微时值修正与双 FX 自动化列快速构建复杂节拍。随后,内容深入探讨了歌曲编排、用于现场即兴的 12 参数表演模式,以及驱动外部硬件(如 Make Noise 0-Coast)的 MIDI 交互逻辑。最后,评测客观权衡了其仅约 90 秒单声道采样内存、双 FX 通道限制与缺乏内置电池等不足,并盛赞了其在复杂切片音序编写与现代便携制作上的极高效率。 ## Atmosphere & style 整段视频延续了 loopop 标志性的严谨、客观与高密度信息流风格,镜头全程聚焦于硬件屏幕与细腻的指尖操作,几乎没有任何多余的寒暄与废话。评测者的讲解语调平静沉稳、逻辑极其缜密,将原本晦涩冰冷的“电子表格”式 Tracker 界面拆解得井井有条,兼具拆解工程图纸般的理性与声音设计时的灵动。随着复杂的碎拍切片、波表合成与粒子氛围音色层层叠加成曲,观众能清晰感受到从最初面对垂直数字流时的陌生困惑,逐渐转变为对这套复古编曲工作流之高效精准的由衷惊叹。 ## Bulletin - [00:00](https://www.youtube.com/watch?v=MQufJBVvAtY&t=0s) Polyend 推出独立硬件工作站 Tracker,将源自 1987 年 Amiga 的垂直滚动网格音序架构带入现代硬件,搭载 7 英寸彩屏并以采样为核心基础。 - [02:40](https://www.youtube.com/watch?v=MQufJBVvAtY&t=160s) 机身具备 8 轨音序容量,支持最多 255 个 Pattern,单项目采样池支持 48 个乐器槽位,内置单声道采样内存上限约为 90 秒。 - [05:05](https://www.youtube.com/watch?v=MQufJBVvAtY&t=305s) 设备通过 USB-C 供电(普通 5V/1A 充电宝即可驱动),除线路与麦克风输入外还巧妙将音频输出线作为天线集成了内置 FM 收音机采样功能。 - [30:45](https://www.youtube.com/watch?v=MQufJBVvAtY&t=1845s) 除了纯采样回放外,Tracker 还集成了基础的单周期波表(Wavetable)合成引擎与单粒子(Granular)合成引擎,可将短采样拉伸为绵延氛围垫音。 ## Key takeaways - [00:00](https://www.youtube.com/watch?v=MQufJBVvAtY&t=0s) Tracker 采用从上至下的垂直时间轴排列,每个音轨细分为音符列(Note)、乐器列(Instrument)以及两条效果列(FX1 与 FX2)。 - [00:50](https://www.youtube.com/watch?v=MQufJBVvAtY&t=50s) 效果列在 Tracker 中主要充当参数自动化,提供微时值(Micro Timing)、声相、滤波、音量滚奏(Roll)等约 25 种效果以及 5 组 MIDI CC 控制。 - [02:40](https://www.youtube.com/watch?v=MQufJBVvAtY&t=160s) 硬件交互由屏幕下方 8 个上下文按键、点动飞轮(Jog Wheel)及硅胶网格打击垫组成,打击垫可用于快速选值、乐器弹奏或字符输入。 - [05:05](https://www.youtube.com/watch?v=MQufJBVvAtY&t=305s) 背部 MIDI 采用 3.5mm TRS-B 规格,需要配合转接线或转接辫连接 TRS-A 设备或传统 5 针 DIN 合成器。 - [09:10](https://www.youtube.com/watch?v=MQufJBVvAtY&t=550s) 采样编辑器包含电平放大(Amplify)、压缩器(Compressor)、裁切(Crop)等破坏性离线效果,处理会重写 RAM 中的波形但不会改动 SD 卡原文件。 - [11:07](https://www.youtube.com/watch?v=MQufJBVvAtY&t=667s) Pattern 编辑器支持 4 轨完整泳道与 8 轨简略泳道两种视图,提供步进编辑、配合 Step Jump 快速打点以及实时演奏录制。 - [14:00](https://www.youtube.com/watch?v=MQufJBVvAtY&t=840s) 强大的 Fill 填充功能支持对音符、乐器或效果列进行整列批量填充,并支持按指定音阶(Scale)离散随机生成旋律或动态律动。 - [17:20](https://www.youtube.com/watch?v=MQufJBVvAtY&t=1040s) 实时录音时如果弹奏和弦,音符会自动溢出记录到相邻音轨中,从而在单音音轨架构下实现跨轨复音序列记录。 - [20:15](https://www.youtube.com/watch?v=MQufJBVvAtY&t=1215s) Pattern 网格深度融合电子表格思维,支持跨轨选区复制粘贴、高亮区域独立试听(Selection Preview)以及步进级瞬时速度自动化(Tempo Automation)。 - [22:55](https://www.youtube.com/watch?v=MQufJBVvAtY&t=1375s) 歌曲模式(Song Mode)既能线性拼接 Pattern,也支持直接跨模式以破坏性方式复制移动音符片段来快速搭积木式编曲。 - [24:50](https://www.youtube.com/watch?v=MQufJBVvAtY&t=1490s) 表演模式(Perform Mode)支持节拍量化的跨模式换轨与瞬时静音,录音状态下打击垫网格会转为包含 12 种可预设梯度的实时参数触发垫。 - [28:25](https://www.youtube.com/watch?v=MQufJBVvAtY&t=1705s) 采样回放包含单发、正反向循环与切片(Slice)模式;切片步进需通过 FX 栏指定 Slice 编号,配合 Randomize 可实现碎拍重组。 - [35:45](https://www.youtube.com/watch?v=MQufJBVvAtY&t=2145s) 乐器架构提供包含 ADSR 包络与速度同步 LFO 的调制矩阵,可动态调制音量、声像、滤波截止频率、波表扫描位置与粒子位置。 - [39:42](https://www.youtube.com/watch?v=MQufJBVvAtY&t=2382s) 外部 MIDI 音序逻辑清晰,将 51 至 66 号乐器直接映射至 MIDI 1 至 16 通道,并支持输出 5 组独立指定的 MIDI CC 与 Program Change。 - [42:50](https://www.youtube.com/watch?v=MQufJBVvAtY&t=2570s) loopop 总结其音序编写与批量处理效率处于顶尖水准,但单工程采样内存较小(约 90 秒单声道)、同一时刻仅有两条 FX 自动化以及缺乏内置电池和更多实体宏旋钮是其主要权衡点。 ## Detailed walkthrough ### [00:00](https://www.youtube.com/watch?v=MQufJBVvAtY&t=0s) Tracker 硬件概述与基础概念 来自 Polyend 的 Tracker 是一款独立的硬件 Groovebox(音乐工作站),其核心工作流基于最早于 1987 年在 Commodore Amiga 电脑上诞生的 Tracker(音乐追踪器)网格音序架构。Tracker 采用全数字架构,以采样为核心基础,同时内置了基础的波表(Wavetable)合成与粒子(Granular)合成能力,并配备了一系列极具创意的音序小技巧。视频的目标是全方位拆解它“能做什么、不能做什么”,并详细解析其工作流程。 ```mermaid flowchart TD accTitle: Polyend Tracker Track Structure accDescr: 单轨四个纵向列的结构分解图 subgraph Track["单个音轨 (Track) 的四列结构"] NoteCol["音符列 (Note)<br/>绿/青色:音高如 C5、D5"] InstCol["乐器列 (Instrument)<br/>黄色:采样池 1-48 或 MIDI 通道"] FX1Col["效果列 1 (FX1)<br/>紫色/蓝色:约 25 种自动化或 CC"] FX2Col["效果列 2 (FX2)<br/>紫色/蓝色:第二重独立自动化"] end ``` Tracker 最具标志性的特征在于屏幕上不断滚动的数字流。绝大多数现代音序器(无论是钢琴卷帘还是传统的步进音序按键)都是沿着“从左到右”的时间轴排列事件,而 Tracker 的逻辑完全相反——事件是“从上到下”垂直滚动的。这种从上至下的纵向排列方式为每个步进(Step)腾出了更充裕的信息展示空间。每个轨道(Track)被细分为四个纵向参数列: - **音符列(Note Lane,青绿色)**:显示当前步进触发的音高信息,例如 D5、C5、C6 等。 - **乐器列(Instrument Lane,黄色)**:指示当前步进由哪一个乐器发声。每个工程支持一个容纳 48 个采样的采样池(Sample Pool),这些采样不仅可以直接触发,还能作为波表或粒子合成的声源。这意味着用户可以在每一个步进上指定完全不同的采样。如果乐器编号下翻到 1 号采样以下,则会直接映射到控制外部硬件合成器的 MIDI 通道。 - **效果列 1 与效果列 2(FX Lanes,紫色与蓝色)**:在 Tracker 的语境中,FX 并不等同于传统乐器里的混响或延迟等音频效果器,而是更接近参数自动化(Automation)信息。 “Effects in Trackers aren't necessarily effects as you'd probably be used to seeing them with other instruments but rather more like automation information like how loud to play a note, panning, micro timing, ratchets.” loopop 这样阐述 Tracker 独特的效果体系。每个效果列目前提供约 25 种不同的自动化选项,外加 5 种 MIDI CC 控制指令以及 Program Change(音色切换)指令。每个效果由特定的字母代码与对应的参数数值组成,按下机身上的 Description 按键即可实时查看该效果的具体说明及数值可调范围。在每一个轨道的每一个步进中,两个效果列均可自由、独立地挂载几十种效果中的任意一种。 --- ### [02:40](https://www.youtube.com/watch?v=MQufJBVvAtY&t=160s) 硬件交互界面与工程规格 Tracker 配备了一块 7 英寸的彩色液晶显示屏。这块屏幕并不支持触控,所有屏幕交互均通过屏幕下方的 8 个物理功能按键(Screen Buttons)完成。按键的功能是动态变化的,严格对应屏幕底部边缘显示的上下文标签(例如执行 Undo 撤销、Pattern 样式切换、更改轨道步进长度等)。在配合大尺寸点动飞轮(Jog Wheel)旋转参数的同时,底部的硅胶打击垫阵列也可以充当快速数值选择器,例如按下指定垫子直接切换到 1 号、4 号或 5 号 Pattern。 除了选择参数外,这套网格打击垫还可以用来弹奏乐器,甚至能充当虚拟打字键盘,用来给工程或采样文件命名。飞轮的右侧和周边分布着常用的功能工具键,包含 Copy(复制)、Paste(粘贴)、Insert(插入)、Delete(删除)、Backspace(退格)以及标准走带按键(Transport Controls)。在屏幕与飞轮之间的一组导航按键,不仅能指定当前编辑哪一个信息列,还能在 Tracker 的各大核心页面之间瞬间跳转:包括 Pattern 编排页、Sample Editor(采样编辑器)、Sample Playback(采样回放模式)、Song Mode(歌曲编排页)、Mutes & Master Control(静音与母带控制)以及系统全局设置等。部分功能页面拥有双层界面,屏幕上会有类似“1 of 2”和“2 of 2”的双页指示器(如 Instrument Parameters 乐器参数页)。 在规格与存储方面,Tracker 的核心指标包括: - **工程存储**:所有工程均保存在机身背部的 MicroSD 卡槽中,出厂附赠一张 16GB 的存储卡,可容纳海量工程。 - **结构容量**:每个工程支持最多 255 个 Pattern;每个 Pattern 拥有 8 个独立音轨。 - **采样限制**:采样池最多加载 48 个采样或外接 MIDI 通道;单工程的总采样内存上限约为 90 秒。“Total sample memory per project is around 90 seconds, so don't expect to load or stream full song stems.” loopop 明确提醒道,这意味着它无法直接流式播放或加载整首歌曲的分轨(Stems)。 - **音频通道**:系统会自动将所有导入的采样强制转换为单声道(Mono),但支持在立体声声场内自由调节 Pan(声像平衡)。 - **机身做工**:整体机身轻薄,采用扎实坚固的全金属外壳。打击垫为硅胶材质,不具备力度感应(Velocity)与压力触后(Pressure Sensitive);功能按键为硬质塑料,按压手感清晰利落。 --- ### [05:05](https://www.youtube.com/watch?v=MQufJBVvAtY&t=305s) 电源与接口连接性 Tracker 的背部接口设计兼顾了便携与硬件拓展: - **供电设计**:设备通过 USB-C 接口供电,机身内部未配备锂电池。其功耗极低,市面上普通的 5V/1A 手机充电头或充电宝即可轻松驱动。 - **USB 传输**:USB 接口目前支持双向 MIDI 传输,但不支持 USB Audio(音频流传输),官方未来可能会通过固件加入通过 USB 进行文件传输的功能。 - **MIDI 输入/输出**:采用 3.5mm TRS 接口实现。Tracker 遵循的是 MIDI TRS-B 标准,如果需要与市面上 TRS-A 标准的设备串联,必须搭配 TRS-A 转 TRS-B 的转接线;而对于同为 TRS-B 标准的设备,直接使用一条通用的 3.5mm 对录耳机线即可通讯。如果连接采用传统 5 针 DIN 接口的 MIDI 设备,则需配合机身附送的 3.5mm 转 5 针 DIN 转接辫使用。 - **隐藏收音机功能**:Tracker 内部集成了一个 FM 收音机模块。该模块巧妙地将插入机身的音频输出线作为天线来接收无线电信号,用户可以直接在机内对广播电台的声音进行实时采样(演示中为防版权警告未直接播放广播内容)。 - **音频接口**:配备一个 3.5mm 立体声总输出接口,以及两个独立的采样输入接口——麦克风输入(Mic In)与立体声线路输入(Line In)。 --- ### [06:10](https://www.youtube.com/watch?v=MQufJBVvAtY&t=370s) 采样载入与内存管理 (Sample Loader) 在 Tracker 中构建音乐,流程从导入或录制声音开始。全新创建的项目在初始状态下没有任何 Pattern 步进数据,打开 Sample Loader(采样加载器)页面,48 个乐器槽位也是完全空白的,底部的采样内存条使用量显示为零。 ```mermaid flowchart LR accTitle: Sample Loading Workflow accDescr: 从 SD 卡导入采样到 Tracker 项目池的流程图 SD["MicroSD 卡目录<br/>(44.1kHz / 16, 24, 32-bit)"] --> Browse["方向键 / 飞轮浏览<br/>进入文件夹 (如 drums/loops)"] Browse --> Preview["Preview 预览按键<br/>实时监听切听"] Preview --> Add["Add / Add Next 按键<br/>装载入 48 个槽位"] Add --> Memory["项目采样池<br/>总计约 90 秒单声道内存"] ``` 文件浏览支持使用方向键或飞轮滚动翻找 MicroSD 卡中的多层级文件夹。Tracker 原生支持的音频格式为 44.1kHz 采样率,位深度支持 16-bit、24-bit 或 32-bit(loopop 顺带提到 Native Instruments 的采样包大多原生为 44.1kHz,无需额外转码即可完美兼容)。当浏览进入存放声音文件的文件夹后,屏幕会立刻列出采样列表: - 按下 Preview 软键可以直接试听声音。 - 确认想要的声音后,按下 Add 将其写入工程;也可以点击 Add Next 顺次批量装填多个样本。 - 随着采样的不断添加,屏幕下方的白色内存指示条会逐步被填满。短促的鼓组单发声音(One-shots)占用空间极小,但加载较长的 Loop 切片时内存消耗会明显加快。 - 采样加载器不仅支持常规鼓声与乐句,还支持加载单周期波形(Single Cycle Waveforms)与 Wavetable 波表文件,供后续合成模块调用。 - 用户可以随时在已载入的项目采样池中进行预览试听,或者删除不需要的声音以释放宝贵的 90 秒内存空间。 --- ### [08:10](https://www.youtube.com/watch?v=MQufJBVvAtY&t=490s) 实时采样录制 (Sample Recorder) 除了直接读取 MicroSD 卡,用户可以通过内置的 Sample Recorder 直接录制音频。录音界面提供了 4 种声源输入选项:Line In(线路输入)、Radio(FM 广播收音机)以及具备 Low Gain(低增益)或 High Gain(高增益)两种放大档位的 Microphone(麦克风输入)。 loopop 在现场接入了一只略显磨损的 SingStar 动圈麦克风进行实测: - 用户可以根据输入源电平自由调节录音 Gain(增益),并选择开启或关闭输入监听(Monitor)。 - 录音触发后,loopop 对着麦克风录入了一段干声语音:“Testing 1, 2, 3, this is Polyend Tracker.”。 - 录音完毕后,屏幕会立即呈现所采集音频的波形图。用户可以在当前页面直接进行粗剪切(Crop),也可以保留原样留到专用采样编辑器中精修。 - 保存时,设备支持通过算法自动生成采样名称,也可以直接借助底部的打击垫键盘手动输入命名(例如保存为“Test 1 2 3”)。 - 保存动作完成后,声音既可以仅保存在 MicroSD 卡的录音文件夹中,也可以直接一键装载进入当前工程的活动采样池。 --- ### [09:10](https://www.youtube.com/watch?v=MQufJBVvAtY&t=550s) 采样编辑器与破坏性效果 (Sample Editor) 进入 Sample Editor 页面后,用户可以对采样池中的任意音频执行一系列“破坏性处理”(Destructive Processing)。“Destructive means that they actually change the physical sample in the project. They don't, by the way, change the sample on the SD card.” loopop 明确区分了破坏性编辑的作用范围:这些操作会彻底重写当前项目内存中的样本波形,但绝对不会修改或覆盖 SD 卡原本保存的母带源文件。 内置的离线破坏性效果工具箱功能十分完备: - **Amplify(电平放大)**:针对录音电平偏低的人声,可直接大幅提升整体增益,并生成预览试听,确认无误后点击 Apply(应用)写入波形。 - **Compressor(压缩器)**:在硬件内部平抑动态。界面支持调节阈值(Threshold)与起音时间(Attack)。演示中通过拉低阈值和压快起音,有效压缩了人声毛刺,将音量动态彻底压平,再配合多次二次 Amplify,将原本微弱的录音做到了饱满响亮。 - **Crop(修剪)与 Zoom(缩放)**:通过飞轮精确微调波形的 Start(起始点)与 End(结束点),配合缩放功能捕捉瞬态零点并裁切掉无效空白。 - **调制类效果器**:内置了 Chorus(合唱)等音频效果。不过由于这些属于离线渲染处理,缺乏实时湿声预览,需要处理并试听,调整手感略显繁琐。 - **Transpose(移调测试)**:页面内配备了快速移调试听功能,方便用户实时校验录制的样本在被映射到不同音阶音高时,音质的表现与拉伸变化情况。 ### [11:07](https://www.youtube.com/watch?v=MQufJBVvAtY&t=667s) Pattern 编辑器架构与音符步进输入 Polyend Tracker 的音频破坏性效果需要花费几毫秒到数秒的时间离线渲染,但系统内部同样配备了丰富的实时调制体系,包括参数自动化效果、Master Reverb 以及各类乐器调制。编曲核心依托于 Pattern 编辑器,该界面提供了两种观察视角:第一种视角同时显示 4 个轨道,每个轨道展开展示全部 4 条参数泳道(Parameter Lanes);第二种视角则横向铺开全部 8 个轨道,但每个轨道只显示单项参数(通过按下 Pattern 键并配合 Note、Instrument 或 FX 泳道按键进行切换)。 每个 Pattern 的最大长度可达 128 步,整个工程支持存储最多 255 个 Pattern。在单一 Pattern 内部,所有音轨强制保持相同的长度与播放速率(若要实现多节拍长度混搭需借助后续的 Perform 模式)。向网格中写入音符或自动化有三种途径:步进编辑(Step Edit)、实时演奏录制(Live Recording)以及批量填充(Fill)。 在进入录音状态前网格受到保护,按下 Record 键后光标会从绿色变为红色。为了演示清晰,Loopop 切回 4 轨完整参数视图,选定预先载入的底鼓(Kick)进行音符输入。步进录音最关键的机制在于步长跳转设定(Step Jump):当 Step 设置为 1 时,输入一个音符光标自动下移一行;若将其设为 0,光标原地不动;若将长度设为 16 步并将 Step 步进值设为 4,只需连续按下四次按键,就能瞬时在第 1、5、9、13 步打上规整的四四拍底鼓(Four-on-the-floor)。 回放时屏幕提供两种跟随逻辑:“If you're in record mode the grid will stick around the step you're editing if you exit record mode the good will scroll along as tractors tend to do.”(如果你处于录音模式,网格会停留在你正在编辑的步进周围;如果退出录音模式,网格就会像传统的 Tracker 软件那样随播放滚动。)每个音轨上的每个步进均可自由分配任意乐器编号,无需为不同音色划分专用轨道;此外系统配备了多达 20 级的 Undo(撤销)历史,误操作时容错率极高。 ```mermaid flowchart TD accTitle: Pattern Editor Display and Input Modes accDescr: 展现了 Pattern 编辑器的两种视图分支以及三种输入音符的方式 PE["Pattern 编辑器"] --> V1["4 轨视图: 每轨显示 4 条完整参数泳道"] PE --> V2["8 轨视图: 每轨仅显示 1 条选定参数泳道"] PE --> IN["数据输入逻辑 (需红灯 Record 激活)"] IN --> S1["步进录入: 配合 Step Jump (0-4+) 快速跳步点音"] IN --> S2["实时演奏: 键盘或打击垫录制,自动记录微时值"] IN --> S3["Fill 填充: 批量生成、音阶限定与随机化算法"] ``` ### [14:00](https://www.youtube.com/watch?v=MQufJBVvAtY&t=840s) Fill 批量填充与算法生成 在面对密集音符输入(例如编写 16 分音符闭镲 Hi-hats)时,逐格点按极为低效。Polyend Tracker 提供了极为强大的 Fill(填充)功能。移动光标至目标列顶端,按下 `Shift + Up` 即可一键选定整列。呼出 Fill 菜单后,用户可以指定填充的目标类型(Note、Instrument 或 FX 泳道)以及具体参数。例如选定 Instrument 泳道并指定 11 号镲片乐器,按下执行后整条音轨瞬间布满该乐器。 为了打破机械重复感,Fill 功能还支持自动化数值生成。切换至 FX 1 泳道,将效果类型指定为 Volume(音量),填充模式设为 Randomize(随机化),并用旋钮划定音量变化的上下限范围。点击填充后,整列镲片的动态电平立刻呈现出充满人情味的起伏律动(Groove)。 在旋律性乐器的编写上,Fill 同样展现了生成式算法的便利。系统内的每个轨道在物理上均为单音(Monophonic),但支持直接加载带有和弦色彩的采样。在没有最终出厂音色库的测试机上,Loopop 载入了 Native Instruments 扩展包中的和弦采样。在旋律轨道的选区内,他开启 Fill 功能: - 将分布模式设为随机离散分布(Randomly,而非每步触发); - 启用 Scale(调式)过滤,锁定为小调音阶(Minor Scale); - 圈定音高范围后点击执行,系统便自动在网格中撒入一组完全合乎调式的随机琶音与切分律动。 ### [17:20](https://www.youtube.com/watch?v=MQufJBVvAtY&t=1040s) 实时演奏录音与微时值修正 第三种音符录入机制是实时录制。用户既可以直接使用面板上的方块打击垫(Grid),也可以外接 MIDI 键盘弹奏。在伴奏声部播放的同时,Loopop 现场即兴弹入一段副歌旋律。Tracker 在录音逻辑上针对其单音音轨架构做出了智能处理:“The nice thing here if I go into note mode if you play chords the notes will spill into the adjacent track so even though each track is monophonic you could record polyphonic sequences you just use you have different tracks.”(如果进入音符模式并弹奏和弦,音符会自动溢出并记录到相邻的轨道中;因此即便每条音轨都是单音的,你依然能够通过跨轨道录制出复音和弦序列。) 由于实时演奏不可避免存在节奏偏差且录音未开启刚性量化,系统会自动捕捉人手弹奏的时值细节:退出录音模式后可以看到,Tracker 自动在每个步进的 FX 泳道中写入了 Micro Timing(微时值)数值。借助这些微小的时差偏移,即使音符在视觉上被吸附到了特定行数,听感上依然完整保留了原始演奏的自然 Groove 与摇摆感。此外,录音时松开按键的动作会被自动识别并标记为“Note Off”(音符关断)事件;除了标准的 Note Off,系统还支持将步进结尾定义为瞬间切断的“Cut”或平滑淡出的“Fade”。 ### [18:00](https://www.youtube.com/watch?v=MQufJBVvAtY&t=1080s) FX 1 & FX 2 泳道效果与自动化参数 每个音轨均配备了 FX 1 与 FX 2 两条效果参数泳道,支持逐步编辑或自动化实时调节。除了前述的 Micro Timing 和 Volume 之外,泳道内包含极其宽广的调制维度: - **Panning(声相)**:可逐步将打击乐或音效向左或向右精准平移。 - **Roll(滚奏 / 轮奏效果)**:内置大量细分滚奏模式,涵盖不同细分倍率、上行渐强或下行衰减曲线,是制作 Trap 镲片连击与故障碎拍(Glitch)的利器。 - **Micro Tuning 与 Glide(微调与滑音)**:Loopop 在 Bassline 轨道中插入滑音指令,使低音音符之间产生平滑的弯音过渡。 - **切片与随机化(Slice & Randomization)**:支持在步进中随机改变音高、效果值、采样播放起始位置或指定的 Slice 切片编号。 - **滤波器与外部控制**:提供板载 Filter 参数自动化,支持输出 MIDI CC 控制信息与 Program Change(乐器程序变更)。 - **Pattern Break(模式中断)**:可在特定步进强制提前结束当前 Pattern 并跳入下一个环节。 ### [20:15](https://www.youtube.com/watch?v=MQufJBVvAtY&t=1215s) 网格编辑技巧与 Pattern 跨步变速 Pattern 编辑器深度吸收了类似电子表格(Spreadsheet)的数据处理思维,提供了极高密度的操作快捷键与批处理工具: - **反转与转调(Invert & Transpose)**:选中任意选区可直接执行 Invert(反转音高序列),或按住 Shift 配合旋钮对整个音轨或局部音符进行快速转调。 - **复制粘贴(Copy & Paste)**:支持选中局部区域跨轨道甚至跨步长自由粘贴(例如将 16 步片段无缝扩充复制至 32 步 Pattern 中);按下整体 Copy 时,系统会同时抓取选区及整张 Pattern,切至 Pattern 2 后使用 `Pattern + Shift + Paste` 即可秒级克隆结构。 - **选区试听(Selection Preview)**:“If you want to work on a particular range you can just select that range to hit preview again super useful function I haven't seen I don't think anywhere else.”(如果你想针对特定区域进行打磨,只需框选该区域并按下 Preview,这是一个极其好用、在其他设备上几乎从未见过的功能。) - **片段重采样规划(Render / Bounce)**:根据官方内测规划,未来固件将支持将选中的特定和弦片段或多轨混录音频一键 Bounce(导出渲染)为单个独立采样,从而实现音轨腾挪与无限声音叠加。 此外,Tracker 还具备突破传统节拍限制的“中途变速”(Mid-pattern Tempo Automation)功能。在演示来自 The Flashbulb(Ben Jordan)的工程预设时,屏幕清晰展现了在某些特定步进上插入的 Tempo 自动化参数:回放进行到该步进时,光标停留的时间明显拉长,赋予了曲目即时拉伸、渐慢或剧烈速度摇摆的极端表现力。 ### [22:50](https://www.youtube.com/watch?v=MQufJBVvAtY&t=1370s) 模式编排与表演准备 当各个 Pattern 切片制作完成之后,工程便进入更高维度的组织架构。用户既可以进入 Song 模式(按顺序添加 Slot 插槽并排布 Pattern 序号,将其搭积木般串联为一首完整歌曲),也可以进入专门针对现场设计的 Perform 模式进行即兴重构与多轨混搭。 ### [22:55](https://www.youtube.com/watch?v=MQufJBVvAtY&t=1375s) 歌曲模式(Song Mode)与轨道拼贴 在 Polyend Tracker 的歌曲模式(Song Mode)中,用户可以通过排列模式槽位(slots)来构建一首完整的歌曲结构,例如从模式 1 开始,过渡到模式 2,再返回模式 1。使用常规播放键会播放当前高亮的选择,而使用 Shift + Play 则会串联播放整首歌曲,屏幕上也提供了专属的屏幕按键以触发播放。 除了按顺序串联现有片段,歌曲模式还提供了一种破坏性(destructive)的音序拼贴与构建方法。用户可以新建多个空白模式(如模式 3、模式 4、模式 5),复制原始模式的步进长度以确保时长一致,随后进入网格视图跨模式移动音符数据。例如,直接从模式 1 中复制闭镲(Hi-hats)粘贴至模式 3,再将底鼓、闭镲甚至贝斯线条逐层复制粘贴到不同的空白槽位中。这样由少到多地组织乐器层,即可在几秒钟内拼贴出带有 Intro、递进与 Full Beat 的完整段落。loopop 强调指出:“Now if you go into the actual patterns you'll see that these were copied in place, right? So these are actual notes that were moved from place to place so these are quote unquote destructive as opposed to say in Ableton Live style grid, but you should be aware of what you're doing here, but this is a really nice function of Tracker.” - 播放快捷键:Play 播放当前单步/当前模式;Shift + Play 播放完整 Song 序列。 - 步进对齐:复制音符前需确保目标空白 Pattern 设置为相同的步长(Step Length)。 - 逻辑特征:不同于 Ableton Live 等宿主中对 Clip 实例的无损引用,Tracker 的拼贴是直接在 Pattern 之间写入底层具体音符数据的实质性复制。 --- ### [24:50](https://www.youtube.com/watch?v=MQufJBVvAtY&t=1490s) 表演模式(Perform Mode)与网格实时参数控制 表演模式(Perform Mode)为 Polyend Tracker 提供了极为动态的现场交互手段。该模式主要提供两大类核心操控:在非录音状态下,用户可以跨模式混合各个轨道(例如实时将模式 2 中的特定和弦轨道引入当前正在播放的模式 1 中,且所有跨模式切换均经过音阶量化),同时还能通过组合按键即时对各个轨道执行静音(Mute);而在录音键开启的状态下,下方的打击垫网格将转变为一个 12 参数控制器。 网格系统允许用户从候选库中挑选并分配 12 种参数(如步进重复 Step Repeats、调音 Tuning、微时值等),并作用于任意单个或多个轨道。网格每列代表一种参数,每列垂直方向包含多个按键:顶行恒为该参数的默认恢复值(Default Row),下方三行则允许用户预设具体数值阶梯。表演时只需按住对应打击垫并拨动拨盘,或直接轻触预设好的数值按键,即可瞬间向所选轨道注入极速滚奏(Rolls/Step Repeats)或进行移调(如降低 2 个半音、7 个半音乃至降低整整一个八度)。一旦松开打击垫,数值便立即回弹复原。 ```mermaid flowchart TD accTitle: 表演模式控制结构 accDescr: 表演模式下录音键关闭与开启状态对应的两种不同控制路径 subgraph RecOff["录音关闭状态 (Record Off)"] A["轨道与模式选择<br/>(Track & Pattern Select)"] --> A1["量化跨模式换轨"] B["轨道静音<br/>(Track Muting)"] --> B1["瞬时静音/解静音"] end subgraph RecOn["录音开启状态 (Record On)"] C["12 参数网格<br/>(12 Parameter Grid)"] --> C1["顶行: 默认初始状态"] C --> C2["下方三行: 阶梯数值预设"] C2 --> C3["瞬间触发: 滚奏/变调/调制"] C3 --> C4["松手回弹: 恢复默认值"] end ``` - 轨道切换量化:切换跨模式轨道时自动依照节拍对齐,平滑不中断。 - 瞬时静音(Instant Mute):按下组合键即可使轨道立即闭音,免去寻轨操作。 - 动态触发机制:按住按键激活效果,松手即刻归位;结合 Jog Wheel 可实时平滑扫频或扫描步进重复率。 --- ### [27:40](https://www.youtube.com/watch?v=MQufJBVvAtY&t=1660s) 主控页面与全局总线设置(Master Section) 在主控设置(Master Screen)的第二页面中,包含了全轨道的独立静音(Mute)与独奏(Solo)总览,便于混音监控。此外,该页面还集成了项目层面的总线效果器与全局输出参数。 主控区提供了整套项目的全局音量(Overall Project Volume)调节、混响发送大小(Reverb Size,在当时测试的固件中混响算法仍在开发测试中)以及一个带有起音(Attack)与释放(Release)控制的主总线限幅器(Limiter)。尤为突出的是其内建的位深削减功能(Bit-depth Reduction),可模拟经典硬件音质:用户可以将音质从原生的 16 位一路回拨到 12 位、8 位乃至更低的极度量化失真状态,瞬间为整体混音赋予浓厚的老式数字采样机 Lo-Fi 质感。 - 全局参数控制:主音量(Master Volume)、混响空间大小(Reverb Size)。 - 动态处理:配备起音(Attack)和释放(Release)可调的母带级限幅器。 - 位深衰减模式:支持实时下采样至 12-bit、8-bit 以及更低分辨率。 --- ### [28:25](https://www.youtube.com/watch?v=MQufJBVvAtY&t=1705s) 采样播放模式:单发、循环与切片(Playback, Loop & Slicing) 在音序功能之外,Polyend Tracker 还包含深入的声音设计引擎。采样回放页面(Sample Playback)与采样编辑器的破坏性剪切不同,它是非破坏性的,负责决定读取该采样的核心模式。可用模式包括最基础的单次播放(1-Shot)、前向循环(Forward Loop)、反向循环(Backward Loop)以及切片(Slicing)。在前向循环中,用户可以通过定位循环起点(Loop Start)与终点(Loop End)形成持续振荡的声音织体。 切片模式(Slicing)是节奏制作的关键所在。用户不仅能够手动添加切片标记点(Slice Points)并由打击垫实时敲击演奏,也可以借助 Auto Slice 算法自动检测瞬态并生成所有切点,若对个别误识别的标记点不满意,还能逐一手动删除微调。不过在当前的步进编排流程中,Pattern 内并不直接将各个切片作为独立琴键录入,而是需要先录入该采样的基础音符,随后在其专属的特效列(FX 栏)中添加“Slice”特效参数并指定切片编号。此外,若想制作鼓组碎拍或不可预测的切片重组效果,只需在 FX 栏中配合使用随机化效果(Randomize FX),系统便会在播放时随机抓取不同的切片标记点。 - 回放模式总览:One-Shot(单发)、Forward Loop(正向循环)、Backward Loop(反向循环)、Slicing(切片)。 - 切片交互方式:支持打击垫手动敲击测试、自动瞬态侦测(Auto Slice)、局部增删微调。 - 音序器切片触发机制:在 Pattern 步进中记录音符后,必须在 FX 栏加载 Slice FX 并设定对应切片参数;搭配 Randomize 参数可实现自动化随机切片乱序重放。 --- ### [30:45](https://www.youtube.com/watch?v=MQufJBVvAtY&t=1845s) 波表合成器模式(Wavetable Engine) Polyend Tracker 内部集成了一个微型波表合成引擎(Wavetable Synth),允许将任意单波形或循环波形转化为合成音色。虽然它能加载普通采样,但由于底层缺乏不同波形周期之间的插值平滑渐变算法(No morphing),直接导入长语音或原声采样并扫动波表位置时会产生明显的阶梯断裂杂音。因此,loopop 强调该引擎主要为格式规范的波表采样而设计。 标准波表通常由以 1024 或 2048 个采样点为单一窗口(Sample Window)拼接而成的连续单周期波形组成。视频中演示了加载一个标准的 2048 窗口脉宽调制(PWM)波表文件:加载后屏幕清晰呈现该波表内包含的完整微观波形。用户进入乐器参数页(Instrument Parameters),将波表位置(Wavetable Position)指定给低频振荡器(LFO)作为目标,选择三角波进行循环往复调制,即刻呈现出醇厚经典的模拟脉宽调制音色。该音色可通过外部 MIDI 键盘(如 Arturia KeyStep)完整弹奏全音域。但在高音区弹奏时,会听到轻微的混叠失真(Aliasing);loopop 评论道:“Now as you go higher you will start to hear aliasing and sort of feel that a little bit in the background, potentially they'll add an anti-aliasing algorithm, but for now it's still...”,期待官方在后续版本中加入抗混叠算法。 - 波表采样规格:适配固定长度窗口(1024 或 2048 采样点大小)。 - 插值特征:暂无平滑渐变插值(Morphing),定位切换表现为阶跃式跳变。 - 动态调制:波表位置可映射至 LFO、包络等内部调制源,还原典型 PWM 与扫频合成织体。 - 声音特质:低频深沉饱满,极高频段存在老式数字硬件风格的轻微混叠声(Aliasing)。 --- ### [33:15](https://www.youtube.com/watch?v=MQufJBVvAtY&t=1995s) 粒子合成引擎(Granular Synthesis)与外接效果 除了波表之外,Tracker 还内置了粒子合成引擎(Granular Engine)。该模式将载入的音频样本粉碎成极其细微的时间颗粒(Grains),用户可以自由在样本的不同时间截面上挪动扫描位置(Position),将原本静态的语音、乐器长音或环境杂音解构拉伸为绵延不绝的超现实声景与氛围垫音(Pads)。 即便 Tracker 的粒子引擎结构较为精简(例如底层仅依靠单粒子进行跨样本挪动扫描,而非繁复的稠密粒子云扩散系统),其颗粒回放依然呈现出质感细腻的声学生成效果。loopop 在视频中拔掉 Make Noise 0-Coast,将 Tracker 的粒子输出路由至外置的高品质混响效果器(GFI Specular Reverb)中进行对比,原本略显单薄干瘪的声音颗粒在经由空间算法的晕染浸润后,瞬间化作层次浩瀚深邃的管弦乐般声响。loopop 为此真诚推荐道:“So I definitely recommend pairing a reverb with Tracker regardless, but especially for the granular ones.” - 核心原理:微观粒子窗口(Grain)在音频文件上进行位置切片读取与极速再循环。 - 声学特点:特别适合将短采样、语音片段拉伸制作为持续发声的氛围垫音与实验音效。 - 设备搭配建议:极度依赖空间残响,强烈建议外接高品质混响硬件以补足单粒子引擎的空间张力。 --- ### [35:45](https://www.youtube.com/watch?v=MQufJBVvAtY&t=2145s) 乐器架构与调制矩阵(Instrument Parameters & Mod Matrix) 在 Polyend Tracker 的系统架构中,48 个项目槽位绝非仅仅是存储原始音频数据的“采样池”(Sample Slots),而是一个个独立的“乐器插槽”(Instrument Slots)。这意味着同一段核心采样在结合了截然不同的回放类型(One-shot、波表、粒子等)、基础滤波参数与调制映射后,能够派生出性质迥异的独立音色单元。乐器参数页面分为两页:第一页负责设定通用全局参数,包括总输出电平(Level)、立体声声像(Panning)、半音与细微调音(Tune & Fine-tune)、带有共振峰调节的低通滤波器(Low-pass Filter with Resonance),以及混响发送量(Reverb Send)。 第二页则是一个高效的调制矩阵(Modulation Matrix)。系统提供了 5 个关键的可调制目标参数,涵盖音量(Volume)、声像(Panning)、低通截止频率(Cutoff)、波表位置(Wavetable Position)以及粒子截面位置(Granular Position)。调制源方面,每个参数都可以独立分配为 ADSR 振幅/滤波包络或低频振荡器(LFO)。loopop 解释说:“And then the modulation source or how these parameters will move can either be off, an envelope, or an LFO, not both together, at least not in the current firmware, so you have to pick one for every one of the parameters.” 在配置包络时,用户可以精确设定 Attack(达到峰值所需时间)、Decay 与 Sustain(衰减至维持电平的速率与量感)以及 Release(松键后音色是骤停还是随时间漫延渐隐)。 | 调制目标 (Destinations) | 可选调制源 (Sources) | 核心调节作用 | |:--- |:--- |:--- | | **Volume (音量)** | Off / Envelope (ADSR) / LFO | 决定音色动态轮廓、震音(Tremolo)效果 | | **Panning (声像)** | Off / Envelope (ADSR) / LFO | 构建立体声自动摇摆、空间游走效果 | | **Cutoff (滤波截止频率)** | Off / Envelope (ADSR) / LFO | 塑造音色亮暗衰减、经典 Auto-Wah 扫频 | | **Wavetable Pos (波表位置)** | Off / Envelope (ADSR) / LFO | 实时扫动波表周期波形,实现拟合模拟 PWM 合成 | | **Granular Pos (粒子位置)** | Off / Envelope (ADSR) / LFO | 自动化移动粒子截面,产生动态拉伸与氛围渐变 | ### [37:58](https://www.youtube.com/watch?v=MQufJBVvAtY&t=2278s) 调制矩阵:声相、滤波器截止频率与波形扫描 Polyend Tracker 为声音塑形提供了深度的调制能力。在调制目标上,用户不仅可以使用 ADSR 包络,还可以将其替换为低频振荡器(LFO)。这在制作律动感强烈的声效时极其好用,但需要注意,目前固件中的 LFO 速度都是与宿主速度严格同步的(tempo-synced),暂不支持非速度同步的自由运行模式。 声相(Panning)和滤波器截止频率(Filter Cutoff)均遵循相同的调制逻辑,你可以自由分配 ADSR 包络或 LFO。loopop 在测试滤波器截止频率时,特意调低了初始截止点,以展示包络的敏捷度与敲击瞬态表现。不过他也指出:“目前没有让滤波器截止频率跟随所弹奏音符的音高或频率进行键位跟踪(Key tracking)的选项,如果官方能加入这个功能就太好了。” 对于波表位置(Wavetable Position)和粒子扫描位置(Granular Position),同样支持包络或 LFO 调制。波表扫描此前已用于展示脉宽调制效果,而在粒子引擎中调制位置则能顺畅扫描整个样本切片,从而在 Tracker 上实现一种精妙的时间拉伸(Time-Stretch)效果。loopop 对调制系统提出了一些期望更新:“我还希望在这里看到采样保持(Sample and Hold)或随机(Random)波形的 LFO 选项,以及更慢的调制速率和不绑定速度的 LFO 频率。” --- ### [39:42](https://www.youtube.com/watch?v=MQufJBVvAtY&t=2382s) 外部 MIDI 音序与路由控制 在 MIDI 交互方面,Tracker 支持接收外部输入的 MIDI 音符、走带控制(Transport)与时钟信号(Clock)。不过在当前版本的固件中,外部设备尚无法通过 MIDI CC 远程控制机内的乐器参数。在输出端,Tracker 能够发送走带和时钟,用户可以在菜单中指定信号是通过 USB、物理 MIDI 接口还是二者同时收发。 机内音序器支持 5 个专用的 MIDI CC 通道以及 Program Change(程序变更)。在系统设置(Settings -> CC Outs)中,用户可以分别配置 CC A 到 CC E 映射的具体控制器编号。loopop 建议官方未来允许用户自定义这些 CC 通道的名称,这样在步进编辑条中就能直观看到正在调节的参数究竟是滤波、衰减还是失真度。 如果要将原本由机内采表演奏的轨道指派给外部合成器(例如展示中接入的 Make Noise 0-Coast),只需在乐器栏将乐器切换为对应的 MIDI 通道即可。Tracker 的 MIDI 乐器编号固定为 51 到 66,分别对应 MIDI 通道 1 至 16,逻辑清晰易记。通过按住并选中整列、按下 Fill 键批量填充为 Instrument 51,该轨便无缝切换为驱动外部 0-Coast 发声,整个过程与机内其他采样轨道的播放完全并行无阻。 ```mermaid flowchart TD accTitle: Polyend Tracker MIDI 架构与路由 accDescr: 展示 Polyend Tracker 接收和发送 MIDI 音符、时钟及 CC 控制的通道分配流程 subgraph MIDI_In ["MIDI 输入 (USB / 物理接口)"] IN_Notes["MIDI 音符输入"] IN_Clock["时钟与走带同步"] end subgraph Internal ["Polyend Tracker 音序引擎"] Track_Engine["8 轨音序器"] Inst_Assign{"乐器分配: 51 - 66"} end subgraph MIDI_Out ["MIDI 输出 (USB / 物理接口)"] OUT_Notes["MIDI 音符 (通道 1 - 16)"] OUT_CC["5 组 MIDI CC (CC A - CC E)"] OUT_PC["Program Change 信号"] OUT_Clock["时钟与走带输出"] end IN_Notes --> Track_Engine IN_Clock --> Track_Engine Track_Engine --> Inst_Assign Inst_Assign -->|"通道 1 (Inst 51)"| OUT_Notes Track_Engine --> OUT_CC Track_Engine --> OUT_PC Track_Engine --> OUT_Clock ``` - **MIDI 乐器分配规则**:机内预设 51 至 66 号乐器直接映射至 MIDI 通道 1 至 16。 - **CC 自动化输出**:每个步进支持分配 A、B、C、D、E 共 5 个全局设定的 CC 参数通道。 - **外置硬件串联**:现场示范使用 TRS 转接线直连 Make Noise 0-Coast 并串接外置混响踏板,实现紧凑的无电脑编曲配置。 --- ### [41:30](https://www.youtube.com/watch?v=MQufJBVvAtY&t=2490s) 常见疑难杂症解答(Q&A) 进入优缺点总结之前,loopop 针对收集到的高频用户疑问进行了逐一解答: 1. **能否导入经典 Tracker 的.MOD 文件?** Polyend 官方给出的答复是“有限支持”,即可能会导入基本的乐符和采样,但不会还原原始效果参数。在录制该视频时,该功能尚未完全实装(固件中虽有 Export to MOD 选项但暂未详细测试)。 2. **硬件的主音量旋钮在哪里?** 除了在 Master 界面内调整外,还有一个极其便捷的全局快捷键:按住 Master 功能键的同时旋转慢动滚轮(Jog Wheel),即可快速调节总音量。 3. **加载新工程时回放会中断吗?** 是的。在同一个项目内切换不同 Pattern 是无缝且瞬时的,但如果通过 File -> Open 打开新工程(例如演示中加载优美的 Light Paths 工程),系统必须先停止当前回放,读取采样和工程数据需要数秒缓冲时间。 4. **能否作为实时音频循环器(Audio Looper)或从 SD 卡直接流式回放音频?** 目前版本的固件明确不支持这两种用法。所有音频必须预先加载进内部 RAM。 5. **工程可以导出为分轨(Stems)吗?** 可以。系统支持将单个 Pattern 或整首 Song 导出为独立的分轨音频,也可以直接渲染总输出。 --- ### [42:50](https://www.youtube.com/watch?v=MQufJBVvAtY&t=2570s) 全面评测:优势、不足与总结 对 Polyend Tracker 的最终权衡,核心在于用户能否接纳电子表格一般的 Tracker 垂直网格界面。这种自上而下的编曲逻辑与当今主流工作流截然不同,loopop 认为:“这在工作流上是一次巨大的转变,完全不同于如今市面上的任何其他设备。”不过上手后会发现它极其直观且高效,学习曲线并不陡峭。尽管有时会怀念传统鼓机“一键一步进(Button per step)”的直接感,但 Tracker 独特的交互带来了常规设备难以企及的高效体验。 在音序功能方面,步进填充(Fill)、特定片段的高亮区域独立试听(Preview)、跨多轨道多步进的数据批量复制粘贴等功能,极大地提升了音乐草稿与复杂段落的编写速度。loopop 给予了音序系统高度评价:“在音序编写这一块,我认为 Tracker 是顶尖水准,没有任何陈旧或来自 90 年代的落后感。” 而在其他功能模块上,表现则相对有得有失: - **采样容量与流式播放**:无法实现大容量采样库与 SD 卡流式读取,单工程采样时长受内部 RAM 严格限制。 - **合成引擎**:相比那些完全没有合成引擎的采样鼓机,Tracker 附带的波表与粒子合成是一大亮点;但若与带有专属合成引擎的 Groovebox 相比,其合成参数相对偏基础。 - **自动化参数通道**:每轨每个步进仅提供 FX1 和 FX2 两个自动化栏位。虽然用户可以在每一步指派完全不同的效果参数(理论上相当于拥有多条自动化轨),但同一时间切片内最多只能触发两个参数变化,编写精细多重调制时稍显局促。 - **音频效果器与硬件设计**:机内缺乏延音混响之外的独立 Delay Send 发送总线,实时音频效果器的丰富度有待后续固件升级。硬件上如果能配备几个宏参数旋钮(Macro Knobs)和内置锂电池,便携移动创作的体验将会更上一层楼(所幸目前使用高功率手机充电宝即可驱动)。 --- ### [45:20](https://www.youtube.com/watch?v=MQufJBVvAtY&t=2720s) 原创曲目完整演示 评测讲解告一段落后,视频展示了使用 Polyend Tracker 制作的数首完整风格演示曲目。音乐涵盖了充满律动的芯片音乐碎拍(Chiptune IDM)、空灵梦幻的粒子波表氛围乐段、复杂多变的切片鼓点,以及联合 Make Noise 0-Coast 外部硬件合成器演奏的模块化合成器声音,淋漓尽致地展现了这台设备在复杂节拍排布、样本质感重塑与独立成曲方面的潜力。 ## Notable quotes > [42:50](https://www.youtube.com/watch?v=MQufJBVvAtY&t=2570s) 在音序编写这一块,我认为 Tracker 是顶尖水准,没有任何陈旧或来自 90 年代的落后感。 — loopop > [00:00](https://www.youtube.com/watch?v=MQufJBVvAtY&t=0s) Effects in Trackers aren't necessarily effects as you'd probably be used to seeing them with other instruments but rather more like automation information like how loud to play a note, panning, micro timing, ratchets. — loopop > [02:40](https://www.youtube.com/watch?v=MQufJBVvAtY&t=160s) Total sample memory per project is around 90 seconds, so don't expect to load or stream full song stems. — loopop ## Mentioned Polyend, Polyend Tracker, Commodore Amiga, Arturia KeyStep, Make Noise 0-Coast, GFI Specular Reverb, Native Instruments, SingStar, The Flashbulb (Ben Jordan), Ableton Live ## Video description For plenty of synth and electronic music tip and ideas check out my ever expanding book, available to the awesome people who support this channel on Patreon: ► Patreon: https://patreon.com/loopop Check out Tracker prices here (affiliate links help the channel): ► Sweetwater: https://imp.i114863.net/Qqmg3 ► Thomann: https://www.thomann.de/gb/polyend_tracker.htm?offid=1&affid=369 Other gear in the video (some of these are affiliate links that help the channel): ► Arturia KeyStep: https://amzn.to/2IX0X9i ► Make Noise 0-Coast: https://amzn.to/2WplxHs ► GFI Specular Reverb: http://bit.ly/GFI-Specular-Reverb ► Retrokits TRS A to TRS B cable: http://bit.ly/Retrokits-TRSA-to-TRSB-cable ► Adam A8X Monitors: https://reverb.grsm.io/Adam-A8X (affiliate link) ► Scopes by Melda: https://www.meldaproduction.com/ Other places I hang out: ► Instagram: https://www.instagram.com/loopopmusic ► Facebook: https://www.facebook.com/loopopmusic ► Twitter: http://www.twitter.com/loopopmusic ► Web: https://loopopmusic.com My music: ► Bandcamp: https://loopop.bandcamp.com ► Spotify: http://bit.ly/LoopopOnSpotify ► Apple Music:http://bit.ly/LoopopOnAppleMusic TIMELINE: 0:00 Intro 0:50 Tracker basics 2:40 Overview 5:05 Connectivity 6:10 Sample loader 8:10 Sampling 9:10 Sample Editor 11:30 Sequencing 14:00 Fill 17:20 Recording live 18:00 FX1 & FX2 20:15 Grid tips 22:50 Song mode 24:50 Perform mode 27:40 Master controls 28:25 Sample playback 29:15 Slicing 30:45 Wavetable 33:15 Granular 35:45 Instrument params 37:05 Modulation 39:45 MIDI Sequencing 41:30 Misc Q&A 42:50 Pros and cons 45:20 A few songs Want to email me personally? ► Ziv (at) loopopmusic.com NOTE: Occasionally I’ll try out affiliate marketing and include affiliate links. This means that I may earn a commission when you click on or make purchases via affiliate links. The content of this clip is entirely my opinion, and was not paid for or dictated in any way by the company creating the gear. Without addressing the particulars of products shown here as they might be under NDA, gear shown on this channel may be either sent by the manufacturer, on loan for review or bought at a discount. [Source](https://www.youtube.com/watch?v=MQufJBVvAtY)

Source quotes

[42:50] loopop: 在音序编写这一块,我认为 Tracker 是顶尖水准,没有任何陈旧或来自 90 年代的落后感。 [0:00] loopop: Effects in Trackers aren't necessarily effects as you'd probably be used to seeing them with other instruments but rather more like automation information like how loud to play a note, panning, micro timing, ratchets. [2:40] loopop: Total sample memory per project is around 90 seconds, so don't expect to load or stream full song stems.

Source quotes

[2:40] loopop: Total sample memory per project is around 90 seconds so don't expect to load or stream full song stems. [42:50] loopop: On the sequencing side I think tracker is top-notch nothing about this feels old or from the 90s. [0:50] loopop: Trackers work differently here you sequence events from top to bottom giving you more room to see what happens in every step.

Original transcript

[0:00] hi this is tracker from Polly and it's a [0:06] new standalone hardware groov box based [0:09] on a grid sequencing workflow first [0:11] introduced on amiga computers in 1987 [0:15] tracker is digital and sample based it [0:18] has basic wavetable and granular [0:20] synthesis capabilities with few [0:25] interesting sequencing tricks up its [0:27] sleeve in this video we'll take a look [0:30] at what it can and can't do its workflow [0:34] in detail let's get started let's first [0:51] explain what's going on with all these [0:53] numbers scrolling by the workflow on [0:56] most other sequencers is one where you [0:58] sequence events from left to right [1:00] either on a piano roll or on a row of [1:02] steps trackers work differently here you [1:04] sequence events from top to bottom [1:06] giving you more room to see what happens [1:09] in every step the green or turquoise [1:11] Lane contains information about which [1:13] notes to play in this particular stamp [1:15] so d 5 c 5 c 6 and so on the yellow lane [1:19] or column tells tracker which instrument [1:22] to play each project contains a pool of [1:24] 48 samples which can also be used as [1:27] sources by the granular and wavetable [1:29] synth this means that every single step [1:31] can play a different sample if you like [1:33] and these steps can also sequence [1:35] external MIDI gear if you go below [1:37] sample number one in the pool you start [1:41] accessing MIDI channels for controlling [1:43] external synths [1:46] and then you've got two more columns per [1:48] track the purple and blue columns which [1:49] are called effects lanes effects in [1:52] trackers aren't necessarily effects as [1:54] you'd probably be used to seeing them [1:56] with other instruments but rather more [1:57] like automation information like how [1:59] loud to play a note panning micro timing [2:02] ratchets all in all about 25 different [2:05] automation options currently plus five [2:08] MIDI CC commands that even a program [2:10] change command each effect has a [2:12] different letter and different effective [2:14] value associated with it and if you hit [2:16] the description button you can see a [2:18] detailed description of what each effect [2:21] does and what its parameter values or [2:24] ranges are just like you can use a [2:25] different sample or a different MIDI [2:27] instrument for every step in every track [2:29] you can also apply a different effect in [2:31] each of the two lanes so each of these [2:34] two lanes can use any one of these [2:37] dozens of effects okay before I dive [2:40] into the details of the workflow anymore [2:42] let's take an overall look at the [2:44] hardware tracker has a seven-inch color [2:46] screen it's not a touchscreen you [2:48] interact with it using the eight screen [2:50] buttons on the bottom here [2:51] they each have a function based on [2:53] whatever is written on top of them so if [2:55] I make a change for example this is the [2:57] undo function this will swap patterns [2:59] this one will change the track length [3:02] for example and if you notice as I turn [3:05] the jog wheel you can also make a [3:07] selection using these pads so for [3:08] example if I wanted to set the pattern [3:11] to pattern number five I'd press here [3:13] pattern number four pattern number one [3:15] and back to whatever this value was [3:18] aside from selecting parameters these [3:19] pads can do a bunch of other things for [3:22] example playing instruments [3:26] you can even use them as a keyboard for [3:30] naming projects or sample names you saw [3:33] me use the jogwheel earlier as well as [3:35] the different utility keys here you've [3:37] got copy paste insert delete backspace [3:39] and so on transport controls as well and [3:42] then this group of button assigned from [3:44] letting you choose which of the lanes [3:46] you edit give you access to all the [3:48] different screens of tracker for example [3:51] we're on the pattern screen now you can [3:53] go into the sample editor sample [3:55] playback options we'll go over all these [3:57] things individually song mode yoots and [4:01] master control different configuration [4:03] options some of these have dual screens [4:06] if they do you'll see the an indication [4:08] of that over here so for example the [4:10] instrument parameter controls have two [4:12] screens that this is screen one of two [4:14] and this is screen two of two you can [4:17] store as many projects as you like on [4:18] the micro SD card on the back it comes [4:20] with a 16 gig card which is enough for [4:22] plenty of projects each project contains [4:25] up to 255 different patterns each [4:27] pattern like I said before has eight [4:29] tracks which for any given step can play [4:33] one of up to 48 different samples which [4:36] you hold in the sample pool or sequence [4:39] external gear total sample memory per [4:41] project is around 90 seconds so don't [4:44] expect to load or stream full song stems [4:47] samples are converted into mono but you [4:50] can pen them in the stereo field let's [4:52] move on with a general tour tracker is [4:54] thin and light with a solid metal [4:56] enclosure the pads are silicon and [4:59] aren't pressure or velocity sensitive [5:01] and the buttons are plastic but they [5:03] have a pretty good feel to them [5:05] tracker is powered via USB see it [5:07] doesn't have an internal battery but you [5:09] can use a one ampere phone power brick [5:12] to power it you can also send and [5:13] receive MIDI over USB but not audio and [5:16] they may add an option to transfer files [5:18] over USB as well MIDI in and out can [5:20] also be sent and received over [5:22] three-and-a-half millimeter cables like [5:25] these TRS cables tracker supports the [5:27] MIDI TRS be standard so if you want to [5:29] work with Terrace a type instruments [5:31] you'll need a trs-80 B converter cable [5:33] but for other TRS B type instruments a [5:36] regular 3.5 millimeter headphone cable [5:38] will work [5:39] if you want to work with MIDI [5:40] instruments that have a five-pin MIDI [5:42] input or output you'll need to use one [5:44] of these dongles tracker comes with them [5:46] which you can't see physically is that [5:48] tracker also comes with an FM radio [5:50] built-in I won't play it for you because [5:52] I don't want to get a copyright strike [5:53] but it's pretty cool it uses the output [5:56] cable as an antenna and you can sample [5:58] from it just to complete the [5:59] connectivity picture tracker has a 3.5 [6:01] millimeter stereo output and 2 inputs [6:04] for sampling a mic input and line in [6:07] input so let's take a look at the [6:09] workflow from start to finish from [6:10] sample to song you can either import a [6:13] sample from the SD card using the sample [6:15] loader or sample it using the sample [6:18] recorder when you start up your patterns [6:20] of course are empty and if I go into [6:23] sample loader you'll see none of the 48 [6:25] slots are populated with samples and you [6:27] can see I'm not using any of my project [6:29] memory you can navigate the SD card [6:32] using either these arrows or the jog [6:35] wheel go into the different folders so [6:37] let's say sample packs and I found out [6:40] that all of Native Instruments sample [6:43] packs are 44 point 1 kilohertz which is [6:46] what you need for this either 1624 or [6:48] 32-bit going to the samples let's say [6:51] going to drums and then once tracker [6:54] identify as a folder with samples it'll [6:56] show you the samples in that folder you [6:59] can preview the samples by hitting [7:00] preview and yep once you've found a [7:05] sample you like you can add it to the [7:07] project and you can also hit add next to [7:09] quickly add multiple samples into the [7:12] project notice as I browse the samples [7:15] this little white bar starts to fill up [7:17] as I add them to the project that's [7:19] maybe not just add kicks to this one [7:21] let's go maybe again to snares [7:27] listen to a few of these this should do [7:33] anyway if I browse up and go into maybe [7:37] the longer samples so here you go into [7:40] loops here you'll see that yeah as I [7:44] browse through these they'll take up [7:46] more space in the project [7:49] but it's easy to add them as well you [7:52] can also bring in single cycle waveforms [7:54] and wave tables more on that later you [7:57] can also preview the samples that are [7:58] already in your project to see what [7:59] you've loaded up delete any ones you [8:03] don't like and like I mentioned there [8:05] are 48 slots of these so you can load up [8:07] quite a few samples into a project [8:10] within the limits of the memory aside [8:11] from loading up a sample from the SD [8:13] card you can also sample audio using the [8:15] sample recorder you've got 4 input [8:17] options line in radio which I will avoid [8:20] for copyright reasons I mentioned before [8:22] and then use the microphone input either [8:24] with lower high gain I've got my [8:26] banged-up [8:27] sync star mic here 1 2 3 you can apply a [8:30] gain if you like and yeah monitor on or [8:33] off and then record testing 1 2 3 this [8:36] is poly and tracker you can crop the [8:38] sample here or edit it in the sample [8:40] editor which I'll show you in a bit but [8:41] before that we need to save it you can [8:43] give it a name or have tracker auto name [8:47] it that's not a good name ok that's [8:49] better [8:49] or you could name it yourself using the [8:52] keyboard so in this case that's a test [8:55] and 1 2 3 I could just save it into the [8:59] SD card or immediately load it into the [9:01] project I can preview it great but we'll [9:06] live with it then go into the sample [9:08] editor and apply a bunch of destructive [9:10] effects to it so change the sample [9:12] itself for example amplified if I wanted [9:15] to definitely increase the gain on this [9:18] process it testing 1 2 3 this is poly [9:21] end tracker preview and apply and of [9:24] course you'll want to use a mic with a [9:25] pop filter if you're sampling audio [9:27] there are a bunch of effects here I [9:29] won't go through all of them but for [9:30] example there is even a compressor in [9:33] here to even out levels so maybe it's [9:36] reduce the threshold I'm doing this on [9:38] the fly let's hope for the best [9:40] reduce attack let's see what happens [9:43] process testing 1 2 3 this is a poly end [9:50] tracker preview and apply so a little [9:52] bit flatter there I can go ahead and of [9:56] course amplify this again testing 1 2 3 [10:00] this is a poly end tracker [10:02] so I could keep applying these let's [10:04] crush it even more why not lower the [10:07] threshold process testing one two three [10:13] this is Paulie and tracker fine I could [10:17] process this even more obviously crop [10:19] the sample if I wanted use the jog wheel [10:23] to set the start and end and I could [10:26] zoom in to the sample if I wanted like [10:33] this for example apply there are a few [10:35] audio effects here it's a little bit [10:37] harder to use these because they're not [10:39] in real-time so I could apply a course [10:41] to it you know process preview okay [10:48] let's not do this and I could also see [10:51] how well my sample transpose is testing [10:53] testing testing testing testing so these [10:58] are the destructive effects destructive [10:59] means that they actually change the [11:01] physical sample in the project they [11:03] don't by the way change the sample on [11:05] the SD card so you could always take the [11:07] original sample mangle it in other ways [11:08] and different projects if you want as [11:10] you saw these effects don't work in real [11:12] time they process the sample and it [11:13] takes a a few milliseconds or a few [11:15] seconds but there are plenty of other [11:17] real-time effects the automation effects [11:19] a master reverb as well as different [11:23] instrument automation parameters which [11:25] we'll get to later on but before that [11:27] let's talk about sequencing sequencing [11:29] is done with a pattern editor and it [11:31] gives you two views into your pattern [11:33] one where you see four tracks at a time [11:35] with all four parameter lanes per track [11:38] and then another where you can see all [11:40] eight tracks but a single parameter of [11:42] the four parameters at a time and you [11:44] get to that by hitting pattern and [11:45] either node instrument and one of the [11:48] effects lanes a pattern can be up to a [11:50] hundred and twenty eight steps long like [11:53] I mentioned before we can use these keys [11:54] to quickly change values or just use the [11:57] jog wheel let's maybe go for eight steps [11:59] to keep it simple and you've got 255 [12:02] patterns let's just stick with pattern [12:04] one for now all the tracks in the [12:06] pattern are the same length and the same [12:08] speed but you can mix and match tracks [12:11] of different lengths in perform mode [12:13] which we'll get to later on [12:15] for now let's stick with sequencing so [12:17] there are three ways of getting notes or [12:19] automation into the grid you can step [12:21] edit them you can play them live or you [12:24] can populate multiple steps at a time [12:26] using the fill function let's look at [12:28] these one by one [12:28] the grid won't change unless you hit [12:31] record notice the cursor change from [12:33] green to red and just so we see all four [12:35] lanes at a time we don't need eight [12:36] tracks for now I'll go back to the mode [12:38] where we see just four tracks but all [12:40] the parameters when entering notes is as [12:42] simple as selecting the instrument I've [12:44] added a few here let's just say go for [12:47] this kick and then I can punch in the [12:49] notes now we get to one of the important [12:50] aspects of step sequencing here when I [12:52] enter a note notice how the Lane moves [12:55] down one step that's because step is set [12:58] to one if I wanted this not to move I [13:00] just set step to zero and I could punch [13:04] in different notes let's maybe make the [13:06] length 16 now you can see how this can [13:08] come in pretty handy to enter kicks [13:10] every four steps just hit one two three [13:12] four and I've got four kicks in my [13:14] pattern you've got two options of [13:19] viewing the pattern as it plays if [13:21] you're in record mode the grid will [13:23] stick around the step you're editing if [13:25] you exit record mode the good will [13:27] scroll along as tractors tend to do now [13:31] I could put any instrument that I wanted [13:32] in any one of these steps I don't [13:34] necessarily need to use a different [13:36] track so let's go into record let's say [13:38] that I wanted to change this instrument [13:40] to something else that's as easy as this [13:43] let's say maybe this snare and there are [13:50] up to 20 levels of undo which is [13:53] obviously very convenient so naturally [13:58] the next step would be to add high hats [14:00] here how do I fill this up quickly well [14:02] I could go into step mode and then go up [14:05] to the top choose a hi-hat say this one [14:10] and then fill it like this but that is [14:15] pretty time-consuming so to do that I [14:17] need to first select a range that I want [14:19] to fill and if I want to select the [14:20] entire column I go all the way to the [14:22] top hit shift and up I have the entire [14:24] column selected I could delete it if I [14:26] wanted but let's not do that [14:28] go ahead select the entire thing and hit [14:30] fill that we have got to tell tracker [14:32] where I want the note to land and [14:34] whether it's a note instrument or effect [14:37] let's go for instrument and I want to [14:39] fill it with instrument number 11 hit [14:44] Phil and I've populated the entire track [14:48] if I didn't like that I wanted to change [14:49] it just hit Phil again choose a [14:50] different instrument Phil got this now [14:54] if I felt this was too monotonous and [14:56] wanted to add a same volume effect right [14:59] I'd choose one of the effect lanes [15:01] that's a effects one I would still want [15:04] to do this on each step the effect that [15:06] I'd want is to change the volume here I [15:09] want to randomize the values and you can [15:14] pick a range for this randomization [15:18] let's just say from here to here [15:19] hitfilm if I felt that wasn't enough I [15:24] could extend the range Phil nice create [15:29] a groove like this so let's maybe add [15:32] them a lot of track I'll go into the [15:34] sample loader and it's just browse the [15:37] samples here and this may be why not [15:43] this one [15:46] each of the tracks by the way is [15:48] monophonic though you can if you wanted [15:51] and chords to them so they can play [15:55] polyphonic notes if you load up chords [15:58] this one no why not this and this just a [16:08] little caveat by the way I'm testing [16:10] this pre-launch so we don't know which [16:11] samples will come with it ultimately it [16:13] will come with multiple demo songs but [16:15] like I mentioned before I'm using [16:16] expansion packs from Native Instruments [16:18] which are compatible with this anyway [16:20] let's go back to my pattern let's pick [16:22] an instrument and maybe just play with [16:24] it just to get a feel for it [16:28] Kord let's let's go with this so again I [16:34] could just enter notes wherever I wanted [16:36] I could also use fill for this so why [16:43] not let's say add a note maybe randomly [16:48] so not in each position but randomly and [16:51] go for let's see a minor scale and go [16:57] from two let's select these notes now if [17:01] I hit fill it now it wouldn't do much [17:03] because I didn't select the entire row [17:06] again fill and let's go ahead fill it up [17:10] with random notes let's be cool point [17:17] let's save that so let's go back to our [17:20] pattern we talked about step sequencing [17:22] we talked about fill sequencing third [17:24] option is just to play a melody in [17:26] either using the grid or an external [17:28] keyboard I could do this in a new track [17:30] by the way in parallel to this beautiful [17:32] paste line so I could play notes here or [17:36] using an external keyboard [17:41] you know fire and the nice thing here if [17:47] I go into note mode if you play chords [17:50] the notes will spill into the adjacent [17:52] track so even though each track is [17:54] monophonic you could record polyphonic [17:59] sequences you just use you have [18:00] different tracks now notice I didn't [18:03] play this perfectly notes aren't [18:04] quantized when you record so if we exit [18:06] this mode you'll see that tracker [18:09] automatically added micro timing for [18:11] each of these steps so even though it [18:13] may look like the notes were added two [18:14] different steps and they indeed were [18:15] because micro timing is applied it [18:19] sounds pretty natural the way I played [18:21] it notice by the way that as I recorded [18:24] track are also inserted note off events [18:27] and it will play until it's turned off [18:28] and there are a couple of other options [18:31] there's also cut which will cut the note [18:33] and fade which will fade it out okay so [18:36] as we were doing this we saw two of the [18:38] different effect types we saw on micro [18:40] timing and we saw volume let's briefly [18:42] look at the others there's pending if [18:45] you wanted [18:46] so yeah let's say that I wanted to [18:48] change the panning on these I could and [18:52] it would need to be for all the steps so [18:53] I could just you know Pam this hi-hat if [18:56] I want it either right or left and if [19:01] there are high hats you certainly want [19:03] roll effects and there are a bunch of [19:06] these as you'd expect [19:12] I won't go through all of them the [19:15] description here shows you what the [19:18] options are and freeze the video and [19:20] look at this if you want so quite a few [19:23] roll effects here anyway let's sample [19:32] just a few more effects [19:33] there's micro tuning if you like there [19:36] glides which are cool so let's maybe go [19:38] into my baseline and maybe glide into [19:43] this one and see what happens here and [19:51] as you saw you can apply these on a per [19:54] step basis randomization of nodes [19:57] effects values position slice we'll get [20:00] to that in a bit volume and handy filter [20:05] on the phones all these things are [20:07] things you can automate as well as MIDI [20:09] CCS and program change and you can also [20:12] insert a break in the pattern which will [20:14] end it at that particular spot before we [20:16] move on from the pattern editor a few [20:18] other interesting features you can [20:20] select a region and invert it if you [20:23] want it I don't know what's going to [20:24] happen now and obviously do if you [20:29] didn't like that you could copy entire [20:31] patterns so if you hit copy it copies [20:33] not only the range that you selected but [20:34] the entire pattern then you can go into [20:36] the next pattern and hit pattern shift [20:39] paste [20:40] you can copy entire regions if you [20:42] wanted solids maybe copy this entire [20:47] thing why not hit copy then I could say [20:50] increase the length to 32 go ahead into [20:54] here and hit paste to duplicate it so [20:57] now I've got this spread out across a 32 [21:00] step pattern you can also copy and paste [21:02] any range kind of like excel I guess [21:05] let's paste this here wreak havoc [21:10] and again undo is always useful if you [21:13] want to work on a particular range you [21:16] can just select that range to hit [21:18] preview again super useful function I [21:23] haven't seen I don't think anywhere else [21:25] and something that isn't available in [21:26] the beta but I'm told will come you'll [21:28] be able to select a section let's say [21:30] this one which is my court or just [21:34] preview this and then an option that [21:36] isn't here but supposedly will come will [21:39] let you take a section and bounce it [21:41] into a single sample so you'll be able [21:43] to do that with a single chord or with [21:45] entire tracks down sample them into one [21:47] track or one sample and add additional [21:49] layers I'm sure I'm missing a few of the [21:51] editing functions another nice one is [21:54] the ability to transpose entire sections [21:56] so if you select the section and hit [21:58] shift you can transpose it so now we've [22:02] got this in pattern 2 and remember we've [22:07] got this below so a lot of handy [22:14] shortcuts in here one really interesting [22:16] automation option is the ability to [22:18] change tempo mid pattern so I'll load [22:22] one of the bends the flashbulbs patterns [22:25] here so check out what's going on here [22:29] notice is tempo automation for these [22:31] steps if I hit play you'll see tracker [22:34] stays on this step a little bit longer [22:37] than the others so you can change tempo [22:39] mid way if you like as well so once [22:41] we've created the patterns that we want [22:43] for our masterpiece you can either [22:45] arrange them into a song in song mode or [22:48] perform them in forum mode let's go [22:50] through these one by one [22:51] so song mode is pretty simple you just [22:53] add slots and choose the patterns that [22:55] you want to play in those slots so I [22:57] want let's say you start with pattern 1 [22:58] then move on to pattern 2 and then go [23:02] back to pattern 1 again [23:04] they will play the current step and then [23:07] shift play will play the entire song and [23:13] you can also hit play pattern our place [23:16] on through here now a fun thing you can [23:17] do here why don't I just delete these [23:19] I've got say pattern one here then add a [23:23] few slots which I will populate with [23:26] empty patterns let's say three four [23:29] let's put one here five here excuse the [23:34] wrong order but these are currently [23:36] empty patterns and this is a full one no [23:38] I need to make sure that these new [23:39] patterns are the right length so I want [23:43] them to be and just hit copy go into [23:49] pattern three paste pattern five [23:55] remember I can select like this paste so [23:58] now they're in the right length anyway I [23:59] could now go into the grid and then say [24:03] copy the hi-hats and put here and then [24:09] copy the kicks and hi-hats copy paste it [24:15] here and then okay why not [24:18] and the bassline here as well copy paste [24:22] and now if I hit play song now if you go [24:33] into the actual patterns you'll see that [24:34] these who are copied in place right so [24:37] these are actual notes that were moved [24:39] from place to place so these are quote [24:41] unquote destructive as opposed to say in [24:43] Ableton Live style grid please should be [24:45] aware of what you're doing here but this [24:46] is a really nice function of tracker [24:48] so that's song mode another way to [24:50] interact with your project is perform [24:53] mode so there are a few things this lets [24:54] you do the first is to select different [24:57] tracks from different patterns so let's [24:59] say I want to bring in Mike or which I [25:02] think was these tracks [25:05] from pattern two so changing the cord [25:09] here I can change it back and this is [25:13] quantized which is nice [25:14] I could also mute and unmute tracks with [25:17] shifting just like this in these mutes [25:21] are immediate they're mutes by the way [25:25] in the master section as well in the [25:27] second page of the master section which [25:32] also includes a solo but I digress let's [25:36] go back to a4 mode and some mutes and [25:39] pattern selection this is when record is [25:42] off when you hit record you can edit [25:44] this grid so what is going on with this [25:46] grid the idea with this grid is to let [25:48] you temporarily change one of twelve [25:50] parameters in any or all of the tracks [25:53] you can select twelve parameters from a [25:55] few more than twelve options so let's [25:57] say that I didn't want to mess with a [25:58] volume and I wanted to you know maybe [26:01] add step repeats here so I could edit [26:04] step repeats let's see how we use this [26:06] I'll hit play you first need to select [26:08] the pattern that you want to change so I [26:10] know my high hats are here and then I [26:12] can use any one of these buttons and [26:14] turn the jog wheel ad step leads to this [26:20] track I can add it to more than one [26:23] Title X and then the minute I leave this [26:30] button the effect is gone however I can [26:33] set values for each of these three rows [26:37] this one is always the default row right [26:39] up top here say we go for yeah this here [26:44] and this and and so even crazier here so [26:51] now I could use this for ticks [26:53] performance changes then I could go [26:55] ahead and mess with any other parameter [26:59] until faculty said this let's maybe try [27:01] this with one more parameter let's go [27:03] for tuning so maybe take this two [27:06] semitones down and seven semitones down [27:10] and you know maybe an octave down and [27:13] hit play so this is the default take it [27:18] down impacting track 3 here I could add [27:29] these if I wanted go back to normal [27:35] go back to normal so that is perform [27:39] mode I mentioned earlier you could also [27:42] mute in solo tracks on the second screen [27:45] of the master screen and while we're [27:47] here let's take a look at a few of the [27:49] options here this overall project volume [27:53] reverb size that I use the reverb yet [27:55] and the reverb in this beta isn't final [27:57] yet so I won't be demoing this you could [27:59] change the bit-depth go back in time to [28:02] 12 bits 8 bits and even further [28:08] [Music] [28:10] there's a limiter here as well with [28:14] attack and release options okay so now [28:20] that you're a tracker sequencing Pro [28:22] let's take a look at the sound design [28:24] options and tracker let's start with the [28:27] sample playback options now this is [28:29] different than the destructive sample [28:31] editor now we're talking about taking [28:33] the sample and adjusting the way that we [28:35] play it back these are the modes that [28:38] you can choose heading 1 2 3 this is one [28:40] shot is record pretty simple forward [28:42] loop will let you set loop poisoning 1 2 [28:44] 3 then loop around those loop points so [28:47] let's say set a loop start here and the [28:50] loop end over here similar to the [28:59] granular mode but we'll see that the [29:00] granular mode has a few extra features [29:04] backward loop is similar only it will [29:06] playback slices where things get [29:14] interesting you could add sliced points [29:16] manually so you just go and add a slice [29:21] point here and one that's here and then [29:26] here and once you do that you could play [29:31] the slice pointing with accusing want to [29:34] be quality track traca traca traca traca [29:36] traca and you can also go ahead move [29:38] between the slice points and remove the [29:40] ones you don't want but of course the [29:42] nice auto slice feature will do all the [29:45] work for you sometimes it does a good [29:47] job of detecting the points has to be 1 [29:49] 2 3 this is about lean back track track [29:52] track track likely and completely and of [29:54] course if you're not happy with the [29:55] points you can remove them back back [29:56] back [29:58] bouillon bouillon Diwali and tracker [30:00] Bali end tracker Bali end tracker it's [30:03] going to this one and remove it [30:06] one one one two three this is Polly and [30:11] Polly and Polly end tracker now [30:12] currently the only way to access these [30:14] slices when you're in the pattern is to [30:17] let's just Ollie and after note and then [30:20] you [30:21] go ahead and enter the slice effect [30:25] which is over here and then choose the [30:28] slice you want to play that's to be want [30:31] to be this oli end best volley and [30:33] tracker you can also use the randomize [30:35] effect to randomize the slice point one [30:40] piston so that's a slicer let's move on [30:43] wavetable is a built-in mini wavetable [30:46] synth now you can feed it any sample so [30:49] I could go ahead and move across the [30:52] position here but there's no morphing so [30:55] it really wouldn't make sense for [30:56] regular samples unless this was the [30:59] effect you're going for and I'll show [31:01] you how to modulate this in a bit but [31:02] ideally you would load properly [31:04] formatted wave tables into this and I [31:07] happen to have a few of those here again [31:09] I'm not sure what will come with tracker [31:11] ultimately one of these will be bundled [31:14] or not but these are nice samples with [31:16] either at 1024 or 248 sample window [31:18] let's go into 2048 go to an empty slot [31:23] and then load up pulse width modulation [31:27] why not so now again if we go to look at [31:30] the sample this is the original sample [31:33] it doesn't sound like much because for [31:35] this instrument I didn't load up the [31:37] wavetable synth and now here we go a [31:40] nice little pulse and notice as I go [31:43] through the position I can look at the [31:46] different waves in this wave table but [31:49] of course it ain't no PWM without any [31:51] modulation so we can go into the [31:53] instrument parameters and go ahead and [31:56] look for wave table position apply an [32:00] LFO to that and [32:03] sorry starting to sound good [32:05] for triangle wave [32:08] if we go back to sample playback we can [32:11] see our pulse width modulated [32:14] I could play this with an external [32:15] keyboard as well [32:17] [Music] [32:22] see it does [32:25] with low registers [32:28] now as you go higher you will start to [32:30] hear aliasing and sort of feel that a [32:34] little bit in the background potentially [32:39] they'll add an anti aliasing algorithm [32:41] but for now it's still [32:45] let's take a listen to a few more wave [32:48] tables just for fun let's go with this [32:53] one so I'll replace it in here which [32:56] means it will be replaced in spots our [33:14] wavetable synth for the granular let's [33:17] open here with a few examples [33:24] listen to this which is so that's the [33:34] granular mode we can travel across the [33:37] sample over here [33:58] [Laughter] [34:38] though most granular synthesis problem [34:46] the across the sample but even this with [34:48] one grain doesn't sound too shabby and [34:50] if we pass it through a good reverb it [34:53] sounds way better I'll just unplug a [34:55] coast here so this is without the reverb [35:03] even not too generous though we could [35:07] get you nervous with it [35:10] there are a bunch of algorithms we can [35:13] try out but even the most basic ones [35:21] quite special so I definitely recommend [35:24] pairing a reverb with tracker regardless [35:29] but especially for the granular ones [35:44] okay let's move on to talk about [35:45] instrument parameters now up until now [35:48] when I was speaking about samples and [35:50] slots tracker has 48 slots but really [35:53] what these slots are aren't just sample [35:55] slots but also instrument slots meaning [35:57] you take a core sample and then you can [35:59] apply modulation and sample playback [36:01] options to it which turn it into an [36:03] instrument a standalone instrument that [36:04] can be very different from the sample [36:06] itself now the instrument parameters [36:08] have two pages the first is general [36:10] overall instructions on how to play the [36:12] sound so for example level you can [36:16] always increase [36:18] panting you can also tune the sample so [36:23] if it's not tuned to your project [36:25] to tune it out of course shooting or [36:28] fine-tuning and then this that's you [36:30] also turn on the filter let's go for [36:32] low-pass of course [36:33] [Music] [36:38] so that's the filter [36:41] Lopez filter without resonance with [36:46] residents [36:47] [Music] [36:56] you also have reverb send here like I [36:59] mentioned this isn't the final reverb [37:01] effect maybe who takes to vid but assume [37:05] that it's going to change and then the [37:07] second instrument page is our little mod [37:09] matrix so the idea with modulation is to [37:11] move parameters around for us [37:13] automatically [37:14] you've got five parameters that you can [37:17] change the volume of the sample panning [37:19] the cutoff frequency and wave table and [37:22] granular position in the sample and then [37:24] the modulation source or how these [37:26] parameters will move can either be off [37:28] an envelope or an LFO not both together [37:31] at least not in the current firmware so [37:33] you have to pick one for every one of [37:35] the parameters these are the envelope [37:36] options adsr attack decay sustain [37:38] release attack is the time it takes the [37:41] envelope to reach maximum level to the [37:45] sustain level add the decay rate or time [37:49] and then release is whether the sound [37:52] will end abruptly or release over time [37:58] that you can replace the envelope with [38:00] an LFO if you like so this is useful for [38:03] rhythmic result and as his tempo souped [38:06] luxury isn't an option for an on tempo [38:09] sync telephone at least currently so [38:12] this is a nice way to generate a [38:14] rhythmic or pulsing sound to the [38:19] envelope pending is pretty [38:20] self-explanatory [38:21] you can apply either an envelope again a [38:23] DSR or another fold to that as well [38:25] [Music] [38:26] move right to left [38:29] let's do this cut off same thing okay [38:32] either an envelope or an LFO so it's as [38:37] is customary check the snappiness of the [38:39] envelopes now for this I need to maybe [38:45] turn down and cut off a lot more then [38:49] you go back into here so you get either [38:58] an adsr envelope or the filter cutoff or [39:01] an LFO for the filter cutoff there's no [39:03] option to have the filter cut off track [39:05] the frequency or the pitch of the keys [39:07] you play that would be nice if they [39:08] could add that and then finally for wave [39:10] table position and granular position [39:12] again same deal either an envelope or an [39:15] LFO so for wave table position you saw [39:17] that that's what's been modulating our [39:19] pulse with granular position again same [39:22] thing you can scan across the sample [39:24] which is a nice way of getting a sort of [39:26] time stretch effect on tracker another [39:29] feature that I'd like to see added here [39:31] is a simple on hold or a random option [39:35] for the LFO and slower other four [39:38] eighths and LFO rates that aren't tied [39:40] to the tempo let's move on to MIDI [39:42] sequencing as far as MIDI coming in you [39:44] can send in MIDI notes as well as [39:47] transport in clock unfortunately you [39:49] can't control instrument parameters or [39:51] any other parameter with MIDI CC at [39:52] least not in the current version of the [39:54] firmware then as far as MIDI going out [39:56] you can send out transport and clock you [39:58] can choose if you want information [39:59] coming and going through USB or through [40:02] the MIDI Jack's or both and I showed you [40:03] earlier [40:04] you've got MIDI CC 5 MIDI CCS 5 MIDI CC [40:09] channels and program change you edit the [40:12] channels in the settings over here so [40:15] going into CC outs you've got to control [40:18] over which cc's a B C D and E will [40:21] change it would be nice in a future [40:24] firmware update if you could also rename [40:26] these so that when you went ahead and [40:28] got into the menu over here you'd see [40:30] which parameter you're changing and then [40:32] as far as sending MIDI notes this is our [40:34] pattern all currently played by tracker [40:36] but if I wanted this line to be played [40:38] by [40:38] no Coast or just go ahead and edit the [40:42] instrument k2 MIDI channels right now [40:48] it's open to all the MIDI channels that [40:53] was just one note and you know the drill [40:55] if I want to change all of these select [40:57] everything hit fill the MIDI instruments [40:59] are instruments 51 to 66 so it's easy to [41:04] sort of understand what the MIDI channel [41:05] is MIDI channel one is 51 hit fill and [41:09] now we've got no post over here of [41:14] course it always likes Reaver [41:25] so that's MIDI sequencing and it works [41:28] in parallel with whatever's going on [41:29] here before I head out to the pros and [41:30] cons on what answer a few of the [41:32] questions I received can you import mod [41:34] files I've been told by Paul Ian that [41:37] yes in a limited way perhaps maybe just [41:39] the notes and the samples but not the [41:41] effects that feature wasn't ready at the [41:43] time of the making of this video people [41:45] has to where's the volume control well [41:47] there's volume control over here but [41:48] there's a shortcut for it if you hold [41:49] master and turn the jogwheel that's your [41:52] volume control i was asked whether [41:54] playback needs to stop when you load [41:55] projects the answer is yes so of course [41:58] when you change patterns that's [41:59] immediate and instantaneous but if I go [42:02] ahead and go into file click open and [42:05] then let's say I want to go into light [42:08] paths project which is a beauty this [42:11] will stop the pattern it takes a while [42:15] and then you hit play and you're good to [42:22] go [42:26] or this later I promise [42:29] I was asked whether this can be used as [42:31] an audio looper or stream samples from [42:33] the SD card the answer is currently no [42:35] and the answer to the question whether [42:37] you can export a project as stems the [42:39] answer is yes either a pattern or a song [42:41] as stems or the whole thing I see [42:43] there's an export to mod option here I [42:45] haven't tested this and that's pretty [42:47] much it [42:47] so let's talk about pros and cons so the [42:50] biggest consideration is obviously [42:51] whether the tracker style grid or [42:53] spreadsheet interface is something that [42:55] you'd be interested in using that's why [42:57] I showed it in detail in this video so [42:59] the decision really is up to you this is [43:01] a major shift in workflow compared to [43:03] anything out there today [43:04] personally I have to say I found it very [43:06] intuitive and fast it didn't take me a [43:08] long time to learn this at all it does [43:10] take a bit to get used to and I do [43:11] sometimes find myself missing a button [43:13] per step workflow but I have to say that [43:15] there are quite a few workflow ideas [43:17] here that make other gear feel very [43:19] lacking I mentioned the step and fill [43:21] options which are very convenient if you [43:23] want to step sequence tracks or quickly [43:25] render patterns the ability to just [43:27] select a section and preview just that [43:29] section like I said before is really [43:33] useful same goes for copying information [43:36] from multiple tracks at a time and [43:37] putting that anywhere you want extremely [43:39] useful and not available anywhere else [43:41] to my knowledge so on the sequencing [43:43] side I think tracker is top-notch [43:45] nothing about this feels old or from the [43:48] 90s so assuming the workflow is [43:50] appealing to you otherwise there's no [43:51] point in talking about the other [43:52] features the question is how does it [43:53] compare on the other fronts and there [43:56] there's no easy answer if you're looking [43:58] for massive samples per project or [44:00] streaming audio from the SD card you [44:01] won't get that here at least not in the [44:03] current firmware some groove boxes don't [44:05] have a synth engine at all so tracker [44:06] does better here with the sample wave [44:09] table and granular engines however [44:11] compared to groove boxes with dedicated [44:12] synths its features are relatively basic [44:15] also in comparison to some but not all [44:17] other groove boxes having only two [44:19] automation lanes is a bit limited though [44:22] you do have some wiggle room here [44:23] because you can change a different [44:25] automation parameter on a per step basis [44:27] so again depending on your point of view [44:29] you could look at this as having [44:30] multiple automation lanes but only two [44:33] are available on a per step basis in [44:35] terms of audio effects it would have [44:36] been nice to have a delay send along [44:38] Reverb perhaps that's something that can [44:40] be added in a firmware update of course [44:41] the more real-time audio effects the [44:43] better hopefully these will be added in [44:45] the future if not be prepared to pair [44:47] this with something external on the [44:48] hardware side personally I would have [44:50] liked to see a few macro knobs for [44:52] parameter control and obviously an [44:54] internal battery though like I mentioned [44:55] a strong phone charger can power this as [44:58] well so that's my take stick around for [45:00] more sound demos for more pros and cons [45:02] and answers to more questions please [45:04] feel free to leave a comment below if [45:06] you want a whole bunch of ideas on what [45:07] to do with the synths in tracker or [45:09] anywhere else check out my book [45:11] available to the awesome people who [45:12] support the work done on this channel on [45:14] patreon hit like if this was useful [45:16] ring the bell after subscribing so you [45:18] don't miss the next one thanks very much [45:20] for watching [45:21] [Music] [45:46] [Music] [45:54] [Applause] [45:59] [Music] [46:31] [Music] [46:36] [Applause] [46:39] [Music] [46:46] [Music] [46:52] [Music] [46:59] [Music] [47:05] [Music] [47:26] [Music] [47:39] [Music] [47:50] [Music] [48:02] [Music] [48:21] [Applause] [48:25] [Music] [48:36] [Music]