Physicist Takes Fatal Radiation Dose to Save Crew in Los Alamos Slip
Movieclips
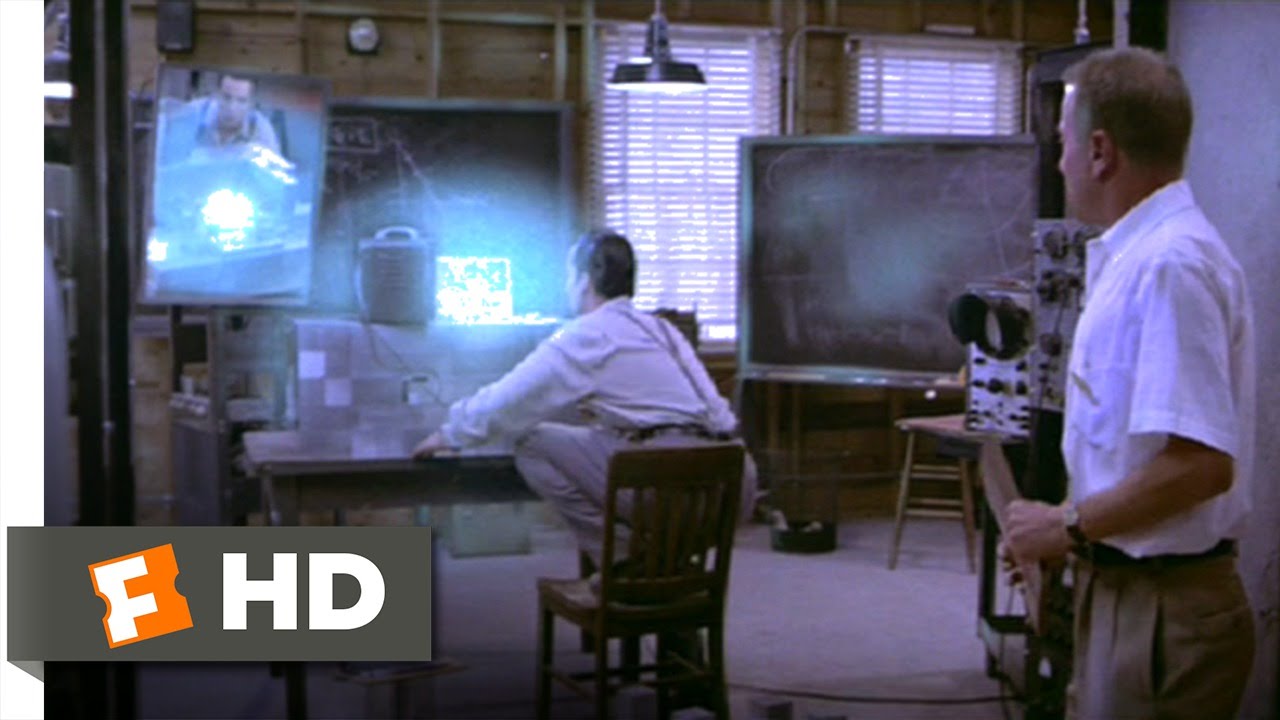
By manually separating the slipped plutonium hemispheres and shielding the blast with his own body, Michael Merriman ensures his team's survival while absorbing an inevitably fatal radiation dose.
AI-assisted summary of Fat Man and Little Boy (6/9) Movie CLIP - I'm Dead (1989) HD — original source. Check the original for full context.
Source published:
Key ideas
- Michael Merriman oversees the delicate manual assembly of a plutonium core, closely tracking instrument readings as the material nears critical mass. (0:00)
- A sudden slip of an assembly tool causes the core halves to touch, instantly initiating a prompt critical excursion accompanied by a blue Cherenkov radiation burst. (0:00)
- Michael halts the runaway reaction by manually tearing the hemispheres apart with his bare hands, shielding his team from the bulk of the neutron blast with his own body. (0:00)
- Taking immediate command of the laboratory, Michael halts evacuation until personnel drop all metallic objects and mark their exact floor locations for dosimetry calculations. (0:00)
- Assessing the radiation falloff and geometric shielding, Michael confirms that his colleagues will survive while acknowledging his own point-blank exposure is fatal. (0:00)
Detailed notes
## Background Published by the Movieclips channel on YouTube on March 3, 2012, this clip from the 1989 film Fat Man and Little Boy portrays a pivotal moment in the Manhattan Project. According to the description, scientist Michael Merriman (played by John Cusack) leads his team in assembling an atomic bomb core when a high-stakes accident occurs.
## TL;DR During a delicate plutonium core assembly, a slipped tool causes the hemispheres to come into contact, triggering a prompt critical reaction and emitting a blinding blue flash of radiation. Michael Merriman instantly tears the halves apart with his bare hands, absorbing the brunt of the neutron burst to shield his team. Despite receiving a catastrophic dose, he maintains command of the laboratory, ordering his colleagues to freeze, discard metal items, and mark their standing positions to allow precise dose calculations before evacuating them to safety. Alone with the core, Michael calmly recognizes that his colleagues will survive the accident while his own exposure is fatal.
## Atmosphere & style The scene builds with breathless, nail-biting suspense as the delicate experiment proceeds, abruptly shattering into sheer dread with the burst of blue Cherenkov radiation and blaring alarms. Michael's decisive, authoritative composure amidst chaos anchors the scene, transforming sudden terror into methodical crisis response. It feels hauntingly quiet and tragic in its final moments, shifting from acute panic to a solemn, devastating realization of irreversible sacrifice.
## Bulletin - [00:00](https://www.youtube.com/watch?v=AQ0P7R9CfCY&t=0s) Michael Merriman oversees the delicate manual assembly of a plutonium core, closely tracking instrument readings as the material nears critical mass. - [00:00](https://www.youtube.com/watch?v=AQ0P7R9CfCY&t=0s) A sudden slip of an assembly tool causes the core halves to touch, instantly initiating a prompt critical excursion accompanied by a blue Cherenkov radiation burst. - [00:00](https://www.youtube.com/watch?v=AQ0P7R9CfCY&t=0s) Michael halts the runaway reaction by manually tearing the hemispheres apart with his bare hands, shielding his team from the bulk of the neutron blast with his own body. - [00:00](https://www.youtube.com/watch?v=AQ0P7R9CfCY&t=0s) Taking immediate command of the laboratory, Michael halts evacuation until personnel drop all metallic objects and mark their exact floor locations for dosimetry calculations. - [00:00](https://www.youtube.com/watch?v=AQ0P7R9CfCY&t=0s) Assessing the radiation falloff and geometric shielding, Michael confirms that his colleagues will survive while acknowledging his own point-blank exposure is fatal.
## Key takeaways - [00:00](https://www.youtube.com/watch?v=AQ0P7R9CfCY&t=0s) Michael Merriman guides his laboratory team through the high-stakes, manual assembly of a plutonium core. - [00:00](https://www.youtube.com/watch?v=AQ0P7R9CfCY&t=0s) Instrument readings are tracked and called out incrementally as the core components edge closer to critical mass. - [00:00](https://www.youtube.com/watch?v=AQ0P7R9CfCY&t=0s) A mechanical slip causes the core hemispheres to make contact, triggering an immediate prompt critical reaction. - [00:00](https://www.youtube.com/watch?v=AQ0P7R9CfCY&t=0s) The nuclear reaction emits an intense blue Cherenkov radiation flash and sets off laboratory radiation alarms. - [00:00](https://www.youtube.com/watch?v=AQ0P7R9CfCY&t=0s) Michael reacts instinctively by pulling the critical hemispheres apart using his bare hands to terminate the reaction. - [00:00](https://www.youtube.com/watch?v=AQ0P7R9CfCY&t=0s) By interposing his own torso between the core and his colleagues, Michael absorbs the primary blast of prompt neutron and gamma radiation. - [00:00](https://www.youtube.com/watch?v=AQ0P7R9CfCY&t=0s) Michael maintains strict command over the chaotic scene, ordering all personnel to freeze immediately. - [00:00](https://www.youtube.com/watch?v=AQ0P7R9CfCY&t=0s) The team is commanded to strip and drop all metallic items onto the floor to prevent interference with exposure measurements. - [00:00](https://www.youtube.com/watch?v=AQ0P7R9CfCY&t=0s) Evacuating scientists are instructed to record their exact standing locations relative to the core to facilitate accurate dosimetry reconstruction. - [00:00](https://www.youtube.com/watch?v=AQ0P7R9CfCY&t=0s) The laboratory personnel are directed behind protective shielding barriers to safety. - [00:00](https://www.youtube.com/watch?v=AQ0P7R9CfCY&t=0s) Analyzing the inverse-square falloff and shielding geometry, Michael determines that the rest of the crew received sublethal doses. - [00:00](https://www.youtube.com/watch?v=AQ0P7R9CfCY&t=0s) Michael calmly realizes that the massive point-blank dose absorbed directly into his body is definitively fatal.
## Detailed walkthrough ### [00:00](https://www.youtube.com/watch?v=AQ0P7R9CfCY&t=0s) The Criticality Accident and Michael's Fatal Dose
Michael Merriman leads his team through the delicate, high-stakes procedure of assembling the plutonium core, carefully calling out instrument measurements as the assembly edges closer to critical mass. The room is filled with palpable tension as the scientists assist and observe, holding their breath while Michael manipulates the hemispheres. Once the test reaches its threshold, a sudden slip of the tool causes the core halves to come into contact, instantly triggering a prompt critical reaction. A burst of blinding blue Cherenkov radiation illuminates the room alongside the shrieking rattle of radiation alarms. Michael reacts instantly, wrenching the hemispheres apart with his bare hands and placing his own body directly between the glowing core and his colleagues to shield them from the massive blast of neutron radiation.
Immediately following the flash, chaos breaks out as personnel attempt to scramble, but Michael takes complete command of the room despite the lethal exposure he has just absorbed. He shouts at everyone to freeze and remain completely still so that the physics team can reconstruct the incident and calculate radiation dosages accurately: “Nobody move! Don't anybody move!” He orders everyone in the laboratory to shed metallic objects that might distort readings or hold secondary activation, commanding, “Take out everything metal! Drop it on the floor!” Directing the researchers out to safety past the protective barriers, he instructs them to record their exact physical locations relative to the assembly, saying, “Mark where you were standing, get out.”
As the room clears and the severity of the incident sinks in, Michael looks down at the core and the physical damage already underway within his own body. Calmly assessing the shielding geometry and inverse-square falloff for his crew versus the catastrophic point-blank dose he absorbed to the torso, he murmurs the grim realization of his sacrifice: “Everybody should make it.” Pausing as the finality of the fatal dose hits him, he adds, “Except me.”
```mermaid flowchart TD accTitle: Sequence of the Criticality Accident accDescr: Flow diagram showing the assembly, the criticality slip, containment action, and dose assessment.
subgraph Assembly ["Core Assembly"] A["Step-by-step assembly of plutonium core"] --> B["Hemispheres slip into contact"] end
subgraph Criticality ["Critical Reaction"] B --> C["Prompt critical burst & blue radiation flash"] C --> D["Michael manually separates the core halves"] end
subgraph Evacuation ["Containment & Evacuation"] D --> E["Order team to freeze and remove metal objects"] E --> F["Mark exact standing positions for dose calculation"] F --> G["Evacuate laboratory behind shielding wall"] end
subgraph Outcome ["Dosimetry Assessment"] G --> H["Colleagues survive with sublethal exposure"] G --> I["Michael absorbs fatal point-blank dose"] end ```
- **Core Assembly Readings:** Michael meticulously checks radiation monitoring levels, calling out numerical intervals as the experiment approaches the critical threshold. - **Accident Containment:** Michael absorbs the vast majority of the lethal prompt neutron and gamma burst by throwing his physical body over the assembly to separate the core halves manually. - **Dosimetry Protocol:** Michael immediately directs all personnel to discard metal items onto the floor and mark their exact standing positions in the room so medical physicists can precisely reconstruct their radiation exposure.
## Mentioned Fat Man and Little Boy, Michael Merriman, John Cusack, Leslie Groves, Paul Newman, J. Robert Oppenheimer, Dwight Schultz, Roland Joffé, Bruce Robinson, John Calley, Tony Garnett, Los Alamos, Manhattan Project, Paramount Pictures
## Video description Fat Man and Little Boy movie clips: http://j.mp/1JboFHm BUY THE MOVIE: http://j.mp/A5A9vi Don't miss the HOTTEST NEW TRAILERS: http://bit.ly/1u2y6pr
CLIP DESCRIPTION: Michael (John Cusack) leads the team in assembling the core when something goes terribly wrong.
FILM DESCRIPTION: "Fat Man" and "Little Boy" were the nicknames given the atomic bombs that were dropped over Hiroshima and Nagasaki in the waning days of World War II. This elaborately assembled film is the story of the events leading up to the dawn of the atomic age. Paul Newman plays General Leslie Groves, a hard-nosed career soldier who in 1942 finds himself the reluctant "nursemaid" to a group of idealistic scientists in Los Alamos, New Mexico. As the military head of the top-secret Manhattan Project, Groves intends to have the operation run by the book--and failing that, to have things his way at all costs. The film's storyline narrows down to a battle of egos between Groves and atomic scientist J. Robert Oppenheimer (Dwight Schultz), in his own way as contentious and childishly single-purposed as the general.
CREDITS: TM & © Paramount (1989) Cast: John Cusack Director: Roland Joffé Producers: John Calley, Tony Garnett Screenwriters: Roland Joffé, Bruce Robinson
WHO ARE WE? The MOVIECLIPS channel is the largest collection of licensed movie clips on the web. Here you will find unforgettable moments, scenes and lines from all your favorite films. Made by movie fans, for movie fans.
SUBSCRIBE TO OUR MOVIE CHANNELS: MOVIECLIPS: http://bit.ly/1u2yaWd ComingSoon: http://bit.ly/1DVpgtR Indie & Film Festivals: http://bit.ly/1wbkfYg Hero Central: http://bit.ly/1AMUZwv Extras: http://bit.ly/1u431fr Classic Trailers: http://bit.ly/1u43jDe Pop-Up Trailers: http://bit.ly/1z7EtZR Movie News: http://bit.ly/1C3Ncd2 Movie Games: http://bit.ly/1ygDV13 Fandango: http://bit.ly/1Bl79ye Fandango FrontRunners: http://bit.ly/1CggQfC
HIT US UP: Facebook: http://on.fb.me/1y8M8ax Twitter: http://bit.ly/1ghOWmt Pinterest: http://bit.ly/14wL9De Tumblr: http://bit.ly/1vUwhH7
[Source](https://www.youtube.com/watch?v=AQ0P7R9CfCY)