Ben Heck Wires Xbox Controller to PC Keyboard for Analog Movement
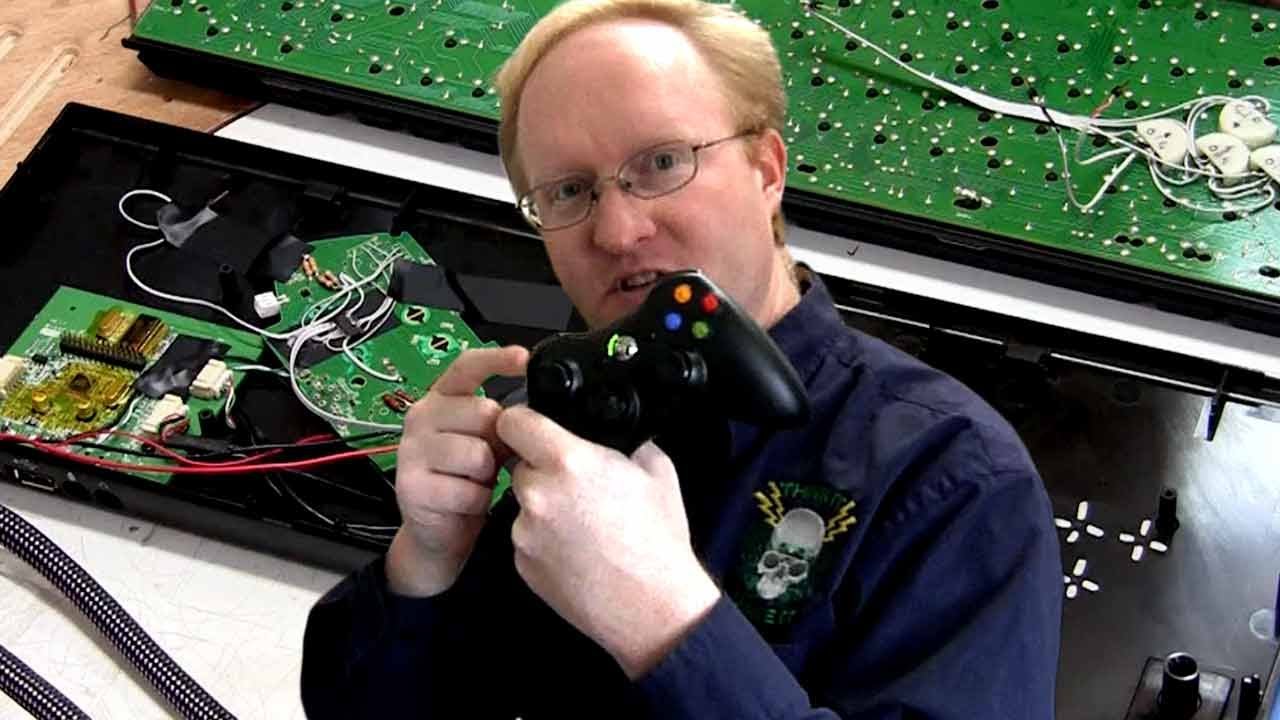
XBOX Controller Mods: Analog WASD Gaming Keyboard — element14 presents

element14 presents

Routing Hall effect sensor readings into a digital potentiometer replaces binary key inputs with variable speed control for PC games.

AI-assisted summary of XBOX Controller Mods: Analog WASD Gaming Keyboard — original source. Check the original for full context.

Source published:

Key ideas

  • Ben Heck modifies a standard PC keyboard using cylindrical rod magnets and linear Hall effect sensors to deliver analog movement controls comparable to console thumbsticks. (0:03)
  • The custom hardware architecture translates key displacement voltages through an MCU into I²C commands, which control a digital potentiometer wired to an Xbox 360 controller board. (1:18)
  • A portable oscilloscope 'geek watch' prototype stalled after coin cell batteries proved unable to provide sufficient amperage, dying after roughly 20 seconds. (0:03)
  • Addressing viewer requests for a fully battery-powered Xbox 360 laptop, Ben clarifies that the sheer volume of batteries required makes such a build impractically bulky. (12:35)

Detailed notes

## Background Published on YouTube by element14 presents on November 26, 2012, this episode of *The Ben Heck Show* follows Benjamin J. Heckendorn as he tackles a custom hardware build. The video demonstrates how to modify a standard PC keyboard using magnets, Hall effect sensors, and an internal Xbox 360 controller board to achieve analog WASD movement control.

## TL;DR Host Ben Heck modifies a mechanical PC keyboard to replace binary on/off WASD keys with true analog movement comparable to an Xbox 360 thumbstick. He outfits key stems with magnetic rods, mounts linear Hall effect sensors underneath, and feeds the resulting analog displacement voltages through a microcontroller and a digital potentiometer wired to an internal Xbox gamepad board. After remapping in-game keys and testing progressive movement speeds in *Left 4 Dead*, Ben closes the episode with a rave for *Borderlands 2*, a critique of rapid DLC release cycles, and an explanation of why battery-powered Xbox laptops remain impractical.

## Atmosphere & style The presentation carries the breezy, approachable confidence of a seasoned maker working out of an informal electronics workshop. Fast-paced bench demonstrations and practical prototyping tips—such as using a floating packing peanut as a makeshift compass—keep the technical explanations lively and accessible. Between intricate soldering work and testing in-game walking speeds, Ben's casual asides, personal gaming rants, and direct responses to viewer inquiries give the video an authentic, conversational, and enthusiastic workshop feel.

## Bulletin - [00:03](https://www.youtube.com/watch?v=gEwDImE0DU4&t=3s) Ben Heck modifies a standard PC keyboard using cylindrical rod magnets and linear Hall effect sensors to deliver analog movement controls comparable to console thumbsticks. - [01:18](https://www.youtube.com/watch?v=gEwDImE0DU4&t=78s) The custom hardware architecture translates key displacement voltages through an MCU into I²C commands, which control a digital potentiometer wired to an Xbox 360 controller board. - [00:03](https://www.youtube.com/watch?v=gEwDImE0DU4&t=3s) A portable oscilloscope 'geek watch' prototype stalled after coin cell batteries proved unable to provide sufficient amperage, dying after roughly 20 seconds. - [12:35](https://www.youtube.com/watch?v=gEwDImE0DU4&t=755s) Addressing viewer requests for a fully battery-powered Xbox 360 laptop, Ben clarifies that the sheer volume of batteries required makes such a build impractically bulky.

## Key takeaways - [01:18](https://www.youtube.com/watch?v=gEwDImE0DU4&t=78s) Standard PC keyboard inputs are strictly binary, preventing gradual speed adjustments like those available on console thumbsticks. - [01:18](https://www.youtube.com/watch?v=gEwDImE0DU4&t=78s) The analog conversion uses rod magnets mounted in key plungers and linear Hall effect sensors beneath the PCB to measure depression depth. - [02:20](https://www.youtube.com/watch?v=gEwDImE0DU4&t=140s) A linear key switch without tactile clicks or bumps is essential to maintain a predictable, continuous mechanical spring profile. - [02:20](https://www.youtube.com/watch?v=gEwDImE0DU4&t=140s) Hall effect sensors require uniform magnet polarity; Ben identifies North and South poles by floating magnets on foam peanuts in water as an improvised compass. - [04:42](https://www.youtube.com/watch?v=gEwDImE0DU4&t=282s) Custom 3D-printed brackets mount directly to the keyboard circuit board to ensure rigid standoff distance regardless of chassis flex. - [07:28](https://www.youtube.com/watch?v=gEwDImE0DU4&t=448s) A dual-channel digital potentiometer replaces the mechanical gamepad joystick, receiving resistance values over I²C from an intermediate microcontroller. - [07:28](https://www.youtube.com/watch?v=gEwDImE0DU4&t=448s) Fixed resistor dividers are soldered onto unused controller stick pads to prevent floating pins and phantom inputs. - [09:38](https://www.youtube.com/watch?v=gEwDImE0DU4&t=578s) Integrating the modified Xbox 360 controller into the keyboard's internal multi-port USB hub allows the entire setup to run through a single external cable. - [09:38](https://www.youtube.com/watch?v=gEwDImE0DU4&t=578s) In-game WASD bindings must be cleared and remapped to unused keys so normal digital key strokes do not preempt the analog controller inputs. - [11:07](https://www.youtube.com/watch?v=gEwDImE0DU4&t=667s) Gameplay testing in Left 4 Dead confirms smooth, graduated character speeds across forward, backward, and strafe movements. - [11:38](https://www.youtube.com/watch?v=gEwDImE0DU4&t=698s) Ben critiques modern DLC release pacing, arguing that rapid rollouts shortly after launch cause player desynchronization and community fragmentation. - [12:35](https://www.youtube.com/watch?v=gEwDImE0DU4&t=755s) Unlike consumer laptops designed for thermal efficiency, home consoles like the Xbox 360 use larger, cost-effective components that preclude compact battery-powered builds.

## Detailed walkthrough ### [00:03](https://www.youtube.com/watch?v=gEwDImE0DU4&t=3s) Introduction and "Ben News": The Oscilloscope Watch Experiment

The episode begins with the show's intro, introducing Benjamin J. Heckendorn—a former graphic artist turned electronics enthusiast who takes on hardware projects, shares technical tips, and answers viewer questions on *The Ben Heck Show*. Ben outlines the core mission of the episode: building an analog WASD keyboard. As Ben explains his goal:

> “I want to improve the PC gaming experience by allowing the same kind of analog movement control that you have while playing your video game console but on your PC.”

Before diving into the build, Ben shares a quick update in "Ben News" regarding a miniature oscilloscope he wired up the prior week. Intrigued by the idea of converting the portable oscilloscope into a wearable "geek watch," he mounted coin cell battery slots to the back of the unit. However, the test hit a power bottleneck: the coin cells lacked sufficient amperage to sustain operation, keeping the display alive for only about 20 seconds. Ben concludes that he will either need to locate a battery capable of higher current delivery or repurpose the project into something else entirely.

[01:18](https://www.youtube.com/watch?v=gEwDImE0DU4&t=78s) Keyboard vs. Gamepad: The Analog WASD Concept

Ben compares keyboard input with a standard game controller using *Left 4 Dead* on the PC. On a standard keyboard, movement inputs are entirely binary: pressing W propels the character forward at maximum velocity, and pressing S sends them backward at full speed. Because most modern PC games are ports of console releases, they offer native support for Xbox controllers. On a thumbstick, input magnitude correlates to displacement, allowing a player to creep forward slowly, accelerate to full speed, backpedal gently, or make smooth lateral strafes. Ben sets out to map those continuous physical gradations onto the standard WASD keys.

```mermaid flowchart LR accTitle: System Architecture for Analog WASD Keyboard accDescr: Diagram tracing input flow from magnetized keys through Hall effect sensors, MCU, digital potentiometer, and Xbox controller back to the PC. subgraph Inputs["Keyboard Switches"] A["WASD Keys with Rod Magnets"] end subgraph Sensing["Sensing & Conversion"] B["Hall Effect Sensors"] C["Microcontroller (MCU)"] D["Digital Potentiometer"] end subgraph Host["Controller & PC"] E["Xbox 360 Controller Board"] F["PC (Left 4 Dead)"] end

A -->|"Physical displacement"| B B -->|"Analog voltage"| C C -->|"I²C commands"| D D -->|"Simulated resistance"| E E -->|"USB / Controller input"| F ```

Ben details the planned hardware architecture: - Cylindrical rod magnets mounted inside the plungers of the WASD key switches move downward as the player depresses the keys. - Linear Hall effect sensors positioned beneath each switch register the magnetic flux density and output a variable analog voltage proportional to key depth. - An onboard microcontroller unit reads these four analog channels and translates the displacement values into commands over the I²C bus. - An I²C-controlled digital potentiometer receives the commands and mimics the variable resistance of the controller's original analog joystick. - The Xbox 360 controller mainboard processes the signals and relays the stick data back to the PC via USB.

[02:20](https://www.youtube.com/watch?v=gEwDImE0DU4&t=140s) Keyboard Disassembly and Magnet Polarity Alignment

Ben inspects the keyboard selected for the modification, purchased in person at a TigerDirect retail store so he could manually evaluate switch mechanics. His criteria required switches with a long travel distance (throw) and linear, continuous resistance rather than a tactile click or sudden tactile drop. This ensures a predictable mechanical spring profile across the full stroke.

Upon opening the casing—locating a hidden chassis screw under a "do not remove" warranty sticker—Ben discovers the keyboard is built with higher quality than expected: individual switches are snapped into a front mounting plate and wave-soldered directly to a single shared printed circuit board. Removing the entire PCB would require desoldering every key switch on the board. To avoid unnecessary labor, Ben chooses to desolder only the terminal pins for the target WASD cluster.

Ben fits miniature magnetic rods through the switch stems so that pressing a key simultaneously makes contact with the keyboard's internal switch pads while driving the magnet closer to the underside of the PCB. Because linear Hall effect sensors respond directionally depending on whether they face a magnetic North or South pole, every rod must be inserted with identical polarity:

> “They're sensitive to North or South Poles a magnet so it's important that we Mount all these rods in the same orientation either with all North down or all South down.”

To identify the poles without dedicated instrumentation, Ben places a magnetic rod into a buoyant foam packing peanut and floats it in a cup of water, creating an improvised compass. Once the Earth's magnetic field aligns the rod toward geographical North, he marks the South-facing end to ensure uniform orientation across all four key switches.

[04:42](https://www.youtube.com/watch?v=gEwDImE0DU4&t=282s) Installing and Calibrating Hall Effect Sensors

With the magnetic rods trimmed to length and seated inside the W, A, S, and D stems, pressing the keys projects the tips of the magnets outward through the rear of the switch bodies. Ben introduces the three-pin Hall effect sensors, which take 5V power and ground and provide a continuous analog voltage output relative to the proximity and polarity of the magnetic field.

To position the sensors at a precise, repeatable standoff distance above each switch post, Ben designs and 3D prints custom mounting brackets. Mounting the brackets directly to the keyboard's circuit board rather than the outer plastic case ensures the spacing remains rigid and immune to case flexing.

Ben tests the sensor output with a digital multimeter before final assembly: - Connecting supply voltage, ground, and probe leads to a sensor, he exercises the key travel and observes a sweep spanning nearly a full volt between rest and bottom-out. - After verifying the response, he secures the 3D-printed holders with hot glue. - The four sensors share common power and ground buses, while their four discrete analog signal lines are routed out via a wiring harness destined for the microcontroller. - Ben then sets aside the keyboard assembly to prepare the Xbox 360 gamepad hardware.

[07:28](https://www.youtube.com/watch?v=gEwDImE0DU4&t=448s) Emulating Thumbsticks with a Digital Potentiometer

Ben explains how an analog gamepad stick operates electrically and how to replicate it digitally. A standard mechanical joystick uses two perpendicular potentiometers (one for the X-axis, one for the Y-axis). Each potentiometer acts as a three-pin voltage divider consisting of a high reference voltage rail (e.g., 5V), a low ground reference, and a center wiper. Moving the physical stick slides the wiper along an internal resistive track, outputting a variable voltage proportional to position.

Because a moving physical wiper cannot interface directly with digital code, Ben substitutes the mechanical assembly with a dual-channel digital potentiometer integrated circuit sourced from element14:

> “And a microcontroller unit sends commands to it over the I²C bus which we'll talk about in a little bit telling it what to do. In this case basically it says set this value for pot zero and set this value for pot one.”

Ben connects an Arduino to the keyboard's four Hall effect sensor lines to map their real-world dynamic range. Running a sketch that executes continuous `analogRead()` operations on the WASD pins, he opens the serial monitor and repeatedly cycles the W and S keys. The serial feed confirms clean, responsive data swings across the key strokes. Ben logs the minimum and maximum analog boundaries, which are then mapped in code across the discrete step resolution of the digital potentiometer.

On the Xbox 360 controller circuit board, Ben desolders the left mechanical analog stick and wires the digital potentiometer IC directly across its solder pads. Because an unpopulated stick input floating without reference signals would drift randomly and introduce phantom inputs, Ben solders fixed resistor dividers onto the unused second stick pads to hold that axis in a permanent, centered steady state.

[09:38](https://www.youtube.com/watch?v=gEwDImE0DU4&t=578s) Hardware Integration and In-Game Configuration

Ben brings all sub-assemblies together inside the chassis. The keyboard's original internal controller board features an integrated multi-port USB hub, allowing Ben to connect the Xbox 360 controller directly into the keyboard's internal hub bus, consolidating the hardware to a single external cable. The intermediate microcontroller captures the analog voltages from the WASD Hall sensors, processes the axis math, and transmits target resistance values across the I²C lines to the digital potentiometer grafted onto the Xbox controller.

To test the hybrid controller in *Left 4 Dead*, Ben adjusts the game's control configuration: - In the keyboard and mouse options menu, the native bindings for WASD movement are cleared and remapped to unused keys (such as B, N, and M). Ben explains: > “I have to actually disable the WD keys because I don't want them to be pushed as keys I want them to work as a joystick if I don't do this they'll trigger before the joystick is fully pressed.” - Gamepad input is enabled in the game settings to allow the modified Xbox 360 board to drive character movement. - Ben enters the game environment to demonstrate how the custom WASD setup successfully breaks away from rigid digital run/stop movement, giving the player analog speed control on a PC keyboard.

[11:07](https://www.youtube.com/watch?v=gEwDImE0DU4&t=667s) Testing the Analog WASD Keyboard

Ben jumps straight into the gameplay test to demonstrate that the custom analog modification works as intended. Moving through the directional inputs, he checks forward movement, testing both slow and fast speeds, followed by backward movement, and then left and right strafing. Each direction successfully registers subtle, gradual input before ramping up to full speed as the key is pressed deeper. Having proven the concept, Ben recaps the entire build pipeline: “Well there you have it, we used Hall effect sensors, magnets, a microcontroller, an Xbox 360 controller, and a PC keyboard to give the PC keyboard analog motion controls.”

```mermaid flowchart LR accTitle: Analog WASD Keyboard Signal Flow accDescr: Diagram showing how key presses are converted from magnetic proximity to Xbox analog stick input. subgraph Inputs ["Physical Input"] Key["WASD Keys + Magnets"] Sensor["Hall Effect Sensors"] end subgraph Processing ["Logic & Translation"] MCU["Microcontroller"] Xbox["Xbox 360 Controller PCB"] end subgraph Output ["Target System"] Game["PC / Game Input (Analog Movement)"] end

Key --> Sensor Sensor --> MCU MCU --> Xbox Xbox --> Game ```

[11:38](https://www.youtube.com/watch?v=gEwDImE0DU4&t=698s) Ben's Rave and Rant: *Borderlands 2* and DLC Fatigue

Ben transitions to his regular segment with a rave for *Borderlands 2*. He praises it as an exceptional sequel that resolved most of the nagging problems from the original release, particularly the confusing navigation system that he could never make sense of. He notes that the game delivers over 20 hours of gameplay—a rare achievement for modern first-person shooters, even if *Borderlands* functions more as a "first-person looter." Because it provides significant value straight out of the box, it serves as the backdrop for his rant against modern downloadable content (DLC).

Ben clarifies that his frustration is not with the existence of DLC itself, but rather the breakneck pace at which publishers push it to market. With *Borderlands 2*, only three days elapsed between his team finishing the main campaign and the arrival of the first expansion pack. He argues that rapid-fire releases create consumer cynicism, making players question why content was not included on the disc in the first place. Furthermore, it fragments the community: “Another downside is desynchronization: if you don't get a pack when everyone else does, you'll no longer be on the same level as them, so I like DLC, I just wish there was a little bit more breathing room between expansions.”

- *Borderlands 2* praise: Addresses navigation flaws from the first title and provides 20+ hours of campaign content out of the box. - Core DLC complaint: A 3-day turnaround between beating the game and the launch of the first expansion pack. - Multiplayer consequence: Rapid DLC rollouts cause player desynchronization, locking out players who do not buy expansion packs immediately on release.

[12:35](https://www.youtube.com/watch?v=gEwDImE0DU4&t=755s) Viewer Mailbag and Next Episode Teaser

Before wrapping up, Ben tackles a question he receives frequently from viewers: whether he can build an Xbox 360 laptop that runs entirely on battery power. He confirms that while it is technically feasible, practical constraints make it unappealing: “Yes, I could do that, but the size of the batteries required would make the unit larger than anyone would want.” He explains the hardware difference between consumer laptops and home consoles: standard laptops rely on proprietary, miniaturized components engineered for thermal efficiency and tight spaces, whereas the Xbox 360 relies on bulkier, off-the-shelf parts engineered to keep console manufacturing costs down.

Looking ahead, Ben announces that the following episode will tackle a double-decker 3D printer build. He encourages viewers to participate in discussions, pitch upcoming project ideas, and enter build giveaways on the element14 website or by emailing him directly.

- Battery-powered console limitation: Battery pack volume would produce an unwieldy, overly thick chassis. - Console architecture: The Xbox 360 uses larger, cost-effective components rather than miniaturized laptop-grade parts. - Upcoming project: Constructing a custom "double-decker" 3D printer.

## Notable quotes > [00:03](https://www.youtube.com/watch?v=gEwDImE0DU4&t=3s) I want to improve the PC gaming experience by allowing the same kind of analog movement control that you have while playing your video game console but on your PC. — Ben Heckendorn

> [11:38](https://www.youtube.com/watch?v=gEwDImE0DU4&t=698s) I like DLC, I just wish there was a little bit more breathing room between expansions. — Ben Heckendorn

## Mentioned Benjamin J. Heckendorn, The Ben Heck Show, element14, TigerDirect, Xbox 360, Left 4 Dead, Borderlands 2, Arduino

## Video description Ben modifies a keyboard so the WASD keys provide the same analog control of an Xbox controller. Ben takes apart a standard keyboard to install magnets, Hall effect sensors, and a modified Xbox controller to create a better gaming keyboard.

[Source](https://www.youtube.com/watch?v=gEwDImE0DU4)

中文简报

Ben Heck将Xbox手柄连入PC键盘实现模拟量移动 通过将霍尔效应传感器读数接入数字电位器,用变速控制取代PC游戏的二进制按键输入。 主持人Ben Heck改装了一款机械PC键盘,用媲美Xbox 360摇杆的真正模拟量移动取代了WASD按键传统的开关式二进制输入。他将磁棒安装在键轴上,并在下方安装线性霍尔效应传感器,随后把产生的模拟位移电压通过微控制器与数字电位器接入内置的Xbox手柄电路板。在重新映射游戏内按键并在《求生之路》中测试了渐进式移动速度后,Ben在节目结尾大赞《无主之地2》,批评了DLC更新周期过快的问题,并解释了为何电池供电的Xbox笔记本依然不切实际。 Ben Heck利用圆柱形磁棒与线性霍尔效应传感器改装了一款标准PC键盘,以提供媲美主机摇杆的模拟量移动控制。 (0:03) 该定制硬件架构通过MCU将按键位移电压转换为I²C命令,进而控制连接到Xbox 360手柄电路板的数字电位器。 (1:18) 一款便携式示波器“极客手表”原型开发受阻,原因是纽扣电池无法提供足够的电流,约20秒后便耗尽电量。 (0:03) 针对观众希望打造完全由电池供电的Xbox 360笔记本的要求,Ben澄清称,所需电池的庞大体积会让这种构想变得过于笨重而不切实际。 (12:35)

Detailed notes — zh

## Background 该视频由 YouTube 频道“element14 presents”于 2012 年 11 月 26 日发布。视频简介说明,主持人 Ben Heck 对一把标准电脑键盘进行了硬件改造,在其中安装了磁铁、霍尔效应传感器以及一块改装过的 Xbox 360 手柄主板,使 WASD 按键具备类似手柄摇杆的模拟量控制功能,从而打造出一把更出色的游戏键盘。 ## TL;DR 为了消除 PC 射击游戏中键盘按键非开即关的生硬感,Ben Heck 将一把长键程机械键盘的 WASD 轴体改装为内置磁铁,并利用 3D 打印支架固定线性霍尔效应传感器以检测按键位移深度。微控制器读取该模拟电压后,通过 I2C 总线控制数字电位器,进而替代 Xbox 360 手柄左摇杆的分压输入,并将手柄主控板接入键盘内置的 USB Hub 中。在游戏《求生之路》中解绑原生 WASD 并开启手柄协议后,玩家仅凭按键下压力度即可平滑实现从微步慢走到全速奔跑的线性过渡。视频结尾还分享了对《无主之地2》及其 DLC 发行策略的评价,并解答了便携式 Xbox 360 电池供电可行性的观众提问。 ## Atmosphere & style 整期节目散发着经典车库极客与创客工坊的务实硬核气息,充满动手拆解的噼啪声与电烙铁的白烟。主持人 Ben Heck 的语调幽默松弛、直率坦诚,既有面对微型示波器供电不足或磁极判定时随手取材(如利用浮水泡沫做指南针)的机智洒脱,也有在调试电气参数时的严谨专注。在后半段随性点评游戏与答疑时,节目又自然流露出资深老玩家的真性情与极客执念,观感既烧脑硬核又亲切接地气。 ## Bulletin - [01:18](https://www.youtube.com/watch?v=gEwDImE0DU4&t=78s) Ben Heck 改造标准机械键盘的 WASD 按键,结合微型磁铁、霍尔效应传感器与 Xbox 360 手柄主板,实现了可媲美手柄模拟摇杆的线性渐进位移控制。 - [07:28](https://www.youtube.com/watch?v=gEwDImE0DU4&t=448s) 为将磁场位移信号无缝转为主机可读取的摇杆输入,方案通过 Arduino 读取霍尔传感器模拟电压,并通过 I2C 控制数字电位器分压,直接替代原装机械摇杆。 - [09:38](https://www.youtube.com/watch?v=gEwDImE0DU4&t=578s) 整机利用键盘内置 USB Hub 整合手柄板实现单线缆输出,且需在 PC 游戏内解除原生 WASD 键位绑定以启用纯手柄模拟输入,避免开关信号与模拟信号冲突。 - [11:38](https://www.youtube.com/watch?v=gEwDImE0DU4&t=698s) 在杂谈与答疑环节中,Ben 批评了游戏 DLC 发布过快导致联机玩家等级脱节的问题,并解释了因功耗和电池体积限制,全电池供电版 Xbox 360 笔记本在实用性上难以落地。 ## Key takeaways - [00:03](https://www.youtube.com/watch?v=gEwDImE0DU4&t=3s) 微型示波器便携化尝试受限于纽扣电池电流输出不足,设备续航仅能维持约 20 秒。 - [01:18](https://www.youtube.com/watch?v=gEwDImE0DU4&t=78s) 传统 PC 键盘的 WASD 按键仅能输出开或关的离散数字信号,无法实现手柄模拟摇杆具备的细腻慢走、微调与渐进加速操控。 - [02:20](https://www.youtube.com/watch?v=gEwDImE0DU4&t=140s) 挑选长键程且弹簧阻力恒定、无突兀段落感的线性轴体机械键盘,是保证下压位移测量精度和模拟摇杆阻尼感的基础。 - [02:20](https://www.youtube.com/watch?v=gEwDImE0DU4&t=140s) 机械键盘轴体引脚直焊于双面 PCB,全部拆解成本过高,因此仅有针对性地脱焊 WASD 四颗轴体进行局部改造。 - [03:33](https://www.youtube.com/watch?v=gEwDImE0DU4&t=213s) 由于线性霍尔传感器对磁极方向反应相反,Ben 利用泡沫粒制成简易水浮指南针,快速统一了所有按键内置磁棒的朝向。 - [03:33](https://www.youtube.com/watch?v=gEwDImE0DU4&t=213s) 采用 3D 打印支架将霍尔传感器精准固定在 PCB 轴体开孔正上方,能彻底消除键盘外壳形变带来的间距测量公差。 - [03:33](https://www.youtube.com/watch?v=gEwDImE0DU4&t=213s) 按键轴芯内置磁棒下压时产生近 1V 的霍尔模拟电压摆幅,提供了足够灵敏的位移测量动态范围。 - [07:28](https://www.youtube.com/watch?v=gEwDImE0DU4&t=448s) 手柄物理摇杆本质为双联分压电位器,通过数字电位器芯片由 I2C 总线接收 Arduino 映射指令,可无缝伪装原生摇杆的分压信号。 - [07:28](https://www.youtube.com/watch?v=gEwDImE0DU4&t=448s) 未使用的手柄摇杆引脚悬空会导致信号抖动漂移,因此需要焊接固定电阻网络模拟电位器中位电压以保证信号稳定。 - [09:38](https://www.youtube.com/watch?v=gEwDImE0DU4&t=578s) 手柄电路板直接接入键盘内置的 USB Hub,使整个系统对外仅需单根 USB 线缆即可向 PC 输出信号。 - [09:38](https://www.youtube.com/watch?v=gEwDImE0DU4&t=578s) 在游戏中必须彻底解绑原生 WASD 键盘按键,防止开关信号抢先触发全速移动指令而破坏模拟线性度。 - [11:07](https://www.youtube.com/watch?v=gEwDImE0DU4&t=667s) 实机测试证实改造后的 WASD 键在前后左右四个方向均可实现轻压慢走、深压疾跑的无级平滑过渡。 - [11:38](https://www.youtube.com/watch?v=gEwDImE0DU4&t=698s) 《无主之地2》单局基础流程与内容扎实,但通关仅 3 天即火速推出首个 DLC 会引发内容拆分质疑,并造成好友联机进度脱节。 - [12:35](https://www.youtube.com/watch?v=gEwDImE0DU4&t=755s) 制作全电池供电的 Xbox 360 笔记本受限于整机高功耗需求,所需电池包体积极为庞大,无法兼顾便携性。 - [12:35](https://www.youtube.com/watch?v=gEwDImE0DU4&t=755s) 市售笔记本通过定制高成本小型化元器件实现轻薄,而家用游戏主机基于成本考虑采用大尺寸标准元器件,二者设计定位截然不同。 ## Detailed walkthrough ### [00:03](https://www.youtube.com/watch?v=gEwDImE0DU4&t=3s) 项目背景与“Ben 的新闻”:极客手表构想 本期节目由面向工程师与电子爱好者的社区及在线商城 element14 赞助。主持人 Benjamin J. Heckendorn(Ben Heck)原本是一位温和的平面设计师,直到他彻底迷上了电子制作,如今每周都会攻克新项目并解答观众问题。在进入正题前,Ben 按照惯例带来了“Ben 的新闻”(Ben News)。他回顾了上周接线制作的微型示波器,并萌生了一个将其改造成手表的极客想法。 他在示波器背面焊接了纽扣电池插槽,但测试结果并不理想。由于纽扣电池输出电流不足,设备仅能维持大约 20 秒的工作时间。Ben 坦言目前需要寻找更好的供电方案或寻找其他载体,不过这一尝试依旧值得一试。 - 赞助平台:element14 社区与在线商城 - 上期遗留项目:微型示波器(Oscilloscope)便携化手表尝试 - 遇到的物理限制:纽扣电池(Coin cell)输出电流(Amperage)过低,仅能续航 20 秒左右 --- ### [01:18](https://www.youtube.com/watch?v=gEwDImE0DU4&t=78s) 键盘开关与手柄摇杆的本质差异 Ben 演示了当前 PC 游戏操控上的一个痛点。在以《求生之路》(Left 4 Dead)为例的第一人称射击游戏中,键盘按键只有开与关两种离散状态:按下 W 键角色直接全速前进,按下 S 键直接全速倒退,缺少中间过渡。而现今大部分 PC 游戏实际上都是主机游戏的移植版,天然支持手柄操作;手柄的模拟摇杆可以让角色根据推力大小实现缓慢走动、疾跑、微调倒退以及任意角度的平滑位移。 为了兼顾键盘的键位布局与主机的平滑操控,Ben 明确了改造目标:“I want to take the fine analog motions of this stick and put it on the WASD keys of a keyboard.”(我想把这个摇杆细腻的模拟量动作移植到键盘的 WASD 按键上。) ```mermaid flowchart LR accTitle: WASD模拟控制改造信号链路 accDescr: 展示从按键内部磁铁移动到PC识别手柄输入的完整硬件数据流。 subgraph Keys["机械结构"] K["WASD 按键与磁棒"] end subgraph Sensing["磁场检测"] H["霍尔效应传感器"] end subgraph Processing["信号中继"] MCU["微控制器 (MCU/Arduino)"] DPOT["数字电位器 (I2C)"] end subgraph Output["主机与游戏识别"] XBOX["Xbox 360 手柄主板"] PC["PC 游戏主机识别为手柄输入"] end K -->|"位移改变磁场"| H H -->|"模拟电压信号"| MCU MCU -->|"I2C 调节指令"| DPOT DPOT -->|"分压模拟左摇杆"| XBOX XBOX -->|"标准手柄输入"| PC ``` --- ### [02:20](https://www.youtube.com/watch?v=gEwDImE0DU4&t=140s) 机械键盘拆解与长键程挑选考量 实现模拟输入的第一步是寻找手感与物理特性合适的键盘。Ben 在 Tiger Direct 的实体店亲自上手挑选了一款键盘。他解释道,实体店挑选至关重要,因为必须亲自感受按键反馈。他需要的是长键程(Long throw,按键向下移动距离足够长)且具备线性按压力度(Continuous force of motion)的键盘。普通薄膜或带有明显段落感的机械轴按压时会有突兀的咔哒声或卡顿感,而恒定弹簧阻力的轴体能线性下压到底,是模拟摇杆阻尼的最佳选择。 拆解外壳时,螺丝隐藏在贴有“禁止拆卸”(Do not remove)的封条下方。拆开外壳后,Ben 发现这把键盘的内部做工出乎意料地扎实:按键开关固定在定位板上一侧,引脚则焊接在另一侧的 PCB 板上。这意味着如果要取下整块电路板,必须将所有轴体全部脱焊。为了提高效率,Ben 决定只把核心改造所需的 W、A、S、D 四颗轴体脱焊取下进行加工。 - 选购要求:长键程、连续线性弹簧阻力、无突兀段落感(Non-clicky) - 结构特征:开关引脚直焊于双面 PCB,全部拆解成本过高 - 改造策略:有针对性地脱焊 WASD 四颗轴体 --- ### [03:33](https://www.youtube.com/watch?v=gEwDImE0DU4&t=213s) 制作水浮指南针判定磁极与安装霍尔传感器 为了让开关在正常触发电气通断的同时感知位移,Ben 计划在轴芯内部植入小磁棒。当按下按键时,原本的金属触点依然闭合,而磁棒则会随轴体向下推进,从而激活对应的霍尔效应传感器(Hall effect sensor)。由于所使用的线性霍尔传感器对磁铁的 N 极和 S 极反应方向相反(一极靠近电压升高,另一极靠近电压降低),必须确保所有按键内的磁棒安装方向严格一致。 为了在缺乏专业仪器的情况下快速判定微型磁铁的磁极,Ben 采用了一个经典的物理实验:将磁棒穿过一颗泡沫花生粒(Packing peanut),让其漂浮在水杯中制成临时指南针。通过水面旋转静止后指向地理北极的方向,迅速确定了磁棒的南极端,确保所有 WASD 键内的磁棒都以相同磁极朝下安装。 接着,Ben 展示了项目采用的霍尔效应传感器。传感器拥有接地(GND)、电源(VCC)和模拟输出(Vout)三个引脚,输出电压会随着磁铁距离的接近而线性变化。为了将霍尔传感器精准固定在 PCB 轴体开孔的正上方,并与磁铁保持刚好不相撞的间隙,Ben 使用 3D 打印技术制作了专用的固定支架。将传感器固定在 PCB 板而非键盘底壳上,可以杜绝外壳形变带来的测量误差,保证四个按键的基准高度一致。 经万用表电压档测试,单个按键在完全按下和抬起之间,霍尔传感器产生了接近 1V 的模拟电压动态范围,灵敏度十分理想。随后 Ben 使用热熔胶加固传感器,将四枚传感器的电源与地线并联,引出四路模拟信号线准备接入微控制器。 - 磁极一致性判定:利用泡沫与水浮法制成简易指南针测定磁极 - 传感器引脚结构:VCC、GND、Analog Output - 安装工艺:3D 打印专用支架限位,直接固定在 PCB 板上保证公差,热熔胶稳固防震 - 测试表现:单键位移产生近 1V 的电压摆幅 --- ### [07:28](https://www.youtube.com/watch?v=gEwDImE0DU4&t=448s) 数字电位器(I2C)与 Xbox 360 手柄主板改装 为了让 Xbox 360 手柄主板识别按键输出,Ben 深入剖析了手柄机械摇杆的内部电气原理。机械摇杆由两个相互垂直的双联电位器构成,分别代表 X 轴和 Y 轴。电位器内部本质上是一个分压电路(Voltage divider):一端接高电平(例如 5V),一端接地,中间的滑动端(Wiper)跟随摇杆机械转动而移动,主机通过读取滑动端靠近高电平还是低电平的电压分压来判断摇杆角度。 机械电位器无法直接用键盘开关驱动,因此 Ben 选用了数字电位器集成电路(Digital Potentiometer IC)。该芯片通过 I2C 总线接收微控制器的指令,分别设定 Pot 0 和 Pot 1 的阻值步进,其内部的 High、Wiper、Low 引脚完全可以无缝替代原有的物理电位器。 ```mermaid flowchart TD accTitle: 手柄摇杆阻值映射与替代电路 accDescr: 展示原生模拟摇杆分压与改装后数字芯片及固定电阻的替换关系。 subgraph LeftStick["左摇杆改装区(WASD 控制)"] DP["数字电位器 IC"] DP -->|"I2C 控制 Wiper 档位"| LX["左摇杆 X 轴信号端"] DP -->|"I2C 控制 Wiper 档位"| LY["左摇杆 Y 轴信号端"] end subgraph RightStick["右摇杆防飘移平衡区"] R1["分压固定电阻网络"] R1 -->|"维持恒定中位电压"| RX["右摇杆 X/Y 轴信号输入"] end ``` 在软件映射方面,Ben 将键盘连接到 Arduino 微控制器,编写简短代码对 W、A、S、D 对应的四个模拟引脚执行 `analogRead`。在串口监视器(Serial Monitor)中多次按压按键以记录读数波动的上下限范围,进而将各按键测得的电压区间等分映射到数字电位器的有效步进档位中,实现对虚拟摇杆的软件模拟。 在手柄硬件改造部分: - Ben 彻底焊下 Xbox 360 手柄的原装左摇杆,将数字电位器的对应端脚引线焊接到手柄 PCB 的焊盘上。 - 针对拆除或未使用的右摇杆,如果引脚悬空会导致信号剧烈抖动与漂移,Ben 解释道:“if we left it open it would be all over the place and wonky, so we put resistors in to simulate the potentiometers so it would be kept in a constant steady state.”(如果我们让它悬空,信号就会到处乱跳甚至失常,所以我们焊接了固定电阻来模拟电位器,让它保持在恒定的稳定状态。) --- ### [09:38](https://www.youtube.com/watch?v=gEwDImE0DU4&t=578s) 系统总装与游戏内键位屏蔽测试 硬件整合阶段,Ben 巧妙利用了键盘原厂 PCB 自带的 USB Hub 功能,直接将 Xbox 360 手柄的主控板接入键盘内置的 Hub 中,这样整个改装套件只需一根 USB 线缆即可同时向 PC 输出键盘与手柄信号。微控制器读取霍尔传感器阵列的模拟电压,通过 I2C 实时更新手柄板上的数字电位器,各模块严丝合缝地塞入键盘内部。 进入《求生之路》进行实际联调前,Ben 指出了一个极其关键的软件设置细节:必须进入游戏设置中的“键盘/鼠标”菜单,将原生的 WASD 移动键位彻底解除绑定(例如重映射到 B、N、M 等无关按键上)。 Ben 解释道,如果保留键盘原生的 WASD 绑定,轴体下压时本身的电气开关会在摇杆行程触发之前抢先触发全速移动指令,从而毁掉渐进加速的模拟效果。只要在游戏中开启“Gamepad”(手柄)支持,作为主机移植游戏的 PC 版便会自动完美调用这套“伪装”成 Xbox 360 左摇杆的数字电位器,玩家便能够通过手指对键盘按键施加不同的下压力度,在游戏中实现随心所欲的慢走、微调和加速奔跑。 - 总线架构:Arduino 通过 I2C 接口下发控制字至数字电位器 - 集成方式:手柄主板直连键盘内置 USB Hub,整合单线缆输出 - 核心配置细节:必须在 PC 游戏内解绑原生 WASD 按键映射,防止开关信号破坏模拟线性度 - 游戏兼容机制:利用大多数 PC 射击游戏对 Xbox 360 原生手柄协议(XInput)的完美兼容特性实现免驱即用 ### [11:07](https://www.youtube.com/watch?v=gEwDImE0DU4&t=667s) 模拟摇杆 WASD 键盘最终实机测试与原理总结 在完成所有硬件与电路的改造后,Ben 亲自对这把改装键盘进行了实际操作测试。他逐步演练了四个方向的模拟量控制:控制角色向前移动,先是轻按按键实现缓慢步行动作,随后彻底深按实现全速快跑;随后测试后退方向,同样呈现出由慢到快的线性变化过渡;左右两侧的移动测试结果亦非常完美,轻轻受力时平缓侧滑移动,深压到底则迅速冲刺。实机测试结果清晰表明,原本只能输出开关量(开/关两种状态)的机械按键,如今完全具备了媲美手柄模拟摇杆的灵敏度与连续渐进幅度。 Ben 对整个项目的核心技术构架进行了精简的总结回顾:“Well there you have it we used hall effect sensors magnets a microcontroller an Xbox 360 controller and a PC keyboard to give the PC keyboard analog motion controls.”(瞧,大功告成!我们利用霍尔效应传感器、磁铁、微控制器、一个 Xbox 360 手柄以及普通 PC 键盘,成功让 PC 键盘获得了模拟量运动控制功能。) ```mermaid flowchart LR accTitle: Analog WASD Keyboard Signal Flow accDescr: Diagram showing how key presses are converted into Xbox 360 analog joystick signals. subgraph Input["按键物理输入"] Key["WASD 按键与磁铁"] end subgraph Sensing["磁场检测与处理"] Hall["霍尔效应传感器"] MCU["微控制器 (MCU)"] end subgraph Output["信号模拟与输出"] XboxPCB["Xbox 360 手柄主板"] PC["PC 游戏主机"] end Key -->|"按键行程改变磁场"| Hall Hall -->|"模拟电压信号"| MCU MCU -->|"模拟摇杆电平"| XboxPCB XboxPCB -->|"原生模拟量信号"| PC ``` - **测试方向**:测试涵盖了前后左右四个完整方向,均能无缝呈现微动轻推与全速深按两种速度状态。 - **核心组件清单**:标准 PC 键盘、微型强磁铁、线性霍尔效应传感器、微控制器、Xbox 360 原装手柄 PCB 板。 --- ### [11:38](https://www.youtube.com/watch?v=gEwDImE0DU4&t=698s) Ben 的好评与吐槽:赞美《无主之地2》与声讨 DLC 发行节奏 在固定的“好评与吐槽(Rave & Rant)”环节中,Ben 首先给出了本期的盛赞对象——《无主之地2》(Borderlands 2)。他认为这是一款非常优秀的续作,不仅修复了前作中绝大多数令人头疼的问题,还彻底重做了初代中让他完全无法理解的导航系统。此外,《无主之地2》拥有良心的单局游戏体量,主线及基础流程长达 20 多个小时,这在当今的第一人称射击游戏(FPS)中实属罕见;不过 Ben 也幽默地指出,这款游戏与其说是纯粹的射击游戏,倒不如更准确地称之为“第一人称刷宝拾荒(first-person looter)”游戏。整部作品仅靠开箱自带的基础内容就给玩家提供了极高的价值体验。 由此引出的则是 Ben 今天的猛烈吐槽:DLC(追加下载内容)的发布节奏。Ben 澄清自己并非原则性反对 DLC 的存在,而是对其推出的速度之快感到极为不满。在通关《无主之地2》仅仅 3 天之后,官方就火速推出了首个扩展包。Ben 批评道:“Plus the faster they release content the more likely people are to say why wasn't that on the disc.”(而且他们发布内容的速度越快,玩家就越容易质疑:为什么这些东西当初没直接做在光盘里?) 除了给玩家留下“拆分本体内容单独售卖”的不良印象外,DLC 推出过快带来的另一大弊端是联机玩家群体的“脱节(desynchronization)”。如果玩家不能在发售第一时间与身边的朋友同时购买扩展包,彼此之间就会立刻处于不同的游戏等级与内容阶段,无法顺畅联机体验。因此 Ben 呼吁,他虽然喜欢 DLC,但厂商应当在各个扩展包之间给玩家留出足够的“喘息空间”。 --- ### [12:35](https://www.youtube.com/watch?v=gEwDImE0DU4&t=755s) 观众答疑与下期节目预告 节目进入尾声,Ben 回答了一个观众高频提问:是否可以制作一款完全依靠电池供电的 Xbox 360 便携笔记本电脑(Xbox 360 Laptop)?Ben 明确答复技术上完全可以做到,但现实限制在于体积。由于 Xbox 360 运行所需的功耗极高,能够维持其正常运转的电池组尺寸将会极为庞大,最终造出来的机器体型会臃肿到没有任何人愿意使用的地步。Ben 进一步剖析了工业消费品与家用主机在设计思路上的本质差异:普通市售笔记本电脑为了追求便携性,内部大量采用专门定制的小型化元器件,这大幅推高了制造成本;而 Xbox 360 作为一款注重极致性价比的家用游戏主机,内部并未采用这类微型化组件,其部件相对更大,而大部件意味着成本更低廉。 在下期节目预告中,Ben 透露他们将开启一个全新硬核项目——从零开始打造一台“双层(Double Decker)3D 打印机”。最后,Ben 提醒广大硬件改造爱好者可以访问 element14 官方页面参与社区讨论、为节目建言献策,甚至有机会赢取往期节目打造的改装硬件,也可以直接通过电子邮件向他提交极客改造构想。 - **电池版主机难题**:高功耗要求巨大容量的电池包,导致便携性彻底丧失。 - **成本与体积矛盾**:市售笔记本使用定制小型元器件(成本高昂),Xbox 360 使用标准平价元器件(体积大、成本低)。 - **下期预告**:双层 3D 打印机(Double Decker 3D Printer)制作企划。 - **互动渠道**:element14 社区(element14.com/tbhs)及官方反馈邮箱(benck@element14.com)。 ## Notable quotes > [11:38](https://www.youtube.com/watch?v=gEwDImE0DU4&t=698s) Plus the faster they release content the more likely people are to say why wasn't that on the disc. — Ben Heck ## Mentioned Ben Heck (Benjamin J. Heckendorn), element14, Xbox 360, Tiger Direct, Arduino, Left 4 Dead, Borderlands 2 ## Video description Ben modifies a keyboard so the WASD keys provide the same analog control of an Xbox controller. Ben takes apart a standard keyboard to install magnets, Hall effect sensors, and a modified Xbox controller to create a better gaming keyboard. [Source](https://www.youtube.com/watch?v=gEwDImE0DU4)

Source quotes

[11:38] Ben Heck: Plus the faster they release content the more likely people are to say why wasn't that on the disc.

Source quotes

[0:03] Ben Heckendorn: I want to improve the PC gaming experience by allowing the same kind of analog movement control that you have while playing your video game console but on your PC. [11:38] Ben Heckendorn: I like DLC, I just wish there was a little bit more breathing room between expansions.

Original transcript

[0:03] the Ben heex show is brought to you by [0:05] element 14 the electronic design [0:07] community and online store Built For [0:09] Engineers and hobbyists alike join now [0:11] and browse the store at element14.com [0:13] Benjamin J Heckendorn was a [0:16] mild-mannered graphic artist until he [0:17] was bitten by the electronics [0:20] [Music] [0:23] bug now every week he takes on new [0:26] projects shares tips and tricks and [0:28] answers your viewer questions [0:30] on the Ben hack [0:33] show hello and welcome back to the Ben [0:36] Haack show in today's episode we'll be [0:38] making an analog wasad keyboard I want [0:41] to improve the PC gaming experience by [0:43] allowing the same kind of analog [0:44] movement control that you have while [0:46] playing your video game console but on [0:48] your PC let's get [0:50] started but first the news today in Ben [0:54] news remember that little oscilloscope [0:56] we wired up last week well I thought it' [0:58] be really cool to make a watch out of it [1:00] so I attached some coin cell battery [1:02] slots on the back however the problem is [1:04] those batteries don't have enough [1:06] amperage to keep it running for very [1:07] long I goes for about 20 seconds so I [1:09] either need to find a better battery or [1:11] just a different thing to make this out [1:12] of but it was worth a [1:15] shot geek watch so let's start by [1:18] talking about the difference between the [1:19] analog Gamepad controller and your [1:22] keyboard okay here we got left for dead [1:24] if I push W my character just moves [1:26] forward at full speed if I push s they [1:28] move backwards at full speed speed now [1:31] since all these games are basically [1:33] ports of Xbox titles controller works [1:35] perfectly with it the controller though [1:38] as you can see I can do I can move [1:39] forward slowly I can move forward really [1:41] fast I can move backwards slowly I can [1:42] move backwards fast and of course I can [1:45] move left and right so I want to take [1:47] the fine analog motions of this stick [1:49] and put it on the WD keys of a keyboard [1:53] here's my plan of attack on our keyboard [1:55] we're going to have some keys with [1:57] little Rod magnets in them the rod mag [1:59] magnets will be pushed back and forth [2:01] and they will affect a hall effect [2:04] sensor the hall effect sensor will send [2:06] its analog value to a microcontroller [2:08] unit the microcontroller will send i squ [2:10] c data to a digital pot the digital pot [2:12] will simulate one of the analog sticks [2:14] specifically the left analog stick on a [2:16] controller and then the controller will [2:18] go back into the PC all right so we're [2:20] going to start with the keyboard that I [2:21] selected I found this keyboard at the [2:23] Tiger Direct uh brick and mortar store [2:26] which is good because I was able to feel [2:27] all the keys what I really wanted was a [2:28] keyboard that had a long throw to each [2:31] key that is the key moves as much as [2:33] possible and also one that had a [2:35] continuous um force of motion to it by [2:39] that I mean sometimes when you push the [2:40] keyboard it'll go click It'll like clunk [2:42] into place this one has a spring with a [2:44] constant motion all the way down and [2:46] that'll be great to simulate our analog [2:47] movement that we need there's got to be [2:49] screws here [2:51] someplace maybe they're [2:53] hiding oh this must be a screw it says [2:55] do not remove yep bingo [3:03] this keyboard is higher quality than I [3:04] thought it was it appears that the [3:06] switches are put in [3:07] place on this side and then they're [3:10] soldered on this side with the circuit [3:11] board so in order to remove the circuit [3:13] board you'd have to desolder every [3:15] switch so what I'll do just to test it [3:17] out is I'll desolder just as switch as [3:19] we need wad D and then go from there [3:33] I'm going to have to cut this rod down [3:35] but the idea is when you push the key in [3:39] it'll do its normal contact which are [3:42] these two pins here but it'll also push [3:44] this magnetic Rod to and [3:46] fro and we can use that to activate the [3:51] analog hall effect [3:53] sensors I plan to use hall effect [3:55] sensors that measure the magnetism off [3:57] the switch they're sensitive to North or [3:59] South Poles a magnet so it's important [4:01] that we Mount all these rods in the same [4:03] orientation either with all North down [4:05] or all South down so I'm going to put [4:08] this rod in a floating peanut put it in [4:12] this [4:15] water so basically we just made a [4:17] compass so that's North so that's the [4:20] south end of our magnet [4:30] this is the part I'm a little worried [4:31] about getting the rod in [4:35] place so you can see the magnets coming [4:37] through when I push the keys that's what [4:39] we'll be sensing with the hall effect [4:42] sensors here are the hall effect sensors [4:45] that I'm going to use with this project [4:48] the holif effect [4:49] sensor requires ground power and then it [4:53] has an output signal the output signal [4:55] is [4:56] analog depending on how close a magnet [4:58] is to it so it'll go in One Direction [5:01] when it's on that side and another [5:03] Direction when it's on that side so for [5:05] our keys we're going to be sensing how [5:06] close the magnet is to the surface of it [5:09] on our board [5:11] here see where the magnets come out so [5:15] we're going to want so we're going to [5:16] want to have these just above the [5:18] surface so the magnet comes just up to [5:20] them and to do [5:22] that I 3D printed some parts insert 3D [5:26] printed footage here of this these will [5:30] sit in place so the integrated circuit [5:32] will be on the inside of these to hold [5:33] them at the right height [5:35] above the post we're attaching Those [5:38] sensors to the circuit board here [5:40] instead of the bottom of the case [5:42] because this way we'll know they're all [5:43] a [5:44] certain height above it time to do a [5:47] test I hooked up the hall sensor to [5:51] power ground then I also have the output [5:55] of it going into my um multimeter set to [5:58] voltage multimeter [6:01] multimeter it's pretty good range on it [6:04] almost a almost a full [6:10] volt four sensors are in place I'm going [6:13] to add some hot glue so they will stay [6:15] in place then I wire them all together [6:17] because their positive and grounds will [6:19] be the same and then we'll have the four [6:22] outputs going to our microcontroller so [6:24] here we have our sensors wired up we [6:26] have power ground and then the four [6:29] analog signals so we're going to connect [6:32] those to a microcontroller and that's [6:33] going to go to the Xbox 360 so the next [6:35] step I'm going to actually take the Xbox [6:37] 360 controller and get it ready [6:39] [Music] [7:05] pitching your big idea to Senior [7:06] Management easier said than done [7:10] researching designing and prototyping [7:11] your big idea using the node on element [7:14] 14 yep much [7:17] easier discover how we're listening to [7:19] your feedback and building a better [7:21] [Music] [7:28] experience now let's talk talk about how [7:29] we're going to get those keys to the [7:31] Xbox 360 controller the Xbox has a [7:33] joystick that looks like this it's [7:35] mechanical and it has two potentiometers [7:37] which tells us in analog ways what the X [7:40] and the Y are the potentiometer looks [7:43] like this typically you have a high side [7:45] let's say 5 volts here a low side [7:48] resistance and then the wiper is the [7:50] part that actually moves so you can tell [7:51] where the potentiometer is by seeing if [7:54] the wiper is closer to 5 volts or closer [7:56] to ground you could also call it a [7:58] voltage divider and measures the [8:00] potential [8:01] potentiometer yeah but we can't use a [8:03] mechanical potentiometer we need to [8:05] simulate it so I'm going to use a [8:07] digital potentiometer now this is an [8:09] integrated circuit you can get these [8:10] from element 14 and a microcontroller [8:13] unit sends commands to it over the iqu C [8:15] buus which we'll talk about in a little [8:16] bit telling it what to do in this case [8:19] basically it says set this value for pot [8:21] zero and set this value for pot one so [8:24] we connect the high the wiper and the [8:27] low just like we would on our normal pot [8:30] so basically this Chip is going to be [8:32] used in place of this mechanical [8:35] potentiometer now let's look at the [8:37] values from the hall effect sensors I've [8:39] hooked up the keyboard to an Arduino and [8:40] the Arduino is going into the computer [8:43] our code is pretty simple we basically [8:44] do an analog read off each of the [8:46] sensors so we have a sensor for WS a d [8:50] so for our example we're just going to [8:51] print out a few of the values and see if [8:53] they change so we load up the serial [8:55] Monitor and now I'm going to push w a [8:59] couple [9:00] times and push s a couple times and we [9:04] see we have a pretty good range in each [9:05] of them so what we do is we write down [9:07] the ranges that we get then we divide [9:09] those into the effective steps of the [9:10] digital potentiometer and that's how we [9:12] set up our fake joystick here's [9:15] integrated circuit we put onto the Xbox [9:17] 360 controller board you can see that [9:20] it's wired up in place of the analog [9:22] stick that we removed also over here we [9:25] attach these resistors and they will [9:27] simulate the second analog stick if we [9:29] left it open it would be all over the [9:31] place and wanky so we put resistors in [9:33] to simulate the potentiometers so it [9:35] would be kept in a constant steady state [9:38] I now have all the parts together here's [9:40] the original PCB that was in the [9:41] keyboard it has a Hub included with it [9:43] so I was able to attach the Xbox 360 [9:46] controller to the hub here's a [9:48] microcontroller which is going to get [9:49] the inputs from the keyboard and the iqu [9:51] C buus going to the digital [9:53] potentiometer that we built into the [9:55] controller so then what you do is you [9:57] put the keyboard in place plug this into [9:59] the microcontroller part and it should [10:01] be ready to go now I'm ready to test it [10:03] with a game I'm going to use left for [10:04] dead now I need to go into options and [10:07] go into keyboard and mouse and I need to [10:09] edit the buttons and keys I have to [10:11] actually disable the WD keys because I [10:14] don't want them to be pushed as keys I [10:17] want them to work as a joystick if I [10:19] don't do this they'll trigger before the [10:21] joystick is fully pressed so I'm [10:22] actually going to map those to something [10:24] weird like uh oh I don't know the B [10:32] bnm all right [10:34] apply also I want to make sure that [10:36] Gamepad is enabled as I mentioned [10:38] earlier most games on PC are just ports [10:41] of the console version but the side [10:43] effect is the Xbox 360 controller almost [10:45] always works just like that all right so [10:48] we're in game here and what I'm [10:50] basically going to do is use the wasad [10:51] keys to move my character in an analog [10:54] fashion normally in a PC firstperson [10:56] shooter you push W to go forward and you [10:58] go forward forward full speed sometimes [11:00] you push shift to run faster but yes it [11:03] doesn't have the analog control like a [11:05] video game system does all right so [11:07] let's go forward okay backward slowly [11:13] and then fast left [11:18] slowly and then fast right [11:22] slowly and then [11:24] fast well there you have it we used hall [11:26] effect sensors magnets a microcontroller [11:29] an Xbox 360 controller and a PC keyboard [11:32] to give the PC keyboard analog motion [11:37] [Music] [11:38] controls my Rave today is Borderlands 2 [11:42] it's a great sequel that's fixed most of [11:44] the nagging issues of the first game [11:45] including the navigation system that I [11:47] never understood it's also a long game [11:50] good 20 plus hours which is rare for a [11:52] first-person shooter these days though [11:54] Borderlands is more of a first-person [11:56] looter there's plenty of value right out [11:58] of the box with leads me into my rant my [12:01] rant today is about DLC downloadable [12:03] content I'm not ranting about the fact [12:05] that it exists rather the speed in which [12:07] it comes out too fast with Borderlands 2 [12:10] for example there was a mere 3 days gap [12:12] between us beating the game and the [12:14] first expansion pack being released plus [12:16] the faster they release content the more [12:18] likely people are to say why wasn't that [12:20] on the disc another downside is [12:22] desynchronization if you don't get a [12:24] pack when everyone else does you'll no [12:26] longer be on the same level as them so I [12:28] like DLC I just wish there's a little [12:29] bit more Breathing Room between [12:33] [Music] [12:35] expansions before we go I'll be [12:37] answering a viewer question I get asked [12:38] frequently which is can you build an [12:40] Xbox 360 laptop that runs off of [12:43] batteries yes I could do that but the [12:45] size of the batteries required would [12:47] make the unit larger than anyone would [12:48] want keep in mind a laptop you buy in [12:50] the store uses many specialized smaller [12:52] parts while the Xbox 360 being a [12:55] cost-effective console does not it's [12:57] larger which is cheaper [12:59] that's all the time we have for today in [13:01] our next episode we're going to start [13:03] building a double decker 3D printer [13:05] we'll see you then stay tuned at [13:08] element14.com [13:10] tbhs where you can join the discussion [13:12] suggest builds for the show and even [13:14] have a chance to win upcoming builds [13:16] remember you can always email build [13:18] ideas to benck element14.com thanks for [13:21] watching [13:26] [Music]