Lenovo ThinkPad P50 Survives Water Spill Under Full Load in Teardown
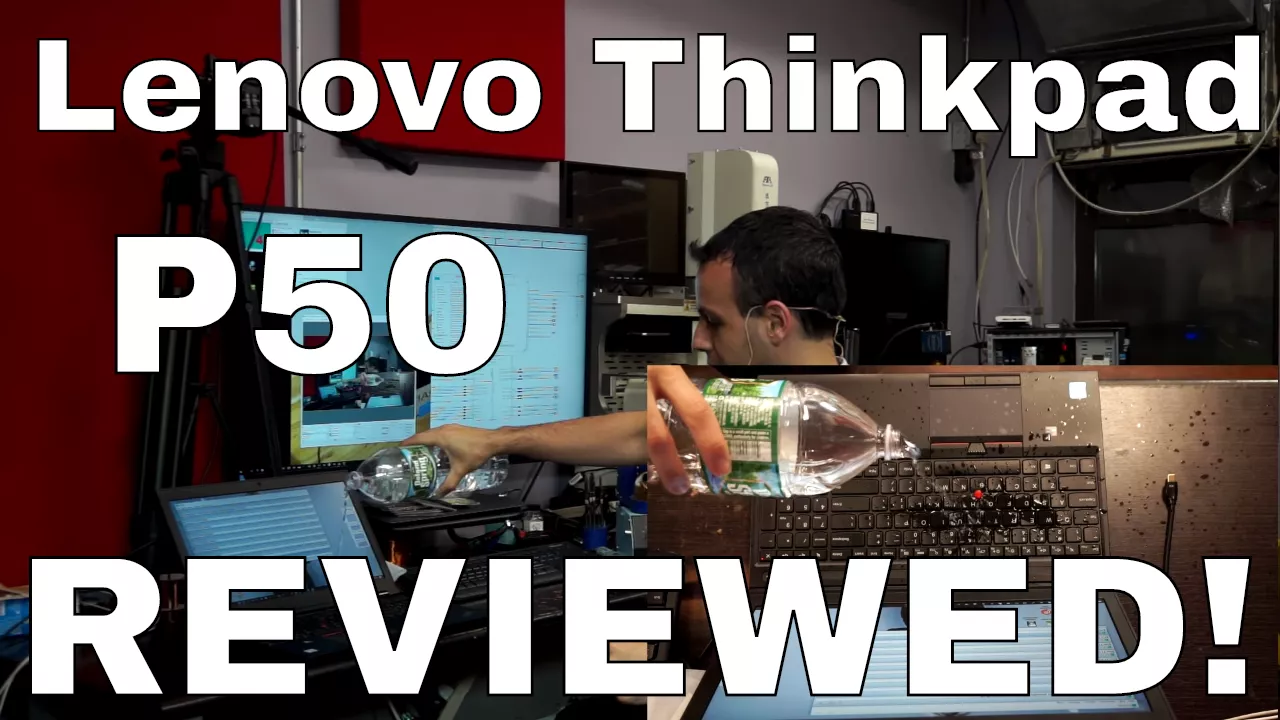
IS IT SPILL PROOF? Lenovo Thinkpad P50 review + spill damage test — Louis Rossmann

Louis Rossmann

Internal chassis drainage channels and protective Mylar shielding prevent motherboard failure during active liquid spills, demonstrating durability advantages over fragile consumer laptops despite ruining speaker surrounds.

AI-assisted summary of IS IT SPILL PROOF? Lenovo Thinkpad P50 review + spill damage test — original source. Check the original for full context.

Source published:

Key ideas

  • The ThinkPad P50 survived half a water bottle poured directly onto its keyboard while actively running Prime95 Small FFTs, continuing to operate without shorting due to internal liquid channels and bottom drainage weep holes. (27:24)
  • The P50's thermal cooling solution keeps palmrest surface temperatures within 1°C to 3°C of idle under sustained maximum CPU and GPU workloads, preventing thermal throttling during real-world 3.3 GHz Sony Vegas video encodes. (5:57)
  • The proprietary rectangular charging port is decoupled from the motherboard by mounting it into a reinforced chassis bracket with a flexible wire pigtail, eliminating the solder joint fractures common on directly soldered DC jacks. (1:43)
  • Factory-ordering the P50 with 2.5-inch SATA drives includes proprietary ribbon cables and rubber bumpers that are otherwise omitted on M.2-only configurations, maximizing future secondary storage upgrade options. (33:08)

Detailed notes

## Background Published on YouTube by Louis Rossmann on June 23, 2017, this video delivers an in-depth review, thermal benchmark, liquid spill test, and full teardown of the Lenovo ThinkPad P50 mobile workstation. Rossmann evaluates the laptop's construction, cooling efficiency, and repair-friendly features, comparing its durability and internal engineering against contemporary MacBooks and modern consumer laptops.

## TL;DR Louis Rossmann evaluates the Lenovo ThinkPad P50 workstation, examining its chassis rigidity, modular DC jack, and thermal performance under synthetic Prime95 and FurMark torture tests. While praising the system's thermal management, port selection, and textured non-backlit keyboard, he critiques the off-center typing position caused by the numeric keypad and the lack of a 4K touchscreen option. To verify Lenovo's liquid-resistance claims, Rossmann dumps water onto the keyboard under full CPU load, rinses the chassis in isopropyl alcohol, and disassembles the machine. The internal inspection reveals that the drainage channels and Mylar shielding successfully kept the motherboard dry and fully operational, with torn speaker surrounds being the only casualty.

## Atmosphere & style The presentation has an unfiltered, pragmatic workbench atmosphere driven by Rossmann's deadpan wit, blunt technical honesty, and hands-on repair expertise. A palpable sense of technical tension builds when he intentionally pours liquid directly onto his own personal editing machine mid-benchmark, contrasting sharp anxiety with his calm, matter-of-fact narration. The mood throughout feels authentic and unscripted, like standing beside a seasoned board technician as he methodically strips away chassis plastics to inspect structural joints, heatsinks, and circuit protection.

## Bulletin - [27:24](https://www.youtube.com/watch?v=ig3xI8dUdm0&t=1644s) The ThinkPad P50 survived half a water bottle poured directly onto its keyboard while actively running Prime95 Small FFTs, continuing to operate without shorting due to internal liquid channels and bottom drainage weep holes. - [05:57](https://www.youtube.com/watch?v=ig3xI8dUdm0&t=357s) The P50's thermal cooling solution keeps palmrest surface temperatures within 1°C to 3°C of idle under sustained maximum CPU and GPU workloads, preventing thermal throttling during real-world 3.3 GHz Sony Vegas video encodes. - [01:43](https://www.youtube.com/watch?v=ig3xI8dUdm0&t=103s) The proprietary rectangular charging port is decoupled from the motherboard by mounting it into a reinforced chassis bracket with a flexible wire pigtail, eliminating the solder joint fractures common on directly soldered DC jacks. - [33:08](https://www.youtube.com/watch?v=ig3xI8dUdm0&t=1988s) Factory-ordering the P50 with 2.5-inch SATA drives includes proprietary ribbon cables and rubber bumpers that are otherwise omitted on M.2-only configurations, maximizing future secondary storage upgrade options.

## Key takeaways - [00:00](https://www.youtube.com/watch?v=ig3xI8dUdm0&t=0s) The previous-generation ThinkPad P50 offers nearly identical performance and build quality to successor models like the P51 and P71 at a substantial price discount. - [00:43](https://www.youtube.com/watch?v=ig3xI8dUdm0&t=43s) The heavy, rigid chassis prevents the base from lifting or wobbling on a desk when rapidly opening the display, unlike thin ultrabooks such as the Retina MacBook Pro. - [01:43](https://www.youtube.com/watch?v=ig3xI8dUdm0&t=103s) A decoupled DC jack design isolates insertion and cord-tugging strain from the mainboard via an intermediate wiring harness. - [03:06](https://www.youtube.com/watch?v=ig3xI8dUdm0&t=186s) Comprehensive perimeter I/O includes full-size SD, HDMI, Gigabit Ethernet, and Thunderbolt 3, but the laptop does not support USB-C Power Delivery charging. - [05:57](https://www.youtube.com/watch?v=ig3xI8dUdm0&t=357s) Under a 10-minute Prime95 Small FFT load, palmrest surface temperature increases by only 1°C while the CPU maintains a non-throttling 3.1 GHz clock. - [08:41](https://www.youtube.com/watch?v=ig3xI8dUdm0&t=521s) Simultaneous Prime95 and FurMark GPU testing stabilizes GPU temperature at 74°C and CPU clock at 2.8 GHz, overcoming cross-throttling flaws found in older models like the W540. - [12:15](https://www.youtube.com/watch?v=ig3xI8dUdm0&t=735s) During Sony Vegas Pro video rendering combined with background GPU torture, the 2.8 GHz Xeon holds its full 3.3 GHz boost clock. - [15:25](https://www.youtube.com/watch?v=ig3xI8dUdm0&t=925s) Windows 10 provides seamless palm rejection when operating the TrackPoint over the enlarged trackpad, but Linux driver support for palm rejection is poor. - [17:39](https://www.youtube.com/watch?v=ig3xI8dUdm0&t=1059s) The non-backlit keyboard variant utilizes a textured, gravelly keycap finish that resists finger grease and sweat better than smooth backlit keys, though it requires lint-free wipes to clean. - [20:55](https://www.youtube.com/watch?v=ig3xI8dUdm0&t=1255s) Including a numeric keypad forces the typing home row, TrackPoint, and trackpad to the left, compromising lap-centered typing ergonomics. - [22:40](https://www.youtube.com/watch?v=ig3xI8dUdm0&t=1360s) The anti-glare matte IPS panel handles harsh overhead lighting well and includes an integrated palmrest Pantone colorimeter, but lacks an optional 4K touchscreen configuration. - [27:24](https://www.youtube.com/watch?v=ig3xI8dUdm0&t=1644s) During an active liquid spill test under Prime95 load, the keyboard, TrackPoint, and video output operated without disruption while water routed through internal drain paths. - [31:07](https://www.youtube.com/watch?v=ig3xI8dUdm0&t=1867s) The internal architecture supports four SO-DIMM RAM slots, split equally between the bottom service door and the area beneath the keyboard. - [33:08](https://www.youtube.com/watch?v=ig3xI8dUdm0&t=1988s) Dual internal drive bays accommodate either M.2 NVMe or 2.5-inch SATA drives, but require proprietary Lenovo interposer cables that only come with factory SATA configurations. - [40:05](https://www.youtube.com/watch?v=ig3xI8dUdm0&t=2405s) A full cast-magnesium roll cage and interlocking drop-down steel hinges protect internal electronics and display anchoring points from drop and torsion damage. - [43:52](https://www.youtube.com/watch?v=ig3xI8dUdm0&t=2632s) Internal post-spill teardown showed dry motherboard circuitry and an uncorroded eDP display connector beneath mylar tape, though alcohol decontamination degraded the speaker cone surrounds.

## Detailed walkthrough ### [00:00](https://www.youtube.com/watch?v=ig3xI8dUdm0&t=0s) Overview and Value Proposition of the ThinkPad P50

Louis Rossmann introduces the Lenovo ThinkPad P50, a workstation-class laptop built for durability and raw processing power. Although the machine is already a year old at the time of the review, its age works to a buyer's advantage: with the arrival of the newer P51 and P71 generations, the price of the P50 drops substantially, creating an opportunity for significant savings without a meaningful penalty in performance.

Rossmann contends that the modest iterative improvements found on the newer siblings do not justify their premium price tag. For anyone looking for an unyielding, high-performance daily workhorse, the previous-generation hardware remains exceptionally viable. As Louis puts it: “The new Lenovo P51 and P71 don't necessarily offer enough of a compelling feature set to pay the price premium for it so this machine being designed to be very durable even though it's last year's model may present a very good choice.”

- **Laptop Class**: Mobile workstation engineered for demanding computational loads. - **Market Context**: Price-to-performance sweet spot created by the launch of the newer ThinkPad P51 and P71. - **Review Scope**: Chassis stability, internal serviceability, port design, thermal performance under stress, and an impending liquid spill test.

---

[00:43](https://www.youtube.com/watch?v=ig3xI8dUdm0&t=43s) Build Quality and Chassis Stability vs. Retina MacBook Pro

Demonstrating the physical behavior of the chassis, Rossmann shows what happens when opening and closing the lid. Regardless of how aggressively or rapidly the display assembly is rocked back and forth, the base of the ThinkPad P50 remains firmly planted on the surface. It does not wobble, bounce, or lift off the desk, communicating a reassuring sense of density and rigidity.

By contrast, Rossmann grabs an equivalent-vintage 15-inch Retina MacBook Pro to demonstrate the difference in desk stability. While acknowledging that the MacBook is roughly one pound lighter and considerably thinner, opening the Apple display lifts the front lip of the chassis entirely off the desk surface—leaving a gap wide enough to easily slide a pinky finger beneath it. While acknowledging Apple's sleek profile, Rossmann argues that excessive thinness compromises long-term survivability by choking cooling systems. In his words: “I like my build quality and since I care about my machine not dying from thermal stress in a few years I also like my vents.”

```mermaid flowchart TD accTitle: Mechanical Stability Comparison accDescr: Diagram contrasting how the ThinkPad P50 base stays flat while the Retina MacBook Pro base lifts off the desk when opening the lid.

subgraph P50["Lenovo ThinkPad P50"] direction TB P1["Heavy, rigid chassis (~1 lb heavier)"] --> P2["Open lid at high speed"] P2 --> P3["Base stays planted flat on desk"] end

subgraph MBP["Retina MacBook Pro"] direction TB M1["Ultrathin lightweight chassis"] --> M2["Open lid at moderate speed"] M2 --> M3["Front lip lifts off desk (pinky-sized gap)"] end ```

---

[01:43](https://www.youtube.com/watch?v=ig3xI8dUdm0&t=103s) Port Selection, SD Card Convenience, and Charging Port Design

Looking at the physical ports, Rossmann highlights practical features that Apple abandoned on modern MacBooks, starting with a built-in full-sized SD card slot. For creators moving footage directly off cameras, an internal reader eliminates the nuisance of carrying loose dongles. An ExpressCard slot is also included on the chassis, protected by a spring door, providing legacy expansion even if few modern users still rely on it.

```mermaid flowchart LR accTitle: Power Jack Mechanical Stress Isolation accDescr: Flowchart contrasting direct PCB soldered charging jacks with Lenovo's cable-decoupled charging harness.

subgraph Standard["Conventional Laptop Design"] direction TB S1["DC Jack soldered directly to PCB"] --> S2["Cable wiggling & mechanical leverage"] S2 --> S3["Cracked solder joints & motherboard trace failure"] end

subgraph P50_Design["ThinkPad P50 Design"] direction TB L1["DC Jack mounted in flexible chassis bracket"] --> L2["Wiring harness connects jack to motherboard"] L2 --> L3["Zero mechanical strain transferred to logic board"] end ```

Rossmann provides an in-depth mechanical breakdown of the ThinkPad P50's proprietary rectangular charging port. On consumer laptops where the DC power jack is soldered directly onto the logic board, years of insertion stress, tripping over cords, and wiggling eventually fatigue and crack the solder joints, forcing board repairs. Lenovo avoids this by mounting the jack into a chassis cavity designed with deliberate mechanical play, bridging power to the system board through an intermediate wired pigtail cable. Rossmann emphasizes the longevity of this design: “Regardless of how much pressure you put on this charging port and regardless of how much you're jiggling it back and forth you're never putting direct pressure on the motherboard which is an excellent design.”

- **SD Card Reader**: Integrated full-size slot eliminates dongles for field media dumping. - **ExpressCard Slot**: Rare expansion option preserved on the chassis perimeter. - **DC Jack Decoupling**: Floating chassis-mounted socket connected via a wire harness prevents board trace damage.

---

[03:06](https://www.youtube.com/watch?v=ig3xI8dUdm0&t=186s) Display Outputs, USB-C Charging Limitations, and Vents

The port array continues with a full-sized HDMI port and a combined USB-C / Thunderbolt 3 connection. The Thunderbolt 3 port offers high-bandwidth capabilities, such as linking an external quad-HDMI video capture box to run the laptop as a production desktop. However, Rossmann notes one significant drawback: unlike Dell's XPS 15 (9550/9500) line—which can trickle-charge off low-wattage Apple USB-C chargers during casual web browsing—the P50 outright refuses to acknowledge or draw power from USB-C chargers, even when the screen is dimmed, the battery is full, and the dedicated GPU is inactive.

Beyond power, the machine includes a drop-jaw full-size RJ-45 Gigabit Ethernet jack, four total USB 3.0 Type-A ports (including an always-on charging port), and a standard headphone jack. Rossmann's primary annoyance with the perimeter layout is the Mini DisplayPort connection. On an ultrabook, Mini DisplayPort makes sense due to height constraints, but on a massive, thick workstation that dwarfs a Retina MacBook, Lenovo had ample volume to integrate a full-size DisplayPort socket as they did on older models like the T520. He points to the extensive perimeter cooling: dual rear copper heatsink exhausts, aggressive side vents, and extensive bottom grates, contrasting them sharply with the tiny, blocked intakes on thin MacBooks. Rossmann remarks dryly: “And you wonder why there's a dead GPU recall every other year.”

- **Video Outputs**: Full-sized HDMI and Mini DisplayPort (dongle required for standard DP monitors). - **Thunderbolt 3 Limitations**: Does not support low-draw USB-C Power Delivery charging. - **Networking**: Dedicated RJ-45 Ethernet port included without requiring an external adapter. - **Cooling Intake/Exhaust**: Massive side grates, dual rear exhausts, and sweeping bottom ventilation slits.

---

[05:57](https://www.youtube.com/watch?v=ig3xI8dUdm0&t=357s) Thermal Stress Testing: Idle and Prime95 Small FFTs Load

Rossmann evaluates the P50's cooling capabilities using an external thermocouple probe placed on the top surface between the keyboard and the palm rest. The laptop is configured to Windows High Performance mode, monitored with Intel Power Gadget, and tasked with Prime95 Small FFTs to place maximum thermal load on the CPU. At idle, the surface temperature on the palm rest hovers around 30°C. Internal core temperatures idle between 44°C and 54°C depending on the individual core—roughly 15°C to 20°C above ambient room temperature. When holding an omnidirectional DPA microphone up against the side exhaust vents at idle, fan noise is virtually inaudible.

After running Prime95 Small FFTs continuously for ten minutes, the external probe on the palm rest registers an increase of just 1°C, moving from 30°C to 31°C. While lesser laptops rapidly turn their wrist rests into uncomfortably hot metal plates that induce hand perspiration, the P50 stays cool to the touch. Internally, the hottest CPU core peaks around 85°C with occasional transient spikes to 87°C, while several cooler cores remain in the mid-70s. The CPU holds an unwavering, non-throttling 3.1 GHz all-core clock speed under maximum torture. Rossmann remarks on the operational comfort: “This machine has pretty much one degree of celcius of difference which is another part of what makes this a really luxurious feeling machine is that while you're using it you're not going to have your hand sweating while you're doing any in any type of encode.”

- **Idle Surface Temperature**: 30°C at the keyboard/palm rest seam. - **Idle Core Temperatures**: 44°C–54°C across CPU cores. - **10-Minute Prime95 Surface Temperature**: 31°C (+1°C rise over idle). - **CPU Core Temperatures Under Prime95**: Peaks of 85°C–87°C on the hottest core, mid-70s on others. - **CPU Sustained Clock**: 3.1 GHz steady package frequency under Small FFT execution.

---

[08:41](https://www.youtube.com/watch?v=ig3xI8dUdm0&t=521s) FurMark GPU Torture Test and Throttling Evaluation

To see whether a simultaneous graphic workload causes thermal throttling, Rossmann loads FurMark (the GPU stress "donut") at 8x anti-aliasing alongside the active Prime95 Small FFT torture test. This combined assault serves as an important benchmark because earlier workstation iterations, most notably the ThinkPad W540, suffered severe CPU down-clocking whenever the discrete Nvidia GPU was heavily engaged at the same time.

After 15 minutes of uninterrupted CPU punishment—with the final five minutes running FurMark concurrently at 100% GPU utilization—the palm rest temperature registers only a 3°C overall rise from the baseline idle state. Even with both heat-generating components pinned at their absolute ceiling, the internal CPU package temperature reaches a maximum of roughly 90°C without aggressive thermal down-throttling, proving the chassis's dual-fan, multi-heatsink cooling apparatus can dissipate simultaneous high-wattage loads.

- **Stress Combination**: Prime95 Small FFTs alongside FurMark with 8x MSAA. - **Historical Comparison**: Fixes the aggressive thermal cross-throttling found on the ThinkPad W540. - **Surface Impact**: Palm rest temperature climbs by only 3°C total after 15 minutes of torture. - **Peak Core Temperature**: Sustains around 90°C on the CPU during concurrent maximum CPU and GPU workloads.

[09:30](https://www.youtube.com/watch?v=ig3xI8dUdm0&t=570s) Stress Testing: Prime95 and FurMark Combined Thermals

With the system subjected to an intense simultaneous load, the shared cooling solution faces its stiffest challenge. The dedicated GPU runs at roughly 97% to 99% load, settling at a steady 74°C. Rossmann highlights that this result is notably better than many competing laptops where GPU temperatures routinely spike to 85°C or 90°C.

```mermaid flowchart TD accTitle: Thermal Dissipation Routing on the ThinkPad P50 accDescr: Diagram showing CPU and GPU heat dissipation pathways out the side vents while keeping top and bottom surfaces cool.

subgraph InternalLoads["Internal Heat Sources"] CPU["Intel Xeon CPU<br/>(Heavy Load / Prime95)"] GPU["Dedicated Quadro GPU<br/>(FurMark ~98% Load)"] end

subgraph Cooling["Shared Thermal Module"] Pipes["Shared Heat Sink & Dual Fans"] end

subgraph ThermalReadings["Chassis Temperature Distribution"] Top["Palmrest / Keyboard Deck<br/>(Cool & Stable)"] Bottom["Center Bottom Panel<br/>(~33.5°C — Cool)"] Exhaust["Side Exhaust Vents<br/>(~50°C to 52.5°C — Boiling Hot)"] end

CPU --> Pipes GPU --> Pipes Pipes -.->|"Shielded internally"| Top Pipes -.->|"Insulated underside"| Bottom Pipes ==>|"Forced air expulsion"| Exhaust ```

Under this combined artificial torture test (Prime95 small FFTs alongside the FurMark "donut"), the CPU throttles to manage heat dissipation across the shared assembly. The clock speeds hold around 2.8 GHz under peak joint load, down from higher single-workload boosts. When checking the underside with an external thermocouple probe placed dead center, the temperature reads just 33.5°C—counterintuitively lower than the top palmrest readings taken earlier. Rossmann points out that the chassis insulation keeps the base impressively cool for lap use, provided you avoid the side exhaust.

- Dedicated GPU stabilizes at 74°C under 97%–99% FurMark load. - CPU stabilizes around 2.8 GHz when running Prime95 and FurMark concurrently. - Thermocouple at the center-bottom chassis measures 33.5°C.

[10:45](https://www.youtube.com/watch?v=ig3xI8dUdm0&t=645s) Exhaust Vents and Fan Acoustics

Moving the thermocouple probe directly over the exhaust vent paints a completely different picture. The laptop aggressively pushes hot air out through the side cooling fins, sending the probe quickly up to between 50°C and 52.5°C. Rossmann notes that this concentrated exhaust stream is hot and uncomfortable to the touch, warning users against sitting with the machine wedged between their thighs. As long as it sits flat across the lap, however, thermal comfort remains manageable because heat is successfully diverted away from the primary contact surfaces.

Holding a DPA omnidirectional microphone next to the left and right sides of the palmrest demonstrates fan acoustics under full load versus idle. Once the stress tests are terminated, the fans spin down almost instantaneously. Within seconds, the machine becomes nearly silent. Rossmann points out that an ordinary room air filter humming in an adjacent room is audibly louder than the idling P50.

> “So this machine does a really good job of thermal management in my opinion.” — Louis Rossmann

[12:15](https://www.youtube.com/watch?v=ig3xI8dUdm0&t=735s) Real-World Video Encoding: Sony Vegas Pro

Moving away from synthetic torture routines, Rossmann evaluates real-world workstation performance using video encoding in Sony Vegas Pro. In this test, the CPU operates at 90% to 100% load while fan noise remains noticeably lower than during Prime95. Clock speeds maintain a rock-solid 3.3 GHz throughout the render.

Because his version of Sony Vegas does not leverage the dedicated GPU for hardware rendering, Rossmann runs a heavy GPU stress test simultaneously in the background to emulate worst-case mixed production workloads. Even with the GPU pegged between 81% and 100% (averaging 98%–99%), the 2.8 GHz base Intel Xeon processor maintains its full 3.3 GHz boost clock. Rossmann observes that unless software is explicitly constructed to punish silicon like a synthetic stress test does, everyday professional tasks will reliably achieve full performance without aggressive thermal throttling.

- Sony Vegas encoding CPU utilization stays between 90% and 100%. - Real-world sustained clock speed sits at 3.3 GHz on the 2.8 GHz base Xeon. - CPU maintains 3.3 GHz even when a heavy GPU stress test runs concurrently at ~98% utilization.

[15:25](https://www.youtube.com/watch?v=ig3xI8dUdm0&t=925s) Input Devices: Trackpad, TrackPoint, and OS Quirks

The ThinkPad P50 features an enlarged trackpad compared to the 2011–2012 ThinkPad models (such as the T520), meaning users who navigate using the red TrackPoint will inevitably rest their palm directly on the surface of the trackpad. In Windows 10, palm rejection proves seamless. Rossmann demonstrates this in Microsoft Paint by scribbling his signature with the TrackPoint while deliberately grinding and moving his palm across the trackpad. The cursor tracks without stuttering, false clicks, or erratic jumps.

The hardware includes physical three-button mouse arrays for both the TrackPoint above and the trackpad below, featuring dedicated center-scroll buttons. Precision gestures—such as two-finger scrolling and three-finger app switching—operate smoothly under Windows. However, Rossmann issues a strict warning to anyone intending to run a Linux distribution on the machine.

> “If you use Linux I'm warning you right now the palm detection on the trackpad is complete and utter crap you're going to want to turn this off if you use Linux.” — Louis Rossmann

Under Linux, the driver stack struggles with palm interference, forcing users to either disable the trackpad entirely in favor of the TrackPoint or forgo using the TrackPoint comfortably.

[17:39](https://www.youtube.com/watch?v=ig3xI8dUdm0&t=1059s) Typing Feel, Ergonomics, and Non-Backlit Keycaps

Typing on the P50 keyboard yields immediate praise. The keycaps feature a distinct, ergonomic concave curve that cradles the user's fingertips, creating an impression of hugging the fingers rather than presenting a flat, slippery slab. Rossmann—a self-professed two-finger typist—finds that his accuracy and typing speed improve noticeably on this keybed compared to other modern laptop designs.

A critical design detail centers on the keycap finish. Rossmann deliberately ordered the non-backlit keyboard variant because it features a coarse, textured "gravelly" surface treatment across both the keycaps and the surrounding palmrest. This rough matte finish prevents body oils, hand sweat, and grease from easily transferring to the plastic, avoiding the slick, shiny buildup common on flat chiclet keyboards. The backlit variant, by contrast, uses smoother keycap plastics that smudge and accumulate finger grease far more readily.

The downside of this textured, porous finish is maintenance: ordinary paper towels tear on the coarse plastic, shedding lint into the keyboard crevices. Rossmann advises cleaning the chassis and keys exclusively with lint-free cleanroom wipers—available cheaply on eBay in packs of 1,000—to keep the finish pristine.

- Keycaps feature concave, finger-hugging curves rather than flat profiles. - Non-backlit keyboard option includes a distinctive rough, textured matte finish. - Textured finish resists finger oils and sweat, unlike smoother backlit key surfaces. - Lint-free cleanroom wipers are required for cleaning to prevent paper towel fibers from shredding into the finish.

[19:52](https://www.youtube.com/watch?v=ig3xI8dUdm0&t=1192s) Keyboard Layout and the Dedicated Keys Debate

Cleaning the non-backlit keyboard's rough, gravelly texture requires something like a cleanroom wiper, whereas a smooth keyboard can be wiped down with almost anything. Moving on to the key arrangement, the layout on the ThinkPad P50 is acceptable, though it falls short of older classic ThinkPad layouts where Page Up, Page Down, Home, End, Delete, and Backspace closely mirrored desktop keyboard spacing. Nevertheless, it easily outperforms the compromises found on modern competitors.

A dedicated Delete key separate from Backspace is an essential functional touch. On MacBooks, triggering a forward delete requires pressing the Function (`Fn`) key in combination with Backspace—a constant frustration for anyone doing heavy editing or data entry. Dedicated volume buttons are placed directly above the numeric keypad; while they used to reside in a dedicated row above the main keyboard on older 13-inch chassis before Lenovo relegated them to shared function keys, having dedicated physical hardware buttons anywhere on the deck remains an upgrade over Apple's approach.

- Key texture requires lint-free cleanroom wipes to clean properly without snagging fibers. - Classic ThinkPad layouts grouped navigation clusters (Home/End/Insert/Delete) closer to desktop ergonomics. - Dedicated Delete eliminates the awkward `Fn + Backspace` combo required on macOS. - Dedicated hardware audio controls are integrated above the number pad.

---

[20:55](https://www.youtube.com/watch?v=ig3xI8dUdm0&t=1255s) The Number Pad Rant: The Case for Centered Keyboards

The presence of the number pad on a 15-inch laptop draws heavy criticism. While a numpad makes sense on a stationary desktop, on a laptop used directly in one's lap, it throws off physical balance and posture. Resting the chassis evenly spaced across both thighs shifts the typing home row, TrackPoint, and trackpad significantly to the left of the user's natural center. To compensate, one must either angle the entire body or slide the laptop off-balance to the right knee so the keys align with the chest.

Lenovo sells sprawling model ranges across the ThinkPad lineup—the X-series, T-series, P-series, W-series, L-series, and Yoga lines—yet fails to provide a centered keyboard configuration on its premier workstation chassis. Rossmann argues that buyers who perform numerical entry should certainly have a numpad option, but ergonomic parity must exist for touch typists:

> “I would happily pay an extra hundred dollars to not have this numpad here and to have the keyboard, the trackpad, and the trackpoint moved over to the center of the laptop where they belong.”

```mermaid flowchart TD accTitle: ThinkPad P50 Lap Ergonomics accDescr: Diagram illustrating how the inclusion of a numeric keypad forces off-center alignment on the user's lap.

subgraph Hardware["P50 Top Deck"] A["Main Keyboard & TrackPoint\n(Shifted Left)"] B["Trackpad\n(Shifted Left)"] C["Number Pad\n(Far Right Deck)"] end

subgraph User["Ergonomic Dilemma"] D["Option 1: Laptop Centered on Lap\nTypist must twist torso/arms to the left"] E["Option 2: Shift Laptop to Right Knee\nChassis becomes physically unbalanced"] end

A --> D B --> D C --> E ```

---

[22:40](https://www.youtube.com/watch?v=ig3xI8dUdm0&t=1360s) Matte IPS Display and Built-in Pantone Color Calibrator

Lowering the display brightness to roughly 50% under harsh overhead shop lighting—surrounded by bright LED tubes and T8 fixtures—demonstrates the strengths of the matte IPS panel. Viewing angles remain clean and visible off-axis when inspecting high-contrast desktop wallpapers, and the matte finish defuses glare, effectively telling ambient office reflections to "gtfo." Raising the backlight to full brightness easily cuts through high-lumen workplace illumination.

Integrated directly into the palm rest next to the trackpad sits a hardware color calibrator by Pantone. Lenovo includes calibration utility software: the user launches the program, shuts the display lid, and the screen cycles through color sequences against the integrated optical sensor. The software reads the panel's actual output and writes an adjusted profile:

> “You'll be able to make decisions based on reality rather than a lie that what your screen is telling you, and that is a very good thing.”

- Anti-glare matte coating resists glare from heavy overhead lighting and T8 shop fixtures. - Wide-angle IPS glass maintains legibility even from steep sideways angles. - Built-in palm rest Pantone colorimeter automates hardware profile generation upon closing the lid. - Practical for mobile print grading and semi-professional video corrections without relying on third-party USB pucks.

---

[24:38](https://www.youtube.com/watch?v=ig3xI8dUdm0&t=1478s) Schematic Navigation: The Omission of a 4K Touchscreen

The primary limitation of the P50's display setup is the lack of a 4K touchscreen configuration. For technical work—such as parsing densely packed logic board schematics—displaying an entire subsystem page like the `ISL6259` charging circuit (`U7000`) in 1080p produces illegible, eye-straining text. Discerning component labels (e.g., `R7001`), resistance values (such as `4.7` ohms), or surface-mount package footprints (`0402` vs. `0603`) across a macro view becomes fatiguing on a standard FHD matrix.

```mermaid flowchart LR accTitle: Schematic Navigation Bottlenecks accDescr: Comparison of board schematic workflows between navigation input methods and resolutions.

subgraph NavMethods["Input & Zoom Methods"] A["ThinkPad Trackpad Pinch-to-Zoom\n(Inaccurate / Drifts Mouse)"] B["TrackPoint + Ctrl + Middle Button\n(Precision Pan & Zoom)"] C["4K Touchscreen Direct Navigation\n(Fastest & Clearest Overview)"] end

subgraph Outcome["Rendering Legibility"] D["1080p Resolution:\nTiny text blurred; component values illegible"] E["4K Resolution:\nFull page readable without constant zooming"] end

A --> D B --> D C --> E ```

Navigating these blueprints on the ThinkPad trackpad highlights PC driver shortcomings; gesture zooming frequently misinterprets pinch commands as upward pointer tracking. Apple hardware continues to lead in multi-touch tracking precision:

> “Apple zooming with the trackpad just shits on this... I will give Apple that, they have by far the best trackpad on any laptop.”

To navigate reliably without a touchscreen, Rossmann relies entirely on the red TrackPoint cap while depressing the center scroll button to pan horizontally and vertically, holding `Ctrl` to zoom. Even so, pinch-to-pan directly on glass—even on a low-resolution 1366×768 touch panel—proves far superior for examining board schematics. Dell demonstrated with the XPS 15 9550 that combining high-performance workstation hardware with a 4K touch display was entirely feasible. Lenovo, by contrast, restricts touch capability to the 1080p panel option on the P50, leaving out professionals who would gladly pay $600 extra for a 4K touch configuration.

---

[27:24](https://www.youtube.com/watch?v=ig3xI8dUdm0&t=1644s) The Liquid Spill Torture Test

Liquid damage repair forms the core of Rossmann's bench work on MacBooks, drawing regular pushback from skeptics who claim that alternative brands are just as fragile or that Apple's chassis design is as resilient as physics allows. To put those claims to the test, Rossmann subjects his own working P50 workstation to a direct spill test under load:

> “I get lambasted a lot for saying that brands that sell much cheaper products are often more durable and liquid resistant, and a lot of people say that that's not true, that doesn't work that way, and Apple does the best they can with it, so I just thought I would put my money where my mouth is with my own machine here.”

While actively running the Prime95 small FFT torture test and plugged into AC power, half a water bottle is dumped directly into the middle of the keyboard deck:

- Prime95 small FFT calculations run uninterrupted throughout the spill. - External monitor output remains completely stable. - The TrackPoint and physical click buttons continue tracking with water pooled under the caps. - Rossmann opens a text document and types: every single key continues to register, with zero stuck inputs or dead traces. - The Caps Lock indicator LED continues toggling on and off while submerged.

To purge the pool of tap water and prevent eventual circuit corrosion after the test, Rossmann immediately drenches the keyboard with high-percentage isopropyl alcohol, chasing the fluid through the bottom drainage channels, and blasts the key assembly dry with compressed air.

[29:51](https://www.youtube.com/watch?v=ig3xI8dUdm0&t=1791s) Post-Spill Alcohol Bath and Bottom Cover Removal

After intentionally pouring a massive amount of water directly onto the running laptop, Louis Rossmann resorted to an aggressive field-expedient decontamination procedure: submerging the upper casing into an entire bin of isopropyl alcohol to displace the water. He was careful not to submerge the LCD assembly, warning that getting alcohol into the backlight layers of a screen completely destroys it. As he sets the unit down on his workbench, the exterior still shows white residue stains left behind from the evaporating alcohol-and-water mixture. He begins disassembling the machine to see if his gamble paid off and whether the machine can be salvaged for daily editing work when he goes home.

Taking off the large bottom service panel initially proves frustrating until Louis realizes he left a fastener in place, roasting himself with: “It helps if you take off all the screws dumbass.” Once the final screw is undone, the hatch pops free easily, revealing a completely pristine compartment. To his relief, the bottom area—including the primary battery connector sitting directly adjacent to where liquid was coursing—is completely untouched by moisture, prompting him to marvel, “dry mofo dry.”

[31:07](https://www.youtube.com/watch?v=ig3xI8dUdm0&t=1867s) RAM Access and Chassis Drainage System

Looking directly into the bottom service bay, Louis inspects the memory configuration and chassis drainage paths. The ThinkPad P50 can hold a massive amount of system memory across four distinct SO-DIMM slots. Two of those slots are readily accessible right on the bottom door, housing two of the four sticks that make up this machine's 32 gigabytes of RAM. The remaining two slots reside on the opposite side of the motherboard beneath the keyboard.

```mermaid flowchart TD accTitle: ThinkPad P50 Spill Drainage Flow accDescr: Diagram showing how liquid entering the keyboard is channeled away from the motherboard and exited through chassis drainage ports.

subgraph Surface ["Top Surface Spill"] A["Liquid poured on keyboard"] end

subgraph Routing ["Internal Isolation & Routing"] B["Keyboard tray channel & drip holes"] C["Motherboard mylar shield tape"] A --> B B -.->|"Blocks seepage"| C end

subgraph Exit ["Chassis Exit"] D["Base drainage weep holes"] E["Liquid expelled onto desk"] B --> D D --> E end ```

Turning the chassis over, Louis points out Lenovo's dedicated liquid management design. Stamped directly into the bottom exterior casing are distinct water-droplet iconography indicators showing where the internal keyboard channels exit. Liquid that breaches the keyboard surface is routed along internal troughs and dropped straight out through these drainage ports without ever pooling on the electronic circuitry. Louis then begins backing out the designated keyboard retention screws, separating them from the varied chassis perimeter screws onto separate magnetic trays, complaining about laptops that use multiple fastener lengths in the same assembly: “Gotta love a laptop that use a bunch of screws of different sizes that's annoying as hell.”

[33:08](https://www.youtube.com/watch?v=ig3xI8dUdm0&t=1988s) Drive Bay Versatility: 2.5-Inch SATA vs. M.2 SSDs

Moving into the internal storage section, Louis exposes two versatile 2.5-inch drive bays that are not constrained by traditional hard drive caddy screws. These dual bays are multipurpose compartments that can accommodate either conventional 2.5-inch SATA solid-state drives or modern M.2 PCIe NVMe solid-state drives. On the exposed printed circuit board, Lenovo integrates both dedicated M.2 slots and proprietary SATA interposer ports side-by-side.

```mermaid flowchart LR accTitle: ThinkPad P50 Dual Storage Bay Architecture accDescr: Diagram illustrating how the dual storage bays can house either M.2 NVMe drives or 2.5-inch SATA drives via proprietary interposer cables.

subgraph Bay1 ["Drive Bay 1"] M2_1["M.2 Slot (Direct to PCB)"] SATA1["Proprietary Motherboard Connector"] --> C1["SATA Ribbon Cable"] --> D1["2.5-inch SATA Drive"] end

subgraph Bay2 ["Drive Bay 2"] M2_2["M.2 Slot (Direct to PCB)"] SATA2["Proprietary Motherboard Connector"] --> C2["SATA Ribbon Cable"] --> D2["2.5-inch SATA Drive"] end ```

Louis shares an essential purchasing strategy for anyone planning to configure or upgrade a ThinkPad P50: - **Buy configured with 2.5-inch drives first**: When the P50 is ordered from the factory with standard 2.5-inch SATA drives, Lenovo includes proprietary flexible ribbon cables (standard SATA power/data on one end, tiny bespoke motherboard header on the other) and custom rubber mounting bumpers. - **Why M.2 factory orders limit upgrades**: If you purchase the laptop configured solely with M.2 drives, Lenovo does *not* include these SATA cable assemblies or drive rails in the box, making it difficult and expensive to add 2.5-inch storage drives down the road. - **Maximum future flexibility**: “I actually bought my machine with two hard drives knowing I didn't want two hard drives rather than M.2 so that I could get these if I want to get M.2 later I can if I want to have an M.2 drive and also have a SATA drive I can so it expands your it expands the possibilities for the machine.”

[35:49](https://www.youtube.com/watch?v=ig3xI8dUdm0&t=2149s) Modular DC Power Jack Inspection

Louis removes the remaining bracket screws securing the drive bay perimeter and transitions toward the battery well to verify an important design detail he mentioned earlier in the review: the construction of the DC power jack. Tracing the path from the rear power receptacle inward, he shows that the charging port is completely modular. It connects to the motherboard via an isolated, thick wiring harness rather than being soldered directly into the multi-layer mainboard.

Because the jack floats independently within its own reinforced housing in the frame, mechanical stress caused by tripping over the charger cord, pulling the cord at an angle, or dropping the laptop on its charging edge is transferred into the chassis frame rather than cracking the motherboard traces or fracturing solder joints.

[37:05](https://www.youtube.com/watch?v=ig3xI8dUdm0&t=2225s) Keyboard and Palmrest Teardown

With the rear retention screws eliminated, Louis flips the machine onto its feet to extract the keyboard. Sliding the keyboard assembly forward toward the display unhooks its bottom retaining tabs, allowing the tray to be tilted up and out. As expected, a significant puddle of blended water and isopropyl alcohol sits trapped in the structural tray directly beneath the keys. Louis quickly dabs the surface dry with shop towels.

Underneath the keyboard tray, two flat printed ribbon cables interface the keyboard and TrackPoint assembly to the motherboard. Louis disconnects both cables, clears away the standing moisture, and begins working the palmrest assembly free. Removing the palmrest requires unsnapping high-tension internal plastic perimeter clips along the edges. The amount of force required makes him nervous: “This just snaps right in and snaps right out it's a little scary how much force you need to snap that out though.”

Underneath the palmrest, three auxiliary ribbon cables tether the chassis: - The integrated swipe fingerprint scanner cable. - The built-in X-Rite Pantone color calibrator sensor cable located near the palmrest. - A secondary palmrest sensor harness.

While detaching the delicate Pantone color sensor ribbon, the connector pulls out with abrupt force, leading Louis to drop a classic deadpan aside: “It's always important to pull out too soon rather than pull out too hard its timing is everything not force.”

[40:05](https://www.youtube.com/watch?v=ig3xI8dUdm0&t=2405s) Internal Roll Cage, Liquid Damage Assessment, and Ruined Speakers

With the palmrest removed, the ThinkPad P50's internal engineering is fully laid bare. Louis highlights the massive cast magnesium roll cage providing structural rigidity across the entire footprint of the chassis, protecting internal logic boards from torsional twist and catastrophic drop impacts. However, the liquid spill and subsequent alcohol flood did take one casualty: the speakers. Looking closely at the speaker housings, Louis observes that the delicate compliance surrounds around the speaker cones are completely dissolved and torn: “As you can see the surrounds from my speakers are pretty much fucked so I'm pretty sure that this is going to the speakers on this computer are going to sounds awful from here on in from the liquid.”

Aside from the sacrificed audio drivers, the motherboard itself survived unscathed: - The entire mainboard surface is sealed under thick, protective black Mylar tape that blankets vital surface-mount components. - Dedicated drainage channels routed under the keyboard guide spilled fluid directly toward chassis exit holes, preventing liquid from bridging board components. - The underside of the keyboard assembly itself features integrated drainage troughs aligned with pass-through channels in the mid-frame.

[41:25](https://www.youtube.com/watch?v=ig3xI8dUdm0&t=2485s) Hinge Construction and Display Assembly

Louis inspects the display assembly area and Wi-Fi antenna routing. Rather than taking the LCD panel completely apart—joking that while the audience might want to see it, he wants to go home and sleep at a reasonable hour—he cleans the screen area with Windex and examines the heavy-duty drop-down steel hinges. Because he subjects his personal laptop to heavy daily abuse, he takes the opportunity to snug down the structural hinge mounting bolts.

To demonstrate the structural integrity of the display mounts, Louis unscrews the main hinge anchoring screws from the base roll cage. Even with all the structural mounting screws removed, the hinge and screen assembly remain firmly held in the base chassis by interlocking steel grommets and frame tabs. He flexes the display back and forth without any play or slippage, contrasting it with budget consumer laptops: “You have to feel this material to feel that these are not the cheap crappy junk plastic you see in the low-end HPs and Toshibas this is all this is all really quiet quality stuff.”

[43:52](https://www.youtube.com/watch?v=ig3xI8dUdm0&t=2632s) Final Board Inspection and Wrap-Up

Finishing the inspection, Louis disconnects and examines the eDP display connector, pointing out that on Apple laptops, the high-voltage backlight pins on the LCD connector are the very first area to corrode, arc, and burn when subjected to liquid ingress, noting that his repair shop buys replacement MacBook LCD connectors “by a hundred load every week.” On the ThinkPad P50, the display connector and surrounding motherboard circuitry show zero visible corrosion, moisture intrusion, or burnt traces.

Delivering his final assessment on the P50's spill-resistant engineering, Louis concludes: “There is no corrosion on the board at all that's visible all the important stuff is completely covered and there is so much in terms of a drainage system to keep the important parts from getting ruined by liquid that I just have not seen on on any other brand laptops that many would be smart to emulate.” While the speakers will sound blown out, the machine survived a deluge of water during an active Prime95 stress test and an isopropyl alcohol bath, proving itself to be an exceptionally durable mobile workstation. Louis closes by inviting viewer feedback on what they would like to see covered in future laptop reviews.

## Notable quotes > [20:55](https://www.youtube.com/watch?v=ig3xI8dUdm0&t=1255s) I would happily pay an extra hundred dollars to not have this numpad here and to have the keyboard, the trackpad, and the trackpoint moved over to the center of the laptop where they belong. — Louis Rossmann

> [01:43](https://www.youtube.com/watch?v=ig3xI8dUdm0&t=103s) Regardless of how much pressure you put on this charging port and regardless of how much you're jiggling it back and forth you're never putting direct pressure on the motherboard which is an excellent design. — Louis Rossmann

## Mentioned Louis Rossmann, Lenovo, Lenovo ThinkPad P50, Lenovo ThinkPad P51, Lenovo ThinkPad P71, Lenovo ThinkPad T520, Lenovo ThinkPad W540, Apple, Retina MacBook Pro, Dell, Dell XPS 15, Intel Xeon, Nvidia Quadro, Prime95, FurMark, Sony Vegas Pro, Microsoft Windows 10, Microsoft Paint, Linux, Pantone, X-Rite, HP, Toshiba

## Video description Let's get Right to Repair passed! https://gofund.me/1cba2545 We repair Macbook logic boards: https://rossmanngroup.com/macbook-logic-board-repair 👉 DISCORD chat server: https://tinyurl.com/rossmatrix 👉 Lenovo Thinkpad P50: http://amzn.to/2hAUpzs ::: TIMESTAMPS BELOW! ✖ Build & Feel ● 0:43 - Thinkpad P50 stays in place. ● 1:13 - Retina MBP flaps around. ● 1:30 - Size comparison with Retina MBP. ● 1:43 - Ports. ● 2:18 - Charging port durability.

✖ Thermal Properties ● 6:09 - Idle palmrest, CPU, & GPU temperature. ● 7:50 - Prime95 small FFTs. Palmrest/CPU/GPU temps, clock speeds. Throttling? ● 9:00 - Prime95 small FFTs + Furmark. Palmrest/CPU/GPU temps, clock speeds. Throttling? ● 10:08 - Thermocouple on bottom of laptop. Prime95 small FFTs + Furmark. ● 10:45 - Thermocouple on side of laptop. Prime95 small FFTs + Furmark. ● 11:39 - DPA omni mic placed by laptop. Prime95 small FFTs + Furmark then idle. ● 12:15 - Sony Vegas Pro video encode. CPU/GPU temps, clock speeds. Throttling? ● 14:05 - Sony Vegas Pro video encode + Furmark. CPU/GPU temps, clock speeds. Throttling?

✖ Trackpad, Keyboard ● 15:25 - Trackpad palm rejection in Windows 10 when using trackpoint. ● 15:40 - Trackpad drawing in MS Paint. ● 16:05 - Multitouch gestures, scrolling, etc. ● 16:40 - Linux warning. ● 17:39 - Typing on the keyboard. How does it feel? Do I lose accuracy typing on a laptop? ● 18:20 - How to properly clean the non-backlit keyboard. ● 18:30 - Word on different keyboard materials - backlit vs. non-backlit & why I prefer non-backlit. ● 20:00 - Keyboard layout. ● 20:55 - NUMPAD RANT! PROTEST off-center keyboards on laptops.

✖ LCD screen ● 22:46 - LCD screen reflectivity, viewing angles. ● 23:43 - Screen color calibrator. ● 24:45 - LCD choices - no 4k touchscreen. Dell wins here. ● 26:42 - How bad does a fullpage schematic look in 1080p?

✖ Spill test ● 27:30 - Let's spill a bunch of water on a laptop running Prime95 stress test with small FFTs! ● 28:45 - Louis cheats and keeps water that splashed from pouring it too high from getting into LCD(hey, I aint techrax - I gotta USE this to edit the video!) ● 29:20 - A few minutes go by, we let the water soak into the keyboard ● 29:25 - Typing on the keyboard after liquid soaked in.

✖ Teardown ● 31:07 - First two RAM slots. ● 33:08 - Storage bays. ● 33:29 - IMPORTANT considerations/planning on M.2 vs. SATA before buying. ● 35:49 - Discrete power jack separate from motherboard. ● 37:05 - Keyboard removal. ● 38:00 - Palmrest removal. ● 40:05 - LOOK AT THAT ROLLCAGE! :) ● 40:15 - Speakers obliterated by water spill + alcohol spill to remove water. :( Louis will be enjoying a much more quiet P50. ● 41:25 - LCD assembly area. ● 42:06 - Hinge attachment - AMAZING! This base is NOT going to crack away & fall apart like the other low end shit.

FIND BELOW the tools we use, board repair help forum, tutoring & repair services, and parts sites. ✖ TOOLS SUGGESTED: ● Soldering Iron: http://amzn.to/2cKkMyO ● Preferred tip: Fine: http://amzn.to/2d5MgPn Flat: http://amzn.to/2xgrx6a GPU wicking: http://amzn.to/2w8chtB ● Micro Soldering Pencil: http://amzn.to/2d5MWUP ● Micro soldering tip: http://amzn.to/2qUSFDh ● Quick 861DW hot air station(UNDER $300): http://bit.ly/quick861dw ● Microscope & LED light: http://amzn.to/2iLrE16 http://amzn.to/2nzfPT2 ● CHEAP Microscope: http://amzn.to/2rTlHbj ● Flux: http://bit.ly/2cYIx7t ● Solder paste: http://bit.ly/2epK1JE ● Tweezers: http://amzn.to/2d5NBpi ● On-Screen multimeter: http://amzn.to/2jtgY9K Setup guide: http://bit.ly/2pMarYQ Probes: https://store.rossmanngroup.com/multimeter-fine-probes.html ● Fume Extractor: http://amzn.to/2d5MGoD ● Solder: http://amzn.to/2cKkxUp ● Desoldering wick/braid: http://ebay.to/2gfKqC1 --- JESSA JONES' FAVORITE WICK! ● Crest CP500D Ultrasonic cleaner: http://bit.ly/2pnKL5h ● Branson EC cleaning fluid: http://amzn.to/2cKlBrp ● Jumper wire THIN: http://amzn.to/2eqF5T7 THICK: http://amzn.to/2eAJ5AU ● Nitrile gloves: http://amzn.to/2iUfumS ● CHAIR: http://amzn.to/2vu8Mvy ● On-screen Bench PSU: http://amzn.to/2i0G8MI

✖ Rossmann Repair Group Inc is a participant in the Amazon Services LLC Associates Program, an affiliate advertising program designed to provide a means for sites to earn advertising fees by advertising and linking to amazon.com

✖ Repair Service: ▶ Local to NYC? Our store offers free estimates on all Macbook problems. http://bit.ly/RossmannLocalBoardRepair ▶ Outside New York? We provide service to the entire U.S. via mail-in service! http://bit.ly/RossmannMailInRepair

⊙ Check out the forum where we answer Macbook logic board repair questions for $29/mo. http://bit.ly/2nX8rMC

✖ RECORDING EQUIPMENT: ● Work camera: https://amzn.to/2QjHnt0 ● Home camera: http://amzn.to/2eAH0oT ● Work microphone: http://amzn.to/2e74PVF ● Home microphone: https://amzn.to/2xfampC ● Microscope camera: http://amzn.to/2icVQoG - mine is DISCONTINUED, this is the closest one I can find. ● HDMI capture: http://amzn.to/2iyGcle

[Source](https://www.youtube.com/watch?v=ig3xI8dUdm0)

中文简报

拆解显示联想ThinkPad P50在满载泼水测试中幸存 机身内部排水通道与Mylar保护遮罩可防止在开机泼水时发生主板故障,展现了相比脆弱消费级笔记本的耐用性优势,尽管测试损坏了扬声器边缘悬边。 Louis Rossmann对联想ThinkPad P50移动工作站进行了评估,考察了其机身刚性、模块化直流电源插孔,以及在Prime95和FurMark综合压力测试下的散热表现。在称赞该机的散热管理、接口种类和带纹理的无背光键盘的同时,他也指出了数字小键盘导致打字位置偏离中心,以及缺少4K触控屏选项的不足。为了验证联想的防泼溅宣传,Rossmann在CPU满载状态下将水倒在键盘上,随后用异丙醇冲洗机身并进行了拆解。内部检查显示,排水通道和Mylar保护层成功使主板保持干燥且功能完全正常,唯一的损坏仅是扬声器悬边破损。 ThinkPad P50在运行Prime95 Small FFT满载测试时,经受住了直接浇在键盘上的半瓶水,由于内部导流槽和底部排水孔的作用,机器未发生短路并继续正常运行。 (27:24) P50的散热方案使掌托表面温度在CPU与GPU持续最大工作负荷下,与待机状态相比仅相差1°C至3°C,从而在实际运行3.3 GHz的Sony Vegas视频编码时避免了因过热而降频。 (5:57) 专用的矩形充电接口通过安装在加固机身支架中并采用柔性飞线连接,与主板实现物理分离,消除了直接焊接式直流插孔常见的焊点断裂问题。 (1:43) 出厂选配2.5英寸SATA硬盘的P50会附带专用排线和橡胶减震垫,而仅配M.2的配置则省去了这些配件,因此选配前者可最大程度保留未来升级副存储的可能。 (33:08)

Detailed notes — zh

## Background 该视频由主板维修专家 Louis Rossmann 于 2017 年 6 月 23 日发布在 YouTube 频道上。简介指出本期内容为联想 ThinkPad P50 移动工作站的全面评测与极限防泼溅损坏测试,并提供了涵盖做工、散热、键盘、屏幕、泼水及拆解等环节的完整时间戳。 ## TL;DR Louis Rossmann 深入评估了上一代移动工作站 ThinkPad P50 的做工、散热模组、磨砂键盘及接口布局,盛赞其坚固机身与分体式缓冲充电口设计,但对缺乏 4K 触控屏选项以及反人类的非居中小键盘提出了严厉批评。在 Prime95 高压烤机期间,他现场将大半瓶水直接倒在通电键盘上,随后整机与小红帽奇迹般正常工作,未产生任何短路。通过随后的真机拆解,他展示了机身坚固的金属防滚架、极其严密的内部导水槽和屏幕铰链用料,证明了 ThinkPad 相比竞品在抗液体腐蚀和机械耐用性上的压倒性工程优势。 ## Atmosphere & style 视频风格硬核、接地气且充满主观张力,Louis 以标志性的快节奏脱口秀语调将专业硬件知识与辛辣讽刺融为一体,频繁拿 MacBook 的散热缺陷和易损排线开涮。实测过程紧张刺激,尤其是在通电满载下将整瓶水泼向键盘的瞬间,主播既忐忑心疼又兴奋狂躁的情绪极具戏剧张力。随后的拆解环节则迅速回归冷静严谨的工匠视角,通过对细微机械结构和电路防护的剖析,为观众带来酣畅淋漓又极具说服力的极客体验。 ## Bulletin - [09:30](https://www.youtube.com/watch?v=ig3xI8dUdm0&t=570s) Lenovo ThinkPad P50 在极端散热测试中表现出色,在 Prime95 与 FurMark 双烤测试下,机身底部中央温度仅约 33.5°C,掌托几乎不发烫,展现了强大的内部风道隔热效能。 - [27:24](https://www.youtube.com/watch?v=ig3xI8dUdm0&t=1644s) 带电泼水极限测试中,向运行 Prime95 的 P50 键盘泼倒大半瓶水后系统依然稳定运行,键盘各按键及指点杆功能无损,内部排水孔设计与金属防滚架有效保护了主板PCB。 - [01:40](https://www.youtube.com/watch?v=ig3xI8dUdm0&t=100s) 机身电源接口采用与主板分离的柔性飞线转接设计,避免外力插拔和意外拉扯直接损坏主板焊点,极大提升了长期耐用度。 - [33:24](https://www.youtube.com/watch?v=ig3xI8dUdm0&t=2004s) 存储扩展方面,推荐购买出厂搭载 2.5 英寸硬盘的版本,以获取原厂标配的专用转接排线和托架,方便后续低成本加装 M.2 固态硬盘。 ## Key takeaways - [00:00](https://www.youtube.com/watch?v=ig3xI8dUdm0&t=0s) ThinkPad P50 凭借沉稳的机身配重与坚固铰链,开合推拉屏幕时底座完全不离桌,稳固度远胜同年代的 MacBook Pro。 - [01:40](https://www.youtube.com/watch?v=ig3xI8dUdm0&t=100s) 电源 DC 接口固定在机壳缓冲结构上并通过独立飞线连接主板,杜绝了接口焊接在主板上导致的疲劳断裂风险。 - [01:40](https://www.youtube.com/watch?v=ig3xI8dUdm0&t=100s) 雷电 3 接口不支持通过 USB PD 供电输入,在轻便充电机动性上落后于同期的戴尔 XPS 系列。 - [09:30](https://www.youtube.com/watch?v=ig3xI8dUdm0&t=570s) 出风口设计充沛且远离机身核心区域,双烤时排出气流高达 50°C-52.5°C,但掌托和底部中间区域依然保持清凉。 - [11:39](https://www.youtube.com/watch?v=ig3xI8dUdm0&t=699s) 在真实的 Sony Vegas 视频渲染叠加后台 98% GPU 满载实测中,Xeon CPU 能够持续稳定跑在 3.3 GHz 睿频且不发生降频。 - [14:27](https://www.youtube.com/watch?v=ig3xI8dUdm0&t=867s) Windows 10 环境下触控板的大面积防误触算法表现优异,但在 Linux 系统下防误触极差,建议 Linux 用户禁用触控板仅使用小红帽。 - [17:04](https://www.youtube.com/watch?v=ig3xI8dUdm0&t=1024s) 非背光键盘采用微弧面砂砾磨砂质感键帽,比光滑的背光版本更抗油污,但需使用专业无尘布擦拭以防卡入纸屑纤维。 - [20:55](https://www.youtube.com/watch?v=ig3xI8dUdm0&t=1255s) 数字小键盘强行塞入导致主打字区、指点杆及触控板整体向左偏心,严重破坏在腿上使用时的人体工学平衡。 - [22:40](https://www.youtube.com/watch?v=ig3xI8dUdm0&t=1360s) 雾面 IPS 屏幕具备出色的抗眩光与广视角表现,且掌托内置 Pantone 色彩校准仪,可合盖自动生成精准校色文件。 - [24:38](https://www.youtube.com/watch?v=ig3xI8dUdm0&t=1478s) 缺少 4K 触控屏选配是查看密集电路原理图的一大痛点,1080p 难以看清细小元器件,且触控板手势缩放体验依然逊色于苹果。 - [28:44](https://www.youtube.com/watch?v=ig3xI8dUdm0&t=1724s) 在 Prime95 满载通电状态下向键盘泼水,整机依靠键盘托盘和底部导水孔顺利排水,所有按键与状态指示灯均未短路损坏。 - [33:24](https://www.youtube.com/watch?v=ig3xI8dUdm0&t=2004s) 出厂仅配 M.2 硬盘的版本不会附带 2.5 英寸专属托架和 SATA 转接排线,建议优先选购带 2.5 寸硬盘版本以保留后期双盘升级灵活性。 - [41:00](https://www.youtube.com/watch?v=ig3xI8dUdm0&t=2460s) 拆解证实机身内部金属防滚架与绝缘防水保护层设计优异,虽然外放扬声器因进水浸泡报废,但主板芯片与屏幕排线接口完全未受电腐蚀侵害。 ## Detailed walkthrough ### [00:00](https://www.youtube.com/watch?v=ig3xI8dUdm0&t=0s) Lenovo ThinkPad P50 的定位与做工对比 Louis Rossmann 带来了 Lenovo ThinkPad P50 的全面评测。这是一款工作站级别的笔记本电脑,设计初衷是提供极致的耐用性与强劲性能。尽管该机器上市已有一年,但随着后续机型 Lenovo ThinkPad P51 和 P71 的推出,P50 的价格大幅回落,形成了极具性价比的二手或库存优势。在 Louis 看来,新一代机型并未带来足以让人支付高额溢价的革命性功能,因此主打扎实耐用的上一代 P50 仍然是非常划算的选择。 ```mermaid flowchart TD accTitle: ThinkPad P50 与 MacBook Pro Retina 机身特性对比 accDescr: 对比 ThinkPad P50 稳固机身与充足散热孔,与 MacBook Pro 轻薄但容易翘起晃动且散热受限的差异。 subgraph P50["Lenovo ThinkPad P50"] P_Weight["略重约 1 磅,厚度较大"] P_Base["底座稳固,快速推拉屏幕完全不离桌"] P_Thermal["侧边/背面/底部大面积粗壮通风口"] end subgraph MBP["MacBook Pro Retina (同年代)"] M_Weight["厚度较薄,轻约 1 磅"] M_Base["开盖或推拉屏幕时底座离桌晃动"] M_Thermal["通风口狭窄细弱,远离风扇"] end P_Weight --> P_Base MBP_Weight --> M_Base ``` 开箱使用时,最直观的体验来自机身转轴与配重的稳定性。无论 Louis 多么剧烈、快速地前后扳动屏幕,ThinkPad P50 的底座始终牢牢贴在桌面上,纹丝不动。作为对比,同年代的 15 英寸 Retina 显示屏 MacBook Pro 尽管比 ThinkPad 轻了大约 1 磅(约 450 克)且厚度明显更薄,但只要打开屏幕,底座就会被带着翘离桌面并发出碰桌声;即便动作放缓,翘起的缝隙也足以塞进一根小拇指。Louis 坦承苹果在轻薄方面确实占优,但他更看重长久使用的结构强度与散热设计,直言:“I like my build quality and since I care about my machine not dying from thermal stress in a few years, I also like my vents.”(我喜欢扎实的做工,既然我希望机器几年内不会因为热应力损坏而暴毙,我也同样喜欢充沛的散热风口。) - 机型定位:ThinkPad P50 为 15.6 英寸专业移动工作站,承袭 ThinkPad 经典防摔抗震设计。 - 重量与便携性对比:Retina MacBook Pro 较 ThinkPad P50 轻约 1 磅,机身也更为纤薄,但在单手开合与机身稳固度上不及 P50。 ### [01:40](https://www.youtube.com/watch?v=ig3xI8dUdm0&t=100s) 机身接口配置与充电口防损设计 谈及接口布局,Louis 对 ThinkPad P50 保留全套专业接口的设计赞赏有加,尤其是它直接配备了全尺寸 SD 卡槽。在新款 MacBook 砍掉 SD 卡槽迫使用户随身携带转接头的时代,ThinkPad 这种插卡即用的便利性对内容创作者极为友好。机身侧面还保留了一个带防尘盖的 ExpressCard 插槽,虽然日常很少有人用到,但依然作为扩展选项被保留了下来。 在充电接口的工程设计上,ThinkPad P50 展现了与普通笔记本截然不同的耐用考量。绝大多数消费级笔记本将充电 DC 接口直接焊接在主板上,频繁插拔会导致焊点承受机械应力,久而久之发生疲劳开裂,最终出现必须晃动充电线才能通电、甚至彻底断电的问题。ThinkPad P50 则是将充电母座固定在具有一定形变容忍度(Flex)的机壳结构件中,再通过一根柔性线束连接至主板。无论外界插头如何剧烈晃动或受力,机械压力都由外壳承担,丝毫不会传导给主板焊点,Louis 盛赞这是一种极具前瞻性的优秀设计。 ```mermaid flowchart LR accTitle: ThinkPad P50 充电口结构受力保护流程 accDescr: 解释分离式线束 DC 接口如何吸收外力,避免直接损坏主板焊点。 subgraph Traditional["普通笔记本直焊方案"] T1["外力摇晃插头"] --> T2["主板锡点直接受力"] T2 --> T3["锡点开裂 / 接触不良 / 主板损坏"] end subgraph ThinkPad["ThinkPad P50 分体缓冲方案"] P1["外力摇晃插头"] --> P2["弹性缓冲机壳吸收应力"] P2 --> P3["内部柔性线束转接"] P3 --> P4["主板零机械受力,安全无损"] end ``` 机器后侧与两侧的接口极其丰富,但也并非毫无瑕疵: - 全尺寸 HDMI 接口:无需任何转接头即可外接主流显示器与投影仪。 - USB-C / Thunderbolt 3 接口:支持高带宽扩展,甚至能外接四路 HDMI 采集卡将笔记本作为主力桌面工作站使用;然而该端口不支持 USB PD 供电输入。Louis 提到同事 Jason 使用的 Dell XPS 9500 系列即便插上 MacBook 充电器也能在轻负载(如刷 Reddit)时维持电量,而 P50 即使在屏幕调暗、独显关闭、待机空载时插入 Type-C 充电头也完全不识别,在这点上联想落后于戴尔。 - 全尺寸 RJ-45 千兆以太网口:避免了轻薄化机型为省空间而砍掉网口的通病。 - 4 个 USB 3.0(Type-A)接口:其中一个黄色接口支持关机对外充电功能。 - Mini DisplayPort 接口(槽点):Louis 对采用 Mini DP 感到不满,因为目前大部分专业显示器标配标准全尺寸 DisplayPort 线缆,这迫使他依然要随身携带转接线。他对比了同门的 ThinkPad T520,指出 P50 庞大的机身完全有充裕空间容纳标准 DP 接口。 - 散热风道布局:背面布置了两个巨大的主散热鳍片排风口,机身左右侧面均有格栅开孔,机身底部更是布满了密集的进气通风孔。Louis 借此讥讽 MacBook 细小且远离风扇的出风口设计,直言这就是为什么苹果电脑“每隔一年就会因为 GPU 虚焊烧毁而发起召回”。 ### [06:05](https://www.youtube.com/watch?v=ig3xI8dUdm0&t=365s) 待机与 Prime95 高压负载下的散热及掌托温控 进入温度实测环节,Louis 将机器的电源计划设定在“高性能”,使用 Intel Power Gadget 监测 CPU 频率与功耗,并使用热电偶温度探头实时读取键盘与掌托接缝处的表面温度。 待机状态下,室内环境温度较为凉爽,掌托表面的热电偶读数为 30°C 左右。此时 CPU 各核心温度在 44°C 至 54°C 之间跳动,比环境室温高出约 15°C 到 20°C。即便 Louis 拿出一支 DPA 全向微型麦克风直接贴在出风口和风扇旁收音,风扇噪声也极其微弱,整机在待机时非常安静。 随后,测试进入严苛的 Prime95 Small FFTs 纯 CPU 拷机测试: - 掌托表面温升:在经过长达 10 分钟的连续高压运算后,掌托接缝处的表面温度仅从 30°C 上升了 1°C,达到 31°C。Louis 感叹很多机器在重负载下掌托发烫导致手掌出汗,而 P50 这种近乎无感的表面温升带来了极其舒适奢华的使用手感,长久渲染视频也无需担心手汗问题。 - CPU 核心温度与频率:在 Prime95 Small FFTs 的严苛压榨下,CPU 最热的核心最高达到 85°C 左右,偶尔瞬间跳动至 87°C,部分较冷核心仍在 70°C 中段;CPU 全核封装频率稳定运行在 3.1 GHz,没有出现剧烈的过热降频现象。 ### [08:40](https://www.youtube.com/watch?v=ig3xI8dUdm0&t=520s) Prime95 + FurMark 双烤测试表现 为了验证以往 ThinkPad W540 在 CPU 和 GPU 同时满载时会发生严重降频(Throttling)的缺陷是否在 P50 上重演,Louis 在后台保持 Prime95 拷机的同时,打开了 FurMark(甜甜圈)图形拷机测试,设置 8x 抗锯齿进行高压渲染。 在经历约 15 分钟 CPU 极限负载、其中后 5 分钟叠加 GPU 全开的双重拷机后,掌托位置的热电偶传感器累计温升仅约 3°C。与此同时,CPU 核心温度最终触碰到了 90°C 的极限天花板,但整体发热仍被稳稳压制在散热模组的能力范围内,展示了这台厚重工作站强悍的风道效能。 ### [09:30](https://www.youtube.com/watch?v=ig3xI8dUdm0&t=570s) 双烤极限负载下的散热表现与温度测量 在 CPU 与 GPU 共享散热模组的高压测试中,GPU(FurMark 甜甜圈)处于约 97% 的极高负载,其核心温度最终稳定在 74°C。相比市面上动辄飙升至 85°C 甚至 90°C 的其他笔电,GPU 能够压制在 90°C 以下让人非常欣慰。此时,CPU 面对 Prime95 小 FFT 和 GPU 双烤的极端压力出现了降频,频率自动限制在 2.0 GHz(若单开 Prime95 配合甜甜圈则维持在 2.8 GHz 左右)。随后,Louis 拿起热电偶探头测量机身底部的实际触感温度,读数显示为 33.5°C——这一数值甚至比机身 C 面(掌托)的温度还要低,证明笔记本底部中间区域整体非常凉爽,完全没有想象中烫手的感觉。 ```mermaid flowchart TD accTitle: ThinkPad P50 热量流向与机身温度分布 accDescr: 展示双烤测试下机身各部位的散热路径与温度表现 subgraph 内部核心负载 CPU["CPU 满载 (降频至 2.0-2.8 GHz)"] GPU["GPU 97% 满载 (稳定 74°C)"] HS["共享散热模组"] CPU --> HS GPU --> HS end subgraph 外部机身触感 Bottom["机身底部: 约 33.5°C (清凉舒适)"] Palm["C面掌托: 触感温和"] Vents["侧边散热出风口: 50°C - 52.5°C (滚烫热风)"] HS -->|风道隔离| Bottom HS -->|风道隔离| Palm HS -->|风扇强力排出| Vents end ``` 然而机身的设计特性决定了热量必须有出口。Louis 将探头移至出风口旁,仅过了几分钟,测温探头的读数就急剧飙升,最终在 50°C 至 52.5°C 之间徘徊。出风口吹出的空气滚烫且灼手,这说明 ThinkPad P50 并不是把热量积攒在体内,而是极为高效地将热量导向机身侧面与后方排出。Louis 强调,使用这台机器必须改掉过去把笔记本夹在两腿之间的坏习惯;但如果只是规矩地平放在大腿上方使用,由于底壳被隔绝得很好,并不会像那些底盘滚烫的机器一样让人痛苦不堪。 - GPU 在 97% 高负荷下稳定在 74°C,未突破 90°C 警戒线。 - Prime95 + FurMark 极限双烤时,CPU 频率被限制在 2.0 GHz 至 2.8 GHz。 - 机身底部中央实测温度仅 33.5°C,隔热效果显著。 - 侧边出风口排出气流温度达到 50°C 至 52.5°C,属于明显的排热集中区。 --- ### [11:39](https://www.youtube.com/watch?v=ig3xI8dUdm0&t=699s) 满载风扇噪音与真实生产力(Vegas 视频渲染)测试 为了客观展示散热风扇的声音,Louis 拿出了一只 DPA 全向型麦克风,先从较远处收音,接着直接贴在机身左侧与右侧掌托边缘,记录满载状态下的风扇轰鸣。随后他关闭了所有压榨 CPU 和 GPU 的压力测试软件,风扇转速在极短时间内迅速回落。当负载卸下后,风扇静音到几乎无法察觉,隔壁房间空气净化器的噪音甚至盖过了笔记本本身的运转声。 Louis 随即指出,Prime95 并不是正常人使用电脑的方式:“我们买一台 1200 美元的工作站,不是为了去寻找最大的质数——至少我们大多数人不是这样,我们是为了做视频编码、音频编码这类事情。”他打开了 Sony Vegas Pro 进行视频渲染实测。在真实渲染流程中,CPU 占用率在 90% 到 100% 之间波动,但此时的风扇噪音明显比跑 Prime95 时柔和很多。更重要的是,即使持续渲染,CPU 的主频也稳稳地维持在 3.3 GHz 的高位,完全不发生降频。 由于他使用的 Vegas 版本并不擅长调用 GPU 参与渲染,为了模拟极致生产力环境,Louis 在后台叠加开启了强力 GPU 压力测试,让 GPU 核心占用率维持在 81% 到 100%(平均 98%–99%)。令人惊喜的是,即便在 CPU 视频渲染与 GPU 满载双重夹击下,原本基准频率 2.8 GHz 的 Xeon 处理器依然能够从容稳定在 3.3 GHz。对于专业创作者而言,这证明在所有合理的现实工作流中,P50 的性能输出绝对充沛且不妥协。 - 双烤停止后风扇迅速降速,闲置状态噪音低于隔壁房间的空气净化器。 - Sony Vegas Pro 视频编码实测中,CPU 占用率 90%–100%,风扇比压力测试时更安静。 - 视频渲染叠加后台 98%–99% GPU 压力测试时,2.8 GHz Xeon CPU 依然稳定跑在 3.3 GHz。 --- ### [14:27](https://www.youtube.com/watch?v=ig3xI8dUdm0&t=867s) 触摸板大改动、防误触测试与 Linux 用户的严重警告 ThinkPad P50 的触控板面积较 2011、2012 年的老款机型大幅增加。对于经常使用小红帽(TrackPoint)的用户来说,变大的触摸板带来了一个潜在痛点:右手大拇指和手掌根部会不可避免地直接搭在触控板上。为了检验 Windows 10 下的防误触(Palm Rejection)算法,Louis 打开画图软件(MS Paint),一边故意将手掌重重贴在触控板上不停摩擦干扰,一边用小红帽在屏幕上书写自己的名字“Louis”。结果测试非常顺利,画笔没有因为手掌的晃动而产生断触或乱跳。 随后他尝试直接用触摸板写字,自嘲现实中的字迹本来就很难看,而且自己平时从不用触摸板,但测试结果证明 P50 在 Windows 系统下的多指手势、三指操作、双指缩放以及触摸板手感都极其出色。硬件上不仅保留了配合小红帽的三键(包含中键滚动),在触摸板下方同样配有实体按键,翻页与滚动手感无可挑剔。 然而,对于开源系统用户,Louis 毫不留情地给出了极为严肃的警告:“如果你用 Linux,我现在就警告你,触摸板的防误触检测简直就是彻头彻尾的垃圾(complete and utter crap)。”他奉劝 Linux 用户要么在小红帽和触摸板之间二选一,如果习惯使用小红帽,务必在系统里彻底禁用触摸板;如果非要在 Linux 下同时开启两者,手掌误触会带来毁灭性的操作体验。 - Windows 10 下手掌大面积贴合滑动时,小红帽绘图与光标控制完全不受干扰。 - 触摸板支持多点触控与三指手势,上方与下方均保留了带实体中键的按键组。 - 操作系统体验差异巨大:Windows 驱动调校优秀,而 Linux 下的触摸板防误触算法极差,建议 Linux 用户直接在设置中停用触摸板。 --- ### [17:04](https://www.youtube.com/watch?v=ig3xI8dUdm0&t=1024s) 弧形键帽、打字体验与非背光版“磨砂键盘”的玄学细节 谈到 P50 的键盘,虽然布局相比经典的 T520 七行键盘有所变动,但键帽本身的做工让 Louis 赞叹不已。键帽表面带有细微的下凹弧度,打字时手指就像是被按键自然包裹住一样,比纯平键帽舒服得多。Louis 在屏幕上打开 Notepad++ 进行现场打字测试,自嘲自己虽然不会标准五指盲打、只能用两根食指“戳键盘”,但在 P50 上的输入准确度却达到了前所未有的高度。 更关键的细节在于键盘材质。Louis 特别说明,他这台机器选配的是**非背光键盘**,按键表面带有非常独特的砂砾感/磨砂质感(gravelly texture),与掌托处的外壳触感融为一体。而背光键盘版本则采用了平滑涂层,没有这种颗粒质感。这种磨砂键盘的最大优势是抗油污能力极强:长期在户外工作或无法频繁洗手时,普通光滑键帽很快就会吸附汗液油脂变得油光发亮且黏手,而这种砂砾涂层则能长时间保持清爽,提升了整机的耐用度与“高级感”。 针对这种磨砂键帽的打理,Louis 详细传授了清洁诀窍:千万不能拿普通厨房纸巾或家用纸巾擦拭,因为粗糙的纸屑纤维会被卡进键帽微小的颗粒缝隙中,导致键盘变得更脏、手感彻底报废。正确的做法是在 eBay 上花大约 15 美元购买一大包(约 1000 张)工业无尘擦拭布(cleanroom wipers),配合适量清洁剂轻轻擦拭,才能既清除污渍又不破坏微颗粒涂层。 - 键帽采用微弧面设计,贴合指尖,显著提升击键稳定性与准确率。 - 只有非背光键盘(Non-backlit)才具备粗糙的砂砾/磨砂质感,背光版本为平滑键帽。 - 砂砾质感有效阻止指纹、手汗和皮肤油脂在按键表面聚集发亮。 - 清洁保养警告:禁止使用会掉屑的普通纸巾,推荐使用工业无尘擦拭布进行清洁。 ### [19:52](https://www.youtube.com/watch?v=ig3xI8dUdm0&t=1192s) 键盘布局与按键设计的优缺点 Louis Rossmann 在谈到键盘清洁时指出,普通表面没有磨砂颗粒感的键盘几乎拿什么布都能擦,但 ThinkPad P50 这种带细微颗粒触感的非背光键盘,最好使用无尘布(cleanroom wiper)来擦拭。谈及整体按键布局,他表示虽然目前的布局还算不错,但他依然更怀念老款 ThinkPad 的经典布局:过去的 Page Up 和 Page Down 位于更上方,而 Home、End、Delete 以及 Backspace 的排列更贴近标准台式机键盘。尽管目前的方案不如老款贴心,但比起市面上许多现代笔记本电脑那堪称“灾难”的键盘排布,ThinkPad P50 依然要强得多。 对于日常实用性,Louis 特别赞赏了该机保留了独立的 Delete 和 Backspace 键。他吐槽在 Mac 上执行删除操作非常折磨人:“something that's always driven me nuts on a Mac is you know if you want delete you have to FN backspace I mean I use delete all the time having that as two separate keys as I mean having two keys to do one when it's a key as useful and that uses commonly as delete is incredibly aggravating”。另外,他也肯定了该机拥有实体独立音量控制键的设计;在以往的 13 英寸机型中,独立音量键曾被砍掉并合并到功能键(Fn)中,而 P50 则在数字小键盘上方保留了专属的音量键。 - **按键布局对比**:老款键盘将 Home、End、Page Up、Page Down 置于接近台式机的位置,操作直觉更强;P50 虽有妥协,但强于大多数竞品。 - **Mac 键位槽点**:Mac 缺少独立的向前删除键,必须按 `Fn + Backspace` 组合键,在高频文本编辑中极其繁琐。 - **独立功能控制**:音量控制无需按住 Fn 键切换,直接在数字小键盘上方配备了独立物理按键。 --- ### [20:55](https://www.youtube.com/watch?v=ig3xI8dUdm0&t=1255s) 痛批数字小键盘:笔记本键盘“偏心”反人类 Louis 随即对笔记本电脑上搭载数字小键盘(Numpad)的做法展开了长篇激烈抨击。他认为数字小键盘在台式机上完全合理,但在笔记本上纯属多余且带来灾难性的人体工学体验。当用户把笔记本放在大腿上使用时,机器通常居中平放在双腿之间;由于右侧塞入了数字小键盘,主打字区、触摸板以及指点杆(TrackPoint)全部被强行挤到了机身偏左侧。这导致用户要么必须别扭地向左侧倾斜身体来打字,要么必须把整台电脑往右挪,破坏机身在大腿上的平衡。 为了证明自己的观点,Louis 在镜头前亲自演示了把 P50 放在腿上打字的姿态。他强调自己哪怕只往左偏一点都觉得难受,这种体验极其愚蠢。他反驳了“做成大一统规格”的借口,并拿出联想丰富的产品线作对比:“Lenovo has the X series and the T series and the P series and the W series and the L series and the Yoga and the... you have so many different machines... yet you get on the workstation one which is the most expensive you can't even give me an option to get rid of the numpad I would happily pay an extra hundred dollars to not have this numpad here and to have the keyboard the trackpad and the track point moved over to the center of the laptop where they belong”。他认为需要小键盘的人去买带小键盘的版本即可,但作为旗舰工作站,联想至少应该给专业用户提供无小键盘、键盘完全居中的选配方案。 ```mermaid flowchart TD accTitle: 笔记本小键盘导致的人体工学失衡问题 accDescr: 展示加入小键盘后如何导致主键盘区及操作构件偏左,进而引发使用姿势不良。 A["笔记本机身居中置于双腿"] --> B["右侧强行塞入数字小键盘 (Numpad)"] B --> C["主键盘区、触控板、TrackPoint 整体向左偏移"] C --> D{"用户妥协方案"} D -->|"方案一"| E["身体长期向左倾斜扭曲打字(疲劳不适)"] D -->|"方案二"| F["电脑向右歪斜摆放(失去物理重心平衡)"] ``` --- ### [22:40](https://www.youtube.com/watch?v=ig3xI8dUdm0&t=1360s) 雾面 IPS 屏幕、抗眩光与内置校色仪 讨论转向显示屏,Louis 将屏幕亮度调至约 50%,并调出 Nina Badrić 的壁纸来测试可视角度与抗反光能力。他的维修工作室顶部安装了大量的 LED 灯和 T8 日光灯管,光照环境非常刺眼。实测显示,这块 1080p 雾面 IPS 屏幕表现优异,在从极端倾斜的角度观看时,壁纸色彩依旧清晰无失真;更重要的是,雾面处理彻底驱逐了头顶灯管的刺眼倒影,Louis 直言它在抗眩光方面干脆利落地“让顶灯彻底滚蛋(gtfo)”,把亮度推满后抗反光表现更加出色。 除了防眩光,P50 掌托处还整合了一套内置的 Pantone 色彩校正仪(Color by Pantone)。配套软件在运行时会提示合上笔记本屏幕,系统会在屏幕上轮流投射不同的色彩块,内置传感器读取屏幕发出的色彩并自动生成校色配置文件。Louis 对这一配置赞不绝口,指出即便利率不如几千美元的专业顶级监视器,但能在移动工作站上随时随地获得精准色彩,对做视频调色或印前处理的半专业用户而言是巨大的竞争优势。他强调:“I've honestly never seen this built into a laptop before so I'm very impressed with it... you're probably not going to like a lot of what things look like but you'll be able to make decisions based on reality rather than a lie that what your screen is telling you”。 - **防眩光表现**:在密集高亮 T8 灯管环境下,雾面 IPS 涂层有效消除镜面反射。 - **超宽视角**:从极端侧面角度观看,壁纸画面的细节和色彩依然保持高辨识度。 - **Pantone 硬件校色**:合盖即可利用掌托传感器自动校准屏幕色温与白平衡,告别虚假偏色。 --- ### [24:38](https://www.youtube.com/watch?v=ig3xI8dUdm0&t=1478s) 缺失 4K 触控屏的硬伤与图纸查看痛点 在肯定屏幕之余,Louis 提出了对该机屏幕最强烈的抱怨:没有提供“4K 触控屏”的组合配置。他声明这绝不是追求噱头,而是源于最真实的工作痛点——他在主板维修中每天需要长时间查看高密度的复杂电路原理图(schematic)。他在屏幕上展示了 ISL6259/U7000 电源管理芯片周围的整页电路,在 1080p 分辨率下,整页缩放下文字极其模糊,若要辨认一个 4.7 欧姆的电阻(R7001)或确认元器件是 0603 还是 0402 封装,眼睛几乎要看瞎。 ```mermaid flowchart LR accTitle: 电路原理图阅读需求与屏幕规格矛盾 accDescr: 对比全页查看与局部细节放大,说明为何需要4K与触控屏结合。 subgraph Problem["1080p 分辨率痛点"] P1["全局查看电路图"] --> P2["文字/引脚糊成一团<br/>极度伤眼"] P3["触控板双指缩放"] --> P4["误触率高,偶尔识别为鼠标向上移动"] end subgraph Solution["理想工作流:4K + 触控"] S1["4K 超清分辨率"] --> S2["整页缩放下可直接辨认微小阻值与封装"] S3["电容触控屏"] --> S4["像纸质图纸一样直觉捏合/拖动导航"] end ``` Louis 承认 Apple 在触控板手势缩放体验上依旧碾压所有 PC 厂商:“Apple zooming with the trackpad just shits on this... I don't think PCs are ever going to realistically catch up with that”。在 P50 上用双指捏合缩放电路图经常被误识别为鼠标指针向上滑动,因此他更习惯按住 Ctrl 配合 TrackPoint 中键来滚动和缩放。他分享道,自己曾在一台 1366x768 屏幕的笔记本上体验过触控屏,双手直接在图纸上拖拽缩放的直觉感碾压一切触控板或指点杆操作。他非常遗憾联想仅在 1080p 面板上提供触控选配,逼得需要 4K 解析力的人只能放弃触控。他援引戴尔 XPS 15(9550)作为成功案例,呼吁联想跟进:“Dell has proven that you can put a workstation class machine together that is somewhat durable that has a 4k touchscreen and I would really like to see Lenovo at least offered as an option I know that I'd be willing to pay an extra $600 for it”。 --- ### [27:24](https://www.youtube.com/watch?v=ig3xI8dUdm0&t=1644s) 极限泼水测试:Prime95 满载下的淋水考验 视频进入了最富悬念的高潮部分——液体泼溅耐受性测试。Louis 解释道,他的频道常年专注于维修各种进水损坏的 MacBook 主板,他经常在视频中表示许多比苹果便宜得多的品牌在机身耐用性和防泼溅设计上远超苹果,但总有苹果拥趸批评他胡说八道、坚称苹果已经做到了最好。为了用事实反击质疑,Louis 决定“用真金白银践行自己的话(put my money where my mouth is)”,拿自己这台刚买的工作机当场测试。 测试现场极其严苛:这台 P50 正插着电源适配器,后台满负荷运行着 Prime95 烤机程序。Louis 拿出一瓶大半满的水,嘴里调侃着“给你的奇异籽浇浇水让它发芽(soak your chia pet keep it watered and watch it grow)”,直接将水哗啦一声全量泼倒在高速运转的 P50 键盘正中央。水流瞬间淹没键帽并深入键盘底板,部分水花甚至飞溅到了屏幕边缘。Louis 紧张地盯着屏幕,祈祷电脑不要当场短路报废,或者至少视频播放量能像毁灭电子产品的网红 TechRax 一样爆炸,好让他有钱再买一台。 - **测试环境**:连接电源充电器,Prime95 满载烧机中进行带电泼水。 - **泼洒剂量**:大半瓶饮用水瞬间直浇键盘打字核心区域。 - **测试初衷**:用真实硬件验证 ThinkPad 宣称的键盘导流槽与防水能力,回应外界对苹果主板进水论战的质疑。 --- ### [28:44](https://www.youtube.com/watch?v=ig3xI8dUdm0&t=1724s) 惊人幸存:按键全通、指点杆工作与紧急排险 大水浇透键盘后,屏幕画面短暂晃动了几下,外接显示输出依然保持稳定。Louis 惊喜地发现时钟仍在走动,机器没有跳闸黑屏。他立刻上手滑动 TrackPoint 指点杆,发现指点杆和鼠标左右键功能完好无损,指针在屏幕上灵活移动并能正常点击窗口。 更令人震惊的奇迹出现在键盘功能测试上。Louis 在键盘充满积水的情况下打开文本编辑器敲字,逐一测试按键输入。他一边敲击一边高声惊呼:“holy shit tell me I'm able to type this would be fucking cool... it appears that we do not have a single key malfunction on the entire machine WTF god damn man even my caps lock LED is working”。在大量积水渗入底层的状态下,整张键盘无一键连键、失灵或短路,甚至大写锁定键(Caps Lock)上的微型 LED 状态灯依然亮起。确认系统毫发无伤后,Louis 迅速转入保护步骤:为了防止水滞留造成内部缓慢电化学腐蚀,他立即向键盘倒入了大量高浓度酒精以驱散残留水分,随后搬出空气压缩机(air compressor)对键盘缝隙进行全面强力风干吹除。 ### [29:51](https://www.youtube.com/watch?v=ig3xI8dUdm0&t=1791s) 泼水测试后的酒精急救与初步拆解 在上一阶段故意向键盘倾倒大量清水后,Louis Rossmann 迅速采取了应对措施:他将整台电脑的上半部外壳浸入装满工业酒精的收纳箱中,利用酒精置换出残余的水分,但小心翼翼地避开了屏幕,因为酒精一旦渗入屏幕层会导致显示效果彻底报废。机壳表面留下了大片水与酒精混合蒸发后的白色痕迹。 他翻转机身开始拆卸底部面板。由于起初漏拆了螺丝导致面板卡住,他自嘲了一句“如果你把所有螺丝都卸掉,蠢货,这就一点都不费劲了”。卸下底壳后,内部的情况令人惊喜:电池舱周围和底层主板区域依然保持干燥,没有出现灾难性的进水短路。 - 机器搭载了 32GB 内存,通过四根独立的内存条组成;底壳下方直接暴露出两个内存插槽,另外两个插槽则位于机身键盘下方的另一侧。 - 底壳上带有明确的排水孔标识(小水滴图标),液体就是通过这些内部导水槽直接从机身底部排出的。 --- ### [32:04](https://www.youtube.com/watch?v=ig3xI8dUdm0&t=1924s) 硬盘仓布局与选购避坑建议(SATA vs M.2) Louis 继续拆卸固定键盘和侧边框架的螺丝,并对联想在不同位置使用不同规格、不同长度的螺丝表达了强烈的吐槽,只能在工作台上使用多个磁吸垫将螺丝按拆卸顺序依次排开以防混淆。随后他展示了 ThinkPad P50 的存储扩展仓。 该机型拥有两个 2.5 英寸硬盘位,但这两个物理槽位具备兼容设计,既能安装传统的 2.5 英寸 SATA 硬盘/固态硬盘,也可以通过转接支架安装 M.2 固态硬盘。主板上同时预留了两个 M.2 专用插槽接口与两个专用的 SATA 数据供电排线接口。 Louis 在这里分享了一条极其重要的购买经验:“如果你买这台机器,我其实建议你买出厂带 2.5 英寸硬盘的版本。”其核心原因在于配件壁垒: 1. **原厂线缆缺失**:如果出厂配置直接选配了 M.2 固态硬盘,包装内**不会**附带 2.5 英寸硬盘所需的专用固定托架以及那根一端是标准 SATA 接口、另一端是联想主板专用微型接口的特殊排线。 2. **后期扩展灵活性**:购买带 2.5 英寸机械硬盘的版本可以以更低成本获得这两根专用排线与支架;日后若想加装 M.2 固态硬盘,直接购买通用 M.2 硬盘即可无缝插入主板插槽,实现“一块 M.2 + 一块 SATA”的最佳组合。 ```mermaid flowchart TD accTitle: ThinkPad P50 硬盘购买与扩展策略 accDescr: 对比购买2.5英寸版本与购买M.2版本的后期升级优势与劣势 subgraph OptionA["建议方案:购买带 2.5 英寸硬盘版本"] A1["出厂附带 2.5寸专有硬盘架"] --> A2["出厂附带专有 SATA 转换排线"] A2 --> A3["后期可保留 SATA 盘,或随时插入原生 M.2 插槽"] end subgraph OptionB["非建议方案:出厂仅配 M.2 版本"] B1["出厂仅有 M.2 托架与接口"] --> B2["缺失 SATA 专用排线与托架"] B2 --> B3["后期想加装 2.5寸大容量盘极其困难,需额外寻觅专有线材"] end ``` --- ### [35:36](https://www.youtube.com/watch?v=ig3xI8dUdm0&t=2136s) 独立电源接口设计与键盘拆卸 在检查电池仓附近的固定螺丝时,Louis 验证了他在视频前部提到的一项关键结构优势:ThinkPad P50 的方形电源插孔(DC Jack)并没有直接焊接在主板 PCB 上,而是通过一组独立的飞线接头与主板相连。这种设计避免了长期插拔电源线或意外绊扯电源线时,杠杆力直接作用于昂贵的主板造成焊点脱落或板层碎裂。 拆除底部的三颗键盘固定螺丝后,键盘通过向上推拉卡扣的方式弹出。键盘下方积存了大量的酒水混合物,但铝制防渗托盘成功托住了绝大部分液体,两根键盘排线接口虽然处于潮湿环境中但没有出现烧蚀黑斑。Louis 快速清理掉残液,准备移除整个掌托框架。 --- ### [38:00](https://www.youtube.com/watch?v=ig3xI8dUdm0&t=2280s) 掌托分离、防滚架与受损的扬声器 拆解掌托需要格外小心,塑料卡扣咬合非常紧,施力过猛容易导致断裂。掌托边缘集成了指纹识别模块排线,以及触控板旁的 Pantone 屏幕色彩校准传感器排线。在拔下传感器排线时,Louis 因用力过猛扯下了接头,他借机开玩笑调侃道:“拔出来(pull out)这事儿,早拔总比用力过猛要好,时机才是一切,蛮力可不行。” 掌托取下后,内部坚固的金属防滚架(Rollcage)完整呈现在眼前: - **扬声器损坏**:虽然防滚架阻挡了物理冲击,但位于侧上方的扬声器纸盆边缘和悬边被泼入的大量水分以及随后的酒精浸泡彻底浸透损坏。Louis 苦笑表示这台电脑以后的外放声音注定惨不忍睹,自己将享受一台“更安静的 P50”。 - **主板防护层与排水孔**:防滚架内侧覆盖了大量黑色绝缘防水胶带,且键盘基座底部密布着通往机身底部的专用排水孔道。这使得从键帽缝隙渗入的水分会沿着预设轨道直接从底部排走,绝大部分水滴根本接触不到核心芯片。 --- ### [41:00](https://www.youtube.com/watch?v=ig3xI8dUdm0&t=2460s) 屏幕转轴做工与终极防腐蚀总结 由于时间已晚,Louis 没有将整个主板完全分解,但他拆卸了屏幕下方的转轴固定结构。ThinkPad 标志性的金属铰链展现出恐怖的机械强度:即便拆除了固定螺丝,铰链的咬合卡槽依然死死地固定在防滚架底座上,用手前后晃动也没有任何松垮脱落的迹象。他盛赞这种用料与低端惠普(HP)或东芝(Toshiba)那种使用薄脆再生塑料、转轴螺母极易从塑料底壳中爆出的廉价设计有着云泥之别。 在取下容易受潮的屏幕排线(LCD connector)进行检查时,接口针脚光洁如新,没有任何电腐蚀发绿发黑的迹象。作为一名苹果 MacBook 维修专家,Louis 感慨道:“我每周都要采购上百个这种液晶屏排线接口,因为苹果电脑进水后最先腐蚀的就是这个部件;而眼前这台机器的接口看起来简直完美,甚至感觉不到它曾接触过液体。” “主板上完全看不到任何肉眼可见的腐蚀痕迹,所有关键部件都被完整覆盖保护,而且内部拥有其他品牌笔记本电脑从未见过的精密排水系统,许多厂商真应该好好学学这种设计。”除了报废的外放扬声器外,整台 ThinkPad P50 成功在极限倒水和浸泡测试中存活了下来。Louis 在片尾向观众致谢,并邀请大家在评论区提出后续评测与改进建议。 ## Notable quotes > [00:00](https://www.youtube.com/watch?v=ig3xI8dUdm0&t=0s) I like my build quality and since I care about my machine not dying from thermal stress in a few years, I also like my vents. — Louis Rossmann ## Mentioned Lenovo, ThinkPad P50, ThinkPad P51, ThinkPad P71, ThinkPad T520, ThinkPad W540, Apple, MacBook Pro Retina, Dell, Dell XPS 15 (9550), Dell XPS 9500, Sony Vegas Pro, Prime95, FurMark, Intel Power Gadget, Pantone, Nina Badrić, TechRax, ISL6259, HP, Toshiba ## Video description Let's get Right to Repair passed! https://gofund.me/1cba2545 We repair Macbook logic boards: https://rossmanngroup.com/macbook-logic-board-repair 👉 DISCORD chat server: https://tinyurl.com/rossmatrix 👉 Lenovo Thinkpad P50: http://amzn.to/2hAUpzs ::: TIMESTAMPS BELOW! ✖ Build & Feel ● 0:43 - Thinkpad P50 stays in place. ● 1:13 - Retina MBP flaps around. ● 1:30 - Size comparison with Retina MBP. ● 1:43 - Ports. ● 2:18 - Charging port durability. ✖ Thermal Properties ● 6:09 - Idle palmrest, CPU, & GPU temperature. ● 7:50 - Prime95 small FFTs. Palmrest/CPU/GPU temps, clock speeds. Throttling? ● 9:00 - Prime95 small FFTs + Furmark. Palmrest/CPU/GPU temps, clock speeds. Throttling? ● 10:08 - Thermocouple on bottom of laptop. Prime95 small FFTs + Furmark. ● 10:45 - Thermocouple on side of laptop. Prime95 small FFTs + Furmark. ● 11:39 - DPA omni mic placed by laptop. Prime95 small FFTs + Furmark then idle. ● 12:15 - Sony Vegas Pro video encode. CPU/GPU temps, clock speeds. Throttling? ● 14:05 - Sony Vegas Pro video encode + Furmark. CPU/GPU temps, clock speeds. Throttling? ✖ Trackpad, Keyboard ● 15:25 - Trackpad palm rejection in Windows 10 when using trackpoint. ● 15:40 - Trackpad drawing in MS Paint. ● 16:05 - Multitouch gestures, scrolling, etc. ● 16:40 - Linux warning. ● 17:39 - Typing on the keyboard. How does it feel? Do I lose accuracy typing on a laptop? ● 18:20 - How to properly clean the non-backlit keyboard. ● 18:30 - Word on different keyboard materials - backlit vs. non-backlit & why I prefer non-backlit. ● 20:00 - Keyboard layout. ● 20:55 - NUMPAD RANT! PROTEST off-center keyboards on laptops. ✖ LCD screen ● 22:46 - LCD screen reflectivity, viewing angles. ● 23:43 - Screen color calibrator. ● 24:45 - LCD choices - no 4k touchscreen. Dell wins here. ● 26:42 - How bad does a fullpage schematic look in 1080p? ✖ Spill test ● 27:30 - Let's spill a bunch of water on a laptop running Prime95 stress test with small FFTs! ● 28:45 - Louis cheats and keeps water that splashed from pouring it too high from getting into LCD(hey, I aint techrax - I gotta USE this to edit the video!) ● 29:20 - A few minutes go by, we let the water soak into the keyboard ● 29:25 - Typing on the keyboard after liquid soaked in. ✖ Teardown ● 31:07 - First two RAM slots. ● 33:08 - Storage bays. ● 33:29 - IMPORTANT considerations/planning on M.2 vs. SATA before buying. ● 35:49 - Discrete power jack separate from motherboard. ● 37:05 - Keyboard removal. ● 38:00 - Palmrest removal. ● 40:05 - LOOK AT THAT ROLLCAGE! :) ● 40:15 - Speakers obliterated by water spill + alcohol spill to remove water. :( Louis will be enjoying a much more quiet P50. ● 41:25 - LCD assembly area. ● 42:06 - Hinge attachment - AMAZING! This base is NOT going to crack away & fall apart like the other low end shit. FIND BELOW the tools we use, board repair help forum, tutoring & repair services, and parts sites. ✖ TOOLS SUGGESTED: ● Soldering Iron: http://amzn.to/2cKkMyO ● Preferred tip: Fine: http://amzn.to/2d5MgPn Flat: http://amzn.to/2xgrx6a GPU wicking: http://amzn.to/2w8chtB ● Micro Soldering Pencil: http://amzn.to/2d5MWUP ● Micro soldering tip: http://amzn.to/2qUSFDh ● Quick 861DW hot air station(UNDER $300): http://bit.ly/quick861dw ● Microscope & LED light: http://amzn.to/2iLrE16 http://amzn.to/2nzfPT2 ● CHEAP Microscope: http://amzn.to/2rTlHbj ● Flux: http://bit.ly/2cYIx7t ● Solder paste: http://bit.ly/2epK1JE ● Tweezers: http://amzn.to/2d5NBpi ● On-Screen multimeter: http://amzn.to/2jtgY9K Setup guide: http://bit.ly/2pMarYQ Probes: https://store.rossmanngroup.com/multimeter-fine-probes.html ● Fume Extractor: http://amzn.to/2d5MGoD ● Solder: http://amzn.to/2cKkxUp ● Desoldering wick/braid: http://ebay.to/2gfKqC1 --- JESSA JONES' FAVORITE WICK! ● Crest CP500D Ultrasonic cleaner: http://bit.ly/2pnKL5h ● Branson EC cleaning fluid: http://amzn.to/2cKlBrp ● Jumper wire THIN: http://amzn.to/2eqF5T7 THICK: http://amzn.to/2eAJ5AU ● Nitrile gloves: http://amzn.to/2iUfumS ● CHAIR: http://amzn.to/2vu8Mvy ● On-screen Bench PSU: http://amzn.to/2i0G8MI ✖ Rossmann Repair Group Inc is a participant in the Amazon Services LLC Associates Program, an affiliate advertising program designed to provide a means for sites to earn advertising fees by advertising and linking to amazon.com ✖ Repair Service: ▶ Local to NYC? Our store offers free estimates on all Macbook problems. http://bit.ly/RossmannLocalBoardRepair ▶ Outside New York? We provide service to the entire U.S. via mail-in service! http://bit.ly/RossmannMailInRepair ⊙ Check out the forum where we answer Macbook logic board repair questions for $29/mo. http://bit.ly/2nX8rMC ✖ RECORDING EQUIPMENT: ● Work camera: https://amzn.to/2QjHnt0 ● Home camera: http://amzn.to/2eAH0oT ● Work microphone: http://amzn.to/2e74PVF ● Home microphone: https://amzn.to/2xfampC ● Microscope camera: http://amzn.to/2icVQoG - mine is DISCONTINUED, this is the closest one I can find. ● HDMI capture: http://amzn.to/2iyGcle [Source](https://www.youtube.com/watch?v=ig3xI8dUdm0)

Source quotes

[0:00] Louis Rossmann: I like my build quality and since I care about my machine not dying from thermal stress in a few years, I also like my vents.

Source quotes

[20:55] Louis Rossmann: I would happily pay an extra hundred dollars to not have this numpad here and to have the keyboard, the trackpad, and the trackpoint moved over to the center of the laptop where they belong. [1:43] Louis Rossmann: Regardless of how much pressure you put on this charging port and regardless of how much you're jiggling it back and forth you're never putting direct pressure on the motherboard which is an excellent design.

Original transcript

[0:00] today we're going to be going over the [0:01] Lenovo ThinkPad P 50 laptop this is a [0:03] workstation class machine it's designed [0:06] to be very durable and very powerful it [0:08] is one year old however since it is one [0:10] year old and the new model just came out [0:12] this one's going to be dropping in price [0:14] to the point where you will save quite a [0:16] bit if you decide to buy this over the [0:18] new one the new Lenovo P 51 and P 71 [0:21] don't necessarily offer enough of a [0:23] compelling feature set to pay the price [0:24] premium for it so this machine being [0:26] designed to be very durable even though [0:28] it's last year's model may present a [0:30] very good choice so we're going to go [0:32] over basic usability durability of great [0:36] ability and well you see in the [0:39] thumbnail how we're going to end the [0:40] string so let's go over the first thing [0:42] that I noticed as soon as I took this [0:43] out of the box the first thing that [0:45] you're going to notice as soon as you [0:46] start using this is that when you move [0:47] it back and forth regardless of how fast [0:49] I move the display assembly back and [0:51] forth this never moves from its original [0:53] position and it never lifts off the desk [0:56] it feels like a sturdy quality piece of [0:59] build and if we go over here to the [1:01] MacBook Pro retina of the same year and [1:04] it's not exactly the same [1:06] the MacBook is about 1 pound lighter [1:08] however when we open it it moves off the [1:11] desk and you can hear it moving off the [1:13] desk and even if we go to move it a [1:16] little bit slower it still opens enough [1:18] that I can fit my pinky under there not [1:20] exactly the greatest feeling however as [1:23] you can see the retina is considerably [1:25] thinner than the Lenovo I will give it [1:28] that that it is considerably thinner and [1:30] it is about 1 pound lighter but I like [1:33] my build quality and since I care about [1:35] my machine not dying from thermal stress [1:37] in a few years I also like my vents so [1:40] let's go into the ports on the Lenovo [1:42] while we're at it the first thing that [1:43] you're going to notice here that is [1:45] missing on all the new MacBook models is [1:47] an SD card slot [1:49] I like having an SD card slot I like [1:51] being able to take a card out of a [1:53] camera and plug it right in and get to [1:55] work without needing a dongle and Lenovo [1:56] is nice enough to include that the Mac [1:58] Book used to be the machine of choice [2:00] for content creators because of these [2:02] basic little conveniences that they had [2:03] thought of just to make people's lives a [2:05] little bit easier and with the new [2:07] machine they decided to make it a little [2:08] bit harder here we have an Express card [2:11] slot and this year to cover it [2:13] very few people I've ever met actually [2:15] use that thing but if you do it's [2:17] included now we're going to go over the [2:18] charging port what makes this charging [2:20] port special is that the charging port [2:22] is not directly soldered on to the [2:24] motherboard [2:24] every time you plug this in on a [2:26] traditional laptop where the charging [2:28] port is directly soldered to the [2:29] motherboard you are loosening weakening [2:32] and beginning to crack these solder [2:33] joints that attach the charge port to [2:35] the motherboard which means that [2:37] eventually you will get to a point where [2:38] you have to wiggle the charger in order [2:40] for it to work and eventually your [2:41] charger won't work at all on the [2:43] ThinkPad p50 the charging port is held [2:46] in place in the part of the casing that [2:48] is actually designed to have a little [2:50] bit of flex to it and then the charging [2:52] port attaches to the motherboard via a [2:54] wire so regardless of how much pressure [2:56] you put on this charging port and [2:58] regardless of how much you're jiggling [3:00] it back and forth you're never putting [3:01] direct pressure on the motherboard which [3:03] is an excellent design now if we move on [3:06] over here you'll see that we have a [3:08] full-sized HDMI port which I approve of [3:10] since that means again no dongles here [3:12] we have a USB C and Thunderbolt three [3:14] port which will allow you to connect [3:15] them what sort of high power devices I [3:18] can even plug my quad HDMI capture card [3:22] into this if I got an enclosure if I so [3:23] wanted and I could use this machine as a [3:25] desktop however the one downside to this [3:27] port if you're used to machines like [3:29] Dell XPS is 9500 series is that you [3:32] cannot charge the machine from it [3:33] jason has a Dell XPS 9500 and it [3:37] actually is able to charge off of a [3:39] MacBook power supply it doesn't charge [3:41] as quickly as when it does when he's [3:43] using his original Dell but power supply [3:45] but if he is just browsing Reddit and [3:47] not doing much and doesn't have the [3:49] screen brightness all the way up it [3:50] works just fine here even if you have [3:52] the screen brightness down you're barely [3:54] using the CPU and the GPU is off and the [3:56] battery is full and you plug that [3:57] charger in here it doesn't recognize it [4:00] at all so it will be nice if lenovo [4:02] decided to take after dell in that [4:03] regard here we have a full sized [4:05] ethernet port which is missing from many [4:07] workstation class machines so I'm glad [4:09] that lenovo chose to not sacrifice the [4:11] port just to make the machine a little [4:13] bit thinner very convenient here we have [4:16] two USB 3 ports this one will allow you [4:18] to charge portable devices even when the [4:20] computer is off the one downside in the [4:22] port's area of this machine is that they [4:24] did decide to go with mini DisplayPort [4:26] which I am not the big [4:27] Phaneuf because mini displayport means [4:29] having to carry around some sort of [4:31] dongle like this and i am a fan of not [4:34] having to use dongles most of the [4:36] monitors i've used have full size [4:37] DisplayPort not mini DisplayPort which [4:40] means that I need a dongle and yes [4:42] either they're cheap but still it's nice [4:44] to just have a machine that doesn't need [4:46] those things and when you look at the [4:47] size of this port and you look at the [4:50] size of this machine it really does make [4:53] sense that they just include a full size [4:54] one again if we were talking about the [4:56] retina [4:57] yeah there's no space on here for that [5:00] type of port I get it but on this [5:02] machine there is more than enough space [5:04] to have included a full size DisplayPort [5:06] the same way that they did on my t5 20 [5:09] and I really hope that in newer [5:10] iterations they include a full size [5:12] DisplayPort alongside many we have the 2 [5:15] USB 3 ports over here and then we've got [5:17] a headphone jack and as you can see the [5:20] machine has really good ventilation so [5:22] we've got a heatsink here we've got a [5:24] heatsink here and we have those two [5:25] large events we've got vents on the side [5:28] as well and they are beefy looking vents [5:30] and we also have vents all over the [5:33] bottom of the machine there are a lot of [5:35] vents in a lot of places for good [5:37] cooling and then we look at the MacBook [5:39] which is yeah and yeah so we got these [5:48] which are far away from the fans and [5:51] when we just get this and you wonder why [5:54] there's a dead GPU recall every other [5:56] year next up we're going to check out [5:57] the thermal properties of this machine [5:59] both under load and idle and compared [6:01] and contrasted to the room temperature [6:03] so up top you're going to see a little [6:05] probe that I put on top of the machine [6:06] the probe is sitting in between the [6:09] keyboard and the palm rest I have set [6:11] the machine over here to high [6:13] performance as you'll be able to see so [6:15] we have this set to high performance [6:17] we've got the Intel power gadget over [6:20] here I have prime95 on the Left I've got [6:23] GPU tests on the right so we're going to [6:26] run a fur mark stress test on this [6:28] machine we're going to have a little [6:29] Intel tool up there and we're also going [6:31] to be able to check out the GPU [6:32] temperature over here and we're going to [6:34] see how much if at all that this thing [6:36] wind up throttling under load so right [6:39] now [6:40] Sheen is idle and the temperature around [6:42] the palm rest area according to this is [6:45] 30 Celsius and it's just moving back and [6:48] forth and if we look over here when the [6:50] computer is idling it's sitting at [6:53] around 44 to 54 Celsius depending on the [6:57] core which is about 15 to 20 degrees [7:01] above the ambient room temperature and [7:04] the Machine is fairly silent so if I [7:07] were to put my head right by the machine [7:09] over here with my microphone this is an [7:13] omni even if I put it right by the fan [7:17] it's really not much going on over there [7:20] again it's pretty quiet running machine [7:22] so now we are going to turn on all of [7:25] this stuff and see how the temperature [7:27] around the machine Rises if at all from [7:30] this 30 Celsius point that we have here [7:32] so I'm going to run a torture test we're [7:35] going to start with small FFTs because [7:38] that typically uses up more of the CPU [7:40] and heats it up more than the blending [7:44] and then in a few minutes we're going to [7:45] start firm are all right so at this [7:46] point we've been going for about 10 [7:48] minutes and we've won out about 1 [7:51] Celsius in pomerance temperature so if [7:54] you used to using machines where when [7:55] you're under high load the palm rest and [7:58] the keyboard starts to make your hand [7:59] sweat [8:00] this machine has pretty much one degree [8:03] of celcius of difference which is [8:04] another part of what makes this a really [8:06] luxurious feeling machine is that while [8:08] you're using it you're not going to have [8:11] your hand sweating while you're doing [8:13] any in any type of ink code so this is [8:15] only with the CPU now so far it seems [8:17] like our temperature for the CPU maxes [8:19] out at the hottest core around 85 [8:22] Celsius some of the cores here are [8:24] sitting as low as a mid 70s and we've [8:26] got some spikes of 87 and it looks like [8:29] the package frequency sits at a steady [8:31] 3.1 gigahertz when you're absolutely [8:33] destroying the CPU if you were using [8:35] anything other than prime95 you probably [8:38] could get a little bit more with turbo [8:39] boost now what I'm going to do is we're [8:41] going to turn on fir markcaswell [8:43] and see if this has any effect on the [8:47] CPUs on the CPU speed because with the [8:50] older w5 40 the CPU would start [8:53] throttling [8:54] self heavily if you use the GPU at the [8:55] same time so I got anti izing at 8x and [8:58] resolution at this just so I have enough [8:59] space that I could still view something [9:01] so we're going to turn on this and that [9:04] is the donut so it's rendering that over [9:07] here and we're going to take a look and [9:08] see if that messes with our CPU [9:11] temperature of our CPUs and head all [9:14] here all right so we've seen about a [9:16] three Celsius difference in palm rest [9:18] temperature after about 15 minutes of [9:21] CPU and five of those minutes being the [9:23] GPU on full force as well the CPU has [9:26] finally hit its max around 90 Celsius [9:30] that is with sharing a heatsink with the [9:32] GPU the GPU is about at 97% load there [9:36] the GPU is settled itself at 74 Celsius [9:39] which is considerably better than some [9:42] laptops that will go up to 85 or 90 [9:45] degrees in the GPU so I'm really happy [9:46] to the GPU is staying under 90 here now [9:49] the CPU is throttling itself it's [9:52] keeping itself at 2.0 gigahertz if you [9:54] try to use prime95 [9:55] and the doughnut at the same time you're [9:58] only going to be getting 2.8 gigahertz [9:59] out of the CPU okay so I just put the [10:01] temperature probe underneath the laptop [10:03] over here and as you can see the [10:05] temperature is still 33.5 Celsius which [10:09] is actually lower than it was when I had [10:10] it on top of the machine which is weird [10:12] that means at the bottom of the machine [10:14] here is actually pretty cool so the [10:16] temperature probe is right around the [10:18] middle of the machine so the middle of [10:20] the bottom of the laptop is not as hot [10:25] as you would imagine now the part that [10:26] you have to be careful with here is not [10:28] the bottom of the machine so much as it [10:32] is the side of the machine that's where [10:34] the boiling air is going to come out of [10:35] this thing so if I put the temperature [10:37] probe over here you will see that in a [10:40] minute or so it is going to spike up [10:42] considerably okay so I just spent a few [10:44] minutes holding the temperature probe [10:46] right next to the vent of the machine [10:48] and that is where you can see all the [10:51] hot air is coming out of so we spent a [10:52] few minutes here with this on that side [10:54] and as you can see I'm holding the [10:56] temperature probe right by the vent and [10:59] now it is actually quite hot and [11:01] uncomfortable to the touch it is [11:03] hovering around 50 to 52 and a half [11:06] Celsius so [11:08] so this machine is really good at [11:09] keeping the heat away from the top and [11:12] the bottom of the machine but it is very [11:15] good at directing some very boiling hot [11:17] air out the sides of it so you would [11:19] have to avoid the very bad habit that I [11:21] used to have of having my laptop sit in [11:22] between my legs rather than on top of my [11:25] legs but if you use the laptop on top of [11:27] your legs it's not going to be as [11:29] incredibly uncomfortable as it would be [11:31] with other machines where the bottom is [11:33] boiling so this machine does a really [11:34] good job of thermal management in my [11:37] opinion I'd also like for you to hear [11:39] what this sounds like it load so this is [11:41] with me a little far away from the [11:43] machine this is me when I put my [11:45] microphone which is the nominee right by [11:47] the palm rest this is on the left side [11:49] and this is on the right side and I want [11:52] you to hear the difference between that [11:54] and when I turn off all this stuff that [11:56] is killing my CPU and GPU so when I turn [11:59] off all the loud the stuff that's [12:01] killing the CPU and GPU very soon after [12:04] the fans are going to turn down [12:12] and now the fan is barely audible and [12:14] the air filter in the next room is [12:16] actually louder than the fan inside the [12:18] laptop so this is a fairly quiet machine [12:19] next I'd like to do a bit more of a [12:21] real-world test prime95 is that's not [12:24] what we're doing with our computers we [12:26] don't buy $1200 workstations to try to [12:28] find the highest prime number at least [12:29] most of us we do this to you know encode [12:32] video and code audio and things of that [12:34] nature so I'm going to open up a session [12:36] file here and try and coding some video [12:38] and see what I get and see if the [12:41] throttling is the same 3.1 gigahertz or [12:44] 2.8 gigahertz I was getting prior all [12:47] right so here I am encoding a video in [12:49] Vegas and you can see that the CPU load [12:54] is between 90 to 100% and the fan is [12:58] actually slightly quieter than it was [13:00] with prime95 [13:01] if I were to put my head right up to the [13:04] laptop like so and you can see here that [13:12] even after a little bit of encoding that [13:15] we are at a base 3.3 gigahertz which [13:20] this is how normal people are going to [13:22] use their computers they're not going to [13:24] be running prime95 so for any type of [13:26] normal use you should be fine here now [13:29] unfortunately my version of Vegas is [13:32] actually not really good at using the [13:34] GPU for encoding anything so what I'm [13:36] going to do is I'm going to run GPU [13:38] tests while I'm running Vegas just out [13:41] of curiosity to see what happens when [13:42] you're doing that and to see if it [13:44] lowers my CPU frequency at all and it [13:48] seems like even if you do have the GPU [13:50] running you can still get 3.3 gigahertz [13:52] out of the CPU just fine sorry let's [13:56] just turn up the GPU usage over here [13:59] let's run a more powerful stress test [14:02] than the one that I just had going so [14:06] the GPU core is being used 81 to 100% [14:09] averaging around a 98 99 and my CPU is [14:13] still sitting at 3.3 gigahertz which [14:15] means that as long as you are not [14:18] purposely running something designed to [14:20] destroy your CPU you should be just fine [14:22] getting 3.3 gigahertz out of [14:25] 2.8 gigahertz Xeon just out of the box [14:27] the next thing that we're going to go [14:28] over here is the keyboard the track [14:30] point the trackpad and the display now [14:33] on these machines they have made the [14:35] trackpad bigger than what it used to be [14:37] in 2011 and 2012 as you can see if the [14:41] trackpad is now large enough that if I'm [14:44] using the track point my palm is going [14:46] to rest on the trackpad so let's go over [14:49] and see if this is really that terrible [14:52] and let's see how the palm rejection is [14:53] now there are a lot of people out there [14:55] that like to use the trackpad they like [14:57] to use the track point so they don't [14:58] want to turn either one of them off but [15:00] that will be frustrated if the palm [15:02] rejection on the trackpad is terrible so [15:04] let's go over and see if I'm able to [15:06] write my name on screen while purposely [15:09] having my palm touch the trackpad and [15:11] move around constantly so I'm going to [15:13] try and write my name L and I'm [15:17] purposely kind of moving my palm around [15:19] here just to screw myself up [15:20] oh let's see if it stops it doesn't seem [15:24] to stop at all all righty [15:28] I am yeah my handwriting is this bad in [15:33] real life too and let's see if I can do [15:36] it with this [15:47] I never use trackpads so I suck a [15:51] trackpad but it seems like I actually [15:53] wrote my name neater with the trackpad [15:55] interesting on Windows the palm [15:57] rejection on this is amazing and you [15:59] also get these features like the being [16:01] able to do this with the three fingers [16:03] at the time so you have if you can do [16:05] three fingers it can detect two fingers [16:08] it does multi-touch you have this little [16:10] button down here for scrolling which is [16:12] awesome so let me just just say I want [16:13] to open a new window let's say I go to [16:15] slash org I can scroll you can also [16:18] scroll with the track point over here by [16:20] hitting this down and doing this or you [16:22] could just tap this middle button and [16:24] use the trackpad which I never use but [16:26] it's nice to have a middle button on [16:27] both now so this is this is pretty good [16:31] now the one point that's going to [16:32] disappoint you is if you use Linux if [16:34] you use Linux I'm warning you right now [16:36] the palm detection on the trackpad is [16:40] complete and utter crap you're going to [16:42] want to turn this off if you use Linux [16:45] I'm telling you now if you use Linux [16:46] don't choose trackpad or TrackPoint but [16:49] if you use TrackPoint turn off trackpad [16:52] because the palm detection and windows [16:54] is great the palm detection and linux is [16:58] just if you don't believe me you can [17:01] figure that out for yourself so this now [17:04] next up on this is the keyboard itself [17:07] now as you'll notice the keyboard keys [17:09] are actually slightly curved which I [17:13] really like I actually I've kind of [17:15] gotten used to these keys and while I [17:17] don't like the layout as much as the [17:19] t520 layout what I like about these keys [17:21] is that they're curved so as I am typing [17:24] it's really easy to just open up notepad [17:26] plus plus here and I'm going to get to [17:29] typing and let's just put this on screen [17:32] so you can see let's see so I can only [17:37] type with two fingers because I never [17:40] learned how to type with five fingers I [17:44] will probably type O like crazy but this [17:47] is a very easy keyboard to type on even [17:51] if you [17:51] you can only type with your index [17:54] fingers this this keyboard is just [17:57] amazing I've never had the level of [17:59] accuracy with a laptop that I have had [18:01] with this one I've never had this the [18:02] level of seamlessness the combination of [18:05] the keys being curved so it kind of just [18:06] seems like they're hugging your fingers [18:07] rather than being flat that and the fact [18:10] that these this is actually the gravelly [18:12] keyboard as I described in another video [18:14] so these keys have this gravelly texture [18:16] to them that you can see so that they're [18:18] the grease doesn't get absorbed onto [18:21] them as easily now as many people have [18:23] mentioned and it is going to be more [18:25] difficult to clean if you want to clean [18:27] these keys you're going to need to use [18:28] something like a clean room wiper if you [18:30] use a standard paper towel it's just [18:32] going to leave the breeze inside that [18:34] gravelly stuff and then the keyboard is [18:36] going to feel like [ __ ] so you can buy [18:38] these clean room wipers you can buy in a [18:39] packs of a thousand on eBay for like 15 [18:41] bucks and that's what I use to clean my [18:43] keyboard but if you the reason I like [18:45] there's more gravelly keyboard and by [18:47] the way this only comes with this [18:48] gravelly keyboard layout if you buy the [18:50] non backlit version the backlit version [18:53] does not have this when you buy the non [18:54] backlit version you get this keyboard [18:56] layout it's the same generally gravelly [18:59] texture that you get with the rest of [19:00] the machine on the palm rest where it [19:02] just doesn't absorb the sweat and the [19:05] crap and the oils from your fingers as [19:07] easily as the machine with the [19:10] completely flat key I like that it's [19:13] just another part of what makes this a [19:14] luxury laptop with other laptops you can [19:17] see and you can eventually feel the [19:18] grease on the keys if you're in some [19:20] situation where you're outdoors you're [19:22] not able to wash your hands for a while [19:24] whereas with this machine it's still [19:26] going to get on there but it's not going [19:27] to get on there nearly as much and it [19:29] won't feel nearly as uncomfortable for [19:31] you and again I like these I personally [19:34] I have a preference for the machine so [19:35] that gravelly texture this machine has [19:37] that gravelly texture throughout the [19:39] palm rest in the keyboard and if you're [19:40] going to clean it do use a clean room [19:43] wiper rather than a standard paper towel [19:45] so that you don't leave behind a bunch [19:47] of debris and just make your keyboard [19:49] even dirtier cleaning the standard [19:52] keyboard that doesn't have the gravelly [19:53] texture can be done with just about [19:54] anything but cleaning this one is really [19:56] best done with the clean room wiper I [19:59] also like the actual layout of the keys [20:00] on this laptop I don't like it as much [20:02] as the old layout where the page up and [20:05] page down [20:05] was up here and this home end and delete [20:08] and backspace were all closer to where [20:10] they would be on a desktop keyboard I [20:12] much preferred when this layout was [20:14] closer to what it wasn't a desktop [20:15] keyboard but it is better than some of [20:17] the disgraces that you'll see in a lot [20:20] of other modern laptops I like that at [20:22] the very least we have delete and [20:24] backspace as dedicated keys something [20:26] that's always driven me nuts on a Mac is [20:27] you know know if you want delete you up [20:29] to FN backspace I mean I use the lead [20:31] all the time having that as two separate [20:33] keys as I mean having two two keys to it [20:36] one when it's a key is useful and that [20:38] users commonly as delete is incredibly [20:40] aggravating I like that I have dedicated [20:42] volume keys which you used to not be [20:44] able to get in the 13-inch models they [20:46] used to have them up here and they took [20:47] them away and they put them on the [20:48] function keys at the very least you have [20:50] dedicated volume keys located on the [20:53] numpad and this is another point that [20:55] it's going to be a little bit of a rant [20:56] I don't like none pads on laptops they [20:59] don't make sense to me on desktops it's [21:01] fine but a laptop if I'm going to be [21:04] using this in my lap so if I'm going to [21:06] take this and I'm going to place it so [21:07] let's say I put this in my lap I'm used [21:09] to having a laptop like this so if I [21:13] have it evenly spaced between both legs [21:15] so which means that I have to use the [21:17] keyboard now off center or I have to put [21:19] the laptop like this so it's not [21:21] balanced properly just so that the [21:23] keyboard can be centered and this to me [21:25] is incredibly incredibly stupid I like [21:27] to have the laptop centered on my lap [21:29] and I like to not have to lean over to [21:31] the left in order to use it it's not you [21:34] know I don't have to lean over to the [21:35] left very much but I prefer to not lean [21:37] to the left when you know I don't when I [21:39] don't have to so here I have to this [21:41] tilt myself over a little bit to the [21:43] left in order to use the machine because [21:45] the numpad causes the keyboard the [21:47] trackpad and the track point to be off [21:49] centered which again I think is kind of [21:52] ridiculous if you find the numpad useful [21:55] that's great you should be able to buy [21:56] the version of the ThinkPad that has a [21:58] numpad or as I should be able to buy the [22:00] version of the ThinkPad that doesn't [22:01] have a numpad again this is this is one [22:04] of those things where I like to [22:05] criticize a don't try to do at Apple [22:07] does Apple has one line for everybody [22:09] won this for everybody very often lenovo [22:13] has the x series and the t series in the [22:15] p series and the w series in the l [22:18] series and the yoga and the [22:19] you have so many different machines at [22:22] the yet you get on the workstation one [22:25] which is the most expensive you can't [22:27] even give me an option to get rid of the [22:28] numpad I would happily pay an extra [22:31] hundred dollars to not have this numpad [22:33] here and to have the keyboard the [22:35] trackpad in the track point moved over [22:37] to the center of the laptop where they [22:39] belong [22:40] now on to the display this is I'm going [22:42] to lower the brightness to about 50% [22:44] here and as you can see I'm just going [22:46] to get a picture on the screen let's get [22:49] a nice picture of Nina Bhadrak which is [22:53] my wallpaper and you can see what she [22:55] looks like as the machine goes from side [22:57] to side here so I have a bunch of [23:00] lighting in my office right above me [23:02] there's a bunch of LED lights and those [23:03] t8 tubes so that I can see everything [23:06] I'm working on and as you can see this [23:08] matte screen this IPS matte screen not [23:11] only does it have an excellent viewing [23:12] angle you could still see Nina perfectly [23:14] at this very uncomfortable angle you can [23:18] still see all this stuff very well but [23:21] also it's very good at selling the light [23:23] a complete gtfo because it's a matte [23:25] display I like being able to get a matte [23:27] one and if you put the brightness all [23:29] the way up it does an even better job of [23:31] selling the lighting in my office a [23:32] complete [23:33] gtfo so this is a pretty nice screen and [23:36] one of the other things that you may [23:37] have noticed earlier on is this actually [23:39] has a color calibrator here so this [23:41] little color by Pantone thing over here [23:43] it comes with software that will you [23:45] close the machine it puts pictures on [23:47] the screen different colors and then [23:49] this reads the color that it sees and [23:50] then it calibrates the screen according [23:52] to what it sees which is a really nice [23:54] feature so even though this is not you [23:57] know some six thousand dollar display if [23:59] you want to do any two on two you know [24:01] color adjust your video or your prints [24:04] in any way and you use this for some [24:06] type of semi-professional use on the go [24:07] this is going to give you an edge ahead [24:10] of other laptops that you don't have [24:13] this color calibration built-in I've [24:15] honestly never seen this built into a [24:16] laptop before so I'm very impressed with [24:18] it [24:18] I tried it out and it is a great great [24:21] feature you can't you're not you may not [24:23] like what everything looks like on your [24:25] screen after this I will warn you that [24:27] you're probably not going to like a lot [24:28] of what things look like but you'll be [24:30] able to make decisions based on reality [24:32] rather than [24:33] a lie that what your screen is telling [24:35] you and that is a very good thing now [24:38] the one complaint that I have about this [24:40] screen that I did a lot of people don't [24:42] like me for making the complaint is that [24:44] there's no 4k touchscreen and it's not [24:46] it's not for me a gimmick it's because I [24:48] genuinely use this machine for work and [24:50] most of what I'm doing with the machine [24:52] is looking at documents like this all [24:53] day and when I'm looking at documents [24:55] like this it is incredibly aggravating [24:58] to look at them in 1080p as you can see [25:01] 1080p is blinding if I want to see the [25:04] entire circuit for you 7000 over here [25:06] you're going to see that this looking at [25:09] this in 1080p is painful yes I can see [25:12] that that's r700 1 but you are killing [25:15] your eyes to see that that's 4.7 ohms [25:18] you're killing your eyes to see whether [25:19] that's you know 603 or 402 package size [25:23] now luckily again because of the [25:25] beautiful interface on this machine [25:26] zooming in you can zoom in with the [25:28] trackpad it does admittedly it doesn't [25:31] work as nicely as it does an Apple Apple [25:33] zooming with the trackpad just shits on [25:34] this as you can see I just did a zoom [25:36] gesture and it thought I was moving the [25:38] mouse up the trackpad is not as good as [25:40] what you're going to get with an Apple [25:41] machine I will give Apple that they have [25:43] by far the best trackpad on any laptop I [25:45] don't use the trackpad I use the track [25:47] point so when i zoom I hold ctrl I hold [25:50] down this and I use the track point so I [25:52] can scroll around the document [25:54] left/right up/down using the track point [25:57] and holding down the middle button and [25:58] what I want to zoom in and out I can do [26:00] that by holding down control a zoomed [26:03] out a little too much there yeah I'll [26:06] give it to Apple there the trackpad just [26:07] shits on this especially for gestures [26:10] this just I don't think pcs are ever [26:13] going to realistically catch up with [26:14] that but you can see here I can zoom in [26:16] and well sometimes again sometimes it [26:19] thinks I'm not hitting ctrl either way [26:21] this is why I like having a 4k [26:23] touchscreen I've tried a 1366x768 [26:26] touchscreen and it [ __ ] on any other way [26:29] of navigating the schematic being able [26:31] to navigate the schematic like this is [26:33] [ __ ] amazing it's beautiful and I [26:35] wish I could do that on here but Lenovo [26:38] only offers a touchscreen on the 1080p [26:40] model and again the problem at 1080p is [26:42] when you want to view the entire page on [26:45] the screen for an overall picture [26:46] you it looks like crap so I wish that [26:51] Lenovo would give you the option to get [26:53] a 4k touchscreen the same way that the [26:55] Dell XPS 95 50 has allowed people to do [26:58] Dell is proven that you can put a [27:00] workstation class machine together that [27:02] is somewhat durable that has a 4k [27:04] touchscreen and I would really like to [27:06] see Lenovo at least offered as an option [27:07] I know that I'd be willing to pay an [27:09] extra $600 for it and I'm sure there are [27:12] other people out there that would like [27:13] to as well [27:14] it's not just a gimmick it's not just [27:16] you know for kids and for multimedia [27:18] it's for people that do real work so [27:21] that's my rant on that now for the fun [27:24] part of this video which I may or may [27:26] not edit to the front depending on how I [27:27] feel the durability test so this channel [27:30] is all about repairing Apple products [27:32] that have been liquid damaged and I get [27:34] lambasted a lot for saying that brands [27:36] that sell much cheaper products are [27:38] often more durable in liquid resistance [27:40] and a lot of people say that that's not [27:42] true that doesn't work that way and [27:44] Apple does the best they can with it so [27:47] I just thought I would put my money [27:48] where my mouth is with my own machine [27:50] here so this is running prime95 [27:53] right now so while it is running prime95 [27:57] i am going to take my water bottle here [28:00] which is about this much full and we're [28:02] going to splash it all over a laptop [28:04] that is plugged in and see how this goes [28:07] and i'm going to pray that either a the [28:11] laptop continues to work or be that a [28:13] miracle occurs and this gets as many [28:15] views as a techrax video so i can just [28:17] buy another one here's half [ __ ] it soak [28:33] your Chia privacy keep it watered and [28:36] watch it grow alright [28:44] so screen has given us a few glitches [28:47] you can see here that the clock says [28:49] 1129 external out is still working well [28:56] the external loud appears to be working [28:59] my TrackPoint is working I'm able to [29:02] click I'm able to move things around [29:05] holy [ __ ] tell me I'm able to type this [29:08] would be [ __ ] cool how many keys this [29:13] is funny you can actually see that how [29:15] many key it's actually letting me type [29:19] still work after being doused in water [29:23] it appears that we do not have a single [29:28] key malfunction on the entire machine [29:33] WTF god damn man even my caps lock LED [29:38] is working Wow alright so now I'm going [29:43] to dry my machine up alright so right [29:44] after I did that I immediately poured a [29:46] bunch of alcohol to follow the water and [29:48] then tried to dry it off with the air [29:50] compressor in the hopes that the alcohol [29:51] would displace the water and with any [29:54] luck my machine would not be totally [29:55] screwed after pour intently pouring not [29:58] just a tiny bit but a lot of water right [30:01] onto it so hopefully the alcohol this [30:04] place that's at the point where I may [30:06] actually be able to use this when I get [30:07] it when I go home and let's open it up [30:11] and see what this thing looks like on [30:13] the inside so of camera there we go you [30:18] can see all the stains from my alcohol [30:20] plus water I have a bin of alcohol so I [30:26] pretty much just tossed the upper casing [30:27] of the computer into the bin not the [30:29] screen because I didn't want to screw up [30:30] the screen too much you don't want to [30:32] get alcohol inside of a screen it will [30:34] look terrible so who knows it may even [30:39] turn on again so let's just remove this [30:41] bottom panel over here first we're going [30:46] to get to the inside this is a bit of a [30:51] pain in the ass to get off it helps if [30:54] you take off all the screws dumbass [30:56] alright not a pain in the ass if you [30:59] don't if you take off all the screws so [31:01] as you can see here dry mofo dry [31:06] I've got a nice battery that's plugged [31:08] in right next on my liquid so here you [31:10] get access to RAM slots you can see that [31:14] this comes with 32 gigabytes of RAM in [31:17] the form of four separate sticks so this [31:24] is this is the RAM slot so this has the [31:26] capability to hold quite a bit of RAM so [31:29] you've got two RAM slots down here and I [31:30] imagine the other two Ram slots are [31:32] going to be on the other side of the [31:34] machine [31:35] never open this this far before so [31:37] you've got two RAM slots over here now [31:48] you've also got some drainage holes on [31:50] the bottom of the machine usually with [31:53] Lenovo so let me see if I can find those [31:55] right over here it says a little drip [31:58] indicator see this so the liquid is [32:01] supposed to come out of there so let me [32:04] just take off some of these screws these [32:06] are going to be the screws that hold the [32:07] keyboard in is one here there's one here [32:15] and there should be one more over here [32:17] those are going to hold the keyboard in [32:20] know you've got these screws on the side [32:23] that I'm going to remove and those look [32:25] to be a separate size so I'm going to [32:26] put them off to the side on the separate [32:29] magnet [32:37] okay there's another separately sized [32:40] screw over here gotta love a laptop that [32:41] use a bunch of screws of different sizes [32:43] that's annoying as hell yeah I'm going [32:54] to just put these in the order that I [32:56] removed them or else I'll never remember [32:57] where they go so now these drives these [33:13] are my two SSD is it has two two and a [33:15] half inch bays over here these drives [33:18] are actually not held in by screws so [33:20] these here are our two bays and here's [33:25] the cool part about this machine that [33:27] doubles as a two and a half inch bay or [33:29] an m2 bays so you can put em two drives [33:32] and they're going to plug in over here [33:34] on the PCB which you can't see because a [33:36] crappy office lighting so I'm sorry [33:38] about that but you may be able to see [33:39] right over there where there's where an [33:41] m2 Drive can plug in and an m2 Drive can [33:43] plug in over there and then you've also [33:45] got these two SATA ports over here where [33:48] you can plug in SATA drives so here's a [33:50] pro tip if you're buying this machine I [33:52] would actually suggest that you buy it [33:54] with two and a half inch drives here's [33:57] why if you ever want to put a two and a [33:59] half inch drive in later it you don't [34:02] get the machine with these special [34:03] little brackets and the cable here so [34:07] this is a SATA cable on one end you have [34:09] a standard serial ata power and data [34:13] connector and on the other end you've [34:15] got this little funky connector for the [34:16] motherboard you don't get these if you [34:18] buy the machine with an m2 drive so I [34:20] actually bought my machine with two hard [34:22] drives knowing I didn't want two hard [34:23] drives rather than m2 so that I could [34:25] get these if I want to get em to later I [34:27] can if I want to have an m2 Drive and [34:29] also have a SATA drive I can so it [34:32] expands your it expands the [34:34] possibilities for the machine if you get [34:36] it with a two and a half inch drive [34:37] since you'll have these two for later if [34:39] you want to buy the machine with 2 m2 [34:41] drives then ignore that and you don't [34:43] need to buy it with these these little [34:45] pieces so I'm going to take off the [34:48] other screws [34:49] better than here this is for the drive [34:52] day and I'm going to put those on yet [34:54] another magnet [35:18] we've got two screws over here by the [35:20] battery compartment [35:33] it's going to do a quick scan through to [35:36] see if we've missed any by the way when [35:39] I said that the power the power jack [35:42] does not is not directly soldered onto [35:44] the motherboard you can see here that [35:46] there is a connection straight from the [35:49] power jack see the power Jack over here [35:54] has a wire that goes to the motherboard [35:58] so as I said if the power jack is not [36:01] directly soldered to the board so [36:02] there's no direct pressure on the [36:04] motherboard itself just one spoon over [36:09] here [36:22] we want to make sure you don't miss any [36:24] screws that it would be safe than sorry [36:26] now [37:06] now this keyboard is supposed to slide [37:09] out so we do this and it's going to be a [37:15] bunch of water and then alcohol and the [37:16] mixed alcohol and water inside here I'm [37:18] sure you know do this and then it's [37:21] supposed to pop out pop up and out here [37:28] we go and under it it is soaked dry that [37:39] off now there are two connectors here [37:57] try out little computer and then we can [38:00] take the palm rest off I believe unless [38:02] there's a bunch of other screws that we [38:04] need to take off how we might have [38:12] missed the screw over there [38:31] or not doesn't look like it doesn't look [38:34] like we've missed a screw okay so we've [38:47] got one little sensor looking thingy [38:49] over here to unplug now what the hell is [38:56] keeping this on over here ah you would [39:00] go up these little people [39:01] this just snaps right in and snaps right [39:03] out it's a little scary how much force [39:12] you need to snap that out though [39:16] okay we got the fingerprint scanner [39:18] right over here [39:19] it's going to toss that out [39:31] and then there's one last cable for the [39:34] color Pantone scanner which is this [39:37] thing over here [39:51] and I pulled it out over here I must [39:53] have pulled pulled out a little too hard [39:57] it's always important to pull out too [39:59] soon rather than pull out too hard its [40:02] timing is everything not force so the [40:06] machine has this really strong roll cage [40:08] and this is going to help it a lot if [40:11] you ever manage to drop it as you can [40:14] see the surrounds from my speakers are [40:15] pretty much [ __ ] so I'm pretty sure [40:17] that this is going to the speakers on [40:19] this computer are going to sounds awful [40:20] from here on in from the liquid however [40:25] you can see that not a lot has gotten to [40:28] the motherboard and you can also see on [40:29] this machine that the board is covered [40:31] in this black tape and it's also covered [40:34] in here and there are all these little [40:35] drainage holes if cool thing is that [40:37] there's so many drainage holes with the [40:38] water that comes through the keyboard is [40:40] going to be let out of the machine and [40:42] if we also if we look at the bottom of [40:44] the keyboard it's got its screw holes [40:48] but it's also got drainage holes on the [40:50] bottom to let the water out of the [40:53] machine [41:00] let's see what it looks like under the [41:02] screen over here not going to take the [41:04] entire thing apart to pieces because I [41:05] do want to get home at a somewhat [41:07] reasonable hour tonight I know [41:10] boo but a would like to go to sleep so [41:21] they're going to take this off this is [41:30] what my screen assembly looks like so [41:32] I'm going to clean with some Windex [41:44] got their Wi-Fi antennas up there and [41:47] these are some really strong hinges down [41:49] here but Lenovo is known for I'm going [41:55] to might as well tighten them a little [41:56] while I'm here since I abused the hell [41:58] out of this laptop these are some [42:09] quality hinges let me show you what a [42:18] good grommet looks like [42:34] okay we take off that one [42:41] take off this one over here [42:52] it's crazy even after unscrewing the [42:55] hinges the laptop is still actually [42:58] attached to the hinges like I can move [42:59] this back and forth I mean just to build [43:01] quality on this is absolutely insane the [43:04] amount of failsafe the amount of thought [43:07] and effort that went into this being a [43:09] strong durable machine from the from as [43:13] you can see from the roll cage to just [43:16] the way the hinges are structured to the [43:18] material that was used you have to feel [43:20] this material to feel that these are not [43:22] the cheap crappy junk plastic you see in [43:25] the low-end HP's in Toshiba's this is [43:28] all this is all really quiet quality [43:30] stuff [43:52] so that is about that this is a pretty [43:56] amazing machine and there is no [43:59] corrosion on the board at all that's [44:01] visible all the important stuff is [44:03] completely covered and there is so much [44:07] in terms of a drainage system to keep [44:08] the important parts from getting ruined [44:12] by liquid that I just have not seen on [44:14] on any other brand laptops that many [44:17] would be smart to emulate I just took [44:19] off the screen connector just to feel [44:21] around and that's the part that is most [44:23] often corroded on Apple computers use [44:27] LCD connectors by you know by a hundred [44:29] load every week and this thing over here [44:32] is just it it looks perfect it looks [44:35] like it doesn't even feel like it's ever [44:37] gotten liquid on the speaker got a [44:38] little bit everything else is just [44:40] covered in great so that's it for the [44:43] overview of the Lenovo P 50 if you have [44:46] any suggestions or marks what I should [44:47] do for the next review of how I could [44:49] have done this one better what else you [44:50] want to know leave them in the comments [44:52] and I will try to I will try to [44:55] accommodate you so thank you as always [44:56] and I hope you learned something