Modder Fits Headphone Jack into iPhone 7 Using Custom Flexible Circuit
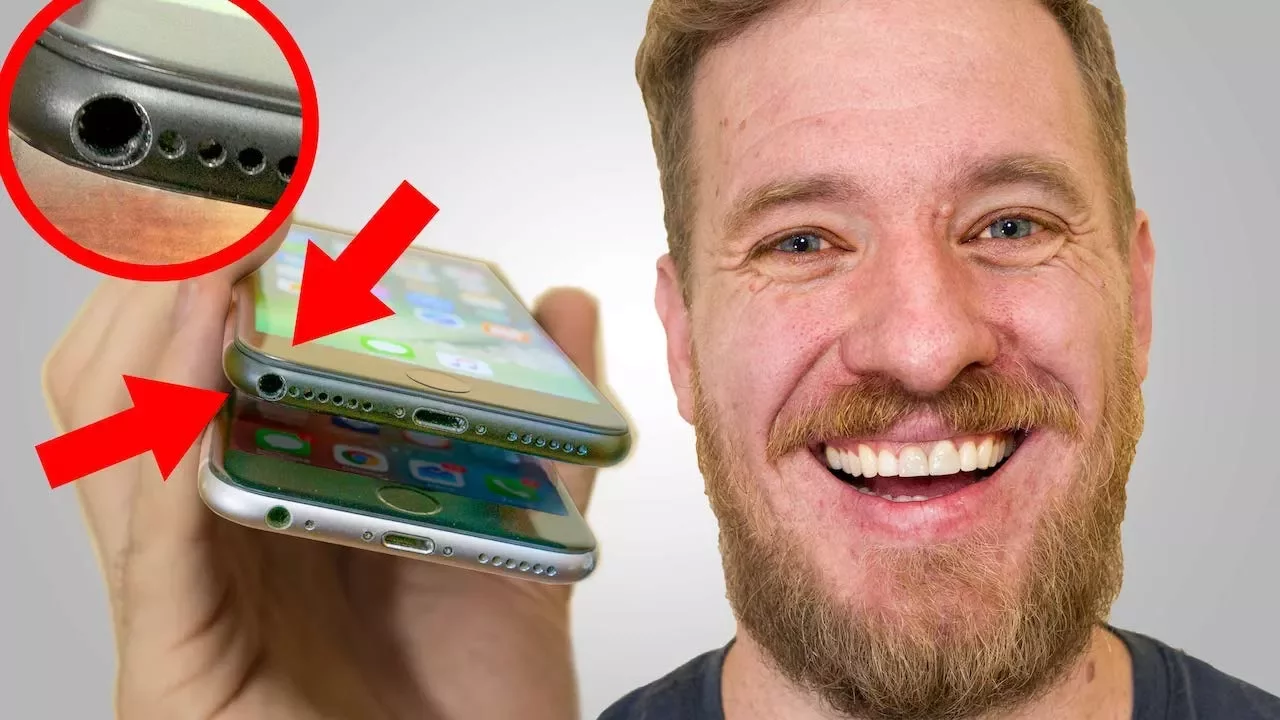
Bringing BACK The iPhone Headphone Jack - in China — Strange Parts

Strange Parts

Relocating internal components and embedding a custom switching circuit demonstrates the iPhone 7 has sufficient internal clearance to house a functional 3.5mm headphone jack without altering the chassis profile.

AI-assisted summary of Bringing BACK The iPhone Headphone Jack - in China — original source. Check the original for full context.

Source published:

Key ideas

  • Scotty from Strange Parts successfully retrofits a working 3.5mm headphone jack inside an iPhone 7 after four months of prototyping, seven circuit revisions, and disassembling three phones. (0:00)
  • Internal space was cleared by shifting the battery upward, rotating the Taptic Engine 90 degrees, removing a plastic internal bracket, and shaving down the headphone jack assembly. (3:24)
  • Because raw analog audio is not exposed on the iPhone 7 logic board, the mod embeds Apple's official Lightning-to-3.5mm adapter circuitry paired with a custom switching multiplexer to toggle between charging and audio. (6:13)
  • Miniaturization required transitioning from rigid fiberglass test boards to a custom dual-layer flexible PCB (polyimide) manufactured in Shenzhen and hand-assembled with BGA components under hot air. (16:15)
  • The entire hardware project was open-sourced to encourage right-to-repair practices and allow Huaqiangbei technicians to refine the retrofit. (31:10)

Detailed notes

## Background Published by Scotty on the YouTube channel Strange Parts on September 6, 2017, this video chronicles a four-month engineering journey to re-engineer an iPhone 7 with a functioning 3.5mm headphone jack in Shenzhen, China. According to the description, the project spanned seven custom circuit board iterations and three disassembled phones to build the world's only modern iPhone featuring a built-in analog headphone port, with the design released entirely open-source.

## TL;DR Frustrated by Apple's removal of the headphone jack, Scotty travels to the Huaqiangbei electronics ecosystem in Shenzhen to physically and electrically integrate a 3.5mm audio port into an iPhone 7. He disassembles an official Lightning-to-headphone adapter, incorporates an active USB switching chip to balance charging with audio playback, and designs a custom flexible printed circuit board (FPC) that fits around internal components like the Taptic Engine and battery. After manufacturing the flex boards in a local factory, hand-soldering microscopic BGA chips under hot air, and using a desktop CNC mill guided by an Xbox controller to bore a clean aperture in the aluminum frame, he overcomes multiple shattered display assemblies. Ultimately, he achieves a fully assembled iPhone 7 that plays audio, supports inline remote controls, and seamlessly fast-charges via Lightning without compromising its factory form factor.

## Atmosphere & style The video carries an earnest, gritty, maker-documentary tone that balances the sensory bustle of Shenzhen's industrial alleys with the isolating intensity of micro-soldering late at night. Scotty acts as an approachable, self-deprecating guide who shares candid moments of genuine panic and fatigue—such as accidentally destroying fragile adapters and cracking multiple costly screens under vertical pressure. The pacing moves from speculative curiosity and benchtop troubleshooting into a stressful emotional trough before delivering a deeply satisfying, celebratory payoff that champions user hardware autonomy and the right to repair.

## Bulletin - [00:00](https://www.youtube.com/watch?v=utfbE3_uAMA&t=0s) Scotty from Strange Parts successfully retrofits a working 3.5mm headphone jack inside an iPhone 7 after four months of prototyping, seven circuit revisions, and disassembling three phones. - [03:24](https://www.youtube.com/watch?v=utfbE3_uAMA&t=204s) Internal space was cleared by shifting the battery upward, rotating the Taptic Engine 90 degrees, removing a plastic internal bracket, and shaving down the headphone jack assembly. - [06:13](https://www.youtube.com/watch?v=utfbE3_uAMA&t=373s) Because raw analog audio is not exposed on the iPhone 7 logic board, the mod embeds Apple's official Lightning-to-3.5mm adapter circuitry paired with a custom switching multiplexer to toggle between charging and audio. - [16:15](https://www.youtube.com/watch?v=utfbE3_uAMA&t=975s) Miniaturization required transitioning from rigid fiberglass test boards to a custom dual-layer flexible PCB (polyimide) manufactured in Shenzhen and hand-assembled with BGA components under hot air. - [31:10](https://www.youtube.com/watch?v=utfbE3_uAMA&t=1870s) The entire hardware project was open-sourced to encourage right-to-repair practices and allow Huaqiangbei technicians to refine the retrofit.

## Key takeaways - [00:00](https://www.youtube.com/watch?v=utfbE3_uAMA&t=0s) Viral internet methods claiming an iPhone 7 headphone jack could be drilled out with a power drill are destructive memes that ruin devices. - [06:13](https://www.youtube.com/watch?v=utfbE3_uAMA&t=373s) The iPhone 7 interior contains no factory analog audio test pads, preventing simple direct wiring to the logic board. - [01:21](https://www.youtube.com/watch?v=utfbE3_uAMA&t=81s) Removing the plastic lower-left bracket (described by Apple/iFixit as a barometric vent) reveals enough clearance to fit a 3.5mm jack barrel. - [03:24](https://www.youtube.com/watch?v=utfbE3_uAMA&t=204s) Internal clearances require moving the Taptic Engine into a 90-degree sideways orientation and pushing the battery flush against the logic board. - [06:13](https://www.youtube.com/watch?v=utfbE3_uAMA&t=373s) Apple's official Lightning-to-3.5mm audio adapter is decapsulated and integrated directly into the internal circuitry to process DAC audio. - [09:52](https://www.youtube.com/watch?v=utfbE3_uAMA&t=592s) A high-speed USB multiplexer/switching chip is added to allow the phone to switch between audio output and normal Lightning charging. - [12:27](https://www.youtube.com/watch?v=utfbE3_uAMA&t=747s) Rapid benchtop validation using oversized rigid breakout PCBs confirmed the logic switching before committing to micro-scale packaging. - [16:15](https://www.youtube.com/watch?v=utfbE3_uAMA&t=975s) Paper mockups laminated with clear tape served as rapid physical prototypes to test folding geometries before fabricating custom flex circuits. - [17:43](https://www.youtube.com/watch?v=utfbE3_uAMA&t=1063s) Industrial flexible PCB production relies on a polyimide core, automated multi-spindle drilling, chemical copper plating, acid etching, and bed-of-nails continuity testing. - [20:37](https://www.youtube.com/watch?v=utfbE3_uAMA&t=1237s) Surface tension during hot-air reflow soldering automatically centers microscopic BGA components onto flex PCB footprints when airflow is strictly controlled. - [24:51](https://www.youtube.com/watch?v=utfbE3_uAMA&t=1491s) CNC desktop milling guided by an Xbox 360 controller via Mach3 software enabled precise, repeatable chassis milling for the headphone aperture. - [26:33](https://www.youtube.com/watch?v=utfbE3_uAMA&t=1593s) Sub-millimeter vertical stack-up clearance was the most punishing mechanical hurdle, cracking two separate display assemblies during reassembly. - [30:00](https://www.youtube.com/watch?v=utfbE3_uAMA&t=1800s) The completed headphone jack fully supports standard iOS audio features, including inline volume adjustment, play/pause controls, and pausing on unplug. - [31:10](https://www.youtube.com/watch?v=utfbE3_uAMA&t=1870s) Full design files and schematics were released open source with no licensing fees to advance user ownership and right-to-repair.

## Detailed walkthrough ### [00:00](https://www.youtube.com/watch?v=utfbE3_uAMA&t=0s) The Hong Kong Apple Store and the Motivation

Standing in front of the Apple Store in Hong Kong, Scotty from *Strange Parts*—known for previously building an iPhone entirely from scratch using spare parts in China—explains why he has embarked on a new project. A few months prior, he purchased an iPhone 7 so he could shoot higher quality video while exploring the industrial world. However, he was deeply annoyed by the removal of the 3.5mm headphone jack. Knowing full well that Apple would never bring it back, he spent the night stewing over the decision. By the next morning, he had reached a bold conclusion: “Why don't I add my own headphone jack? How hard could it be?”

While viral videos across the internet showed users taking cordless power drills to their phones in an attempt to uncover hidden jacks, Scotty dismisses that destructive meme outright: “Don't do that. Turns out it's really bad for your phone.” Instead, he wants to engineer a true, fully functioning hardware modification. Unsure if the modification is even physically or electrically viable, he leaves Hong Kong and heads directly across the border to Shenzhen to find out.

[01:21](https://www.youtube.com/watch?v=utfbE3_uAMA&t=81s) Opening the iPhone 7 and the Internal Space Dilemma

Arriving in Shenzhen, the undisputed electronics manufacturing capital of the world, Scotty heads straight into the Huaqiangbei wholesale electronics markets. Rather than taking apart his brand new Apple Store device, he looks for a standalone iPhone 7 logic board to build up a prototype. Logic boards are scarce in the markets, so he settles on buying a complete used iPhone 7 to tear down. Back at his workbench, he uses a specialized suction-clamp screen cracker to pop open the display assembly and inspect the interior layout.

Upon looking inside, he finds an extraordinarily dense assembly with almost no unoccupied volume. Right where the headphone jack traditionally sat on earlier models, he discovers a small piece of molded plastic. Apple documentation and teardown guides like iFixit claim this plastic piece is a barometric vent designed to equalize internal pressure for an accurate altimeter, but Scotty remains deeply skeptical: “Yeah, I don't believe that that's a barometric vent. I don't really know what I'm talking about. It just looks to me like a plastic clip that holds some connectors on.” Holding a loose 3.5mm headphone jack against the housing where the plastic piece sits, he is stunned to discover that the jack might actually squeeze into the enclosure without requiring an unsightly custom bulge protruding from the outer shell: “Holy shit. I was expecting to say that there's no space here, and I don't think that's true.”

- The phone's interior is packed with virtually no leftover room, making millimeter-level placement critical. - Original design expectations assumed an ugly external protrusion would be necessary, but internal clearance looks barely feasible. - The only exterior modification Scotty intends to make to the chassis is drilling a single clean hole for the headphone port.

[03:24](https://www.youtube.com/watch?v=utfbE3_uAMA&t=204s) Dremel Modifications and Component Relocation

Scotty heads out to the market stalls to buy a rotary Dremel tool so he can physically carve out space inside the aluminum rear casing. After clearing out the internal plastic bracket and metal mounting posts in the lower-left corner, he cuts an opening through the bottom perimeter of the phone for the 3.5mm audio barrel. However, dry-fitting the headphone jack reveals immediate spatial conflicts: the oversized Taptic Engine and the bottom edge of the battery completely obstruct the jack's rear housing.

Examining the clearance, Scotty realizes he can shift components rather than abandon the project: “I am a lucky bastard. I can totally just put the Taptic Engine in sideways.” By rotating the Taptic Engine ninety degrees, it nestles into the cavity, and by pushing the battery slightly upward until it rests against the logic board, the lower corner clears up. Yet when he attempts to close the screen, the display fails to sit flush because the metal bracket supporting the home button and lower flex cables collides with the top of the headphone jack. He dremels away corners of the bracket, but the severe vertical pinch puts heavy mechanical pressure on adjacent board-to-board connectors, threatening to pop them loose.

```mermaid flowchart LR accTitle: Component Realignment Inside Lower Chassis accDescr: Flow diagram showing how internal parts were modified and shifted to clear space for the 3.5mm jack. subgraph Clearance["Chassis Carving"] Dremel["Dremel Aluminum Wall"] Hole["Drill 3.5mm Port Hole"] end subgraph Relocation["Component Shifting"] Taptic["Rotate Taptic Engine 90°"] Battery["Shift Battery Upward"] end subgraph Trimming["Clearance Adjustments"] Bracket["Grind Home Button Bracket"] Fit["Check Flex Connector Strain"] end

Dremel --> Hole Hole --> Taptic Taptic --> Battery Battery --> Bracket Bracket --> Fit ```

[06:13](https://www.youtube.com/watch?v=utfbE3_uAMA&t=373s) The Lightning Adapter Teardown and Tool Hunting

Scotty steps back from the physical fitting issues to tackle the electrical engineering problem, noting that mechanical tweaks are useless if the circuit cannot output audio. Research confirms that the iPhone 7 logic board does not route raw analog audio signals to unused test points, meaning he cannot simply solder a headphone jack directly to the motherboard. His workaround is to integrate Apple's official Lightning-to-3.5mm headphone adapter entirely inside the phone by hardwiring its circuit between the Lightning dock and the audio jack.

He visits the official Apple Store in Shenzhen and buys an adapter for 78 RMB. Bringing it back to his workbench, he attempts to grind off the molded plastic shell with his Dremel, only to nick the delicate internal circuit board and ruin it instantly. Resigned, he returns to the Apple Store to purchase three more adapters for roughly 200 RMB; when the store clerk asks why he needs so many, Scotty sheepishly confesses: “I keep breaking 'em.”

Realizing his current bench setup is inadequate for microscopic soldering, Scotty visits his favorite vendor in Huaqiangbei's tool alley. The merchant outfits him with ultra-fine Swiss-made Vetus tweezers, high-temperature silicone wire, and soldering supplies. He then replaces his inadequate $10 USB microscope with a professional digital inspection microscope, watching in admiration as the shopkeeper unboxes every piece, hooks up the cables, and tests it on the spot to verify complete functionality before completing the sale.

- Official Apple Lightning-to-3.5mm adapters cost 78 RMB each at the Shenzhen retail location. - High-precision tweezers (Switzerland Vetus 2-series) and heat-resistant micro-wire are acquired to solder the tiny exposed pads. - The tool alley vendors provide full benchtop demonstrations to verify microscope optics and hardware prior to purchase.

[09:52](https://www.youtube.com/watch?v=utfbE3_uAMA&t=592s) Proving the Audio Circuit and Switching Dilemma

Armed with proper optics and fine-gauge soldering wire, Scotty spends well over a week meticulously soldering jumper wires to every microscopic pin on an iPhone 7 Lightning dock assembly, running each connection out to an external breakout header. He carries out the identical micro-soldering operation on the stripped-down Apple headphone adapter board. He then patches the two sets of header pins together, effectively creating an unrolled, hardwired prototype of the Lightning adapter plugged directly into the dock connector. He plugs headphones into the breakout assembly, starts playback on the phone, and celebrates as crisp audio plays: “Yes! It works!”

```mermaid flowchart LR accTitle: Lightning and Headphone Switching Architecture accDescr: Block diagram illustrating how the multiplexer chip switches logic board access between external Lightning and internal audio DAC. subgraph Inputs["External Ports"] Jack["3.5mm Headphone Jack"] ExtDock["External Lightning Port"] end subgraph Conversion["Audio Conversion"] Adapter["Apple Adapter DAC Board"] end subgraph Switching["Signal Multiplexer"] Mux["USB Switching Chip"] end subgraph Motherboard["Phone Internals"] Logic["iPhone 7 Logic Board"] end

Jack --- Adapter Adapter -->|"Audio Lines"| Mux ExtDock -->|"Power & Data"| Mux Mux -->|"Selected Bus"| Logic ```

The triumph is immediately tempered by a major functional roadblock: if the internal headphone adapter permanently occupies the Lightning interface pins, the phone can no longer charge or sync via its external Lightning port. While discussing the problem with friends over beer and street barbecue, an engineer friend suggests using an integrated USB multiplexer/switching chip to toggle the phone's internal data lines between the headphone adapter and the physical charging port. Scotty locates an appropriate high-speed switching chip, contacts a local chip broker named Endy, and picks up a batch of the components in Huaqiangbei. Back at the test bench, he wires the switching IC into the breakout array to test whether inserting a Lightning cable will automatically cut off the internal headphone adapter and restore charging functionality.

[12:27](https://www.youtube.com/watch?v=utfbE3_uAMA&t=747s) Benchtop Switching Success and the First Rigid Prototype

Following extensive benchtop troubleshooting, Scotty reaches a breakthrough: the iPhone screen registers “headphones,” and plugging in the Lightning cable reliably switches over to charging. Toggling back and forth confirms that the switching logic works smoothly in real time. Relieved, Scotty claps and exclaims, “Holy shit. It works,” before declaring, “Time to make a circuit board.” While he had originally imagined he might hand-wire the entire assembly inside the phone, the switching circuitry has grown far too intricate for loose wires. He decides to design a custom printed circuit board (PCB), which he describes as essentially a precise network of copper wires laminated onto a rigid fiberglass backing.

Scotty intentionally designs his initial PCB oversized rather than trying to cram it directly into the iPhone 7 enclosure. By selecting larger chip packages, he ensures the components will be manageable to hand-solder and leaves ample space for test points to make probe debugging straightforward. After two grueling days of PCB layout work, he sends the digital gerber files to a board house. On a Sunday morning at around 10:30 AM, a courier delivers the manufactured boards. With his iPhone 7 still disassembled in the repair shop, Scotty tests the populated board against an iPhone 6S.

```mermaid flowchart LR accTitle: Lightning Switching Logic Test Flow accDescr: Benchtop breadboard routing between audio playback and Lightning power. subgraph Input["Signal Routing"] A["Lightning Connector"] --> B{"Multiplexer Switch"} end subgraph Logic["Active Channels"] B -->|"Audio Mode"| C["Headphone Jack Output"] B -->|"Charge Mode"| D["Battery Charging"] end ```

The prototype does not work straight out of the gate; Scotty realizes in dismay that he accidentally wired the headphone jack pads entirely backwards on the layout. To salvage the experiment, he desolders the board-mounted jack, solders in loose flying wires, and bridges the connections to his earlier hand-modified Lightning-to-3.5mm audio adapter. With audio finally piping through, Scotty observes, “Right about now, I was hoping to say, 'There it is. The prototype is done and it's working.' But not so much.” Nevertheless, because the core logic circuit successfully routes signals to his hand-soldered adapter, he decides to declare victory on the proof-of-concept and move on to the miniaturization phase.

- The preliminary PCB was deliberately designed oversized with accessible test pads rather than sized for internal phone clearance. - Hand-soldered patch wires were required to invert the reversed headphone jack pinout on the physical board.

---

[16:15](https://www.youtube.com/watch?v=utfbE3_uAMA&t=975s) Designing the Flexible PCB and Paper Modeling

Fitting the switching electronics inside the chassis requires a radical departure from rigid fiberglass boards. Scotty pivots to designing a flexible printed circuit board (flex PCB or FPC), which replaces rigid FR4 fiberglass with a bendable polyimide plastic film. These ultrathin circuits—often nicknamed “origami circuits” because of the intricate folds required to weave through cramped consumer electronics—are ubiquitous in smartphones and digital cameras where space is at an absolute premium. Scotty admits he has never designed a flexible PCB before and faces a steep learning curve.

To verify the three-dimensional geometry before submitting the files for production, Scotty purchases a desktop printer to print 1:1 scale paper mockups of his design. He cuts out the delicate paper outlines and laminates them using strips of clear packing tape—a step he calls “a little ghetto lamination”—to mimic the stiffness and thickness of actual flex material. By physically inserting the mockups into the gutted cavity of an iPhone housing, he iterates on the bends, ribbon runs, and connector clearances to ensure the components will clear the taptic engine and battery walls.

- Flex PCBs substitute a thin polyimide plastic base for rigid fiberglass substrates so traces can flex and fold around internal structures. - Scale printouts coated with packing tape served as functional mechanical fit-checks inside the phone casing.

---

[17:43](https://www.youtube.com/watch?v=utfbE3_uAMA&t=1063s) Factory Run: Manufacturing the Flex Circuit

Scotty heads into the electronics markets of Huaqiangbei to meet Lisa, his sales contact for a flexible PCB manufacturing plant. Sitting at her booth, Scotty presents his paper mockup and an iPhone 7 chassis, explaining that he is modifying the phone to add a 3.5mm jack. Lisa smiles and remarks, “Oh, You changed it. You changed the phone.” When Lisa asks if he only needs a single test board, Scotty replies, “I probably should get like at least five pieces just in case I have—five or 10 pieces just in case I have problems.” He finalizes the CAD files that evening, sends them via WeChat, and joins Lisa for an on-site tour of the fabrication plant.

Inside the factory, Scotty walks through the end-to-end industrial FPC manufacturing line, remarking on the pungent chemical smell:

```mermaid flowchart TD accTitle: Flex PCB Industrial Production Process accDescr: Step-by-step manufacturing sequence for dual-layer flexible printed circuits. subgraph Prep["Substrate & Drilling"] A["Raw Copper/Polyimide Laminate"] --> B["CNC Multi-Spindle Drilling"] B --> C["Electroless & Electroplated Copper Vias"] end subgraph Pattern["Etching & Protection"] C --> D["Acid Chemical Etch of Copper Traces"] D --> E["Polyimide Coverlay / Solder Mask"] E --> F["Silkscreen Legend Printing"] end subgraph Verification["Quality Assurance"] F --> G["Bed-of-Nails Electrical Continuity Testing"] end ```

The process begins with rolls of raw laminate consisting of two micro-thin sheets of copper bonded to a central polyimide core. Automated robotic drill stations automatically cycle through tiny drill bits to bore micro-vias, which are immediately sent through chemical copper-plating baths to establish electrical continuity across both sides. Next, acid baths etch away unwanted copper to leave behind the fine-pitch circuit traces Scotty drew on his computer. A protective plastic coverlay and solder mask are bonded down to shield conductors from accidental shorts, followed by silkscreen printing for component reference markings. Before shipping, each finished panel is clamped into a custom spring-loaded bed-of-nails test jig to verify that every trace has electrical continuity and no unintended shorts exist. Shortly after the tour, Lisa texts Scotty on WeChat to confirm that his small batch of boards is finished.

- Raw stock consists of double-sided copper foil sandwiching an insulating polyimide core. - Robotic drilling arrays swap drill bits automatically to bore via holes down to fractional-millimeter diameters. - Custom test jigs perform 100% electrical continuity and isolation testing on every finished batch of FPC panels.

---

[20:37](https://www.youtube.com/watch?v=utfbE3_uAMA&t=1237s) Micro-Soldering BGA Components onto the Flex Circuit

Collecting the finished flex circuits from Lisa in Huaqiangbei, Scotty faces what he considers the most daunting hurdle of the project: hand-soldering microscopic ball grid array (BGA) silicon onto a delicate, heat-sensitive plastic substrate. As Scotty confesses, “This is the smallest soldering I've ever done, so I'm hoping I can pull it off.” Because a misstep could easily incinerate the thin polyimide or destroy expensive ICs, he starts with the cheapest passive components and small supporting chips first.

Working under magnification, Scotty dispenses solder paste—a suspension of microscopic metallic solder spheres blended into a thick flux paste—across the tiny footprint pads. Relying on liquid surface tension to pull the parts into alignment once liquefied, he places the miniature decoupling capacitors before positioning the BGA silicon chips onto their target footprints. Lowering the hot-air rework nozzle, he takes extreme care to avoid blowing the minute chips across his bench: “Just want like a baby's breath of hot air.” As heat saturates the zone, the grey paste liquefies into reflective molten beads, and surface tension snaps the components into dead-center alignment.

Inspection confirms the absence of solder bridges between the micro-pitch pads. He turns the board over, populates the opposing side, and links the completed flex circuit assembly to his phone test jig. When audio streams cleanly into connected headphones, months of agonizing schematic design and fabrication finally yield a fully functional miniaturized module, causing him to shout, “Months of work finally coming through.”

- Solder paste consists of micro-scale alloy spheres suspended in a viscous flux carrier. - Surface tension from molten solder automatically centers BGA packages over their corresponding substrate footprints. - A controlled, low-airflow hot-air profile was essential to avoid blowing micro-passives and BGA chips off their footprints.

---

[23:37](https://www.youtube.com/watch?v=utfbE3_uAMA&t=1417s) Precision Machining with Nick's Desktop CNC

With the internal flex electronics confirmed to be working, Scotty shifts to the mechanical challenge: cutting a clean, factory-grade 3.5mm aperture in the bottom aluminum rim of the iPhone 7 housing. Unwilling to settle for the jagged, uneven results produced by a hand Dremel tool, he visits his friend Nick Starno, a mechanical engineer who has recently set up a desktop CNC mill in his workshop lab.

Nick is still dialing in the machine's control software, noting, “I'm still figuring out how to use this software. So it's gonna sit like this, right? And the important measurement is the height of the hole from this space.” Nick generates toolpaths with helical lead-ins to bore into the curved aluminum sidewall, then compiles and loads the G-code into the machine controller. Clamping a spare donor iPhone rear housing into the mill vise, they initiate the cut. As the high-speed spindle engages the aluminum, the machine lets out a loud, harsh chatter. Watching the aggressive cutting forces shake the setup, Scotty remarks with concern, “Well, I don't think our feeds and speeds were ideal. There's definitely a lot of vibration going on.”

- Nick uses a custom desktop CNC milling machine running helical G-code routines to bore headphone jack openings. - Initial test cuts on spare chassis revealed chatter and high vibration, indicating the cutting speeds, feeds, and workholding rigidity required fine-tuning before cutting production housings.

[24:51](https://www.youtube.com/watch?v=utfbE3_uAMA&t=1491s) Machining the Jack and Controller-Guided CNC Milling

Scotty begins cutting out the interior clearance to test-fit the headphone jack and verify whether their combined modifications will fit. While testing the fit with a Dremel, the component gives way, prompting Scotty to realize, “I guess we'll have to have a 2.0.” To gain finer, more intuitive control over the CNC mill running Mach3 software, they pick up an Xbox 360 controller for about 180 RMB, complete with its original box sticker. Driving the mill axes with the analog thumbsticks dramatically speeds up the process, with Scotty remarking that they are now “cutting plastic like a video game.”

```mermaid flowchart TD accTitle: Headphone Jack Modification and Case Fit Process accDescr: Steps taken to shave down the headphone jack and mill the phone housing to fit inside the chassis. subgraph JackPrep["Jack Modification"] A["Stock 3.5mm Jack"] --> B["Dremel Shaving"] B --> C["Expose Metal on All Sides"] C --> D["Lathe / Mill Outer Bevel"] end subgraph CaseMod["Enclosure Machining"] E["Xbox 360 Controller + Mach3"] --> F["CNC Mill Clearance Cavity"] F --> G["Mill Beveled 3.5mm Port Hole"] end JackPrep --> H["Final Dry Fit in Chassis"] CaseMod --> H ```

The new milling run produces parts that look significantly cleaner than their initial terrifying attempts. The next challenge is machining the front face of the headphone jack into a circle so it seats neatly into the newly drilled case aperture. Scotty aggressively modifies the plastic casing of the connector with a rotary tool, shaving it away until bare metal is exposed on every side before handing it over to Nick Starno for fine lathe and CNC trimming. The resulting beveled port aligns neatly with the chassis, setting up the final assembly attempt.

- The Xbox 360 controller was sourced locally for roughly 180 RMB and mapped directly to control Mach3 CNC movement. - Scotty shaved down the headphone connector with a Dremel until metal was exposed on every perimeter surface to minimize its physical footprint.

---

[26:33](https://www.youtube.com/watch?v=utfbE3_uAMA&t=1593s) Assembly Failures, Broken Screens, and the Edge of Giving Up

Scotty attempts to seat the modified assembly into the bottom of a hand-drilled housing to verify screen clearance, but a noticeable gap remains between the display bracket and the aluminum shell. As he tries pressing the phone shut, the internal components crush against the delicate display assembly. Within twenty-four hours, two separate iPhone screens shatter under the strain of being compressed directly against the headphone jack mechanism.

Faced with mounting costs and exhausted from the delicate mechanical assembly, Scotty reaches an emotional low point. The pressure of living up to the expectations of his audience weighs heavily on him: “I wanted this story to be another story of inspiration, of success.” After venting his frustration, he refuses to quit after coming this far, resolving that he is gradually learning how to handle the fragile tolerances and deciding to give the assembly one final, methodical try.

- Scotty cracked two display assemblies in under 24 hours due to uneven pressure from the headphone jack beneath the bracket. - Broken replacement parts alone accumulated hundreds of dollars in unexpected project costs within a single week.

---

[30:00](https://www.youtube.com/watch?v=utfbE3_uAMA&t=1800s) Victory: A Fully Functional Headphone Jack on an iPhone 7

After a careful final reassembly, Scotty boots the modified iPhone without cracking the glass or damaging the internals. He immediately tests audio output: the speaker plays loud and clear, and when 3.5mm headphones are plugged into the custom port, audio seamlessly diverts to the earbuds. The inline volume buttons adjust level accurately, pressing the inline control pauses and resumes playback, and pulling the plug instantly halts the audio stream just like a factory Apple device.

```mermaid flowchart LR accTitle: Custom Audio and Power Switching Verification accDescr: Functional test flow confirming audio routing and Lightning charging behavior. subgraph AudioPath["Audio Routing"] A["Media Playback"] --> B{"3.5mm Connected?"} B -->|Yes| C["Route to Custom Jack"] B -->|No| D["Route to Internal Speaker"] C --> E["Inline Controls & Pause on Unplug"] end subgraph PowerPath["Power Routing"] F["Lightning Cable Plugged In"] --> G["Switch Logic Prioritizes Power"] G --> H["Standard Fast Charging Verified"] end ```

The final hurdle—ensuring the Lightning port could still charge while sharing routing lines with the headphone circuitry—works on the first try, eliciting an audible chime as power connects. Scotty compares his finished build to an original iPhone 6S, noting that while his custom port sits slightly further outboard and features a slightly rougher hand-finished bevel than Apple's factory version, the result is fully functional and remarkably close to factory aesthetics.

> “And when I unplug the headphones, it stops. How cool is that?” — Scotty

---

[31:10](https://www.youtube.com/watch?v=utfbE3_uAMA&t=1870s) Open Source Files, Apple Challenge, and the Right to Modify

Scotty directly addresses viewer demand, cautioning that while many want an updated iPhone with an analog jack, the delicate manual fabrication means he cannot sell commercial conversion kits himself. Instead, he produces a batch of limited-edition bare circuit boards for loyal fans and invites Apple engineers to reach out: “If you're an Apple engineer, and you can email me any reasonable proof, I'll send you a free circuit board.”

Scotty releases the full design files openly with zero licensing fees for the repair shops and technicians in Huaqiangbei and Shenzhen. He uploads the production files to Weibo and his website, inviting local hardware makers who possess superior microsoldering and fabrication skills to iterate on the board and sell retrofits to consumers. Looking beyond Shenzhen, Scotty solicits video ideas and invites leads from viewers worldwide via tips@strangeparts.com, closing with a call for user autonomy and right-to-repair:

> “I hope that one day we'll feel like we truly own our devices, that we'll feel free to modify and repair our phones as we please, to upgrade them and to add whatever features we can dream up.” — Scotty

- The complete hardware design was released free of charge on Weibo and the Strange Parts website for the Huaqiangbei manufacturing ecosystem to produce and modify. - Viewers with industrial, factory, or mining leads outside China were invited to send tips to tips@strangeparts.com. - Scotty concludes by acknowledging the upcoming launch of the iPhone 8, noting he has not seen one yet and cannot yet confirm whether a headphone jack could be added to it.

## Notable quotes > [31:10](https://www.youtube.com/watch?v=utfbE3_uAMA&t=1870s) I hope that one day we'll feel like we truly own our devices, that we'll feel free to modify and repair our phones as we please, to upgrade them and to add whatever features we can dream up. — Scotty

## Mentioned Strange Parts, Scotty, Apple, iPhone 7, iPhone 6S, iPhone 8, Hong Kong, Shenzhen, Huaqiangbei, iFixit, Taptic Engine, Vetus, Endy, Lisa, Nick Starno, Mach3, Xbox 360, Weibo

## Video description I love my iPhone, but it doesn't have a headphone jack! So I decided to add my own. For real. How I made an iPhone in China video: https://youtu.be/leFuF-zoVzA Share this video: https://youtu.be/utfbE3_uAMA Subscribe to the channel here: https://goo.gl/qeurxc

4 months, 7 custom circuit boards designs, 3 disassembled iPhones later, it works. It's the first modern iPhone with a headphone jack - the only one like it in the world.

More details here (and answers to all your questions): http://strangeparts.com/bringing-back-the-iphone-headphone-jack-in-china/ For diehard Strange Parts fans, go here to find out more about how to get a limited edition headphone jack circuit board: http://strangeparts.com/headphones The design is completely open source! Go here to find out more: http://github.com/strangeparts/niubi-headphones

I NEED YOUR HELP! Tell me what you'd like to see me do next in the comments! I'm really looking forward to exploring the back alleys of the industrial world outside of just cell phones and China. And if you think you have a really awesome idea, please email tips@strangeparts.com. In particular, if you live somewhere cool (particularly India or Africa), I want to hear about the industrial world(markets/factories/mines/etc) where you live. And if you're an engineer in manufacturing, hit me up with that cool factory story you've been dying to have someone tell. Thanks guys!

My Gear: I shot it on this camera: http://amzn.to/2B0Snke And also with this: http://amzn.to/2D7q5pN And recorded sound on this: http://amzn.to/2CFuyPv Collaborative editing software: http://bit.ly/frameio-sp

Facebook: http://facebook.com/strangepartscom Twitter: http://twitter.com/strangepartscom Instagram: http://instagram.com/strangeparts_com Email Newsletter: http://strangeparts.com/

Thank you to everyone that helped! Please go check them out - they’re all doing cool stuff. -- Galen - Assistant editor and all around right hand man Junshu - cameraman and filmmaker extraordinaire Colin Shipp - Advisor/Youtube Consultant (colin@thepossibilitygroup.com) Lewis - Translations wizard Nick Starno (http://nickstarno.info) - CNC master Loic De Buck - The keeper of the logic analyzer Ian Lesnet (http://dirtypcbs.com) - Supplier of antique drill presses, scavenged monitors, sage advice, and other curiosities Greg Needel and David Yanoshak - REV Robotics (http://www.revrobotics.com/) - bringers of the wisdom Hans (hmichl) - Electronics insight Paul Campbell (http://www.moonbaseotago.com) - Electronics insight and lore Julong Tool Brothers - The best tool booth in tool alley! Endy - chip brokerh (WeChat: YCJ13691959788) Lisa - Flexible PCB supplier (segpcb@163.com)

Music -- Handpan player - Chor Lai (http://facebook.com/chorsharp) Nice To You - Vibe Tracks - Youtube Audio Library Other Scenario - Lana Inspired (licensed through http://bit.ly/artlist-sp) Follow Me - Jimmy Fontanez - Youtube Audio Library Verve - A-GROUP (licensed through http://bit.ly/artlist-sp) Innocence - Suraj Nepal (licensed through http://bit.ly/artlist-sp) Pie Flavor - 0r4 (CC-BY https://soundcloud.com/0r4/pie-flavor) Breath Celebration - Gabriel Meyer (licensed through http://bit.ly/artlist-sp) Glitch garage rmx - faze rock (CC-BY https://soundcloud.com/fazerock/p-glitch-garage-rmx) Paradise - Ryan Little (https://soundcloud.com/iamryanlittle) Year Of Life - Young Rich Pixies (licensed through http://bit.ly/artlist-sp) Long Way - Lush Island (licensed through http://bit.ly/artlist-sp) Endless Inspiration - Nick Petrov (licensed through hooksounds.com)

#StrangeParts #PhoneAdventures #China

[Source](https://www.youtube.com/watch?v=utfbE3_uAMA)

中文简报

极客利用定制柔性电路为iPhone 7加装耳机孔 通过重新排布内部元件并嵌入定制切换电路,该改装证明iPhone 7在不改变机身外形的前提下,拥有足够内部空间容纳可正常工作的3.5毫米耳机孔。 因对苹果取消耳机孔感到不满,Scotty前往深圳华强北电子生态圈,试图在物理与电气层面将3.5毫米音频接口集成至iPhone 7中。他拆解了官方Lightning转耳机接口转接头,加入一颗有源USB切换芯片以兼顾充电与音频播放,并设计了避开Taptic Engine和电池等内部组件的定制柔性印刷电路板(FPC)。在当地工厂生产柔性板、使用热风枪手工焊接微型BGA芯片,并通过Xbox手柄操控的桌面数控铣床在铝制边框上精准开孔后,他在克服了多次屏幕总成碎裂的挫折下,最终拼装出一台不仅能播放音频、支持线控,还能通过Lightning无缝快充且未破坏原厂外形规格的iPhone 7。 来自Strange Parts的Scotty历时四个月的原型开发、七次电路修改并拆解了三部手机后,成功在一部iPhone 7内部改装出可正常工作的3.5毫米耳机孔。 (0:00) 通过将电池向上平移、将Taptic Engine旋转90度、拆除一个内部塑料支架并削薄耳机插孔组件,内部腾出了所需空间。 (3:24) 由于iPhone 7逻辑板未引出原始模拟音频信号,该改装内置了苹果官方Lightning转3.5毫米转接头电路,并搭配定制切换多路复用器以在充电和音频间进行切换。 (6:13) 为实现微型化,硬件从刚性玻璃纤维测试板转为在深圳制造的定制双层柔性PCB(聚酰亚胺),并在热风下手工焊接了BGA元件。 (16:15) 整个硬件项目均已开源,以鼓励维修权实践并让华强北技术人员进一步完善该改装方案。 (31:10)

Reading summary

Scotty from Strange Parts engineered a fully functional 3.5mm headphone jack inside an iPhone 7 by embedding Apple's adapter circuitry, adding a custom switching chip, and manufacturing a flexible printed circuit board in Shenzhen. The project demonstrated that the missing port was physically possible to fit, while highlighting the extreme mechanical tolerances of modern smartphones and the prototyping power of China's hardware ecosystem. Reclaiming Chassis Clearance and Precision Machining (1:21) The interior of the iPhone 7 is densely packed with virtually no unoccupied volume. Where previous models housed the audio jack, Scotty encountered a plastic bracket described by Apple and teardown guides as a barometric vent—a claim Scotty openly doubted. By removing this plastic piece, rotating the Taptic Engine ninety degrees, and nudging the battery upward against the logic board, he uncovered just enough internal clearance to seat a 3.5mm jack without altering the phone's exterior profile beyond a single port hole. Achieving that clearance required aggressive mechanical modification. Scotty trimmed the jack's plastic housing down to bare metal and enlisted mechanical engineer Nick Starno to mill the aluminum casing on a desktop CNC router mapped to an Xbox 360 controller. The vertical tolerances remained exceptionally unforgiving: mechanical pressure from the home button bracket crushed and shattered two display assemblies within twenty-four hours before Scotty dialed in the final seating depth. Audio Conversion and Signal Switching Architecture (6:13) Because the iPhone 7 logic board does not provide analog audio signals at accessible test points, Scotty could not simply solder the jack directly to the motherboard. His solution was to harvest the internal circuit board from official Apple Lightning-to-3.5mm adapters, which cost 78 RMB each at the Shenzhen Apple Store, and embed the digital-to-analog converter inside the device. Hardwiring the audio adapter directly to the internal Lightning pins introduced a critical conflict: it blocked external charging and data transfer. Advised by an engineer friend, Scotty added a high-speed USB multiplexer chip sourced through local broker Endy to switch internal connections automatically between the audio board and the physical Lightning port. Benchtop prototyping verified that the circuit played crisp audio and instantly restored charging when a Lightning cable was plugged in. Flexible Circuit Prototyping and Micro-Soldering (16:15) To route the switching electronics through the cramped phone cavity, Scotty abandoned rigid fiberglass PCBs in favor of an ultrathin flexible printed circuit (FPC) made of polyimide film. He designed 1:1 scale paper mockups laminated with packing tape to test the multi-fold 'origami' fit around internal battery walls and brackets before submitting CAD files to a Huaqiangbei fabrication contact named Lisa. A local factory ran a small batch through CNC multi-spindle drilling, chemical copper plating, acid etching, and bed-of-nails continuity testing. Scotty then hand-soldered ball grid array (BGA) components and microscopic passives onto the delicate film using solder paste, high-precision Vetus tweezers, and a low-airflow hot-air rework station, relying on liquid surface tension to pull the microscopic chips into dead alignment. Functional Validation and Open-Source Release (30:00) The completed assembly booted successfully without damaging the display. The custom 3.5mm jack retained complete factory behavior: audio redirected seamlessly from the built-in speaker, inline volume and play/pause controls functioned accurately, unplugging headphones paused playback, and standard Lightning charging triggered without interference. Citing the extreme difficulty of hand fabrication, Scotty chose not to sell commercial retrofit kits. Instead, he released the complete CAD schematics and manufacturing files free of charge on Weibo and the Strange Parts website for Huaqiangbei repair shops to develop and produce, framing the project as an argument for hardware ownership, user autonomy, and the right to modify consumer electronics. While the project proved that an iPhone 7 could accommodate an internal 3.5mm headphone jack alongside its native components, doing so required micro-machining, custom flex PCB manufacturing, and microscopic BGA soldering. Scotty openly noted that he could not manufacture retrofits at scale, leaving open-source iteration to Shenzhen's repair technicians while leaving unanswered whether later models like the iPhone 8 could support similar modifications.

精炼阅读摘要

硬件创客 Scotty 凭借深圳华强北完善的电子供应链与加工生态,成功为取消了 3.5 毫米耳机接口的 iPhone 7 逆向植入内部音频转换与切换电路,证明了在极端紧凑的消费电子设备中进行用户自主硬件改装的可行性。 内部空间权衡与机械结构重新排布 (1:21) 在拆解 iPhone 7 后,Scotty 发现机身内部结构极为紧凑,几乎没有任何闲置空间。原先耳机孔的位置被一块注塑塑料件占据,官方文档及 iFixit 拆解将其描述为气压通风阀,用于平衡内外气压以保证高度计读数准确,但 Scotty 对这一说法表示怀疑。为在不改变手机外壳整体外凸造型的前提下容纳 3.5 毫米音频插座,必须在毫厘之间对内部元件进行彻底重组。 利用旋转工具切除底角多余塑料与金属支柱后,耳机插孔的放置依然面临 Taptic Engine 振动马达和电池下沿的严重阻碍。Scotty 最终通过将 Taptic Engine 旋转 90 度安装、并将电池整体向上平移至紧贴主板,在左下角创造了必要的容纳空间。但这种挤压导致底部柔性电缆支架受到竖向压力,在后续装配中一度由于公差过紧而连续压碎了两块昂贵的屏幕,凸显了在超薄手机内调整机械结构的极高风险。 内置转换架构与多路复用切换电路 (6:13) iPhone 7 主板未向未使用的测试点输出原生模拟音频信号,因此无法直接从主板引出声音。Scotty 采取的方案是将售价 78 元人民币的 Apple 官方 Lightning 转 3.5 毫米转接头拆解,提取其微型数模转换芯片(DAC)并完整内嵌至机身。然而,将转换电路直接永久硬接至 Lightning 引脚会导致外部接口失去充电和数据同步功能。 为解决接口独占问题,经同行工程师建议,Scotty 引入了一颗集成高速 USB 多路复用器(multiplexer)切换芯片。该芯片能够在检测到外部插入 Lightning 充电线时,自动切断内置耳机转换器的通路并优先保障供电与数据连接;而在未充电时,则将总线信号定向至内置耳机接口。该逻辑在面包板与自制刚性测试板上成功完成了充电影音平滑切换的验证。 微型柔性印刷电路板(FPC)的设计与代工 (16:15) 标准刚性玻璃纤维板(FR4)尺寸过大且不可形变,完全无法塞入 iPhone 7 的缝隙。Scotty 转而设计使用聚酰亚胺塑料基材的双层柔性印刷电路板(FPC),这种“折纸式电路”具备极薄且可弯折的物理特性。为了验证三维空间折叠形态,他先通过打印机制作 1:1 纸质模型,并用透明胶带覆膜以模拟真实 FPC 的硬度与厚度,在空机壳内完成了精准的走线验证。 随后,Scotty 在华强北代工商 Lisa 的协助下,进入专业柔性板工厂进行小批量生产。工厂流程涵盖了数控多轴微孔钻孔、沉铜与电镀通孔、化学酸洗刻蚀微米级铜线、压合聚酰亚胺覆盖膜以及针床电连续性检测。收到成品裸板后,Scotty 在显微镜下使用极微风量的热风枪与精密镊子,利用焊膏表面张力完成微型 BGA 无引脚芯片的手工焊接,最终打造出能够穿梭于紧凑底仓的完整定制电路模块。 桌面数控加工与外壳精密切割 (23:37) 为了让机身底部的 3.5 毫米开孔达到接近原厂的外观水准,Scotty 放弃了切口粗糙的手持 Dremel 雕刻机,转而与机械工程师 Nick Starno 合作,采用其自建的桌面 CNC 铣床进行加工。为了以更直观、细腻的方式控制 Mach3 驱动软件,他们耗资约 180 元人民币采购了一款 Xbox 360 游戏手柄,通过模拟摇杆精确引导铣刀轨迹。 除机壳开孔外,3.5 毫米耳机母座本身的塑料外皮也被手工打磨削薄直至四面裸露金属,并送上车床与 CNC 进行边缘倒角切割。经过精密的螺旋下刀铣削,底壳外壁成型了规整的倒角孔洞,使极度紧凑的改装母座得以与机身外壳严密咬合,消除了因装配受力不均导致内屏再度破裂的隐患。 Scotty 最终装配出功能完备的 iPhone 7,其 3.5 毫米接口不仅能完美输出音频并支持线控调节与拔出自动暂停,外部 Lightning 接口的充电功能亦未受影响。鉴于手工微焊与公差控制极其严苛,Scotty 明确表示无法量产该套件,而是将全部硬件工程图纸免费开源上传至微博与个人网站,供华强北维修生态与第三方技术人员自由生产迭代,同时借此呼吁保障消费者对自有设备的维修与改装权利。

Detailed notes — zh

## Background 该视频由创作者 Scotty 于 2017 年 9 月 6 日发布在 YouTube 频道“Strange Parts”上。视频简介指出,作者深感 iPhone 取消耳机孔的不便,历时 4 个月、设计了 7 版定制电路板并拆解报废了 3 部 iPhone,最终在硬件制造之都中国深圳成功为 iPhone 7 重新加装了内置的 3.5 毫米耳机接口,并宣布将全部设计开源。 ## TL;DR 为了打破苹果取消耳机孔的限制,Scotty 前往深圳华强北展开极限逆向工程。他首先通过物理改造将 Taptic Engine 侧装并上移电池,为 3.5mm 耳机母座腾出极其局促的内部空间;接着解剖苹果官方 Lightning 转接头,并设计了带有模拟切换芯片的柔性电路板(FPC),完美解决了音频输出与 Lightning 充电通道之间的自动切换;在经历显微镜级手工微焊接、CNC 精准铣削后盖开孔以及数次压碎屏幕的崩溃边缘后,他最终打造出全球首台兼具完整线控、拔出暂停及边充边听功能的定制版 iPhone 7,并公开呼吁科技行业捍卫消费者的设备所有权与维修权。 ## Atmosphere & style 整部视频散发着浓郁硬核、接地气且充满悬念的创客极客氛围。Scotty 亲切自然的叙事风格与华强北熙攘嘈杂的工业街景形成了奇妙的共鸣,从路边吃烤串讨论芯片架构的灵光乍现,到在显微镜下屏息焊接 BGA 芯片时的屏气凝神,情绪起伏极其真实。尤其是当他在 24 小时内连续压碎两块原装屏幕、在镜头前坦承想要彻底放弃时,那种在绝望边缘徘徊后又重拾信心的坚持,赋予了最终插上耳机音乐响起的那一刻无与伦比的释放感与精神共鸣。 ## Bulletin - [00:00](https://www.youtube.com/watch?v=utfbE3_uAMA&t=0s) 创客 Scotty 历时 4 个月、设计 7 版电路并拆解报废 3 台手机后,成功在取消了 3.5 毫米接口的 iPhone 7 内部无损加装了功能完备的原生耳机孔。 - [02:58](https://www.youtube.com/watch?v=utfbE3_uAMA&t=178s) 改造方案通过将 Taptic Engine 旋转 90 度侧装、向上微调电池位置,并引入 USB 模拟切换芯片,完美解决了机身内部物理干涉与边充电边听歌的电气冲突。 - [17:43](https://www.youtube.com/watch?v=utfbE3_uAMA&t=1063s) Scotty 依托深圳华强北的微电子加工与柔性印刷电路板(FPC)供应链完成了精密制造,并宣布将全套设计文件与 PCB 开源供所有人免费商用与改进。 - [31:10](https://www.youtube.com/watch?v=utfbE3_uAMA&t=1870s) 该项目不仅攻克了微型 BGA 芯片的手工焊接与 CNC 铣削难题,更公开呼吁科技行业重视用户的“设备所有权”与自主维修改装权(Right to Repair)。 ## Key takeaways - [00:00](https://www.youtube.com/watch?v=utfbE3_uAMA&t=0s) 源于对苹果取消 3.5mm 耳机孔的不满,Scotty 拒绝采用外挂转接壳或恶搞打孔方案,决心在 iPhone 7 原机内部实现真机硬件集成。 - [01:29](https://www.youtube.com/watch?v=utfbE3_uAMA&t=89s) 拆解发现苹果官方宣称用于气压平衡的塑料件可被移除,腾出的空间刚好能容纳 3.5mm 耳机母座,无需破坏外壳做凸起改装。 - [03:24](https://www.youtube.com/watch?v=utfbE3_uAMA&t=204s) 通过将 Taptic Engine 旋转 90 度侧置并将电池向上微调平移,成功化解了耳机母座在机身底部的横向物理干涉。 - [06:13](https://www.youtube.com/watch?v=utfbE3_uAMA&t=373s) 因 iPhone 7 主板彻底移除了原生模拟音频线路,Scotty 只能通过解剖苹果官方 Lightning 转 3.5mm 转接头来获取内置音频解码芯片(DAC)。 - [08:05](https://www.youtube.com/watch?v=utfbE3_uAMA&t=485s) 借助华强北专业工具街采购的高清立体显微镜与精密镊子,历经一周手工微米级飞线,首次验证了底部接口引脚输出音频的可行性。 - [10:58](https://www.youtube.com/watch?v=utfbE3_uAMA&t=658s) 引入高速 USB 模拟切换芯片(Switching IC),使设备能够在外部插线时自动走 Lightning 充电通路、未插线时默认接通内置耳机模块,解决充放电冲突。 - [12:27](https://www.youtube.com/watch?v=utfbE3_uAMA&t=747s) 面包板原型调试成功后,通过制作大尺寸预留测试点的 FR4 刚性 PCB 快速验证了硬件逻辑,避免了前期手工飞线塞入机身的不可靠性。 - [16:15](https://www.youtube.com/watch?v=utfbE3_uAMA&t=975s) 为在极小缝隙中布线,必须改用聚酰亚胺材质的柔性电路板(FPC),Scotty 创造性地使用 1:1 打印件结合透明胶带覆膜来核验 3D 折弯干涉路径。 - [17:43](https://www.youtube.com/watch?v=utfbE3_uAMA&t=1063s) 深入深圳本地 FPC 制造工厂,完整经历了覆铜打孔、过孔沉铜电镀、酸液蚀刻线路、贴防焊薄膜与针床治具测试的全套工业化流程。 - [20:40](https://www.youtube.com/watch?v=utfbE3_uAMA&t=1240s) 微型球栅阵列封装(BGA)芯片引脚全隐藏在底部,Scotty 使用微风速热风枪配合焊膏表面张力,极其惊险地完成了双面微型元件的手工焊接。 - [23:37](https://www.youtube.com/watch?v=utfbE3_uAMA&t=1417s) 借助好友 Nick 的桌面数控铣床(CNC)配合 Xbox 360 手柄精确微调,在铝合金后盖与塑料件上铣出严丝合缝的正圆耳机孔通道。 - [26:35](https://www.youtube.com/watch?v=utfbE3_uAMA&t=1595s) 在组装调试冲刺阶段,由于微米级的厚度超标,Scotty 在 24 小时内连续挤碎了两块原装液晶屏,承受了巨大的心理与经济压力。 - [29:55](https://www.youtube.com/watch?v=utfbE3_uAMA&t=1795s) 最终装配成功的 iPhone 7 完美保留了全部耳机线控功能、拔出自动暂停逻辑、扬声器无缝切换以及独立的 Lightning 充电响应。 - [31:10](https://www.youtube.com/watch?v=utfbE3_uAMA&t=1870s) Scotty 将整套电路方案开源上传至 GitHub 与个人网站,允许华强北商家和全球创客自由制造销售,以此践行用户应当真正拥有并改装自己设备的理念。 ## Detailed walkthrough ### [00:00](https://www.youtube.com/watch?v=utfbE3_uAMA&t=0s) 缘起:给 iPhone 7 重新装回耳机孔的狂想 YouTube 频道“Strange Parts”的创作者 Scotty 此前曾因在深圳华强北完全依靠散件组装出一台 iPhone 而为人所知。几个月前,他在香港的 Apple Store 购买了一台全新的 iPhone 7,原本计划用它在深入工业制造世界探险时拍摄更高画质的视频。然而,iPhone 7 彻底取消了 3.5 毫米耳机接口,这让他感到极其烦恼。“I was stewing on it, and I was stewing on it, because I know Apple's not gonna add it back.”(“我一直在为此生闷气,不停地琢磨,因为我知道苹果绝对不可能把它加回来了。”)Scotty 如此说道。第二天早晨醒来时,一个大胆的想法涌上心头:为什么不能自己给手机加一个耳机孔? 虽然网络上曾有恶搞视频教人用电钻在 iPhone 底部强行打孔,但那只会彻底毁掉手机。Scotty 决心要真正通过硬件改造实现功能完整的内置耳机孔。为了验证这个看似不可能的想法,他再次启程前往世界电子制造业之都——深圳。 ### [01:29](https://www.youtube.com/watch?v=utfbE3_uAMA&t=89s) 拆解评估:寻找机身内部的物理空间 抵达深圳华强北电子批发市场后,Scotty 面临的第一个难题是需要一台用于拆解和试验的备用机。他并不舍得拆开刚在 Apple Store 买的原装新机,但市场上很难单独买到 iPhone 7 的散片逻辑主板,于是他退而求其次买了一台二手 iPhone 7。用专用的屏幕开启工具撬开缝隙后,内部紧凑的结构展现在眼前。iPhone 7 内部空间极其局促,留给改装的余地微乎其微。 在原先 iPhone 6s 耳机孔所处的位置,Scotty 发现了一块不起眼的塑料结构件。知名拆解机构 iFixit 援引苹果官方的说法称,这块位于机身角落的塑料件是一个“气压通气孔”(barometric vent),用于让机身内部与外界气压平衡以保证高度计的测量精度。但 Scotty 对此深表怀疑,直言这看起来就是个普通的塑料固定卡扣。当他拿起一个标准的耳机母座放进去比对时,惊讶地发现如果对周边部件进行适当切削,耳机孔居然有可能完全塞进机身内部,而不需要在手机外壳上做一个难看的凸起大包。这意味着他或许只需要在机身底部钻一个小孔,就能保持原本的外观形态。 ```mermaid flowchart TD accTitle: 机身内部空间改造与部件挪位方案 accDescr: 展示将耳机孔塞入iPhone 7机身时涉及的物理干涉与部件位移调整。 subgraph 原机结构冲突 A["原有塑料结构件<br/>(官方称气压通气孔)"] -->|拆除释放空间| B["放置 3.5mm 耳机母座"] C["Taptic Engine 震动马达"] -->|横向物理干涉| B D["原电池安装位置"] -->|纵向空间受限| C E["屏幕底部支架与排线接头"] -->|垂直高度冲突| B end subgraph 结构调整方案 B --> F["底部金属外壳精准开孔"] C -->|旋转90度侧向放置| G["Taptic Engine 侧装"] D -->|向上平移紧贴逻辑板顶端| H["电池位置上移"] E -->|Dremel打磨切角消除挤压| I["屏幕平整扣合且排线不脱落"] end ``` ### [03:24](https://www.youtube.com/watch?v=utfbE3_uAMA&t=204s) 暴力改造:Dremel 打磨与内部组件的乾坤大挪移 为了为耳机孔腾出物理空间,Scotty 前往市场买了一台 Dremel 旋转雕刻打磨机,开始对机壳和内部构件进行物理切削改造。在打磨机的高速嗡鸣与火花碎屑中,耳机孔被初步放置在左下角,底壳边缘也对应磨出了耳机插孔的通道。然而,原本横向布置的 Taptic Engine(震动马达)严重阻挡了空间。 在反复比对后,Scotty 惊喜地发现只要把电池向上略微平移,让它紧贴在逻辑主板的顶端边缘,就可以将 Taptic Engine 旋转 90 度侧着装入机身。“I am a lucky bastard. I can totally just put the Taptic Engine in sideways.”(“我真是一个走运的混蛋,我完全可以把 Taptic Engine 侧着塞进去。”)他兴奋地感叹。虽然布局看起来有些歪斜,但横向干涉的问题迎刃而解。 紧接着出现了更为棘手的垂直高度问题。当屏幕盖回时,左下角明显翘起无法平整扣合。症结在于屏幕底部的金属支架直接压在耳机座上方,且该区域的两组排线连接器在狭小空间内相互挤压冲突,稍有压力就会导致接头崩开脱落。Scotty 拿起打磨机小心翼翼地磨削排线接口的边角以消除物理干涉,经过反复微调打磨,屏幕终于能够基本水平合上。 ### [06:13](https://www.youtube.com/watch?v=utfbE3_uAMA&t=373s) 电气原理突破:解剖苹果官方转接头 机身物理空间虽然勉强解决,但更核心的挑战在于电气连接。Scotty 最初抱有一丝侥幸,希望能像旧款 iPhone 一样在主板上直接找到耳机音频输出的焊盘引脚,但在查阅资料并咨询多位专家后,他确认 iPhone 7 内部根本没有多余的原生模拟音频线路。 他随即想到了苹果随机附赠的 Lightning 转 3.5 毫米耳机转换头——其内部必定包含微型的音频解码芯片(DAC)及电路。他设想将转接头拆解并焊接到原机底部 Lightning 尾插的背面引脚上,从而实现音频转接。为此,Scotty 前往深圳益田假日广场的苹果官方直营零售店购买原装转接头(单价 78 元人民币)。在首次尝试用打磨机切开塑料外壳时,他不慎切断了内部元件,导致转接头彻底报废。他不得不立刻返回 Apple Store,一口气再买了三根备用。 ### [08:05](https://www.youtube.com/watch?v=utfbE3_uAMA&t=485s) 工具升级:探访华强北工具档口与显微镜实操 由于需要在密集的 Lightning 尾插引脚与微型转接头电路之间进行飞线焊接,这远超 Scotty 过去的焊接精细度极限。他原先购买的 10 美元劣质 USB 显微镜成像模糊,根本无法辅助操作,于是他来到华强北著名的工具街(Tool Alley)升级装备。 在熟悉的巨龙工具兄弟档口,店主热情地向他推荐了三款不同档次的防静电精密镊子,并自豪地展示其中最顶级的瑞士原装 Vetus 镊子;随后又为他挑选了耐高温的高品质红白飞线。紧接着,Scotty 在市场里选购了一台全新的专业光学立体显微镜。档口的女老板在交货前当场开箱组装调试,逐一排查问题以确保设备完美可用。这种细致入微、现场验证的商业文化让 Scotty 连连称奇。 借助专业显微镜的高清视野,Scotty 耗费了一整周以上的时间进行极度微小的手工飞线,成功将 iPhone 7 原装尾插排线的每个针脚引出到排针板,并与剥离外壳的苹果音频转接头线路一一对接。当他在工作台上第一次通过这套飞线原型插上耳机成功听到声音时,忍不住长舒一口气大笑起来。 ### [10:58](https://www.youtube.com/watch?v=utfbE3_uAMA&t=658s) 解决充放电冲突:引入 USB 模拟切换芯片 初步音频验证成功后,新的矛盾接踵而至:如果直接将耳机转接电路永久焊死在尾插的 Lightning 引脚上,原本的 Lightning 充电口就将完全失去与主板的连接,手机将无法正常充电或传输数据。 在一次与朋友喝啤酒吃路边烧烤的聚会中,Scotty 倾诉了这个瓶颈。朋友们为他提供了关键思路:自主设计一块电路板,利用市面上的 USB 模拟切换芯片(Multiplexer/Switch IC),在原装 Lightning 接口和内置耳机转换电路之间进行自动切换。一旦检测到外部插入了原装充电线,芯片便将线路自动切换至外部 Lightning 接口;外部未插入时,线路则默认接通内置的耳机转接模块。 ```mermaid flowchart LR accTitle: Lightning 接口与耳机自动切换逻辑 accDescr: 展示切换芯片如何根据外部插线状态,在耳机转接板与外部充电口之间动态路由信号。 A["iPhone 7 逻辑主板"] <--> B["USB 模拟切换芯片<br/>(Switching IC)"] B <-->|"未插入外部线缆<br/>(默认音频通路)"| C["内置苹果音频转接模块<br/>(DAC + 3.5mm母座)"] B <-->|"检测到线缆插入<br/>(切换充电/数据通路)"| D["外部 Lightning 接口"] ``` 在朋友的引荐下,Scotty 在华强北市场见到了芯片分销商 Endy,顺利拿到了满足高频切换需求的集成芯片。回到工作台后,Scotty 迅速搭建起由 iPhone 逻辑主板接口、Lightning 尾插、解剖后的耳机转换模块以及切换芯片组成的四方测试平台,准备正式验证在耳机插入与充电切换状态下这套电路的实际表现。 ### [12:27](https://www.youtube.com/watch?v=utfbE3_uAMA&t=747s) 面包板原型验证成功与刚性 PCB 设计 在经过复杂的逻辑分析与信号切换调试后,Scotty 迎来了关键突破时刻。当他将耳机插头插入测试接口时,屏幕状态栏立刻跳出了“Headphones”的提示,令他兴奋地惊呼:“Holy shit. It works.”。随后,他插入充电线验证双重功能:切换至充电模式时,屏幕立即亮起并显示正在充电;切换回耳机插孔,系统再次无缝识别为耳机。这种反复插拔与切换的稳定性彻底证实了自制电路在电气逻辑上的可行性。Scotty 拍手大呼:“Time to make a circuit board.” ```mermaid flowchart LR accTitle: 音频与充电逻辑验证流程 accDescr: 验证信号切换器在耳机音频与 Lightning 充电之间正确切换并被系统识别的步骤 subgraph Inputs["输入设备"] A["3.5mm 耳机"] B["Lightning 充电线"] end subgraph Switch["自制切换电路"] C["硬件切换开关"] D["信号逻辑控制芯片"] end subgraph iPhone["iPhone 识别"] E["音频输出 (Headphones)"] F["充电状态 (Charging)"] end A --> C B --> C C --> D D --> E D --> F ``` 最初他曾设想完全用手工飞线的方式将这些元器件塞进手机内部,但面对日益复杂的逻辑芯片和细密线路,这种想法已经不再现实。他决定绘制印刷电路板(PCB)。为了稳妥起见,他并没有一开始就尝试做出一块能够塞入机身尺寸的微型板,而是先设计了一块面积较大、焊盘宽松且带有大量测试点的原型 PCB。这样不仅便于手工焊接大封装芯片,更能在遇到故障时用万用表和逻辑分析仪逐点排查。在电脑前连续奋战两天后,他终于将设计图交付工厂生产。 - 验证核心功能:不仅成功识别 3.5mm 音频输出,还实现了音频与 Lightning 充电通道之间的可靠切换。 - 原型板设计考量:采用大尺寸封装芯片以降低焊接难度,并预留大量测试点(Test Points)以便于硬件除错。 - 制造交付周期:在深圳的高效供应链支撑下,从发出设计图到周日早上 10:30 收到实物电路板仅用了极短时间。 ### [15:05](https://www.youtube.com/watch?v=utfbE3_uAMA&t=905s) 第一代刚性原型板的接线失误与权衡取舍 收到交付的绿色原型 PCB 后,Scotty 立即开始手工组装与测试。由于此前拆解的 iPhone 7 仍处于维修改装状态,他选择用一台 iPhone 6S 作为测试平台。然而,通电后耳机并没有像预期那样正常发声,调试陷入停滞。排查后他啼笑皆非地发现,自己在布线时竟然完全将引脚定义给画反了:“I just totally wired these backwards.” 面对这一低级失误,他并没有重做整块板子,而是采取了变通手段:拆下板载的耳机母座,改用飞线将正确的管脚重新引出并跨接到电路板上。经过这番飞线修正,板载的原装 Lightning 转 3.5mm 转换芯片依然存在偶发工作不稳定的情况,但换上他之前手工焊接验证过的转接板模组后,整套逻辑便能顺畅运行。眼看核心验证已经达成,Scotty 决定不再在一块注定要被淘汰的大尺寸测试板上深究细枝末节,而是干脆地表示:“I think I'm gonna declare victory and move on.” ### [16:15](https://www.youtube.com/watch?v=utfbE3_uAMA&t=975s) 构想柔性电路板(FPC)与纸样实机匹配 要把整个转接与切换系统塞入结构极其紧凑的 iPhone 7 内部,刚性玻璃纤维板(FR4)显然无法胜任,Scotty 必须采用柔性印刷电路板(FPC,Flexible Printed Circuit)。柔性板利用聚酰亚胺等轻薄塑料薄膜替代了坚硬的玻璃纤维基材,能够像纸张一样在狭小缝隙中随意弯折,因此在手机、相机等精密数码产品中被广泛应用,甚至被称为“折纸电路”(Origami circuits)。 对于从未涉足过柔性电路板设计的 Scotty 而言,折弯半径、走线重叠以及元件布局全都是全新挑战。为了在打样前确保图纸上的异形轮廓与折叠路径能完美避开手机内部的 Taptic Engine、电池和天线,他特意买了一台普通办公打印机。他将 1:1 比例绘制的 PCB 轮廓打印在纸上,手工贴上一层透明胶带进行“简易覆膜”(ghetto lamination)以模拟板材挺度,随后用剪刀细心剪下并折叠塞入 iPhone 7 底部的各个缝隙中,反复核验实际结构间隙。 - 柔性板(FPC)特性:以聚酰亚胺(PI)薄膜为基材,具备极佳的柔韧性与极小的厚度,适合在立体空间中折叠布线。 - 纸样模拟法:利用 1:1 打印件结合透明胶带覆膜,快速低成本验证 3D 折叠路径与元器件干涉情况。 ### [17:43](https://www.youtube.com/watch?v=utfbE3_uAMA&t=1063s) 探访深圳柔性电路板工厂与制造工艺全貌 完成设计后,Scotty 前往华强北市场拜访他的柔性板供应商对接人 Lisa。Lisa 对他在 iPhone 7 上自加耳机孔的设想感到十分惊奇,笑着说道:“Oh, You changed it. You changed the phone.” 考虑到手工焊接可能带来的极高报废率,Scotty 要求打样 5 到 10 片备用。随后,他跟随 Lisa 深入柔性电路板的制造工厂,亲眼见证了一块 FPC 从卷材到成品的严密工业化流程。 ```mermaid flowchart TD accTitle: 柔性印刷电路板 (FPC) 制造工序 accDescr: 展示从铜箔基材到最终出厂测试的柔性电路板完整工业生产步骤 subgraph BasePrep["基材准备与打孔"] A["双面铜箔卷材下料"] --> B["数控自动钻孔机打孔"] end subgraph PlatingEtching["线路成型"] B --> C["化学沉铜与导电孔 (Via) 电镀"] C --> D["曝光显影与酸液蚀刻铜皮"] end subgraph Finishing["表面处理与测试"] D --> E["贴附聚酰亚胺阻焊膜 (Coverlay)"] E --> F["丝网印刷字符与标识"] F --> G["专用测试治具 (Test Jig) 电气测试"] end ``` 车间内弥漫着浓烈的化学试剂气味,生产首先从切卷双面覆铜板开始;接着,高度自动化的数控钻床自动调配不同规格的微型钻头钻出过孔;随后,通过化学沉铜对孔壁进行电镀,使正反两层线路导通;紧接着,板材送入强酸蚀刻机,将多余的铜箔溶蚀,仅留下精密的走线;此后,工人为其压合保护覆盖膜(Coverlay)充当阻焊层,并送入丝印车间印制文字标示;最后,每一批下线的板子都需要放入专门制作的针床治具中进行严格的通断与绝缘测试。几天后,Lisa 微信通知板子已做好并在市场交货,这让 Scotty 既兴奋又忐忑。 - 钻孔工艺:全自动数控钻机具备自动换刀功能,钻出直径极其微小的过孔。 - 导通电镀:通过在过孔内壁镀铜(Copper plating the vias),实现双层薄膜之间的电气连通。 - 出厂品控:针对特定电路板设计专门制作的针床测试治具(Test jigs),逐片检验所有引脚之间是否存在短路或虚焊。 ### [20:40](https://www.youtube.com/watch?v=utfbE3_uAMA&t=1240s) 高难度微型 BGA 芯片的手工热风枪焊接 拿到实物 FPC 后,挑战转移到了微型手工焊接上。这是 Scotty 尝试过焊盘最小、密度最高的焊接作业,特别是其中几颗采用球栅阵列封装(BGA)的芯片,其引脚全隐藏在芯片底部的微型焊球上,任何轻微的手抖或风速过大都会导致芯片移位甚至被吹飞。他坦白承认:“I'd be lying if I didn't say I was at least a little bit worried.” 他的操作策略极为谨慎:先在细小的焊盘上均匀点涂微量的锡膏(由悬浮在助焊膏中的微观金属锡球组成),依靠熔融状态下的液体表面张力来自动拉正元器件的位置。他先从小体积的电容等被动元件入手,随后用镊子小心翼翼地夹取 BGA 芯片对准位置。他将热风枪的风速调低到宛如“婴儿呼出的微风”(a baby's breath of hot air),自上而下缓缓加热。随着锡膏闪亮熔化,微型芯片在助焊剂的表面张力作用下精准对齐并沉入焊盘。在显微镜下仔细确认没有任何引脚桥接短路后,他又翻转板子完成了背面的焊接。 焊接完成后,Scotty 屏住呼吸将这套极其脆弱的柔性板连接至系统进行带电验证。当耳机插头轻轻接入、音乐声清脆传出的那一瞬间,他兴奋地叫出声来:“How cool is that! Months of work finally coming through.” 数月以来的艰苦摸索终于在这一刻得到了回报。 ### [23:37](https://www.youtube.com/watch?v=utfbE3_uAMA&t=1417s) 求助好友 Nick:桌面 CNC 铣削后盖开孔 电路问题彻底攻克后,最后的难关落在了 iPhone 7 铝合金一体化金属机身的机械加工上。由于机身内部没有现成的耳机开孔,Scotty 此前仅靠手持 Dremel 旋转雕刻机尝试打磨,不仅切口粗糙不平,且极易打歪报废。为此,他搭乘出租车前往机械工程师好友 Nick Starno 的工作室求助。Nick 的实验室里配备了一台高精度的桌面数控铣床(Desktop CNC mill),其工作原理正如精密受控的机器人钻头。 两人围在电脑前反复调试 CAM 加工软件中的 G-code 代码,重点测量了耳机孔中心相对于外壳内侧平面的精确垂直高度,并设定了沿螺旋下刀(Helix)的切削路径。为了验证转速与进给速度,他们决定先拿一块备用的废旧后盖进行试切试刀。然而机器刚一开始运转,伴随着剧烈的嗡鸣,主轴传来了明显的振动与异响。Scotty 担忧地看着飞溅的碎屑,两人随即意识到当前的进给速率与主轴转速设置显然并不理想,金属铣削的参数依然需要进一步探索与微调。 - 数控加工核心参数:开孔的关键在于精准定位孔心相对于机身内部定位面的基准高度。 - 试切反馈:刀具沿螺旋线切入铝合金后盖时产生异常振动,反映出切削进给量(Feeds)与主轴转速(Speeds)尚未匹配至最佳状态。 ### [24:51](https://www.youtube.com/watch?v=utfbE3_uAMA&t=1491s) CNC 精密加工与耳机接口打磨 测试装配的过程充满了各种机械干涉问题。Scotty 尝试使用电磨机(Dremel)切除内部干涉结构以便试装耳机孔,但第一次尝试并不理想,不得不承认需要改进方案:“Oh, shit. I guess we'll have to have a 2.0.”(糟糕,我想我们得搞个 2.0 版本了)。为了更精确地加工机壳和塑料件,他们找来了一个二手 Xbox 360 手柄并将其连接到 Mach3 数控软件上,以极具操作感的方式操控 CNC 铣床。Scotty 调侃道:“Cutting plastic like a video game. Yeah, I really want one of these now.”(像打电子游戏一样切削塑料,我现在真的很想要一台这个设备)。 ```mermaid flowchart LR accTitle: 耳机接口与机壳适配加工流程 accDescr: 展示从电磨粗加工到CNC精密成型再到最终装壳试配的工艺步骤。 subgraph S1["粗加工"] A["电磨机削减外壁\n打磨至露铜/金属边缘"] end subgraph S2["数控精加工"] B["Xbox手柄 + Mach3\n控制 CNC 铣床"] C["铣出正圆孔位\n精准匹配外壳开孔"] end subgraph S3["试装配"] D["外壳底部嵌入试装"] E["检查屏幕贴合间隙"] end A --> B --> C --> D --> E ``` 铣削出来的效果比最初的手工尝试漂亮得多,边缘整齐划一,甚至显得专业规范。接下来需要对耳机母座前端进行精密外圆加工,切出完美的圆形轮廓以契合后壳开孔。由于空间极度紧凑,Scotty 之前已经用 Dremel 把插座四周的塑料材质尽可能削去,直到四面全部露出金属支撑结构为止。经过 CNC 仔细倒角加工后,插座与开孔的贴合度达到了极高水准。 - CNC 加工采用二手 Xbox 360 手柄作为 Mach3 的微调手轮(手柄在二手市场约 180 元)。 - 耳机插孔外壳被电磨切削至各方向均露出金属屏蔽层,以极致压缩尺寸。 - 在机壳底部尝试装入打磨后的插座与总成时,屏幕盖合处依然留有一道明显的缝隙,结构干涉问题尚未彻底解决。 --- ### [26:35](https://www.youtube.com/watch?v=utfbE3_uAMA&t=1595s) 屡遭挫折的崩溃边缘与最终坚持 解决内部间隙并不容易,机身内仅差微米级的空间就会导致极其致命的后果。Scotty 尝试多次压合总成,但屏幕频繁损坏。在短短 24 小时内,他连续压碎了两块昂贵的原装屏幕——耳机插孔总成在微小的压力下顶裂了脆弱的液晶面板。疲惫与压力让他情绪陷入谷底,面对镜头,他坦言自己一度想要彻底放弃。 “I really wanna give up at this point. Just feels like now it's a matter of not screwing up, not breaking something, which isn't very much fun.”(到了这一步,我真的很想放弃。现在的感觉就像是纯粹在提心吊胆地避免犯错、避免弄坏东西,这一点都不好玩了)。这不仅带来了巨大的心理折磨,经济成本也在急剧飙升,仅那一周损坏的配件成本就高达数百美元。 Scotty 想起此前收到的无数封观众邮件与私信,大家都被他从零组装 iPhone 的经历所激励。他深知自己承载着观众的期待,不愿以失败告终:“I wanted this story to be another story of inspiration, of success. And right now it's not.”(我本想让这个故事成为另一个励志、成功的范例,但现在它还不是)。在经过激烈的思想斗争后,他调整好心态,决定放慢动作、极致小心地再试最后一次。 - 故障主要原因:耳机孔模块厚度依然超标,强行按压屏幕卡扣时将液晶屏内部挤压破损。 - 仅最后一周报废的屏幕与配件成本便达数百美元。 - 面对巨大的心理压力,Scotty 凭借对观众的承诺以及不断摸索出的容错细节,重拾工具进行最后的装配挑战。 --- ### [29:55](https://www.youtube.com/watch?v=utfbE3_uAMA&t=1795s) 见证奇迹:功能完备的“定制版”iPhone 经过细致入微的组装与谨慎调试,这部改装手机终于在没有损坏任何元件的情况下顺利合盖并成功开机。Scotty 迫不及待地在镜头前演示了全部功能: 1. **外放与耳机自动切换**:扬声器播放音乐时插入 3.5mm 有线耳机,音频立即无缝切换至耳机,声音饱满清晰。 2. **线控功能全面保留**:耳机线控上的音量加减按键响应迅速,单击中键可顺畅暂停和继续播放。 3. **断开检测**:拔下耳机插头的瞬间,系统自动暂停播放,逻辑完全遵循原生标准。 4. **边充边听与独立充电**:接入 Lightning 充电线后,手机立即发出清脆的充电提示音并显示充电图标,攻克了该项目最棘手的双路切换难题。 拿这部手机与苹果最后一款带耳机孔的官方机型——iPhone 6S 对比,可以清晰看到两者细微的布局差异:iPhone 6S 的耳机孔更靠近机身中轴线,而改装版由于避让内部 Taptic Engine 与电池排线,位置更靠边缘;开孔边缘也是手工与 CNC 结合加工,虽不及原厂冲压阳极氧化那般平滑,但整体质感与集成度已令人叹为观止。Scotty 欣慰地感叹道,对于一部完全手工打造的原型机而言,这已经相当出色了。 --- ### [31:10](https://www.youtube.com/watch?v=utfbE3_uAMA&t=1870s) 开源设计、喊话苹果与设备所有权愿景 Scotty 强调,该方案目前制作难度极高,尚不具备大规模量产或给普通人改造的条件。不过,他为死忠粉丝特别定制了小批量的纪念版柔性电路板,供硬件极客研究。同时,他还公开向苹果喊话:“I hear you've got a new phone coming out soon, so if you want help adding a headphone jack, let me know.”(我听说你们很快要发新手机了,如果你们需要帮忙加回耳机孔,随时联系我)。他甚至承诺,只要苹果工程师能提供身份证明发邮件给他,他就免费寄送一块测试电路板。 不仅如此,Scotty 对深圳华强北的生态体系致以最崇高的敬意。为了感谢华强北那些身怀绝技的师傅们在制作期间给予的无私帮助,他宣布将电路图及设计文件完全无偿开源: - **完全商业授权**:允许华强北商家与技术人员自由制造、修改并销售此改装套件,利用他们精湛的焊接与量产技术造福大众。 - **获取方式**:所有资料均上传至他的个人网站和官方微博,同时他还在微博上向创客们免费赠送剩余的打样 PCB 板。 在视频的尾声,Scotty 升华了整个项目的初衷,呼吁科技行业重视用户的“设备所有权”(Right to Repair): “I hope that one day we'll feel like we truly own our devices, that we'll feel free to modify and repair our phones as we please, to upgrade them and to add whatever features we can dream up.”(我希望有朝一日,我们能真正感受到自己拥有手里的设备;我们能随心所欲地改造和维修手机,升级它们,并添加任何我们能想象出的功能)。至于观众普遍关心的“iPhone 8 是否也能加装耳机孔”,Scotty 幽默地回应道,目前还没拿到真机,未来一切皆有可能。 ## Notable quotes > [31:10](https://www.youtube.com/watch?v=utfbE3_uAMA&t=1870s) I hope that one day we'll feel like we truly own our devices, that we'll feel free to modify and repair our phones as we please, to upgrade them and to add whatever features we can dream up. — Scotty ## Mentioned Scotty, Strange Parts, iPhone 7, iPhone 6s, iPhone 8, Apple, Apple Store, 华强北, iFixit, Taptic Engine, Dremel, Lightning 接口, 巨龙工具兄弟 (Julong Tool Brothers), Vetus, Endy, Lisa, Nick Starno, Xbox 360, Mach3, FPC (柔性印刷电路板) ## Video description I love my iPhone, but it doesn't have a headphone jack! So I decided to add my own. For real. How I made an iPhone in China video: https://youtu.be/leFuF-zoVzA Share this video: https://youtu.be/utfbE3_uAMA Subscribe to the channel here: https://goo.gl/qeurxc 4 months, 7 custom circuit boards designs, 3 disassembled iPhones later, it works. It's the first modern iPhone with a headphone jack - the only one like it in the world. More details here (and answers to all your questions): http://strangeparts.com/bringing-back-the-iphone-headphone-jack-in-china/ For diehard Strange Parts fans, go here to find out more about how to get a limited edition headphone jack circuit board: http://strangeparts.com/headphones The design is completely open source! Go here to find out more: http://github.com/strangeparts/niubi-headphones I NEED YOUR HELP! Tell me what you'd like to see me do next in the comments! I'm really looking forward to exploring the back alleys of the industrial world outside of just cell phones and China. And if you think you have a really awesome idea, please email tips@strangeparts.com. In particular, if you live somewhere cool (particularly India or Africa), I want to hear about the industrial world(markets/factories/mines/etc) where you live. And if you're an engineer in manufacturing, hit me up with that cool factory story you've been dying to have someone tell. Thanks guys! My Gear: I shot it on this camera: http://amzn.to/2B0Snke And also with this: http://amzn.to/2D7q5pN And recorded sound on this: http://amzn.to/2CFuyPv Collaborative editing software: http://bit.ly/frameio-sp Facebook: http://facebook.com/strangepartscom Twitter: http://twitter.com/strangepartscom Instagram: http://instagram.com/strangeparts_com Email Newsletter: http://strangeparts.com/ Thank you to everyone that helped! Please go check them out - they’re all doing cool stuff. -- Galen - Assistant editor and all around right hand man Junshu - cameraman and filmmaker extraordinaire Colin Shipp - Advisor/Youtube Consultant (colin@thepossibilitygroup.com) Lewis - Translations wizard Nick Starno (http://nickstarno.info) - CNC master Loic De Buck - The keeper of the logic analyzer Ian Lesnet (http://dirtypcbs.com) - Supplier of antique drill presses, scavenged monitors, sage advice, and other curiosities Greg Needel and David Yanoshak - REV Robotics (http://www.revrobotics.com/) - bringers of the wisdom Hans (hmichl) - Electronics insight Paul Campbell (http://www.moonbaseotago.com) - Electronics insight and lore Julong Tool Brothers - The best tool booth in tool alley! Endy - chip brokerh (WeChat: YCJ13691959788) Lisa - Flexible PCB supplier (segpcb@163.com) Music -- Handpan player - Chor Lai (http://facebook.com/chorsharp) Nice To You - Vibe Tracks - Youtube Audio Library Other Scenario - Lana Inspired (licensed through http://bit.ly/artlist-sp) Follow Me - Jimmy Fontanez - Youtube Audio Library Verve - A-GROUP (licensed through http://bit.ly/artlist-sp) Innocence - Suraj Nepal (licensed through http://bit.ly/artlist-sp) Pie Flavor - 0r4 (CC-BY https://soundcloud.com/0r4/pie-flavor) Breath Celebration - Gabriel Meyer (licensed through http://bit.ly/artlist-sp) Glitch garage rmx - faze rock (CC-BY https://soundcloud.com/fazerock/p-glitch-garage-rmx) Paradise - Ryan Little (https://soundcloud.com/iamryanlittle) Year Of Life - Young Rich Pixies (licensed through http://bit.ly/artlist-sp) Long Way - Lush Island (licensed through http://bit.ly/artlist-sp) Endless Inspiration - Nick Petrov (licensed through hooksounds.com) #StrangeParts #PhoneAdventures #China [Source](https://www.youtube.com/watch?v=utfbE3_uAMA)

Source quotes

[31:10] Scotty: I hope that one day we'll feel like we truly own our devices, that we'll feel free to modify and repair our phones as we please, to upgrade them and to add whatever features we can dream up.

Source quotes

[31:10] Scotty: I hope that one day we'll feel like we truly own our devices, that we'll feel free to modify and repair our phones as we please, to upgrade them and to add whatever features we can dream up.

Original transcript

[0:00] - Do you think it's possible [0:01] to add a headphone jack to an iPhone 7? [0:04] (technician speaks in Mandarin) [0:06] (bright traditional music) [0:14] (bright traditional music continues) [0:18] I'm Scotty with "Strange Parts." [0:20] You probably know me as the guy [0:21] who built his own iPhone in China. [0:23] I'm here in Hong Kong in front of the Apple store. [0:25] And I came down here a few months ago [0:27] to buy a new iPhone 7, [0:29] because I wanna shoot better video [0:30] when I'm out exploring the industrial world. [0:32] But I was really annoyed. [0:34] It doesn't have a headphone jack! [0:36] And I really want one. [0:37] So I was stewing on it. [0:40] And I was stewing on it, [0:41] because I know Apple's not gonna add it back. [0:44] But I did end up buying one. And I went home. [0:47] And I woke up the next morning and I thought, [0:49] "Why don't I add my own headphone jack? [0:51] How hard could it be?" [0:52] Now, other people have tried doing this. [0:54] (drill whirring) [0:56] Don't do that. [0:57] Turns out it's really bad for your phone. [1:00] I wanna do it for real. Is it possible? [1:03] I don't know. I'm gonna head to Shenzhen and find out. [1:07] (subtle bright music) [1:13] (subtle bright music continues) [1:21] (Scotty speaks in Mandarin) [1:24] (driver speaks in Mandarin) [1:29] I'm here in Shenzhen, [1:30] the electronics manufacturing capital of the world. [1:33] We're here in Huaqiangbei, [1:34] which are the electronics wholesale markets. [1:37] And you can get just about anything here. [1:39] I need a phone I can take apart. [1:41] And I don't really wanna take apart [1:43] the nice shiny one I just got at the Apple store. [1:45] So I looked around for an iPhone 7 logic board [1:48] that I could use to build up my own phone. [1:50] And I'm not really finding very many. [1:52] So instead I bought a used phone. [1:55] This is my screen cracker. [1:56] Let's see if we can open a gap down here [1:59] where we can get either our fingernail or a tool in there. [2:04] Yep, there we go. [2:06] You can see, there's not a whole lot of empty space [2:09] in this phone. [2:11] A little bit of extra room, but not much. [2:14] I wanna know what this thing is here, [2:16] because that's where the headphone jack would've gone. [2:19] So iFixit says, according to Apple, [2:22] this little plastic thing in the corner [2:24] is a barometric vent, [2:26] in order to have an accurate altimeter. [2:29] That's [2:31] just a piece of plastic. [2:32] Yeah, I don't believe that that's a barometric vent. [2:35] I don't really know what I'm talking about. [2:37] It just looks to me like a plastic clip [2:39] that holds some connectors on. [2:41] Here is the headphone jack. [2:43] If this was in here, would it fit? [2:46] Oh, it would. It might. [2:48] It might stick out a little. [2:49] I wonder how much I can cut this down without... [2:55] Okay, so. [2:57] Holy shit. [2:58] I was expecting to say that there's no space here, [3:02] and I don't think that's true. [3:04] I thought it was gonna look like that, [3:07] where I was gonna have this big bulge on the outside. [3:10] But now I think I can put it on the inside. [3:13] I don't want to change the case at all. [3:15] I just want to drill a hole. [3:17] I didn't think that was possible. [3:18] I didn't think there was enough room inside. [3:20] but I think there might be. [3:21] And that's kind of crazy. [3:24] I'm on my way to the markets to get a Dremel [3:26] to grind out more room in the case. [3:29] Okay, I think that's what I want. [3:31] Let's see if that'll work. [3:35] This right here [3:38] is where I want to put the headphone jack. [3:43] (Dremel whirring) [3:49] (Dremel whirring) [3:57] (object thuds) [4:02] This goes here. [4:05] The battery will go up here. [4:08] So this, [4:11] now it needs a hole to come out through. [4:14] Right here. [4:15] (Dremel whirring) [4:23] That is getting pretty far out there. [4:27] The Taptic Engine is still in the way. [4:31] Maybe I can move the battery up. [4:33] (Scotty exclaims) [4:36] I am a lucky bastard. [4:38] I can totally just put the Taptic Engine in sideways. [4:43] So the battery, just a little higher. [4:45] It sits right up against the top of the logic board, [4:47] which I think is fine. [4:51] (object thuds) [4:57] It looks totally cockeyed, but it works. [5:01] I'm starting to get really worried about the vertical space. [5:03] So that's fully flush on that corner, [5:06] but over here it's sticking up. [5:08] That's a pretty big problem. [5:09] So this is the bottom of the screen. [5:11] That's the button. [5:12] This bracket right here goes right on top [5:17] of where we wanna put the headphone jack. [5:18] Let's start taking that off. [5:20] (Dremel whirring) [5:23] Ooh, that is very close [5:25] to at least allowing the top connector to fit in [5:28] if I grind off the corner. [5:30] Oh, man. [5:31] Now I've got a problem with connectors getting unplugged. [5:34] It's these two connectors right here [5:36] that are giving me the problem. [5:37] It's really hard to show this, [5:39] but they both sort of [5:43] come together like right in the same area. [5:47] And I'm worried they're colliding with each other. [5:49] And so it does work. [5:51] It comes pretty much flush at this point, [5:54] but I'm worried that that pressure [5:55] is popping that connector off. [5:58] The other option I was thinking about [5:59] is if I can move this connector over far enough, [6:01] then this actually can go on the bottom again. [6:03] I'm not sure if that's gonna fly. [6:06] (people conversing) [6:13] I'm getting ahead of myself, though. [6:15] First, I just need to get [6:16] the electrical side of things working. [6:18] I thought maybe I'd get lucky [6:20] and I'd find a place inside the phone [6:22] that I could just wire up a headphone jack to. [6:24] And after doing some research online and talking to people, [6:27] I don't think that's the case. [6:28] So I'm gonna have to get clever. [6:31] I started thinking about this headphone adapter [6:33] that Apple gives you with your phone. [6:35] It's got a Lightning plug on one end [6:37] and a headphone jack on the other. [6:38] And I thought, "Could I wire that into the back [6:41] of one of these Lightning jacks, like this, [6:44] and then have the headphone adapter stick out the front?" [6:47] So I've come to the Apple store here in Shenzhen, [6:50] it's the only official Apple store run by Apple, [6:52] to get some more official adapters. [6:55] (Scotty speaks in Mandarin) [6:58] - You wanna buy this? - Yeah, I want to buy this. [7:00] Yeah. - 78. [7:02] (employee speaks indistinctly) [7:05] - Okay, thank you. [7:06] Well, that was pretty easy. [7:09] Not cheap, but easy. [7:11] Let's cut this open. [7:12] (Dremel whirring) [7:13] Oh! [7:16] I just broke something. [7:18] Yeah. Damn it. [7:20] That might have been bad. [7:22] Oh, that's bad. [7:25] Dang it. I should have bought more than one. [7:30] Hi. Do you guys have Lightning-to-headphone adapters? [7:33] - Yes. - I didn't see it here. [7:36] Oh, it's hiding. Perfect. [7:38] Great. I need a couple, actually. [7:39] I'll take three. [7:40] - Three. - Yeah. [7:42] - Why do you need- - I keep breaking 'em. [7:45] - [Employee] 200- [7:46] - 200 and 30 cents. [7:49] - [Employee] But do you need a receipt for that [7:52] in case you have some problem, [7:53] although it's very small. [7:56] - I think it's okay. [7:57] I think the next step is for me to try and solder wires [7:59] onto the back of a Lightning jack [8:02] and onto the headphone adapter, [8:03] and then try and connect them together. [8:05] But this is finer solder work than I've ever done. [8:08] So I went to my favorite tool booth in the markets [8:10] and I got their fanciest tweezers. [8:14] This one, okay. [8:16] This one, good. - Good. Yeah. [8:19] - And this one, the best. - The best. [8:21] - Switzerland Vetus. [8:23] And they come in at two, which means they're extra fancy. [8:27] Good. You get it? - Really, really good. [8:29] - Super nice guy. - Okay. [8:31] (in Mandarin). Okay, okay. [8:37] - This, high temperature. - High temperature. Okay. [8:43] High temperature sounds good. [8:44] - What do you want? - Maybe I'll get red [8:47] in the high temperature. [8:49] Yeah. - High temperature. [8:54] (Scotty sighs) [8:57] - My $10 USB microscope is total crap, [9:00] so it's time to go get a new one. [9:03] (Scotty speaks in Mandarin) [9:05] (employee speaks in Mandarin) [9:06] So that was a typical but amazing experience. [9:09] She took everything out of the box, [9:11] showed me how everything went together, [9:14] debugged it all just to prove everything works [9:16] and make sure I have no problems. [9:17] Good. [9:19] Perfect. [9:22] (dispatcher speaking indistinctly) [9:29] All right. [9:31] How cool is that? [9:34] Here goes nothing. [9:37] (subtle bright music) [9:46] (subtle bright music continues) [9:52] This is what I've been working on for far too long now. [9:55] Well over a week, at this point. [9:57] This is the Lightning dock [9:59] that would go in the bottom of an iPhone 7. [10:02] I've soldered wires on the back of that [10:04] to each of the pins, to this breakout header here. [10:07] This is my taken-apart [10:11] Lightning-to-headphone jack adapter. [10:13] I've just taken all of the pins on the Lightning jack, [10:16] and I've attached them to these header pins here. [10:19] The next thing to do is to connect them together. [10:22] This is exactly the same thing. [10:23] It's just plugging the adapter into the Lightning jack, [10:26] but it'll just test that I've got my wiring right [10:28] before I start trying new things. [10:30] Here it goes. [10:35] Yes! It works! [10:39] (laughs) [10:41] Nice. [10:43] (upbeat music) [10:50] (upbeat music continues) [10:58] Now I need to figure out how to charge the phone. [11:00] If I'm gonna wire up this headphone adapter [11:03] instead of the Lightning jack, [11:05] then the Lightning jack won't be connected anymore. [11:08] So I gotta figure something else out. [11:10] I was just talking with some friends [11:11] over beer and street barbecue tonight, [11:14] and I've been telling 'em what I've been working on [11:16] and struggling with. [11:16] And they suggested that I make my own circuit [11:19] to just switch between the Lightning jack [11:21] and the headphone adapter. [11:23] Apparently, there are chips that can switch USB, [11:25] so maybe something like that'll work. [11:29] I think I found a chip that'll work. [11:31] I'm on my way to the markets to meet a chip broker [11:33] that a friend recommended. [11:36] (in Mandarin). Are you in Andy? [11:37] - Yes. - Yeah. Scotty. [11:39] Nice to meet you. - Nice to meet you. [11:40] - Oh, you've got 'em already ready. [11:41] - Yeah. - Perfect. [11:43] (bright music) [11:47] (bright music continues) [11:53] I just wanna give a quick explanation [11:54] of what's happening here. [11:55] This is the headphone adapter. [11:57] And this headphone jack will stick out of the phone. [11:59] This is the Lightning jack [12:01] that you'll see on the outside of the phone. [12:03] And then this is where it's all connected to the phone [12:05] where the Lightning jack used to be connected. [12:07] And then this is the switching chip [12:09] that switches between connecting the headphone adapter [12:11] to the phone or the Lightning jack to the phone, [12:14] depending on whether something is plugged in [12:15] to the Lightning jack or not. [12:16] Here it goes. [12:17] So let's start by putting the Lightning jack in. [12:21] First test, do the headphones work? [12:24] It says iPhone, right? [12:26] Plug this guy in. [12:27] Now it says headphones. Sweet. [12:30] Amazing! [12:32] Holy shit. It works (laughs). [12:37] Put this in. [12:38] And it charges. [12:41] Okay, now, here's the real test. [12:43] Can I switch over to the other jack. [12:51] Okay. Headphones are connected. [12:54] Now, let's switch it to one. [12:56] And bingo! [12:58] Headphones. [12:59] Plug in. Charging. [13:03] Headphones. [13:04] Plug in. Charging. [13:07] Headphones. I think I got it (laughs). [13:11] (claps) Yes. [13:12] Time to make a circuit board. [13:13] I'm really excited to get to this point. [13:16] (bright traditional music) [13:25] Next, I need to figure out how to get this inside of here. [13:29] Originally, I thought I'd be able to hand-wire it, [13:31] but I think things are way too complex for that now. [13:34] So I'm gonna make a printed circuit board, or PCB. [13:36] You've probably seen these before. [13:38] They look really complex, [13:40] but they're really just a bunch of wires [13:42] glued onto a rigid piece of fiberglass. [13:46] And the cool part about these [13:47] is that I can draw them on the computer [13:49] and then have a factory make a really precise copy. [13:53] The first circuit board I make [13:53] is not gonna fit inside the phone. [13:55] It's gonna be way too big. [13:56] I'm gonna use big chips [13:57] that are really easy for me to solder. [13:59] I'm gonna add lots of test points to make it easy to debug. [14:02] And then I'll use what I learn from this [14:04] to design a much smaller board [14:06] that will fit inside the phone. [14:08] (upbeat electronic music) [14:13] ♪ Break, break, break ♪ [14:15] (upbeat electronic music continues) [14:18] ♪ Break, break, break ♪ [14:20] (upbeat electronic music continues) [14:28] Okay. [14:29] Finally done designing the circuit board. [14:31] I'm exhausted. [14:32] I've been working on this for the past two days. [14:34] Hopefully I didn't screw anything up too badly. [14:39] It's about 10:30 in the morning here on a Sunday, [14:42] and I just got a delivery: [14:46] the circuit boards. [14:47] There is our finished prototype board. [14:52] Sweet. Time to put it together. [14:55] (upbeat music) [15:00] (upbeat music continues) [15:05] Let's give this a shot. [15:07] I'm gonna put it together with the iPhone 6S; [15:10] 7 is still in the shop. [15:13] I don't know. [15:14] So headphones don't work straight out of the gate. [15:18] That's not right. [15:20] I just totally wired these backwards. [15:23] Okay, well, there's probably an easy solution to this, [15:27] which is to remove the headphone jack [15:30] and wire it up with the wires. [15:39] Right about now, I was hoping to say, "There it is. [15:42] The prototype is done and it's working." [15:45] But not so much. [15:47] The only part that's not working right now [15:50] is this little guy, which is the headphone, [15:54] the Lightning to headphone adapter. [15:55] But I have wired up the headphone adapter [15:59] that I hand-soldered, [16:00] that I was using before for prototyping, [16:02] and I can get that to work. [16:04] I think I'm gonna declare victory and move on. [16:08] (singer singing in foreign language) [16:15] Now it's time to fit all this circuitry inside the phone. [16:18] Now, obviously, this big board isn't gonna fit, [16:22] so I'm gonna have to make a smaller one, a much smaller one. [16:25] I'm going to try in making a flexible circuit board. [16:29] Now, these are the same as the normal circuit boards, [16:33] except that instead of gluing the wires down [16:36] to a rigid piece of fiberglass, [16:39] they're glued down to a flexible piece of plastic instead. [16:41] This allows them to bend around other parts. [16:45] They're used a lot in cell phones and cameras [16:47] where space is really at a premium. [16:48] They're sometimes called origami circuits, [16:50] because they often have really complex folds. [16:53] I've never designed one of these before, [16:54] so we'll see how this goes. [16:58] (upbeat electronic music) [17:04] (upbeat electronic music continues) [17:09] I went and got a printer, [17:10] so that I can figure out whether the flex PCB design [17:15] fits as drawn on the computer inside the phone. [17:19] (printer whirring) [17:22] Time for a little ghetto lamination. [17:29] (relaxed electronic music) [17:38] (relaxed electronic music continues) [17:43] I'm going to the markets to see Lisa, [17:45] who is my contact at the flexible circuit board factory. [17:48] Hi, how are you? [17:49] So this is an iPhone 7. [17:52] I am adding a headphone jack. [17:54] - [Lisa] Oh, You changed it. [17:55] You changed the phone. [17:57] - Yeah. - Ah. [17:57] Yeah, so that's what this board does. [17:59] - Oh, okay. (Scotty laughs) [18:01] - It's good? - It's cool. [18:03] - This is my first flex PCB design, [18:04] so I wanna make sure I'm not making any major mistakes. [18:07] - You just need one piece. [18:08] - I probably should get like at least five pieces [18:11] just in case I have- - Five pieces. [18:13] - Five or 10 pieces just in case I have problems. [18:15] - Five or 10 pieces. - Yeah. [18:17] And I'll send you the file when I'm done. [18:19] Hopefully the end of today I'll get it to you. [18:21] Thank you. Good seeing you, Lisa. [18:22] Good seeing you, Nana. [18:23] Okay. Bye-bye. - Bye. [18:24] - Feeling pumped up again. [18:26] Things are moving forward, finally. [18:29] All right, I just sent the files off to Lisa, [18:31] and she said she got 'em. [18:32] So just waiting on them to make the actual boards now. [18:36] I'm super excited. [18:40] I'm rushing over to meet Lisa to go out to the factory. [18:43] All right, so we're here at the FPC factory. [18:45] Let me give you a quick overview of what we're gonna see [18:47] before we go into the factory. [18:49] Remember I said that circuit boards [18:51] were just a bunch of small wires? [18:52] Well, they etch those wires [18:54] out of a sheet of copper using acid. [18:57] First, we need the copper [18:58] that's gonna become part of our circuit board. [19:00] They cut it off a roll. It's actually two sheets of copper [19:02] with a layer of special plastic in the middle. [19:04] Next, they drill any holes the board needs. [19:06] They use these really cool robotic drilling machines [19:08] which can automatically switch [19:10] between different size drill bits. [19:14] Wow. It's super strong smelling in here. [19:18] Okay, so for plating, copper-plating the vias, [19:21] when they drill a hole, [19:22] then they need to fill the hole back in with copper [19:24] so it conducts between the two layers. [19:27] They then run it through these machines [19:28] which etch off all of the rest of the copper, [19:30] leaving only the wires I've drawn. [19:32] Now it's time to make the solder mask. [19:34] The solder mask is another layer of plastic [19:36] that covers up the wires where I don't want solder to stick [19:39] when I go to solder on the chips. [19:41] This is the silk screening room here, [19:43] where they're putting on the silk screen [19:45] for any numbers or letters or writing [19:48] that needs to be on the board. [19:49] It's gradual stacking up of a layer sandwich. [19:52] - [Lisa] It's for testing. [19:54] - So these are our test jigs [19:55] for testing all of the electrical contacts, [19:57] everything that should connect connects, [20:00] and things that shouldn't connect don't connect. [20:02] Every time a board is made, [20:03] then we need to make a tool, a test tool for it. [20:06] - [Lisa] Okay For the FPC. [20:08] It's finished. - Finished. Okay. [20:10] That's the whole process. [20:12] Great. [20:13] And finally, they ship out the board to the customer. [20:15] That's me. [20:16] So Lisa just texted me on WeChat [20:18] and said that the flex PCB boards are done. [20:21] Hoping this board just works. [20:24] If it doesn't, it'll be at least a week's delay, maybe more. [20:27] Hi Lisa, how are you? [20:28] - Fine. Fine. - Good. [20:30] Oh, you've got 'em right in your hand (chuckles). [20:32] Awesome. [20:34] Yeah. [20:35] Yeah, they look good. [20:37] I got the boards, and I'm super psyched. [20:40] Big question now is do they work and can I solder them? [20:44] I'd be lying if I didn't say [20:46] I was at least a little bit worried. [20:47] This is the smallest soldering I've ever done, [20:49] so I'm hoping I can pull it off. [20:52] So I'm gonna start with the cheap chips first. [20:55] I mean, I think the strategy here [20:58] is to apply a little bit of solder paste. [21:00] This solder paste is little, tiny microscopic metal balls, [21:05] solder balls, suspended in flux in like a flux paste. [21:09] All right, I've got something everywhere. [21:13] Now, when I apply the hot air, all of this, [21:16] all of these little microscopic solder balls are gonna melt [21:19] and turn into a solid piece of metal wherever they are. [21:23] So I'm trying to make sure it's all in the right places. [21:25] Surface tension is totally your friend [21:27] when you're doing this kind of stuff. [21:28] So I just want everything to be kind of connected enough [21:31] that surface tension will pull it all together [21:33] when it melts. [21:34] I guess, let's put the capacitors on first, [21:36] the little capacitors and stuff. [21:38] Okay, now, [21:41] chips. [21:42] All right, these are the BGA chips. [21:44] These are the ones that are the smallest [21:46] and have the little solder balls on the bottom. [21:53] (sighs) [21:56] This could result in massive failure [21:58] if I just blow all these chips everywhere. [22:01] Just want like a baby's breath of hot air. [22:06] See everything moving around? [22:09] That's what should happen. [22:11] Boy, that looks great. [22:12] I think I'm gonna stop there. [22:14] If that was actually it, [22:16] that's really darn simple. [22:18] Just looking for that everything got adhered properly [22:22] and there aren't any major bridges [22:25] between pins or pads. [22:27] There it is. [22:29] That's our little set of chips here. [22:31] Sweet! (laughs) [22:34] (claps) Awesome. [22:35] Next step, the other side. [22:39] (suspenseful music) [22:47] (suspenseful music continues) [22:53] I will accept that as maybe working. [22:58] So many things have to go right for this to work. [23:02] I'm nervous. [23:05] (board rattling) [23:12] This is the moment of truth. [23:19] (upbeat music) [23:21] (headphone dropping) [23:23] (upbeat music continues) [23:29] How cool is that! [23:30] Oh! [23:33] Months of work finally coming through. [23:37] I'm headed over to my friend Nick's place. [23:40] (Scotty speaks in Mandarin) [23:41] (driver speaks in Mandarin) [23:42] (Scotty speaks in Mandarin) [23:43] He's a mechanical engineer, [23:45] and he just got a desktop CNC mill. [23:47] CNCs are super cool. [23:49] They're basically super precise robotic drills. [23:51] So he's gonna try and help me mill better holes [23:53] in the case for the headphone jack [23:55] than what I can do by myself just with a handheld Dremel. [23:58] - Hey. - Hello. Hello. [23:59] How's it going? - Good. [24:01] - [Scotty] Oh, you got a proper lab in here? [24:03] - I set up the basics of this. - Okay. [24:06] - I'm still figuring out how to use this software. [24:09] So it's gonna sit like this, right? [24:12] - Yep. [24:13] - And the important measurement is the height [24:16] of the hole from this space. [24:18] Okay, so it's doing the helix. [24:19] And then these blue lines are for- [24:22] - Yeah, just cuts. - I'm gonna load the G code. [24:25] - Just try it? - Yeah, let's give it a shot [24:27] with one of these of these spare backs. [24:29] - I hope this isn't a bad idea. [24:30] All right. Here goes nothing. [24:32] (machine whirring) [24:37] (machine whirring) [24:42] Well, I don't think our feeds and speeds were ideal. [24:44] There's definitely a lot of vibration going on. [24:47] Oh man, I wonder how many like [24:51] new things we did all in one go. [24:54] - I'm going to cut out the inside now, [24:56] and that'll allow us to actually like test-fit the jack [24:59] and see if this all works. [25:01] (Dremel whirring) [25:07] - How's that look? (board tapping) [25:09] - Getting there. [25:11] - There it goes. - Oh, shit. [25:14] I guess we'll have to have a 2.0. [25:16] - Yeah, totally. [25:19] (upbeat rock music) [25:25] (employee speaks in Mandarin) [25:26] - What's that? - The box is destroyed, [25:28] but it's still got the sticker on it. [25:30] I looked it up on (indistinct). [25:31] And they're about 180. - Yeah. Cool. [25:34] (Nick speaks in foreign language) [25:35] So we picked up this Xbox 360 controller, [25:38] and now it works with Mach3. [25:40] - [Scotty] Cutting plastic like a video game. [25:42] Yeah, I really want one of these now. [25:46] (machine whirring) [25:51] - [Nick] Those look pretty good. [25:53] - It looks a lot better than the first time we tried this. [25:55] It was a lot less terrifying than last time. [25:57] - That looks pretty good, I think. [25:59] - It almost looks like we know what we're doing now. [26:02] - That's beautiful. [26:03] - Next is to machine one of these headphone jacks [26:05] around the front to get that perfect circle [26:08] so that it fits in the hole. [26:09] - Okay, so it looks like you hacked the shit [26:11] out of this connector. [26:12] - Yeah, I really did. [26:13] So I took the like Dremel to it, [26:15] and basically just shaved it off [26:16] until I hit metal on every side (laughs). [26:19] And it was like, okay, that's enough. [26:24] (machine whirring) [26:28] - That looks pretty damn good. [26:29] - I think that's it. [26:31] Hopefully, this case is the one. [26:33] I'm gonna go home and go to sleep. [26:35] Last thing I need to do is fit it inside the phone. [26:38] So have it mounted here [26:42] in the bottom of the case. [26:44] It's one of the ones I drilled out by hand. [26:46] And I just wanna make sure the screen fits on still. [26:52] A shot. [26:53] Pretty decent-sized gap there still. [26:56] That's a problem. [26:59] (slow ambient music) [27:08] (slow ambient music continues) [27:17] (phone clicks) [27:27] That's [27:30] where I'm at. [27:33] It fits together, but the screens are breaking. [27:36] I've broken two screens in the past 24 hours. [27:39] And they're just being too smashed, I think, [27:42] by the headphone jack. [27:50] I don't know, guys. [27:54] I really wanna give up at this point. [27:58] Just feels like now it's a matter of not screwing up, [28:01] not breaking something, which isn't very much fun. [28:08] It's also getting really expensive. [28:11] Hundreds and hundreds of dollars in broken parts, [28:14] like just this week alone, [28:17] ignoring the rest of my costs. [28:20] I knew this project was gonna be hard. [28:22] I had no idea of how hard it was gonna be. [28:26] I've heard from so many of you [28:27] via emails and Facebook messages, [28:30] and a lot of you have said how inspired you were [28:36] by what I did. [28:38] And I wanted this story to be another story of inspiration, [28:42] of success. [28:46] And right now it's not. [28:51] Fuck. [28:53] I really wanna show you guys like a finished phone. [28:55] I really wanna be able to say here it is and it works. [29:06] Yeah, I can't stop here. [29:09] I'm gonna go give it one more shot [29:11] and be really careful this time. [29:14] I feel like I'm gradually learning how to not break stuff. [29:17] It gets a little bit better each time, but wish me luck. [29:25] (soft ambient music) [29:33] (contemplative music) [29:40] (contemplative music continues) [29:48] (contemplative music continues) [29:55] (contemplative music continues) [30:00] Finally got it working. [30:01] I finally put it together without breaking anything. [30:04] Check this out. [30:05] Okay, here's the speaker (upbeat music) [30:07] and here is the headphones. [30:13] How awesome is that? [30:16] Volume buttons work. [30:19] I can pause it and play. [30:22] And when I unplug the headphones, it stops. [30:26] How cool is that? [30:27] And lastly, the hardest part was getting it [30:31] so that it would charge. [30:33] Check this out. [30:38] (phone beeping) [30:40] That is a pretty sweet sight. [30:43] So one question you might be asking is: [30:45] How does this compare to an iPhone 6S? [30:47] which was the last model of iPhone [30:49] that Apple made with a headphone jack. [30:52] This here is my old 6S. [30:54] And you can see the headphone jack here [30:57] is a little bit closer in on the 6S, [30:59] and mine's a little bit further out. [31:01] And then my hole is a little bit more jagged than theirs. [31:05] But hey, not too shabby for a handmade phone, right? [31:10] But wait, there's one more thing. [31:13] I'm sure a lot of you are asking: [31:14] "How do I get my own iPhone with a headphone jack?" [31:17] Be patient. [31:19] I've already talked to a lot of people [31:20] who want a modern iPhone with a headphone jack, [31:22] and unfortunately I'm not your savior just yet. [31:25] You could see how hard it was for me [31:26] to put together just this one phone. [31:28] This design isn't quite ready for prime time, [31:31] but for you diehard "Strange Parts" fans, [31:33] I've made a limited-edition board just for you. [31:37] Go here to find out more. [31:38] Next, to Apple. [31:40] I really wanna buy an iPhone [31:41] with a headphone jack in it from you. [31:44] I hear you've got a new phone coming out soon, [31:46] so if you want help adding a headphone jack, let me know. [31:49] I'll go one step further. [31:51] If you're an Apple engineer, [31:52] and you can email me any reasonable proof, [31:55] I'll send you a free circuit board. [31:56] I just wanna help, guys. [31:58] If you're a "Strange Parts" fan, [31:59] I need some help. [32:00] Please comment below with what you'd like to see me do next. [32:03] And if you think you've got a really awesome idea, [32:06] send me an email to tips@strangeparts.com. [32:08] I'm really looking forward to exploring [32:10] outside of just cell phones in China. [32:12] I travel full-time, so if you live somewhere interesting [32:15] or you've got an idea for an interesting story [32:17] in an out of the way place, [32:20] chances are I'm interested in going to check it out. [32:22] Also, to the brothers and sisters in Huaqiangbei [32:25] and the broader cellphone ecosystem here in Shenzhen, [32:29] you've helped me so much. [32:30] So I have a gift for you. [32:31] I wanna give you the design for this, no charge, [32:34] to make and modify. [32:36] So many of you are way more skilled than I am. [32:38] I hope that you can improve on this design [32:40] and make it available to the average person. [32:42] Believe me, they really want it. [32:45] I give you my full permission to make and sell these. [32:47] The files are on my Weibo account and website here. [32:51] Also, I have some extra PCBs to give you. [32:53] Send me a message on Weibo, [32:54] and I'll tell you how to get one. [32:55] I hope that one day [32:57] we'll feel like we truly own our devices, [32:59] that we'll feel free to modify [33:01] and repair our phones as we please, [33:03] to upgrade them and to add whatever features [33:06] we can dream up. [33:07] Until then, thank you for watching. [33:09] I'm Scotty with "Strange Parts." [33:11] Hit that Subscribe button down below, [33:12] and stay tuned for more adventures. [33:15] Oh, and lastly, I wanted to give a huge shout-out [33:17] to everybody that's helped me with this video. [33:19] Go check out the description. [33:20] There's a lot of people doing really amazing things. [33:23] I know a lot of you're gonna ask: [33:24] "Can this be done on an iPhone 8?" [33:26] I don't know. I haven't seen one yet.