Gamers Nexus Builds DIY x86 Routers to Evade ISP Gateway Telemetry
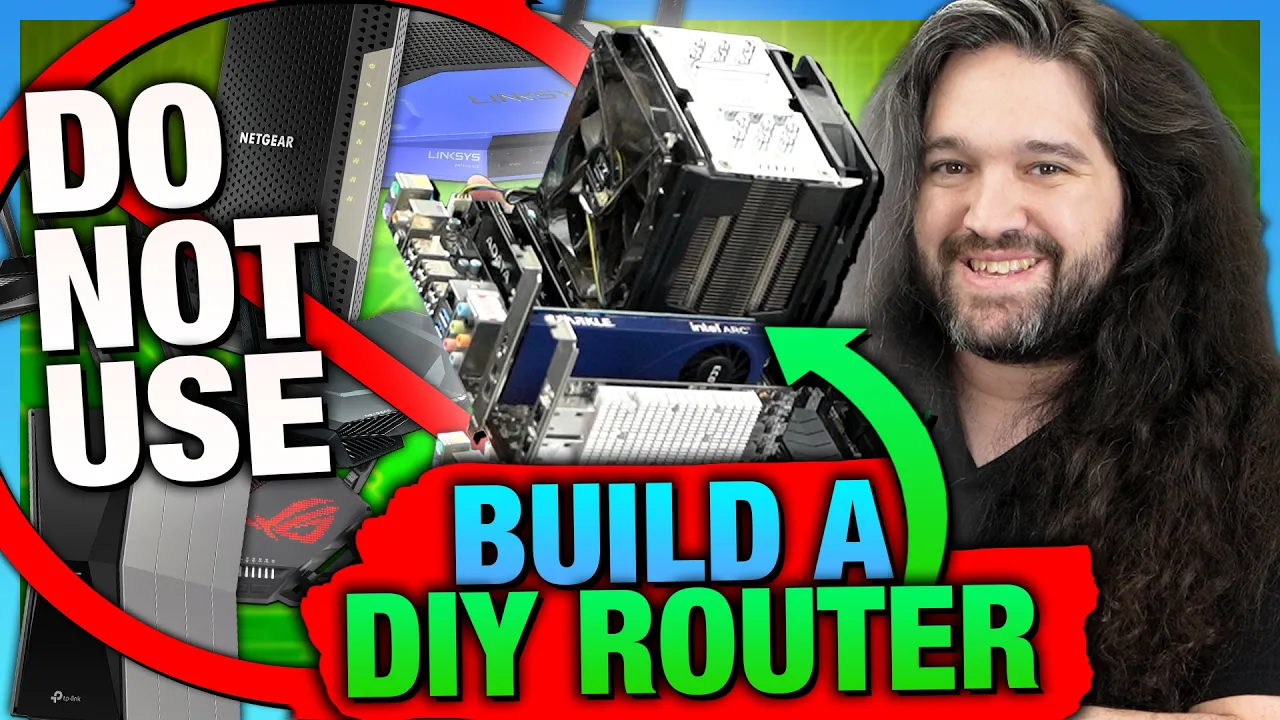
Your Router Spies On You. It's Time to Build Your Own | DIY Router Guide — Gamers Nexus

Gamers Nexus

Mandatory ISP gateway hardware harvests household telemetry and caps bandwidth via constrained state tables, making repurposed x86 hardware and open-source firewalls necessary to secure home networks.

AI-assisted summary of Your Router Spies On You. It's Time to Build Your Own | DIY Router Guide — original source. Check the original for full context.

Source published:

Key ideas

  • Gamers Nexus initiated a series on self-hosting and digital ownership, demonstrating how repurposed desktop PC hardware paired with dedicated network interface cards can outperform consumer routers and eliminate commercial telemetry. (0:00)
  • Proprietary ISP fiber gateways, such as AT&T's BGW320-505, monitor connected device MAC addresses and usage habits even when configured in IP passthrough mode, driving advanced users toward complete hardware bypasses via SFP+ optical network terminals. (8:15)
  • The guide benchmarked and evaluated major DIY router distributions—including pfSense, OPNsense, OpenWrt, and IPFire—identifying differences in installation models, feature flexibility, and privacy policies such as pfSense requiring personal contact data before downloading. (20:21)
  • Universal Plug and Play (UPnP) presents persistent network vulnerabilities by enabling local software to map ports through firewalls without admin oversight, leading the team to advise keeping UPnP globally disabled unless required for specific gaming consoles or services. (28:20)

Detailed notes

## Background Published by Gamers Nexus on YouTube on October 26, 2026, this guide initiates a new series focused on device self-ownership, homelabs, and digital privacy. According to the video description, the team explores building custom DIY routers using open-source platforms like OPNsense, OpenWrt, pfSense, and IPFire to help users break free from untrustworthy ISP hardware and invasive telemetry.

## TL;DR Gamers Nexus demonstrates how to repurpose retired x86 PC hardware—such as an older Intel Core i7 desktop—into a high-performance network router and edge firewall. The guide provides step-by-step walkthroughs for configuring prominent routing platforms, including pfSense, OPNsense, OpenWrt, and IPFire, while evaluating their security, interface assignment, and hardware isolation features. Additionally, the video details techniques for circumventing mandatory ISP equipment like AT&T fiber gateways using IP passthrough or SFP-based optical network terminals, offering alternatives such as RouterOS, DD-WRT, and FreshTomato to help users reclaim total control over their network traffic.

## Atmosphere & style The presentation blends serious consumer advocacy with the enthusiastic, hands-on spirit of traditional PC building. Steve Burke delivers his signature incisive commentary, cutting through corporate telemetry practices and regulatory blunders with sharp, sardonic humor alongside technical insights from Level1Techs' Wendell. Watching the guide feels like participating in an empowering, pragmatic masterclass that demystifies networking complexities and equips the viewer to take back ownership of their digital life.

## Bulletin - [00:00](https://www.youtube.com/watch?v=sJidlu3pPb4&t=0s) Gamers Nexus initiated a series on self-hosting and digital ownership, demonstrating how repurposed desktop PC hardware paired with dedicated network interface cards can outperform consumer routers and eliminate commercial telemetry. - [08:15](https://www.youtube.com/watch?v=sJidlu3pPb4&t=495s) Proprietary ISP fiber gateways, such as AT&T's BGW320-505, monitor connected device MAC addresses and usage habits even when configured in IP passthrough mode, driving advanced users toward complete hardware bypasses via SFP+ optical network terminals. - [20:21](https://www.youtube.com/watch?v=sJidlu3pPb4&t=1221s) The guide benchmarked and evaluated major DIY router distributions—including pfSense, OPNsense, OpenWrt, and IPFire—identifying differences in installation models, feature flexibility, and privacy policies such as pfSense requiring personal contact data before downloading. - [28:20](https://www.youtube.com/watch?v=sJidlu3pPb4&t=1700s) Universal Plug and Play (UPnP) presents persistent network vulnerabilities by enabling local software to map ports through firewalls without admin oversight, leading the team to advise keeping UPnP globally disabled unless required for specific gaming consoles or services.

## Key takeaways - [00:00](https://www.youtube.com/watch?v=sJidlu3pPb4&t=0s) Building an x86 custom router lets users reclaim device ownership, eliminate ISP rental hardware, and block third-party telemetry from mining home network data. - [04:37](https://www.youtube.com/watch?v=sJidlu3pPb4&t=277s) Broad regulatory router definitions from the FCC and persistent firmware vulnerabilities in consumer equipment highlight the necessity of an owner-controlled perimeter firewall. - [06:33](https://www.youtube.com/watch?v=sJidlu3pPb4&t=393s) Repurposed enterprise PCIe network cards in standard desktop chassis run hot and necessitate dedicated active cooling solutions to avoid thermal throttling or instability. - [08:15](https://www.youtube.com/watch?v=sJidlu3pPb4&t=495s) ISPs leverage integrated residential gateways to profile household demographics and internal device topologies, retaining packet inspection capabilities even under passthrough settings. - [13:45](https://www.youtube.com/watch?v=sJidlu3pPb4&t=825s) x86 routing software benefits more from strong single-threaded CPU performance than high core counts, requiring a minimum of two separate physical interfaces for WAN and LAN. - [20:21](https://www.youtube.com/watch?v=sJidlu3pPb4&t=1221s) Netgate requires users to complete a zero-dollar checkout demanding personal contact information to download pfSense Community Edition, diverging from typical open-source privacy standards. - [24:20](https://www.youtube.com/watch?v=sJidlu3pPb4&t=1460s) Deploying the ZFS file system on FreeBSD-based firewalls provides essential protection against file corruption caused by sudden power cuts, unlike the fragile UFS file system. - [28:20](https://www.youtube.com/watch?v=sJidlu3pPb4&t=1700s) UPnP poses substantial security risks by permitting internal devices to open public WAN ports automatically, making manual port forwarding the preferred method for home security. - [29:03](https://www.youtube.com/watch?v=sJidlu3pPb4&t=1743s) OPNsense offers a community-centric, offline-installable alternative to pfSense that avoids registration hurdles, though its documentation can lag behind rapid architectural updates like the shift to DNSmasq. - [35:35](https://www.youtube.com/watch?v=sJidlu3pPb4&t=2135s) OpenWrt originated from legal pressure that forced Cisco to open-source the Linksys WRT54G firmware under the GPL, establishing a durable open-source networking foundation with robust Wi-Fi compatibility. - [38:55](https://www.youtube.com/watch?v=sJidlu3pPb4&t=2335s) IPFire enforces a strict, color-coded four-zone security architecture (Red, Green, Blue, Orange) and intentionally leaves out UPnP support to ensure rigorous boundary control. - [43:22](https://www.youtube.com/watch?v=sJidlu3pPb4&t=2602s) AT&T enforces mandatory gateway hardware through certificate-based authentication, creating hardware bottlenecks that can saturate state tables under heavy network loads. - [45:24](https://www.youtube.com/watch?v=sJidlu3pPb4&t=2724s) Enthusiasts can fully bypass ISP fiber gateways by employing SFP/SFP+ ONTs running community firmware from 8311 to clone official MAC addresses, serial numbers, and equipment IDs. - [51:26](https://www.youtube.com/watch?v=sJidlu3pPb4&t=3086s) The safest deployment approach is staging the DIY router on a secondary PC alongside the operational network, allowing instant rollback by swapping patch cables if setup difficulties occur. - [55:21](https://www.youtube.com/watch?v=sJidlu3pPb4&t=3321s) OpenWrt serves as a lightweight, familiar option for basic home routing, whereas pfSense and OPNsense provide enterprise-grade toolsets that may prove overly complex for standard consumer needs.

## Detailed walkthrough ### [00:00](https://www.youtube.com/watch?v=sJidlu3pPb4&t=0s) Taking Ownership Back from "You'll Own Nothing and Be Happy"

Gamers Nexus introduces their new DIY router project, which is built from an old Intel Core i7-4930K CPU and an X79 motherboard bought off a sidewalk in Taipei for pennies on the dollar. While functional X79 motherboards are notoriously difficult to track down, this scavenged enterprise-class desktop platform still outperforms many modern pre-built consumer routers—especially when paired with upgraded network cards and modified cooling. This project forms part of an ongoing series focused on reclaiming ownership over personal hardware and services, kicking out unnecessary subscriptions, and cutting off corporate data harvesting from vendors that fail to secure their own products.

Steve Burke highlights that with modern DIY PC components reaching prohibitively expensive price tiers, repurposing retired enthusiast gear into home infrastructure is the ideal outlet for the PC building spirit. Users can achieve greater privacy, bypass rental hardware lock-in fees, and stop third-party surveillance. Alongside the custom PC build, the team also demonstrates a commercial retail router that has had its factory firmware wiped and replaced with an open-source alternative to prevent sketchy background telemetry. Steve frames this movement directly against modern corporate overreach:

> “So, if you've felt like you've heard the phrase ‘You'll own nothing and be happy’ enough, this is the how do you do something about that and take back ownership of as much as you can using the scrappiest, most fun PC hardware enthusiast driven approach possible where you're taking old parts, breathing new life into them, and you're kicking out some of the companies that have otherwise tried to displace your ownership.”

[02:11](https://www.youtube.com/watch?v=sJidlu3pPb4&t=131s) Reclaiming the DIY Spirit and Sponsoring Consumer Rights

Beyond security and financial independence, building your own router taps back into the joy of tinkering and technical exploration that defined early PC hobbyism. Steve notes that the passion enthusiasts poured into chipmakers and memory brands for decades has been undermined by hostile industry practices. Channeling that frustration into learning open networking allows users to acquire genuine skills while insulating their home networks from tracking.

The video is sponsored by Louis Rossmann's FULU Foundation and their campaign targeting Section 1201 of the Digital Millennium Copyright Act (DMCA). Under DMCA 1201, bypassing digital locks—even on devices consumers legally purchased and own, such as the PlayStation 5—is treated as a criminal act. FULU funds bounties for cybersecurity researchers who defeat these artificial locks and is organizing a grassroots coalition of hardware enthusiasts to lobby lawmakers. The foundation maintains a Zulip chat server to organize outreach to government representatives and operates the Consumer Rights Wiki to document anti-consumer hardware practices with verifiable evidence.

[04:37](https://www.youtube.com/watch?v=sJidlu3pPb4&t=277s) Regulatory Overreach: The FCC Router Ban and Defining a Router

Consumer networking hardware has been plagued by vendor neglect, unpatched vulnerabilities, and massive botnet exploits (such as those previously documented on ASUS routers). On top of these security failures, government policy has created further dysfunction: the Federal Communications Commission (FCC) pursued a broad, short-sighted router ban that ended up granting exemptions to Netgear after heavy lobbying, alongside aggressive actions taken against TP-Link mirroring earlier bans on ZTE and Huawei.

The team points out that the FCC's official definition of a router is comically overbroad, classifying virtually anything capable of sending and receiving network packets as a router—a criteria that applies equally to smart TVs and internet-connected refrigerators. Wendell from Level1Techs joins to provide a practical, functional definition for home networking:

```mermaid flowchart LR accTitle: Practical Router Architecture accDescr: Diagram showing the router managing connections between ISP uplinks and the internal local network.

subgraph WAN ["Internet Access (WAN)"] ISP1["Primary ISP (Fiber / Cable)"] ISP2["Backup Uplink (Cellular)"] end

Router["DIY Router (Custom OS / Firewall)"]

subgraph LAN ["Local Network (LAN)"] WIFI["Wireless AP / Network"] Clients["Home Devices / Clients"] end

ISP1 --> Router ISP2 -.-> Router Router --> WIFI Router --> Clients ```

> “I think for the context of the of the video and the audience, it's the thing that sits between your network and your ISP.”

As Wendell explains, the router manages whatever uplinks exist—be it fiber, cable, a wireless ISP, or a multi-WAN failover setup using a cellular modem backup—and controls local routing, optionally managing Wi-Fi access points or offloading them to dedicated hardware.

[06:33](https://www.youtube.com/watch?v=sJidlu3pPb4&t=393s) Scrapping Together the DIY Router Hardware

To prove that specialized enterprise gear is unnecessary, Gamers Nexus builds a router out of spare, low-value components lying around the studio:

- **CPU & Platform:** Intel Core i7-4930K on an Intel X79 LGA 2011 motherboard (sourced from a Taipei street market). - **Memory:** 32 GB of DDR3 RAM. - **Add-in Network Card:** A dedicated PCIe network interface card (NIC), which serves as the most capable, modern component in the build to ensure high network throughput. - **Dedicated Cooling:** An auxiliary fan zip-tied or positioned over the NIC, as high-throughput network cards generate substantial heat without rack-chassis airflow. - **GPU:** An Intel Arc A380 graphics card, utilized strictly for display output during installation and troubleshooting. - **Storage:** Retired, low-capacity solid-state drives (128 GB and 256 GB) that are near the end of their write endurance but offer more than enough capacity and reliability for a lightweight network operating system. - **Boot Drive:** A thumb drive humorously labeled as an "unreliable USB 3" drive. - **Power Supply:** A standard, budget Corsair CX550M power supply pulled from storage.

This rough test-bench assembly shows that any decommissioned corporate desktop, retired DDR3-era PC, or e-waste recycling find can instantly become a router by adding a multi-port PCIe NIC.

[08:15](https://www.youtube.com/watch?v=sJidlu3pPb4&t=495s) ISP Telemetry, Device Profiling, and Mandatory Hardware

The urgency behind replacing ISP equipment stems from aggressive data harvesting. Wendell details how Internet Service Providers exploit their managed gateways to monitor traffic inside the local home network, logging private internal metadata that has no bearing on delivering internet service:

> “I've seen concerning reports from ISPs treating the customer equipment behind the the the router, their router, as a place to data mine. MAC addresses, what kind of devices, how expensive was this TV that you bought? Let's use that as a demographic. So there are credible reports that ISPs are using that to build their subscriber advertising profile. It's also really important for ISPs to be able to separate traffic. Consider a family, like a husband and wife, couple of kids, which device is the traffic coming from? That also helps for building profiles because it's not just a household profile that you want to build, it's individual profiles you want to build. And those MAC addresses, the usage patterns, time of day, those are all pieces of telemetry that your ISP doesn't have when you have a router that's fully under your control.”

To guarantee access to this telemetry stream, many providers mandate customer use of proprietary, locked-down hardware, often bundled into mandatory monthly rental fees. On services like AT&T Fiber, customers are forced to use an all-in-one optical network terminal (ONT) and gateway combination. Even when configured in "IP passthrough" mode, the ISP's gateway remains physically inline on the connection, retaining the technical capability to inspect packets and inventory household devices with far higher fidelity than raw internet routing demands. Placing a user-owned DIY router at the network perimeter strips away internal MAC addresses, isolates internal device topologies, and denies the ISP visibility into individual household habits.

[09:30](https://www.youtube.com/watch?v=sJidlu3pPb4&t=570s) Taking Control: Why Build a DIY Router?

Gamers Nexus approaches this guide strictly from the perspective of an end user who wants a simple, drop-in replacement for their existing router using direct-to-disk installations. While Wendell from Level1Techs runs pfSense inside virtual machines for advanced setups like LAN cache or Pi-hole, this guide targets the physical fundamentals. Standard home setups rely on an ISP-provided modem, a router, or a combination gateway unit. With enough dedication, users can replace every piece of that hardware.

The rationale goes well beyond basic privacy concerns. As Wendell explains, custom hardware almost always delivers better throughput: “In almost all scenarios, it will be faster. You will be able to take better advantage of your connection from the ISP.” ISP-supplied hardware is universally engineered down to the lowest possible cost, directly degrading the user's connection. Furthermore, building a custom router simplifies secure remote access to home hardware without relying on cloud subscriptions or archaic firewall pinholes, using modern tooling like Tailscale and Pangolin. A DIY router allows users to deploy granular ad-blocking, identify smart TVs hardcoded to bypass local DNS filters like Pi-hole, and run comprehensive traffic logging. Wendell emphasizes that having surgical control over ingress and egress empowers users to defend against network attacks that weak ISP-provided routers simply fail to handle.

- ISPs frequently charge monthly equipment rental fees, reviving older anti-consumer cable practices where providers billed customers per connected TV or attempted to charge separate subscriptions for multiple household computers. - Gamers Nexus views repurposing hardware into routers as the same enthusiast pursuit as hosting a local Plex media server or buying a 3D printer to solve niche problems. - Gamers Nexus frames this initiative as a collective community effort: taking ownership back from corporations requires enthusiasts to discard corporate fanboyism and share technical knowledge openly.

[13:45](https://www.youtube.com/watch?v=sJidlu3pPb4&t=825s) DIY Hardware Selection: Turning E-Waste into Network Gear

```mermaid flowchart TD accTitle: DIY Router Physical Setup Architecture accDescr: Diagram illustrating incoming WAN routing through a DIY x86 PC to an access point and local clients.

subgraph WAN ["Internet Source"] ISP["ISP Connection / ONT / Modem"] end

subgraph RouterPC ["DIY Router (x86 Hardware)"] NIC_WAN["NIC Port 1 (WAN In)"] CPU_Engine["Single-Threaded CPU & RAM\n(pfSense / OPNsense / OpenWrt)"] NIC_LAN["NIC Port 2 (LAN Out)"] SSD["Local Storage\n(Small SSD / Flash Drive)"]

NIC_WAN --> CPU_Engine CPU_Engine --- SSD CPU_Engine --> NIC_LAN end

subgraph LocalNet ["Local Network Distribution"] AP["Access Point / Repurposed Router\n(Switched to AP Mode)"] Switch["Network Switch\n(Optional Expansion)"] Clients["Wired & Wireless Clients"] end

ISP --> NIC_WAN NIC_LAN --> AP AP --> Switch Switch --> Clients AP -.->|"Wi-Fi Broadcast"| Clients ```

Building an x86 router does not demand high-end components; nearly any legacy motherboard from this century will suffice. Gamers Nexus built their demonstration rig using an old, inexpensive Intel X79 platform. Single-threaded processor performance is the primary metric to optimize for basic routing, while high core counts are unnecessary. Display output is only needed for the initial boot and setup; a low-end discrete GPU like an Intel Arc A380 or simple integrated graphics handles the initial video out, after which the machine runs headless via web management interfaces.

The most critical requirement is physical networking ports. The host machine requires at least two separate Ethernet connections—one for the wide area network (WAN) and one for the local area network (LAN). Gigabit network interface cards (NICs) are abundant at electronics recycling facilities like the Kramden Institute, where they can often be acquired for pocket change. For faster networks, adding a dual-port 10 Gigabit PCI Express NIC allows high-speed uplinks directly to a network switch. Storage needs are similarly modest: an older, lower-end SSD is preferred for quick responsiveness, though a 32 GB USB flash drive can suffice in non-critical environments where drive endurance and write latencies are not concerns.

- Dedicated Wi-Fi access points and standalone network switches cleanly separate router duties from distribution: the router directs packet traffic, the access point broadcasts wireless signals, and the switch expands physical ports. - Repurposing cheap, store-bought consumer routers (such as a budget TP-Link model) into dedicated access points requires navigating to its default gateway (such as `192.168.0.1`), toggling on "Access Point Mode" to disable internal routing, and using its onboard switch ports for local expansion. - Motherboard Wi-Fi cards should not be used as software-defined access points; virtually all router operating system developers warn that broadcasting Wi-Fi directly off x86 desktop boards is notoriously unstable and janky.

[16:33](https://www.youtube.com/watch?v=sJidlu3pPb4&t=993s) Software Choices and the Drama of pfSense

Router software distributions function simultaneously as packet routers and stateful firewalls, inspecting data as it moves through the network. The ecosystem includes numerous options: pfSense, OPNsense, OpenWrt, IPFire, RouterOS, DD-WRT, and Tomato64. Like many open-source ecosystems, deep tribalism and bitter history divide these projects.

The largest and most contentious name in the space is pfSense. Emerging in 2004 as an independent fork of m0n0wall, pfSense is a FreeBSD-based platform that shares common ancestry with its primary modern rival, OPNsense. Describing the team behind pfSense, Wendell quipped: “They're ill-tempered, but do good work, like the dwarves of Middle-earth.” Netgate, founded in 2004 as an appliance hardware vendor selling m0n0wall-powered units, assumed official leadership over the pfSense project in 2012.

Tensions mounted when Netgate created a proprietary fork designed exclusively for their own hardware, which eventually morphed into "pfSense Plus" and was made available for third-party hardware under paid subscriptions. Although Netgate maintained a free "Community Edition" (CE), its historical status as fully open-source software has eroded. Wendell explains Netgate's commercial push, noting that the developers contribute immense amounts of code directly upstream to the FreeBSD subsystem: “pfSense really had completely taken over the universe, and a lot of the the work that those folks do, they contribute upstream, and they do a lot of programming for the underlying BSD subsystem, and like they've really done a lot of hard work. So, they really want people to subscribe, even home users.” Confronted with millions of users on their dashboards, Netgate pushed to aggressively monetize their dominant footprint.

[18:13](https://www.youtube.com/watch?v=sJidlu3pPb4&t=1093s) Netgate's Feud with OPNsense and the UN Dispute

The history surrounding pfSense and its parent company, Netgate, carries an astonishing amount of internet drama and bad blood. Beyond rumors that "OPNsense" is a banned word on the pfSense subreddit, Netgate notoriously ran into legal trouble with the United Nations' World Intellectual Property Organization (WIPO) back in 2017 for cybersquatting the opnsense.com domain. Rather than merely parking the address, Netgate hosted a brazen parody site disguised to look like their competitor. The site featured abrasive slogans such as, “When your users start complaining, it's probably the firewall. Tell those whiny [ __ ] to shut it. You're leading technology.” It also mocked the project’s open-source lineage by declaring, “Everything we do, from our product to our documentation, was bold copied, ripped off, or otherwise borrowed from someone who had the idea before us.”

The feud escalated into bizarre, personal territory on the domain Netgate established. In one notable clip, OPNsense lead developer Franco Fichtner—who was born in the former East Germany—was explicitly depicted as Adolf Hitler, with Netgate's Jim Thompson cast as his unstoppable nemesis. Steve Burke reacts with dry sarcasm to the sheer pettiness and hostility of the incident, joking about the site's aggressive formatting and early-web aesthetic. Remarking on the absurdity of a networking company stooping to such depths, Steve quipped: “They would be guessing the P stands for psychopaths.”

- Netgate lost the opnsense.com domain following a 2017 WIPO dispute after engaging in domain squatting and hostile parody. - The squatted site targeted OPNsense founder Franco Fichtner with personal attacks, casting him as Hitler in video parodies. - The antagonistic campaign centered on accusations that OPNsense had stolen and copied pfSense's documentation and codebase.

[20:21](https://www.youtube.com/watch?v=sJidlu3pPb4&t=1221s) pfSense Acquisition, Account Requirements, and USB Creation

Setting aside the controversial community relations, users wanting to deploy pfSense must navigate Netgate’s increasingly walled distribution system. To obtain the software, users must go to pfSense.org/download, select the `amd64` architecture, and proceed through an online store checkout to purchase the installer for zero dollars. Crucially, this download provides only an installer stub rather than a standalone disk image of pfSense itself. Completing the order forces users to register a Netgate account, entering their full name, physical address, and telephone number before being granted access to the file. As Steve points out: “Of all the options here, pfSense is the only one that requires an account with your name, address, and phone number, which flies in the face of privacy, which is a lot of the reason we're doing this.” While users can easily provide fake details, the requirement itself is contrary to the ethos of self-hosting.

Furthermore, Netgate has deprecated the traditional offline installation media. The image retrieved from the site is merely a base Netgate installer that requires an active internet connection during the actual hardware setup process to pull down the free Community Edition (CE). Flashing the downloaded image to installation media follows standard PC procedures: Rufus is the recommended utility for Windows users, while alternatives like BalenaEtcher serve macOS and Linux platforms. The user selects a sacrificial USB flash drive, targets the downloaded disk or ISO image, leaves the default settings intact, and writes the boot drive. The flash drive is then inserted into the target router machine, and the system is booted via a one-time boot menu or BIOS boot priority change.

```mermaid flowchart TD accTitle: pfSense Media Acquisition and Preparation accDescr: Flow showing the steps from website checkout to creating a bootable installer flash drive.

subgraph Download ["Netgate Portal"] A["Visit pfsense.org/download"] --> B["Select amd64 Architecture"] B --> C["$0 Checkout & Mandatory Account Creation"] C --> D["Download Netgate Installer Stub"] end

subgraph Flash ["Drive Preparation"] D --> E["Insert Flash Drive"] E --> F["Open Rufus / BalenaEtcher"] F --> G["Flash Stub ISO to USB"] G --> H["Boot Target Router Hardware via USB"] end ```

[21:43](https://www.youtube.com/watch?v=sJidlu3pPb4&t=1303s) Hardware Interfaces and Initial Network Configuration

Because the installer requires an active network connection to fetch packages, the physical WAN Ethernet cable must be connected to its designated port before powering on the machine. Once pfSense finishes booting, a brief copyright splash screen appears before presenting the configuration menu. For most users, the advanced installer options can be left untouched: `CE repositories` allows installing the open-source version on pfSense Plus hardware, `Export network config enabled` creates an exportable setup profile, `Swap size` handles memory paging automatically, and setting `Console type` to EFI works reliably on any modern platform.

When configuring network cards, port mapping requires careful attention. In an installation utilizing a discrete two-port network interface card (NIC) alongside an onboard motherboard jack, pfSense assigns device identifiers by controller driver (such as `ix` for 10Gb Intel interfaces or `em` for 1Gb Intel interfaces). In this build, `ix1` serves as the active WAN port, `ix0` serves as the primary LAN interface, and the onboard controller `em0` is reserved for future expansion. WAN connectivity defaults to DHCP client mode, though users behind ISPs that mandate point-to-point authentication will need to choose PPPoE and supply their credentials. The LAN interface is set to a static IP so the gateway address remains predictable, and the built-in DHCP daemon (DHCPD) remains enabled to dispense IP addresses to client machines.

- **WAN Port Identification:** Selected as `ix1` (active link); configured as a DHCP client (or PPPoE if credentials are required by the ISP). - **LAN Port Identification:** Assigned to `ix0`; configured with a static local gateway address and an active DHCPD pool. - **Onboard NIC (`em0`):** Left unassigned during initial setup to be used later as an isolated physical network. - **VLANs & DNS:** VLANs are avoided in this entry-level build to eliminate the need for expensive managed network switches, and local DNS resolver overrides remain toggled off.

[24:20](https://www.youtube.com/watch?v=sJidlu3pPb4&t=1460s) File System Selection, Storage Setup, and Installation

With network interfaces mapped, the installer contacts Netgate's servers to present installation options for Community Edition. Storage configuration centers on selecting between the ZFS and UFS file systems. While UFS is an older, lightweight option with lower RAM utilization, Netgate warns that UFS “can be fragile when it comes to sudden interruptions such as power loss.” Consequently, ZFS is the strongly recommended default for reliability. For partition layouts on modern systems, GPT is the standard, whereas MBR is relegated strictly to legacy hardware and select ARM platforms.

```mermaid flowchart LR accTitle: Storage and File System Selection accDescr: Decision pathway for selecting the file system and drive mode in the pfSense installer.

A["Target Drive"] --> B{"File System Choice"} B -->|"Recommended Default"| C["ZFS"] B -->|"Legacy / Low Resource"| D["UFS"] C --> E["Stripe Mode (RAID 0)"] E --> F["Select Target Disk"] F --> G{"pSLC Cache Mode?"} G -->|"Default: Disabled"| H["Install CE System"] G -->|"Warning: Irreversible"| I["Halves MLC / Cuts 2/3 TLC Capacity"] ```

When provisioning a single storage drive under ZFS, the correct pool topology is "stripe" (RAID 0). Within the advanced disk menu, users are cautioned against enabling pseudo-SLC (pSLC) mode. Although pSLC improves write endurance on compatible flash controllers, it is completely irreversible, cannot be verified automatically by the installer, and drastically shrinks usable capacity—cutting MLC drive space in half and reducing TLC drive space by two-thirds. Unless a user understands the specific industrial endurance requirements of their storage hardware, this feature must be avoided. After choosing the latest stable CE release, the installer writes the system files and prompts for a system restart, at which point the USB drive should be pulled from the machine.

[26:12](https://www.youtube.com/watch?v=sJidlu3pPb4&t=1572s) Web UI Setup and Configuring an Isolated Network

Once the router completes its reboot, the rest of the configuration moves off the serial/display console and into the web browser interface. Plugging an administrative PC directly into the router’s LAN port (`ix0`) and navigating to `192.168.1.1` brings up the pfSense management UI. Bypassing the self-signed HTTPS certificate warning presents the factory credentials: username `admin` and password `pfsense`. Initial setup walks through setting the device hostname, leaving the default domain as `home.arpa` (or a subdomain like `gn.home.arpa`), configuring the local timezone, and entering a strong administrator password. Console security is also emphasized: users are urged to set a password on physical console access to protect against anyone with physical access to the chassis.

```mermaid flowchart TD accTitle: Physical Port Topology on the Custom Router accDescr: Diagram illustrating the three physical network ports and what connects to each.

subgraph Router ["Custom DIY Router Hardware"] WAN["Port ix1 (WAN)"] LAN["Port ix0 (LAN)"] OPT["Port em0 (Untrusted)"] end

WAN <-->|"Upstream Internet"| ISP["Modem / Fiber ONT"] LAN <-->|"Trusted Traffic"| MainNet["Managed/Unmanaged Switches & Trusted APs"] OPT <-->|"Isolated Traffic"| GuestNet["Untrusted / IoT Device Network (Kea DHCP)"] ```

Taking advantage of the third, unused onboard motherboard port (`em0`), the guide details isolating untrusted hardware. By following Netgate's isolation documentation, `em0` is configured as a dedicated physical network labeled "untrusted," running Kea DHCP rather than the deprecated ISC DHCP daemon. This isolated segment allows untrusted or smart home devices to access the open internet without granting them the ability to communicate with devices on the primary LAN or access the router's management portal. Finally, after attaching switches and access points to the LAN side, ongoing maintenance becomes the user's personal duty. As Steve emphasizes regarding software maintenance: “It's possible to set up a cron job to do that automatically, but the whole point of building a router is to reclaim control of it.”

- **Default Web UI Address:** `192.168.1.1` - **Default Credentials:** Username: `admin` | Password: `pfsense` - **Default Local Domain:** `home.arpa` - **DHCP Engine:** Migrated to Kea DHCP per pfSense's modern interface prompts. - **Port Isolation:** Motherboard NIC `em0` designated as an isolated network to firewall off suspicious or IoT devices from the primary trusted LAN.

[28:20](https://www.youtube.com/watch?v=sJidlu3pPb4&t=1700s) Port Forwarding and UPnP Considerations

Port forwarding comes up far less frequently for modern users because consumer networking hardware heavily relies on Universal Plug and Play (UPnP). UPnP enables local applications to configure their own port forwarding rules automatically without user intervention, though this convenience introduces significant security vulnerabilities. While manual port forwarding carries its own security risks, Netgate observes that many mainstream software suites depend on protocol helpers:

> "There are many popular programs and platforms which support UPnP IGD and PCP such as Steam or Steam Deck, Nintendo consoles, PlayStation consoles, Xbox consoles, video conferencing apps, torrent clients, and more."

Gamers Nexus strongly advises keeping UPnP disabled by default. However, if connectivity issues arise on gaming hardware, video conferencing tools, or self-hosted media servers such as Plex, administrators can find the configuration toggles under **Services > UPnP & NAT-PMP** (or **IGD & PCP**).

---

[29:03](https://www.youtube.com/watch?v=sJidlu3pPb4&t=1743s) OPNsense: History, Upstream Drama, and Homelab Appeal

The guide transitions to OPNsense, the well-known pfSense fork that emerged under contentious circumstances, with pfSense historically alleging that OPNsense plagiarized their work. Guest expert Wendell from Level1Techs explains the philosophy behind the split:

> "Then there's OPNsense, which is the fork of pfSense to try to peel away some of the more, let's call it graybeard opinion. Like there are well-reasoned reasons for why they're doing things, but they may be suboptimal from a usability standpoint or suboptimal from a 'I can vibe code a better thing than this' standpoint, cuz that is probably not untrue at this point. And so the OPNsense people have forked that and try to provide a better experience. But at the same time, it doesn't appear to me that the OPNsense people have put in the same infrastructure to support the underlying pfSense ecosystem in terms of upstream patches and contributions of code and that kind of thing. And so like there are good arguments here for both things."

When asked whether he has a favorite between the two distributions, Wendell frames it strictly as “different tools, different jobs.”

The steward behind OPNsense is Deciso, which executed the fork in 2015. While Deciso maintains that minimal original, pre-fork code remains in modern OPNsense builds, both platforms trace their core upstream lineage to FreeBSD. This shared dependency has generated friction, as developers from both rival camps must interact within the FreeBSD ecosystem:

> "Franco of OPNsense announced that he officially retired from contributing to FreeBSD in December 2025 after getting suspended from the FreeBSD bug tracker. Reading through the threads in question, it's a wonder any work gets done at all by anybody with great quotes like quote, 'Once upon a time, common sense was used.' Free BSD is what the PlayStation OS is based on, by the way. Underneath every piece of polished corporate software, there are a bunch of unpaid nerds treating a message board like it's Game of Thrones."

From an end-user and homelab perspective, OPNsense offers clear advantages over pfSense: it requires no account creation, avoids funnels into paid subscription models, operates entirely offline during setup, and carries far less risk of having its free edition suddenly deprecated. Steve also notes wryly:

> "Its marketing also has, as far as we can tell, 100% fewer Hitlerian references as compared to pfSense. That is not normally something we review, but seems like an improvement, I guess."

On the flip side, pfSense's community documentation was found to be notably more organized and helpful.

---

[31:44](https://www.youtube.com/watch?v=sJidlu3pPb4&t=1904s) OPNsense Setup: Step-by-Step Installation

```mermaid flowchart TD accTitle: OPNsense Installation Workflow accDescr: Step-by-step process of installing and configuring OPNsense from bootable media to web interface.

subgraph Boot["Boot & Media Prep"] A["Download AMD64 VGA Image"] --> B["Flash to USB via Rufus"] B --> C["Boot Target Hardware"] C --> D["Auto-boots to Live Read-Only Mode"] end

subgraph Install["Local Drive Installation"] D --> E["Log in as 'installer' / 'opnsense'"] E --> F["Select Keymap & 'Install ZFS'"] F --> G["Pick 'Stripe' RAID & Target Disk"] G --> H["Reboot into Permanent System"] end

subgraph Config["Console Configuration"] H --> I["Console Login: 'root' / 'opnsense'"] I --> J["Assign Interfaces (ix0, ix1, em0)"] end

subgraph WebGUI["Browser Onboarding"] J --> K["Access Web GUI at 192.168.1.1"] K --> L["Keep Unbound DNS Enabled"] L --> M["Uncheck 'Optimize for Multi-WAN'"] M --> N["Leave DNSsec & IPsec Off for Initial Run"] end ```

The installation process begins by pulling down the AMD64 VGA image from the official OPNsense website (which runs on standard x86-64 hardware regardless of CPU brand) and writing it to a flash drive using Rufus. Upon booting the machine, OPNsense automatically configures an ephemeral live session in read-only mode.

- **Storage Setup:** To install permanently, log in through the console using username `installer` and password `opnsense` (all lowercase). Select the keyboard layout and choose **Install ZFS**. The installer uses a hybrid boot partition scheme:

> "The hybrid referenced in the menu means that, quote, you can turn UEFI on and off and the boot won't fail."

- **Partition Layout:** Select **Stripe** for single-disk layouts, designate the target storage volume, and execute the installation. The installer prompts for a root password change, which can be deferred until initial setup completes. - **Console Interface Mapping:** After rebooting, log in to the system console with user `root` and password `opnsense`. Select the option to assign interfaces. VLAN configurations and Link Aggregation (LAG / LAGG) can be bypassed:

> "Our understanding is that lags only help with bandwidth when multiple devices on the network are saturating their connections at the same time. Our understanding is also that they are less reliable in a lot of cases. We don't have a ton of experience with link aggregation, so we'll move along."

Interface identification requires trial and error. The hardware ports populate under FreeBSD labels like `ix0` and `ix1` without connection status indicators. If the 50/50 guess between WAN and LAN proves incorrect, physical Ethernet patch cables can simply be swapped afterward. The auxiliary port (`em0`) is designated as an optional interface.

- **Web GUI Setup Wizard:** Connect an administration PC to the assigned LAN port and open `192.168.1.1` in a browser. Authenticate with `root` and `opnsense`. Hostname and domain defaults can remain unmodified. - **DNS & Routing Rules:** Unbound DNS remains enabled to take advantage of integrated security and ad-blocking lists. DNSSEC should remain unchecked during baseline setup because upstream ISP resolvers must explicitly support it. On the deployment screen, disable **Optimize for multi-WAN** unless configuring redundant internet connections, leave automatic DHCP and DNS registration active, and leave IPsec disabled unless building IPsec VPN tunnels. - **Guest Network Friction:** Configuring an isolated guest subnet on the spare physical NIC proved unusually difficult in OPNsense compared to every other platform tested. Documentation has lagged behind architectural changes:

> "There are plenty of guides to setting up VLANs. Home network guides are popular, as well as an official guide to setting up a guest network on a separate physical interface, but the documentation seems to predate OPNsense's switch to DNSmasq. Switching to Kea DHCP may make things easier, but we're not comfortable trialing and erroring our way through providing instructions to lots of people on the internet for something that we're just not sure about and don't have a lot of experience with."

Maintenance requires periodically logging into the administrative UI to review updates. For users needing UPnP, install the `os-upnp` plugin via **System > Firmware > Plugins**, then manage its policies under **Services > Universal Plug and Play**.

---

[35:35](https://www.youtube.com/watch?v=sJidlu3pPb4&t=2135s) OpenWrt: Origins in the Linksys WRT54G GPL Controversy

OpenWrt draws its heritage from the iconic blue-and-black Linksys WRT54G home router. Following Cisco's acquisition of Linksys in 2003, developers discovered that Linksys had built the device firmware using code governed by the GNU General Public License (GPL), including the Linux kernel.

Because Cisco had used GPL-licensed software, Linksys was legally compelled to publish the firmware source code. This was a messy supply chain: Cisco owned Linksys, Linksys bought silicon from Broadcom, and Broadcom acquired upstream firmware components from third parties. Threatened with legal enforcement, Cisco published the source code, creating a major legal precedent for open-source licensing.

This disclosure enabled enthusiasts to write custom distributions directly targeting the WRT54G platform. Over the subsequent two decades, those experimental forks evolved into modern OpenWrt: an enterprise-grade, general-purpose Linux distribution capable of running on dedicated embedded network gear, smart home appliances, and full x86 desktop platforms.

---

[36:38](https://www.youtube.com/watch?v=sJidlu3pPb4&t=2198s) OpenWrt Setup: Direct SSD Flashing and Firewall Zones

Unlike standard operating systems, OpenWrt does not utilize a dedicated installer utility for bare-metal x86 hardware. Instead, the storage drive itself must be flashed directly with the raw image using a secondary computer.

```mermaid flowchart TD accTitle: OpenWrt Untrusted Network Isolation accDescr: Firewall zoning architecture used in OpenWrt to isolate an untrusted network segment while routing traffic out to the internet.

subgraph Hardware["Hardware Interface"] P0["Physical Port: eth0"] --> B0["Bridge: br-untrusted"] end

subgraph ZoneConfig["Firewall Routing: 'untrusted_zone'"] B0 --> Z["Zone Policy"] Z -->|"Input"| AC1["Accept"] Z -->|"Output"| AC2["Accept"] Z -->|"Intra-zone Forward"| RJ["Reject"] Z -->|"Forward Out"| WAN["Destination: WAN Zone Only"] end ```

- **Imaging Storage:** Connect the target SSD to a workstation and run Rufus. Pressing `Alt + F` inside Rufus enables non-removable drive detection, allowing users to flash the target SSD directly. - **Console and Port Mapping:** Connect an Ethernet patch cable between the management PC and the target system's ports until `192.168.1.1` responds in a web browser. Log in using `root` with no password entered, and assign an administrative password immediately. While OpenWrt prompts to search for software updates automatically, it will never apply changes without explicit user approval. - **Interface Reassignment:** Under **Network > Interfaces > Devices**, identify ports by cable link status. With two active cables connected, `eth0` and `eth1` flag as live links, revealing `eth2` as the unpopulated physical port. Edit the default bridge device (`br-lan`), rebind its physical member to `eth2`, click **Save & Apply**, and migrate the administrative LAN cable to the newly designated port. - **Configuring an Untrusted Network:** Creating an isolated network segment on OpenWrt is straightforward: 1. Under **Devices**, create a bridge named `br-untrusted` bound to `eth0` with default parameters. 2. Under **Network > Firewall**, create a dedicated zone labeled `untrusted_zone`. 3. Set **Input** to `accept`, **Output** to `accept`, and **Intra-zone forward** to `reject`. 4. Restrict forwarding destinations strictly to `WAN`, preventing untrusted traffic from crossing into private LAN subnets while still preserving outbound internet access. 5. Bind the newly configured firewall zone to an isolated network interface.

[38:12](https://www.youtube.com/watch?v=sJidlu3pPb4&t=2292s) OpenWrt Wrap-Up and Comparison to the Senses

The configuration of the untrusted network interface wraps up by assigning the device to `br-untrusted`, setting the IP address to `192.168.2.1` with a subnet mask of `255.255.255.0`, setting the firewall zone to the untrusted zone, and launching a DHCP server with default settings.

Reflecting on the platform as a whole, OpenWrt is noted for being extremely compact and stripped down, featuring minimal drivers out of the box. Because of this footprint, deploying it onto a full-blown x86 PC rather than a prefab consumer router feels somewhat out of place. It remains an entirely viable choice if the objective is pure routing without extra packages, but platforms like pfSense and OPNsense provide far more headroom to grow. Conversely, OpenWrt holds a distinct advantage in integrated wireless support compared to FreeBSD-based alternatives, provided the necessary wireless drivers are installed.

[38:55](https://www.youtube.com/watch?v=sJidlu3pPb4&t=2335s) Introduction to IPFire Architecture and Setup

IPFire markets itself as “a professional-grade open-source firewall and security platform.” In terms of its lineage, IPFire is a Linux distribution forked from IPCop, which was itself derived from Smoothwall (a project that hasn't seen an IPCop release since 2015, while Smoothwall transitioned toward pfWall).

```mermaid flowchart TD accTitle: IPFire Color Coded Network Layout accDescr: Diagram showing how IPFire organizes WAN LAN DMZ and WLAN using four color coded zones. subgraph WANZone["WAN Interface"] RED["Red Network<br/>(External / WAN - DHCP)"] end

subgraph InternalZones["Internal Networks"] GREEN["Green Network<br/>(LAN: 192.168.10.1)<br/>Safe / DHCP Enabled"] BLUE["Blue Network<br/>(WLAN / IoT: 192.168.11.1)<br/>Restricted / MAC Filtered"] ORANGE["Orange Network<br/>(Optional DMZ)"] end

RED --> GREEN RED --> BLUE RED -.-> ORANGE BLUE -.->|"Blocked by Default"| GREEN ```

Installation begins conventionally: write the downloaded IPFire ISO image onto a USB flash drive using Rufus and boot the machine. The installer prompts for basic system choices: - **File System:** EXT4 is selected alongside preferred language and system drive. - **Hostname and Domain:** Defaults work fine. - **Credentials:** IPFire requires two distinct passwords during setup—one for the root command-line interface and another for the web administration interface.

IPFire organizes traffic across four distinct, color-coded security zones: - **Red:** Untrusted external Internet connection (WAN). - **Green:** Trusted local internal network (LAN). - **Orange:** Optional DMZ for public-facing servers. - **Blue:** Semi-trusted guest or wireless network (WLAN/IoT).

For this build, a Red, Green, and Blue configuration is selected. The Blue interface does not have to be strictly wireless; its out-of-the-box restrictions make it an ideal candidate for an isolated guest or IoT segment. Using trial and error to sort out driver-to-port assignments, the system's gigabit NIC is allocated to Blue, while two 10-gigabit ports are assigned to Red and Green.

The console IP setup is configured as follows: - **Green IP:** `192.168.10.1` - **Blue IP:** `192.168.11.1` - **Red:** Set to obtain an IP via DHCP - **Green DHCP Pool:** Start address of `192.168.10.100` and end address of `192.168.10.200`

[40:50](https://www.youtube.com/watch?v=sJidlu3pPb4&t=2450s) IPFire Web UI Configuration, Quirks, and Limitations

Once console initialization finishes, the web UI is accessed by connecting a client to the Green port and navigating to `https://192.168.10.1:444`. Omitting either the `https://` protocol or port `444` prevents the interface from loading.

Initial setup revealed that DNS resolution was non-functional under the Network > Domain Name System menu—likely caused by running in a nested lab environment behind existing office networking gear. This was remedied by designating Cloudflare's `1.1.1.1` as the primary resolver and unchecking the option to use ISP-assigned DNS servers.

Configuring the Blue network requires addressing several interdependent settings: - **MAC Filtering:** Blue enables MAC address filtering by default. Each allowed device must have its hardware MAC address added, checked as enabled, and saved under Firewall > Blue Access. - **DHCP Services:** The DHCP server settings from the Red/Green configuration must be manually adapted under Network > DHCP Server to support the `192.168.11.x` subnet. - **DNS Leak/Isolation Bug:** Global DNS settings applied only to the Red network, requiring an explicit entry of `1.1.1.1` inside the Blue DHCP server menu so clients could resolve domain names. - **Web UI Hardening:** By default, Blue traffic cannot access Green, but locking out access to the router's web admin UI from Blue requires manually appending two lines of code to the system configuration file with the `192.168.11.x` subnet specified.

System maintenance features stand out positively: IPFire provides hardware sensor graphs for CPU and memory usage, along with a dedicated vulnerability status tab listing known hardware security flaws tied to the detected processor and platform.

On the downside, community support and flexibility are narrower compared to the FreeBSD giants: - IPFire lacks any UPnP (Universal Plug and Play) support by design, requiring manual port forwarding under Firewall > Firewall Rules for every service or game. - The color-coded layout enforces a rigid topology that simplifies standard deployments but restricts complex bespoke network designs. - “We also get the impression that the two senses completely dominate the DIY router space by market share,” leaving smaller distributions like IPFire with sparser documentation and slower forum assistance.

[43:22](https://www.youtube.com/watch?v=sJidlu3pPb4&t=2602s) ISP Hardware Lock-in and Wendell on AT&T Fiber Bypasses

The guide pivots toward the friction of dealing with mandatory ISP-supplied hardware. Many users turn to custom routers to escape vendor tracking and bloated hardware, only to find the ISP insists on their equipment remaining the frontline access point. Level1Techs' Wendell joins the discussion to unpack the practical frustrations of ISP-mandated gear:

> “AT&T with their fiber really want to control the endpoint. And even if you use your own custom router, the options in like the BGW gateways, for example, the pass-through router option there is still really limited. Like a couple power users in a household can saturate everything that that piece of equipment can handle.”

Wendell explains that AT&T locks authentication strictly to their proprietary hardware using an embedded digital encryption certificate. If you want to bypass the hardware completely, “you have to get a special piece of equipment, and you have to emulate the serial number on from your gateway, and you have to peel off the encryption certificate from the AT&T gateway, and stuff it onto a new piece of equipment that's not, you know, brain-dead, and then you have a reasonable internet experience.”

Some ISPs do not mandate this level of control. Google Fiber, for instance, allows customers to connect an Ethernet cable straight out of the provided fiber jack into any third-party router without requiring vendor authentication.

[45:24](https://www.youtube.com/watch?v=sJidlu3pPb4&t=2724s) Bypassing ISP Gateways: IP Passthrough vs. ONT Emulation

For customers trapped with restrictive ISPs, the simplest starting point is checking whether the provider gateway supports a true bridge mode or an IP Passthrough mode. On popular AT&T gateways such as the Humax BGW320-505, this can be configured directly in the interface: - Log in to the gateway interface at `192.168.1.254`. - Navigate to the Firewall > IP Passthrough page. - Change the Allocation Mode to "Passthrough." - Disable the gateway's built-in Wi-Fi radios entirely to prevent interference, then run an Ethernet cable straight to the WAN interface of your custom router.

While IP Passthrough avoids the complexity of hardware hacking, it still leaves the ISP gateway handling the physical link and running its constrained internal state tables. To cut the ISP gateway out of the circuit completely, users must deploy their own Optical Network Terminal (ONT)—the device where the fiber optic strand terminates into copper Ethernet.

Replacing the ONT requires spoofing the ISP's original gateway credentials: - The replacement ONT acts like a shapeshifter, mimicking the factory hardware down to its serial number, MAC address, and extracted authentication certificates. As Steve jokes, “It's kind of like when CEOs like Mark Zuckerberg kill a human and then wear their skin. They pretend to be the original. That's what you're doing to AT&T.” - Community resources like `pon.wiki` document the process thoroughly and maintain the 8311 community firmware commonly used to emulate AT&T ONTs. - Pre-flashed SFP-based ONTs typically run upwards of $100 from third-party sellers. - SFP-based ONT modules demand hardware planning: the custom router or upstream switch must feature an SFP/SFP+ cage, alongside appropriate transceivers and cables. - Thermal management is a major engineering hurdle for miniaturized ONTs. These pluggable modules run notoriously hot, with vendors frequently bundling stick-on aluminum heatsinks or requiring community-designed 3D-printed fan brackets (housing 25mm or 40mm fans) to keep the transceivers from overheating and dropping packets.

[47:55](https://www.youtube.com/watch?v=sJidlu3pPb4&t=2875s) Bypassing ISP Hardware: The AT&T Gateway Bypass

Replacing ISP-mandated hardware entirely is a complex, hyper-specific project that could easily fill its own dedicated video. Even so, if users are clever and willing to seek out independent documentation, it is entirely possible to sever ties with the provider's equipment at the fiber level. Taking AT&T as a prime example, the community wiki guides walk through swapping an AT&T BGW320-505 gateway using a third-party SFP+ optical network terminal (ONT), such as the Aztek / Azores or AXON USG-PF. The procedure requires precise execution: checking the AT&T fiber status page to confirm the connection operates at a 1270 nm wavelength, equipping the DIY router with an SFP+ card, and spoofing the official AT&T gateway's MAC address on the router's WAN port.

```mermaid flowchart TD accTitle: AT&T Gateway Bypass Flowchart accDescr: Step-by-step process of configuring a DIY router to bypass and replace an AT&T fiber gateway using an SFP+ ONT. subgraph Prep ["Preparation & Verification"] A["Confirm 1270 nm Fiber Wavelength"] --> B["Equip DIY Router with SFP+ Card"] B --> C["Acquire Replacement SFP+ ONT Module"] end subgraph Config ["Configuration & Spoofing"] C --> D["Spoof AT&T Gateway MAC on WAN"] D --> E["Set up SNAT to Reach Local ONT Craft Tool"] E --> F["Clone Gateway Info:<br>Equipment ID & Firmware Version"] end subgraph Deployment ["Fiber Cutover"] F --> G["Hot-swap Fiber Cable to DIY Router"] G --> H{"Verify Connection"} H -->|Success| I["Full Liberation from ISP Hardware"] H -->|Timeout| J["Troubleshoot or Revert"] end ```

Before plugging in the fiber, the user must set up Source NAT (SNAT) on the router to access the ONT's Local Craft Terminal (LCT). Through the ONT's web configuration interface, the user clones the equipment ID, software version, and remaining identity parameters of the original carrier gateway. Only then is the fiber line hot-swapped into the replacement unit to determine if the handshake succeeds or times out from AT&T's end. Patrick personally tackled this configuration for his own home setup, and it consumed an entire Saturday. Steve summarizes the exhausting effort and the ultimate payoff:

> “When Patrick did this for himself, personally, it took him a Saturday to do. But, the reward is that you're free of their [shit]. And that's a pretty big reward.”

The community wiki is packed with technical jargon, abbreviations, and steep hurdles. Although Gamers Nexus has no affiliation with the 8311 Discord community, they advise anyone attempting an ISP bypass to join that server and confer with experienced members before buying hardware or altering their connection.

[49:23](https://www.youtube.com/watch?v=sJidlu3pPb4&t=2963s) Overview of RouterOS, DD-WRT, and FreshTomato

Beyond the primary distributions tested in the main guide, several other long-standing operating systems warrant mention for users exploring alternative platforms:

```mermaid flowchart LR accTitle: Router Firmware Ecosystem Overview accDescr: Summary of RouterOS, DD-WRT, and Tomato alternatives, their origins, and current status. subgraph MikroTik ["MikroTik"] ROS["RouterOS (1999)"] --> WB["Managed via WinBox GUI"] ROS --> LIC["Requires License Key after 24h"] end subgraph WRT_Family ["WRT Family & Ports"] LNK["Linksys WRT54G"] --> DD["DD-WRT (Perpetual Betas)"] LNK --> HYP["HyperWRT"] HYP --> TOM["Tomato"] TOM --> FT["FreshTomato"] TOM --> T64["Tomato64 (x86-64 / ARM64)"] end ```

* **RouterOS (MikroTik):** MikroTik’s software actually predates their dedicated hardware; the company was founded in 1996 and debuted RouterOS in 1999. The software runs without initial registration, but it mandates acquiring and registering a license key within 24 hours of uptime. While a free trial license is available upon creating a MikroTik account, its feature comparison matrix reveals heavy limitations on advanced networking capabilities. Unlike web-managed distributions, RouterOS is configured via a dedicated graphical tool called WinBox, which functions on Linux and macOS in addition to Windows. Running RouterOS on bare-metal, non-MikroTik hardware requires custom manual configuration right out of the gate, categorized in their documentation under "router without default configuration" for advanced users. * **DD-WRT:** Emerging alongside OpenWrt during the early surge of third-party Linksys firmware projects, DD-WRT is broadly compatible with both off-the-shelf consumer routers and generic x86 hardware. However, deploying it on standard PC hardware feels even less like an intended use-case than running x86 OpenWrt. Users who want to test it must pull raw disc images from directory paths like `downloads/betas/latest/x86_64/raw-dd-wrt-64-public-vga.image`. Notably, every single DD-WRT release since 2008 has carried a "beta" designation. Image burning can be handled through utilities hosted on the m0n0wall website. * **FreshTomato & Tomato64:** Tomato traces its heritage back to the Linksys WRT54G through the HyperWRT lineage. The modern branch, FreshTomato, continues development, though its maintainer regularly struggles to keep the project financially viable. Tomato was originally engineered for low-power embedded router chipsets, but a fork named Tomato64 provides a port targeted directly at x86-64 and ARM64 standard PCs. Because Tomato64 exists as a port of a fork of a fork, it lacks the stable architectural foundation of more established projects and remains outside the team's top recommendations.

[51:26](https://www.youtube.com/watch?v=sJidlu3pPb4&t=3086s) Reclaiming Network Ownership and the DIY Spirit

Setting up a custom router evokes the early days of personal computer building—scrapping disparate components together into an operational machine that sparks genuine pride, even if it is not the fastest or flashiest box. Steve emphasizes that taking ownership of critical edge devices is one of the few direct ways enthusiasts can counter modern tech trends:

> “And we talk all the time about you'll own nothing, but there are ways you can fight back.”

Because a router governs internet connectivity for an entire household, configuring one without prior experience can quickly lead to frustration if things break. Anyone attempting this should schedule the project during downtime when there is zero time pressure to be online.

```mermaid flowchart TD accTitle: Safe DIY Router Deployment Strategy accDescr: Recommended transition strategy to deploy a DIY router without risking home internet downtime. subgraph Fallback ["Primary Network (Untouched)"] Old["Existing ISP / Commercial Router"] end subgraph Testing ["Secondary Rig (Staging)"] New["DIY Router (Old PC + Extra NIC)"] New --> Step1["Install OS & Review Settings Slowly"] Step1 --> Step2["Change Default Passwords & Apply Updates"] end subgraph Cutover ["Safe Cutover"] Step2 --> Swap["Swap Ethernet Cables to DIY Router"] Swap --> Test{"Working?"} Test -->|Yes| Keep["Enjoy Private Network Ownership"] Test -->|No| Revert["Instantly Swap Cables Back to Old Router"] end ```

The safest path is retaining your existing, functioning router as a live backup and building the DIY router on secondary hardware—such as an idle desktop outfitted with an add-in network card—rather than flashing your sole household gateway. By running the hardware side-by-side, you can simply transfer the ethernet cables over to the new box. If any issue arises, moving the cables straight back to the old router restores internet immediately, allowing you to debug the DIY machine later at your leisure.

Steve observes that while tinkering with homebrew infrastructure is intrinsically fun, the current urgency behind the homelab movement is driven by an industry-wide erosion of consumer rights and security standards:

> “The reason that we're looking to it now is because beyond being fun, all of us, I think, have become a lot more aware of the practical reasons that we should be doing this, which is you can't trust any of these [fucking] companies to just sell you a thing and then do their job to keep it secure so that you can use it safely.”

For enthusiasts who feel priced out or alienated by modern PC component markets, repurposing older desktop hardware as a dedicated firewall restores that agency. When something goes wrong on a homebrew system, troubleshooting and fixing it is entirely in your own hands, providing an authentic learning experience. Recent investigations into recurring smart TV tracking (such as LG) and chronic vulnerabilities across consumer hardware (such as recurring ASUS router flaws) underscore why maintaining your own edge firewall has become vital.

[55:21](https://www.youtube.com/watch?v=sJidlu3pPb4&t=3321s) Final Firmware Recommendations and Future DIY Guides

Reflecting on the platforms surveyed throughout the guide, Steve and the team share their preferences based on practical use cases:

* **pfSense & OPNsense:** These two FreeBSD-derived giants remain the most exciting platforms for Gamers Nexus, partly inspired by collaborating with Wendell from Level1Techs, whose "bunker of oddities" routinely yields an endless stream of homelab project ideas. While both operating systems offer extensive plug-in ecosystems, they represent massive overkill for ordinary domestic setups. * **OpenWrt:** A practical alternative for households that do not require enterprise-grade routing. Its web interface closely resembles traditional consumer firmwares from brands like Netgear or Linksys, giving users a familiar control paradigm combined with granular administrative power. * **IPFire:** Although functionally capable, its rigid, color-coded zoning architecture imposes strict network topologies that become cumbersome and overbearing as soon as a user deviates from standard designs.

When deploying any of these distributions, the best safety practice is to proceed through the initial setup wizard methodically, researching every setting before modifying it. Even if you maintain the default parameters, understanding the logic behind those defaults is essential for managing your own security. Default administrative usernames and passwords must be changed immediately, and system updates should always be verified and applied before placing the router into daily production.

Steve closes by expressing his hope that this walkthrough channels community dissatisfaction with modern corporate electronics into constructive technical projects. Future guides in this expanding series will focus on self-hosted infrastructure, including custom DIY VPN deployments and personal private cloud storage.

[57:15](https://www.youtube.com/watch?v=sJidlu3pPb4&t=3435s) Taking Back Ownership and Supporting the Series

Steve wraps up the comprehensive DIY router guide by inviting the community to get involved in shaping the future of this content. He asks viewers to share feedback and let the team know what specific projects, software, or hardware setups they want covered as the homelab and self-hosting series expands. At its core, this push into independent networking is motivated by reclaiming personal agency over consumer tech. Steve emphasizes the fundamental ethos driving the effort: “It's all about taking back ownership and to quote Louis Rossmann, owning your shit.” He jokes about platform moderation quirks, noting that while YouTube’s algorithm would almost certainly suppress or bury the upload if profanity were placed in the title, speaking it aloud in the video is somehow considered acceptable.

Producing extensive networking tutorials represents a significant pivot from the outlet's standard coverage, requiring substantial research and production overhead. Steve admits that sticking strictly to traditional DIY PC hardware benchmarks would be vastly easier since the team has refined that workflow for nearly two decades. Because venture into self-hosted networking infrastructure is fresh territory, he encourages viewers to help sustain the independent testing through community support. He points viewers toward Patreon and their official web store, where fans can pick up bench supplies like mouse mats, mod mats, and soldering mats, or physical Blu-ray discs featuring their in-depth investigative reports, such as the AI GPU black market documentary, the LG investigation, and their international factory tour series.

- **Audience suggestions:** Community input is requested to determine upcoming topics for self-hosting, homelab setups, and networking guides. - **Support platforms:** Viewers can back the ongoing series directly via `store.gamersnexus.net` or `patreon.com/gamersnexus`. - **Physical releases & merchandise:** Featured store items include Blu-ray physical editions of the AI GPU black market documentary, the LG investigation, factory tour collections, and workshop gear like mod mats and solder mats.

## Notable quotes > [51:26](https://www.youtube.com/watch?v=sJidlu3pPb4&t=3086s) You can't trust any of these [fucking] companies to just sell you a thing and then do their job to keep it secure so that you can use it safely. — Steve Burke

> [20:21](https://www.youtube.com/watch?v=sJidlu3pPb4&t=1221s) Of all the options here, pfSense is the only one that requires an account with your name, address, and phone number, which flies in the face of privacy, which is a lot of the reason we're doing this. — Steve Burke

## Mentioned Gamers Nexus, Steve Burke, Patrick Lathan, Wendell, Level1Techs, Louis Rossmann, FULU Foundation, FCC, WIPO, Netgate, Deciso, Jim Thompson, Franco Fichtner, Intel Core i7-4930K, Intel X79, Intel Arc A380, Corsair CX550M, pfSense, pfSense Plus, pfSense Community Edition, OPNsense, OpenWrt, DD-WRT, IPFire, RouterOS, Tomato64, FreshTomato, Tomato, HyperWRT, m0n0wall, IPCop, Smoothwall, FreeBSD, Rufus, BalenaEtcher, ZFS, UFS, Kea DHCP, ISC DHCP, Unbound DNS, DNSmasq, Pi-hole, Tailscale, Pangolin, AT&T, Google Fiber, Netgear, TP-Link, ASUS, ZTE, Huawei, Cisco, Linksys, Linksys WRT54G, MikroTik, WinBox, Humax BGW320-505, Aztek / Azores, AXON USG-PF, 8311 Discord community, pon.wiki, LG, Mark Zuckerberg, Patreon

## Video description SPONSOR: Contribute to FULU Foundation's Consumer Rights Wiki https://geni.us/lAWAZ or join their Zulip server to take action! https://geni.us/jeEBB Find their bounties here: https://geni.us/Iyzy2n It's time to apply all the DIY PC spirit and desire for knowledge toward device ownership, decentralizing, and taking control back from companies. This guide is our first attempt at building DIY routers. We tried several big names, like OPNsense, OpenWrt, DD-WRT, pfSense, IPFire, RouterOS, and Tomato in our efforts to detach from ISPs and big brands that have proven untrustworthy with their routers, especially as privacy policies have expanded to claw deeper into your packet history than even necessary to provide internet functionality. This is part of our new series of self-ownership of devices like routers, NASes, VPNs, self-hosted media, and more. This is part of our Data Dragnet fundraising campaign! Thank you to our viewers for making this possible! https://store.gamersnexus.net/data-dragnet

WE NEED YOUR HELP TO FUND THIS SERIES. The best way to support our work is through our store: https://store.gamersnexus.net/ Check out Wendell here! https://www.youtube.com/c/Level1Techs

Like our content? Please consider becoming our Patron to support us: http://www.patreon.com/gamersnexus

This is part of a growing movement of self-hosting, homelab, and DIY content that's brewing from the scraps of DIY PCs. Not only does a DIY router give you more control, including over your privacy, it's also just fun to learn.

TIMESTAMPS

00:00 - Own Everything And Be Happy 02:06 - It's Just Fun 04:37 - The FCC's Short-Sighted Router Ban 06:33 - Building a DIY Router 09:06 - ISPs Mandating Hardware 12:31 - Disclaimer and Disclosures 13:45 - DIY ROUTER: GETTING STARTED 16:53 - pfSense's Crazy History 20:21 - pfSense Setup: How-To Guide 29:02 - OPNsense's History 31:44 - OPNsense Setup: How-To Guide 35:35 - OpenWrt's History 36:38 - OpenWrt Setup: How-To Guide 38:55 - IPFire Setup: How-To Guide 43:22 - ISPs Are Evil, ft. AT&T 45:24 - Replacing ISP ONTs and Routers 49:23 - RouterOS Overview 50:16 - DD-WRT Overview 50:51 - Tomato Overview 51:26 - Conclusion

** Please like, comment, and subscribe for more! **

Links to Amazon and Newegg are typically monetized on our channel (affiliate links) and may return a commission of sales to us from the retailer. This is unrelated to the product manufacturer. Any advertisements or sponsorships are disclosed within the video ("this video is brought to you by") and above the fold in the description. We do not ever produce paid content or "sponsored content" (meaning that the content is our idea and is not funded externally aside from whatever ad placement is in the beginning) and we do not ever charge manufacturers for coverage.

Follow us in these locations for more gaming and hardware updates:

t: http://www.twitter.com/gamersnexus f: http://www.facebook.com/gamersnexus w: http://www.gamersnexus.net/

Our policies, processes, and ethics statements relating to review samples, advertising, travel, errors, and more are transparently and publicly available on this page: https://gamers.nexus/ethics-statements

Steve Burke: Host, Additional Writing, Research Patrick Lathan: Writing, Testing, Research Vitalii Makhnovets: Camera, Editing Tim Phetdara: Editing, Camera

[Source](https://www.youtube.com/watch?v=sJidlu3pPb4)

中文简报

Gamers Nexus自制x86路由器以规避ISP网关遥测 ISP强制提供的网关硬件会收集家庭遥测数据并通过受限的状态表限制带宽,因此利用闲置x86硬件和开源防火墙来保护家庭网络变得必不可少。 Gamers Nexus展示了如何将淘汰的x86 PC硬件(如老款Intel Core i7台式机)改造为高性能网络路由器和边缘防火墙。该指南逐步演示了pfSense、OPNsense、OpenWrt和IPFire等主流路由平台的配置过程,并对其安全性、接口分配以及硬件隔离特性进行了评估。此外,视频还详细介绍了如何通过IP直通或基于SFP的光网络终端绕过AT&T光纤网关等强制性ISP设备,同时提供了RouterOS、DD-WRT和FreshTomato等替代方案,帮助用户重新夺回对自身网络流量的完全控制权。 Gamers Nexus启动了关于自托管和数字自主权的新系列,展示了改造后的台式PC硬件与专用网卡配合使用,如何超越消费级路由器并消除商业遥测。 (0:00) 专有的ISP光纤网关(如AT&T的BGW320-505)即使在配置为IP直通模式时,也会监控所连设备的MAC地址和使用习惯,这促使进阶用户转向通过SFP+光网络终端实现彻底的硬件绕过。 (8:15) 该指南对主流自制路由器发行版(包括pfSense、OPNsense、OpenWrt和IPFire)进行了基准测试和评估,指出了它们在安装模式、功能灵活性以及隐私政策方面的差异,例如pfSense在下载前需要提供个人联系信息。 (20:21) 通用即插即用(UPnP)允许本地软件在未经管理员监督的情况下通过防火墙映射端口,从而带来持续的网络安全隐患,因此团队建议全局禁用UPnP,除非特定游戏主机或服务确有需要。 (28:20)

Reading summary

Gamers Nexus and Wendell from Level1Techs demonstrate that building a custom DIY router from repurposed PC components provides superior network throughput, bypasses ISP equipment rental fees, and halts device-level telemetry harvesting. Deploying open-source routing distributions allows users to regain operational control over edge networking while isolating smart devices and internal traffic. ISP Telemetry and Custom Hardware (8:15) Internet service providers frequently leverage mandatory, locked-down gateway equipment to inspect and harvest data from the local home network. According to Wendell from Level1Techs, providers log private internal metadata—including hardware MAC addresses, household device types, and usage schedules—to build subscriber demographic profiles and separate traffic per individual user. Even when configured in IP passthrough mode, carrier gateways remain physically inline and retain packet inspection capabilities, often creating connection bottlenecks due to cheap, cost-reduced internal hardware. Placing an independently managed DIY router at the network perimeter strips away internal MAC addresses, shields local device topologies, and eliminates monthly hardware rental fees. A user-owned router also enables granular ad-blocking, exposes smart hardware hardcoded to bypass local DNS filters, facilitates secure remote access via tools like Tailscale, and provides sufficient throughput to withstand network attacks that overwhelm consumer-grade gear. Repurposing Low-Cost x86 Components (6:33) Assembling a performant router does not require dedicated enterprise hardware; retired consumer desktops and e-waste recycling components provide ample routing capability. Gamers Nexus built their demonstration platform around an Intel Core i7-4930K CPU, an X79 motherboard, and 32 GB of DDR3 RAM. Basic routing workloads prioritize single-threaded CPU performance over core count, while discrete graphics cards or integrated GPUs are only required during initial installation before the system transitions to headless web administration. The essential hardware upgrade is a dedicated multi-port PCIe network interface card (NIC) to supply at least two physical Ethernet ports for wide area network (WAN) and local area network (LAN) connections. Because high-throughput enterprise NICs produce notable heat without server chassis airflow, supplementary cooling fans should be positioned over the card. Storage demands remain modest, as low-capacity SATA solid-state drives near write-exhaustion easily accommodate lightweight firewall operating systems. Evaluating pfSense and OPNsense (16:33) The two primary FreeBSD-derived distributions, pfSense and OPNsense, deliver extensive stateful firewalling but carry distinct community histories. Netgate, which took over pfSense in 2012, has transitioned toward proprietary subscription tiers (pfSense Plus) while maintaining a free Community Edition (CE). Obtaining pfSense requires checking out through Netgate's storefront with personal registration details to receive a network installer stub, which Gamers Nexus notes runs counter to privacy goals. In 2015, Deciso forked the codebase into OPNsense to improve usability and reduce legacy opinions, a move that precipitated severe friction including a 2017 WIPO cybersquatting dispute over opnsense.com. Both platforms recommend using ZFS in a stripe topology for single-drive resilience against unexpected power loss, while cautioning against irreversible pseudo-SLC (pSLC) modes that severely reduce drive capacity. Both distributions facilitate creating isolated networks for untrusted IoT hardware on spare physical interfaces. While services like UPnP simplify port management for gaming consoles and video conferencing, Gamers Nexus advises keeping UPnP disabled by default due to inherent security vulnerabilities. Lightweight Alternatives: OpenWrt and IPFire (35:35) Users seeking alternatives to FreeBSD systems can turn to Linux-based distributions. OpenWrt traces its history back to Cisco's mandatory GPL source disclosure after acquiring Linksys and its WRT54G platform. Highly compact, OpenWrt excels in direct wireless hardware support. On x86 systems, it lacks a dedicated installer utility and requires writing the raw operating system image directly onto the target storage drive via tools like Rufus before manually binding interface bridges and firewall zones. IPFire approaches security through a color-coded zone topology: Red for external WAN, Green for trusted LAN, Blue for wireless or untrusted IoT clients, and Orange for optional DMZs. While IPFire includes hardware vulnerability tracking for CPU flaws, its architecture is comparatively rigid. The Blue network enforces default MAC address filtering, requires manual configuration tweaks to prevent DNS leaks and admin portal exposure, and deliberately lacks UPnP support, mandating manual port forwarding for all inward-facing services. Bypassing Gateways and Safe Cutover (43:22) Overcoming mandatory ISP hardware requires distinct approaches depending on provider architecture. While services like Google Fiber allow direct Ethernet handoffs from a fiber jack, providers like AT&T enforce authentication using proprietary 802.1X certificates embedded inside their gateways. To eliminate the gateway entirely rather than relying on constrained IP passthrough modes, advanced users deploy specialized SFP+ Optical Network Terminals (ONTs) running community firmware (such as the 8311 project) to spoof the original gateway's serial number, MAC address, equipment ID, and firmware version. To prevent prolonged household internet outages, Gamers Nexus advises building and configuring the DIY router on secondary hardware while leaving the existing ISP router fully operational. This staged transition allows users to verify firmware updates, assign interface ports, and configure passwords without pressure, enabling an immediate rollback simply by swapping Ethernet cables back if the new setup encounters connection issues. Repurposing decommissioned PC hardware into an independent router provides substantial performance and privacy gains over commercial gateways, but requires users to take full responsibility for ongoing maintenance and security hardening. Staging builds on secondary hardware and understanding the structural tradeoffs between FreeBSD and Linux distributions allows builders to cut off ISP surveillance while avoiding domestic network downtime.

精炼阅读摘要

Gamers Nexus 指出,商业路由器与互联网服务提供商(ISP)的网关存在严重的后台遥测、强制租赁费及安全漏洞,呼吁硬件爱好者利用退役的 x86 PC 硬件自建开源路由器以夺回数据与设备控制权。 自建路由器动机与数据自主 (8:15) 商业路由器市场充斥着厂商维护缺失、未修补漏洞以及僵尸网络攻击风险;与此同时,ISP 也将用户端设备视作数据挖掘渠道。Level1Techs 的 Wendell 指出,ISP 倾向于通过自营网关监控家庭内部网络流量,收集局域网 MAC 地址、设备类型、昂贵家电品类以及不同家庭成员的使用时段,以此构建精准的广告用户画像。许多宽带运营商(如 AT&T Fiber)强制捆绑光纤调制解调器与网关一体机并收取月租,即使开启“IP Passthrough”模式,设备依然保留了深入检测家庭拓扑结构的能力。在网络边界部署由个人掌控的 DIY 路由器,能够阻断内部 MAC 地址暴露,防止运营商窥探家庭内部流量,同时规避强制租赁费用,并利用 Tailscale 或 Pangolin 等现代工具实现安全的远程访问。 利用退役硬件组装 x86 网关 (6:33) 组装功能完善的 x86 路由器不需要昂贵的高端硬件,几乎任何退役桌面平台均可胜任。Gamers Nexus 演示了一套基于在台北街头低价收购的 Intel Core i7-4930K 处理器与 X79 主板构建的测试平台,搭配 32 GB DDR3 内存与低容量旧 SSD。路由器运行主要依赖单核性能,多核配置并非必需;显卡仅用于初次开机和安装系统,后续均可通过 Web 界面进行无头(Headless)管理。搭建中最关键的硬件是网络接口:系统必须具备至少两个独立的物理网口(分别用于 WAN 和 LAN)。团队为平台配备了额外的 PCIe 网卡,并强调高吞吐网卡在缺少机架风道时发热严重,需要额外加装风扇辅助散热。通过增配千兆网卡或双口 10GbE PCIe 网卡,老旧企业台式机或废旧电脑即可转变为吞吐性能优于廉价消费级路由器的网络边界防火墙。 核心路由系统的选型与争议 (16:33) 在开源路由与防火墙系统中,pfSense 与其分支 OPNsense 最为知名,但也伴随着长期的社区矛盾与商业化争议。pfSense 基于 FreeBSD,其母公司 Netgate 在 2017 年因恶意抢注 opnsense.com 域名并发布攻击性恶搞内容而败诉于世界知识产权组织(WIPO)。目前 pfSense 免费的 Community Edition(CE)不仅转向了专有在线安装存根,下载时还强制要求用户注册包含姓名、地址与电话的账号,且要求安装过程中全程联网拉取数据。相比之下,Deciso 主导的 OPNsense 分离自 pfSense,旨在改善界面交互体验并摆脱保守的代码哲学,两者在底层均依赖 FreeBSD。如果用户不需要企业级复杂的防火墙功能,OpenWrt 提供了更轻量、接近传统消费级路由器的界面体验,对无线网卡驱动的支持也优于 BSD 系系统;而基于 Linux 的 IPFire 则采用红(WAN)、绿(LAN)、蓝(WLAN/IoT)的严格色彩隔离架构,但其完全不提供 UPnP 支持,且配置隔离网络时需要较多手动干预。 物理网络隔离与部署实操 在部署各开源系统时,存储分区建议在 ZFS 单盘模式下采用 Stripe(RAID 0)布局,安装过程中应避免开启不可逆且大幅缩减容量的 pSLC 缓存模式。为了保证网络安全,多网口设备应划定独立的物理网络:例如保留主板板载网口并运行 Kea DHCP 服务,作为专供智能家居(IoT)或访客使用的隔离网络,使其仅能访问外网而无法窥探主 LAN 或路由管理面板。针对消费级设备常见的连接问题,虽然 UPnP 协议便于 Steam、游戏主机及视频会议软件自动映射端口,但因安全隐患较大,建议平时保持禁用,仅在特定服务出现故障时按需开启。为避免网络配置失误造成家庭断网,Gamers Nexus 建议采用“双轨并行”方案:先在独立二手硬件上完成安装、配置变更与密码加固,确认无误后再将网线热切换到自建路由器上,一旦遇阻可即刻接回原路由恢复网络。 攻破 ISP 强制网关的技术路径 (43:22) 许多光纤用户面临着运营商强制锁定网关的困境。以 AT&T 为例,其系统通过内置数字加密证书与硬件序列号进行严格的身份验证,导致普通家用网关在多用户高并发场景下迅速耗尽内部状态表。除了在运营商提供的网关(如 BGW320-505)中开启简易的“IP Passthrough”外,进阶极客可以选择彻底淘汰运营商设备。该方案需要采购第三方 SFP+ 格式的光网络终端(ONT,如 Azores 或 AXON 模块),确认光纤处于 1270 nm 工作波长,在自建路由器的 WAN 端口伪造原厂网关的 MAC 地址,并通过源地址转换(SNAT)登录替换 ONT 的本地维护终端,克隆原厂设备的固件版本与设备 ID。微型化 SFP ONT 模块发热极高,实际落地时必须加装铝制散热片或 3D 打印散热风扇支架以维持系统稳定。 自建 x86 路由器兼具保护个人隐私、消除租赁费用与释放网络吞吐能力的优势,但其初始配置涉及复杂的硬件搭配、证书伪装及安全策略调整。尽管彻底脱离 ISP 封闭生态在技术上可行,用户仍需在配置学习成本与网络维护风险之间权衡。

Source quotes

[51:26] Steve Burke: You can't trust any of these [fucking] companies to just sell you a thing and then do their job to keep it secure so that you can use it safely. [20:21] Steve Burke: Of all the options here, pfSense is the only one that requires an account with your name, address, and phone number, which flies in the face of privacy, which is a lot of the reason we're doing this.

Original transcript

[0:00] This is our new router. It's just an old [0:01] computer that we bought off of a [0:03] sidewalk for pennies on the dollar in [0:05] Taipei and it's plenty for a router. [0:08] Ooh. [0:09] >> Uh, those are like mounted [0:10] >> It's got the coolers on the board. [0:12] >> 4930K [0:14] >> Okay. [0:15] >> X79A. That's actually pretty cool. [0:17] >> Dude, X79 motherboards are very [0:19] difficult to find like functional ones. [0:21] >> Yeah. In fact, it's actually better than [0:23] a lot of the pre-built routers that are [0:25] out there today, especially if we do [0:26] some modifications to it. And this is [0:28] part of our series of how to take back [0:32] control over your devices and your [0:34] services and get things into your own [0:37] hands so that you're not paying as many [0:39] subscriptions and so more importantly, [0:41] you're getting away from the prying eyes [0:43] of these huge companies that one can't [0:46] keep their own devices secure and two [0:48] are harvesting as [music] much data as [0:50] possible from you. So, if you've felt [0:52] like you've heard the phrase "You'll own [0:54] nothing and be happy" enough, this is [0:57] the how do you do something about that [1:00] and take back ownership of as much as [1:02] you can using the scrappiest, most fun [1:06] PC hardware enthusiast driven approach [1:07] possible where you're taking old parts, [1:10] breathing new life into them, and you're [1:13] kicking out some of the companies that [1:15] have otherwise tried to displace your [1:18] ownership. [1:19] So, this is our big installment in that [1:22] series. We think it's time to build your [1:24] own things and not just DIY PCs anymore. [1:27] It's a good time for it because DIY PCs [1:29] are difficult to afford now. But, you [1:31] can still get a lot of the same [1:32] enthusiast tinkering and you can get [1:34] more privacy out of it by taking your [1:36] older systems, doing some smaller mods, [1:39] and then replacing other devices in your [1:42] network. We want to get out from under [1:44] rental lock-ins that are brewing and the [1:46] spying third parties. This is our other [1:49] new router. It's a retail router whose [1:51] firmware we've completely overwritten [1:53] with something that we have control [1:55] over. So, we know it's not doing sketchy [1:57] [ __ ] in the background. Aside from both [1:59] of these being more private from [2:01] companies trying to sell your data and [2:03] their inability to keep their own [2:04] devices secure, doing this now and [2:07] building your own router is important [2:08] for another reason, which is [2:11] it's just fun. [2:13] It's all the exact same DIY PC building [2:16] enthusiast spirit and interest and [2:18] technical know-how and the desire to [2:20] learn things [2:22] that applied to what got us all here [2:23] today [2:24] before [2:25] the companies that we supported for [2:27] decades, like [2:29] those you bought from, the memory [2:31] manufacturers, the GPU, the CPU [2:32] manufacturers, decided to trample all of [2:34] us. But, all of that spirit applies here [2:38] and we're going to turn all of the [2:40] frustration [2:42] and anger about the loss of privacy and [2:46] the lack of respect over what people [2:48] actually own when they [ __ ] buy [2:50] something. We're going to take that [2:53] and turn it into something [2:55] that's actually kind of special, which [2:57] is learning a new thing. And for us, [3:00] this is actually learning a new thing. [3:01] We're learning right alongside you as we [3:03] build some of our own routers and take [3:07] control over our own services [3:09] internally. [3:11] And we're going to go through that [3:12] today. Before that, this video is [3:14] brought to you by Louis Rossmann's [3:16] Foundation and killing the DMCA section [3:19] 1201. That's right. He paid for this ad [3:22] spot specifically so I could say, "Fuck [3:25] the DMCA." I would have done it for [3:27] free. We just went on tour with Louis's [3:29] Foundation. is a proponent of owning [3:32] your own [ __ ] and paying bounties to [3:34] unlock devices like the PS5 as [3:36] corporations make it harder than ever to [3:37] do so. bounties for cybersecurity [3:40] researchers to unlock devices that are [3:42] locked behind artificial walls. Thanks [3:44] to the Digital Millennium Copyright Act [3:46] section 1201, it's a criminal act to [3:48] circumvent digital locks. FULU your help [3:51] to build a grassroots coalition of [3:53] hardware enthusiasts to ensure [3:55] governments are informed about [3:56] technology and how it actually works. To [3:59] get involved, join FULU's Zulip chat [4:01] server and learn about how to contact [4:03] representatives so that we can all work [4:05] together to actually change the laws. [4:07] Likewise, visit the Consumer Rights Wiki [4:09] to document with evidence instances of [4:11] the bad and anti-consumer actions of [4:13] companies, which FULU can use as [4:15] evidence when speaking with lawmakers [4:17] about change. The Consumer Rights Wiki [4:19] is linked below. If you felt like [4:21] ownership rights have gotten worse, but [4:22] haven't known how to make that better, [4:24] now is the time to get involved and take [4:26] action. With enough people, we can get [4:28] laws passed to protect consumers or in [4:30] the worst case, at least get some [4:31] bounties up to support unlocks of [4:33] devices. Check the links below to get [4:36] involved and change things for the [4:37] better. When we've mentioned routers [4:38] lately, it hasn't been for positive [4:40] reasons. Most recently, it's been the [4:42] FCC's short-sighted, possibly corrupt [4:45] router ban, followed by enthusiastic [4:47] lobbyist-hiring company Netgear getting [4:50] an exemption. Related to this, the US [4:52] government is pulling the old ZTE Huawei [4:55] shakedown maneuver on TP-Link, which [4:58] seems like it's working. Before all [5:00] that, we took a look back at ASUS's [5:02] security issues, including a router [5:04] botnet. But for as much as purpose-built [5:06] routers have continued to get worse, [5:09] have become more vulnerable, the [5:11] companies have cared less to maintain [5:13] them, and now for whatever reason the [5:14] government has decided to basically [5:16] blanket ban them, [music] [5:18] they're pretty simple devices, and [5:20] that's a good thing. You can take an old [5:22] retired DDR3 computer, you can probably [5:25] get some basically garbage from an [5:27] e-waste recycler that used to be an old [5:29] corporate desktop or something, and you [5:31] can turn it into a router, especially if [5:33] you then maybe go buy a network card and [5:35] throw that in there to spruce it up a [5:37] bit for the speeds. But this is the [5:39] definition of a router by the FCC. And [5:42] if we're going to replace our router by [5:44] building our own, we need to start by [5:46] doing a better job than the FCC of [5:48] defining what the [ __ ] a router actually [5:50] is. The The first question I have for [5:52] you is so the FCC definition of a router [5:55] is very broad. It's things that can send [5:57] and receive packets. [5:58] Uh [5:59] >> That's basically anything. [6:00] >> Yes. [6:00] >> Anything that plugs into a network. [6:01] That's a TV. The TVs that we just Yeah. [6:04] >> It could be a refrigerator. It could be [6:05] whatever. Can you define Can we start by [6:07] defining router a little more [6:08] specifically? [6:09] >> I think for the context of the of the [6:10] video and the audience, it's the thing [6:12] that sits between your network and your [6:14] ISP. [6:15] >> Right. [6:15] >> And what a how are we going to take care [6:16] of that? Oh, you got a wireless ISP. You [6:17] got fiber optics. You got AT&T cable [6:19] modem. Whatever. Maybe you got more than [6:21] one. Maybe you got a cable modem with a [6:23] cellular modem backup or whatever. Your [6:26] router is the thing that's managing [6:28] that. And your router maybe optionally [6:30] is also managing your wireless network [6:31] or maybe not. Maybe you do that [6:33] differently. [6:33] >> So, that's what Wendell thinks. But, now [6:34] it's time to select some parts and put [6:36] some together. To prove how easy this is [6:38] in combination with the X79 LGA 2011 era [6:42] parts that we actually did find on a [6:44] Type-A site at work, we also grabbed our [6:46] smallest and oldest SSDs. So, in terms [6:49] of our build, it's some pretty simple [6:50] parts. There's a CPU. There's an X79 [6:52] motherboard. We've got a network card in [6:54] here. That's probably the nicest thing [6:56] in here right now. There's an [6:58] older, but not that old, Intel A380 [7:01] card. It's not good for a whole lot of [7:03] other stuff other than what we're using [7:04] it for here, which is display out. And [7:06] uh I know this is crazy, but 32 GB of [7:10] memory and it is DDR3. [7:14] So, that's some of the value of finding [7:17] a purpose for this today. We also have [7:20] this fan. [music] [7:22] Because that card gets pretty damn hot. [7:24] Also, we pulled out this [7:27] USB 3 drive, which we've labeled as [7:30] unreliable [7:33] USB 3. [7:35] In addition to those parts, for our SSD [7:38] solutions, we've pulled basically all of [7:40] our old retired various size drives that [7:43] have just been sitting on a shelf. [7:45] Things that are as low as 128 GB or 256 [7:48] GB [7:49] that are near the end of their life in [7:50] terms of endurance, but are still great [7:53] for something as simple as this. And [7:54] then we just pulled [7:56] the cheapest, [7:57] least useful to us power supply that we [7:59] had [8:01] uh just kind of sitting around, but was [8:02] still kind of modern and safe, and just [8:04] threw a CX550M in there for the power [8:06] supply. [8:07] And all of that [8:09] that's our router. [8:11] Make it fancy and put it in a case if [8:12] you want. As for all the reasons you [8:14] might do this. [8:15] >> I've seen concerning reports from ISPs [8:18] um treating [8:20] the customer equipment behind the the [8:23] the router, their router, as a place to [8:25] data mine. [8:26] >> Mhm. [8:26] >> MAC addresses, what kind of devices, how [8:28] expensive was this TV that you bought? [8:30] Let's use that as a demographic. [8:31] >> Oh, that's evil. I didn't think about [8:33] that. Okay, yeah. [8:34] >> so there are credible reports that ISPs [8:36] are using that to build their subscriber [8:39] advertising profile. [8:40] It's also really important for ISPs to [8:43] be able to separate traffic. Consider a [8:45] family, like a a husband and wife, [8:46] couple of [music] kids, which device is [8:49] the traffic coming from? That also helps [8:51] for building profiles because it's not [8:53] just a household profile that you want [8:55] to build, it's individual profiles you [8:56] want to build. [8:56] >> Right. [8:57] >> And those those MAC addresses, the usage [8:59] patterns, time of day, those are all [9:02] pieces of telemetry that your ISP [9:04] doesn't have when you have a router [9:06] that's fully under your control. [9:07] >> ISPs mandating their own hardware has [9:09] become pretty common. And a lot of them [9:11] are trying to move towards a forced [9:13] subscription to that hardware, [9:15] which they control. AT&T Fiber is one [9:18] such example. The all-in-one box has an [9:21] IP passthrough mode, but it's always [9:23] there, able to see your packets with [9:25] greater resolution than necessary for [9:27] even your ISP. We're covering plain old [9:30] direct-to-disk installs, and we're doing [9:32] it from the perspective of a user who [9:34] just wants a drop-in router replacement. [9:36] Wendell over at Level One Techs, has a [9:38] series of forbidden router videos of his [9:40] own where he installs pfSense on a [9:42] virtual machine, which has advantages [9:44] for more advanced use cases. If you're [9:46] interested in stuff like LAN cache or [9:48] Pi-hole, check his series out. We have [9:50] our own upcoming coverage on a lot of [9:51] that, plus self-hosted VPNs and DNS [9:54] shenanigans, but that'll be coming up in [9:57] the rest of the series. Today, we're [9:58] focused on the basics of building your [10:00] own router. We're going to give you all [10:01] the options. A typical home internet [10:03] setup consists of something we call a [10:05] modem, even if it technically isn't, [10:08] something we call a router, even if it [10:10] technically does more than that, or a [10:12] combination of the two. With enough [10:14] dedication, you can get rid of all of it [10:15] and substitute your own. We'll start [10:17] with why even bother taking this on at [10:19] all. Privacy is a concern, but there's [10:20] other reasons, too. [10:21] >> In almost all scenarios, it will be [10:23] faster. You will be able to take better [10:25] advantage of your connection from the [10:26] [music] ISP. Now, it might take some [10:28] tweaks. You might have to jump through [10:30] some hoops, but generally, there are [10:32] scenarios where your ISP-provided [10:34] equipment fall short, or it was the [10:36] cheapest possible thing that they could [10:37] give you, and so your connection [music] [10:39] suffers a little bit because of that. [10:41] One. Two. [10:43] Um [10:43] in a world where we contemplate maybe [10:46] moving away from subscriptions and [10:48] self-hosting things, [10:49] >> [music] [10:50] >> having your own custom router makes it a [10:52] lot easier for you to use your [10:55] internet-connected stuff at home [10:57] remotely. And I'm not necessarily [10:58] talking about like making holes in the [11:00] firewall. That's actually like kind of [11:01] old-school thinking. There's new stuff [11:03] like Tailscale and Pangolin [11:05] >> Mhm. [11:05] >> that will give you easy remote access to [11:07] stuff. [11:07] >> There's also all kinds of extra features [11:09] or functions that you can stack onto a [11:10] DIY router. For example, easier ad [11:13] blocking, or utilities that might be [11:15] useful for monitoring, say, your smart [11:18] TV [11:19] to get a better idea if it's got maybe [11:21] hard-coded in IP addresses that are [11:23] trying to basically circumvent Pi-hole [11:25] or something. Those are tools that you [11:27] can stack on top of your DIY router. [11:29] >> And also monitoring and logging. Like if [11:31] somebody is like attacking your thing, [11:32] maybe your ISP modem isn't as good or [11:34] your ISP router isn't as good at dealing [11:36] with those kinds of things. So, you have [11:37] a really uh surgical control of ingress [11:41] and egress from your network, and that [11:43] can be really fun. [11:44] >> Now, some ISPs already charge equipment [11:46] rental fees, but remember, [11:48] it can always get worse. [11:50] >> Remember the olden days when cable [11:51] companies would charge you per TV? It's [11:53] like, "Oh, this is a five-TV house." [11:55] >> I remember when [11:58] they would also try to look at how many [12:00] devices you have connected to the [12:01] internet behind [12:03] the routing devices, whatever those were [12:05] at the time, you know, modem and router. [12:07] And uh the intent was to if oh, you've [12:09] got three computers hooked up to the [12:11] internet, that's three subscriptions, [12:14] you know. [12:14] >> No. [12:15] >> But buying second-hand hardware or [12:16] sourcing your own old hardware to do all [12:18] this, it's fun. It's right up there with [12:20] building a Plex server or buying a 3D [12:22] printer to then [12:24] discover problems you didn't previously [12:26] had, but you can 3D print your way out [12:27] of to justify the purchase of the 3D [12:29] printer. It's kind of in that same vein [12:30] of enthusiast interest. And a quick [12:33] disclaimer on this as we get into our [12:35] parts list and our how-to guide, this is [12:37] our first time trying to do DIY routers [12:40] in any like kind of for publication way. [12:43] That means there are people in this [12:44] audience who will know more about this [12:45] than us, and that's cool. We're happy [12:48] about that. So, if you're one of those [12:49] people and you have something that you [12:51] think we should maybe look into next or [12:54] something that we should know about to [12:55] expand on and explore, please share it [12:57] below because we're learning alongside [12:59] people in the audience as we do this. I [13:01] think we have a pretty good foundation [13:03] to share with people, uh but we're also [13:05] still trying to learn more and rapidly [13:07] kind of dive into this stuff. And so, if [13:09] you share your experience below, it will [13:12] help everybody who's here trying to [13:13] learn about how to take ownership of [13:14] this stuff cuz that's it's really [13:16] important to understand that more than [13:18] ever, like all the old [ __ ] Nvidia, [13:21] AMD, Intel fanboy wars aside, right now, [13:26] this is about all of us need to work [13:30] together to support each other to try [13:32] and take control over things. And that [13:35] means sharing knowledge in a nice way. [13:38] So, I'm really looking forward to seeing [13:39] some actual discussion in the comments [13:41] and learning a lot more about all this [13:42] stuff. But, we think we have a pretty [13:44] good foundation for you. So, for our [13:45] part, most motherboards from this [13:47] century have built-in NICs, but we want [13:48] two Ethernet ports and an add-in card [13:50] with two RJ45s as a simple way to [13:53] accomplish this. Gigabit NICs are [13:55] basically e-waste, and if you have [13:56] access to an e-waste recycling center, [13:58] you should check there first. The [14:00] Kramden Institute near us has tons of [14:02] this stuff, and they would probably give [14:04] it to you or sell it to you for very [14:05] cheap. Now, we have some spare 10 [14:07] Gigabit NICs here, and that's pretty [14:09] useful for us cuz we can take something [14:11] like this and put it into this system [14:14] and feed it out to maybe a switch or [14:16] something like that and get some more [14:18] bandwidth on the network. [music] Any [14:19] old motherboard and CPU will work, but [14:21] single-threaded CPU performance is key, [14:23] not multi-threaded for at least what [14:25] [music] we're looking at today. We're [14:26] using this older X79 platform that we [14:28] picked up for cheap. A GPU is not [14:31] strictly necessary aside from display [14:32] out. We use the Intel A380 that we have [14:34] here. An integrated GPU would make [14:36] things even simpler. There's no need for [14:39] graphics at all after initial setup for [14:40] what we're doing today because all the [14:42] variants we're covering have web [14:43] interfaces and you can access them over [14:45] the network from another computer. Some [14:47] storage is required for a permanent [14:48] install. This should be ideally a small [14:50] SSD, but a removable storage option like [14:53] a 32 GB flash drive can work. A [14:55] mechanical hard drive isn't a good [14:57] choice for latency-sensitive [14:58] applications, though. For home router [15:00] purposes, we are comfortable with using [15:02] an older SSD that might be a little less [15:04] reliable on the endurance side of things [15:06] cuz it's not a big loss to us. I mean, a [15:08] lot of these tools are pretty easy to [15:10] just back up, so you could reapply the [15:12] settings to a new drive if you really [15:13] needed to go that route. But, if you're [15:15] in a situation where you're less fault [15:17] tolerant for failures, like maybe you're [15:19] doing backups over the network or [15:21] something like that, obviously you get a [15:22] new SSD or just something you can trust. [15:25] Two other things are very helpful to [15:26] have, a wireless access point and a [15:29] network switch. A router chooses where [15:31] things go. A wireless access point [15:33] broadcasts a Wi-Fi network and a switch [15:36] allows you to plug more things in. And [15:37] if you're replacing a prefab router, [15:40] then you could use that as the switch or [15:43] for some of these other things. For [15:44] example, we went to Best Buy and bought [15:46] the government's most hated router brand [15:48] for cheap, TP-Link. And we bought the [15:50] cheapest router we could find. After [15:53] plugging it in, we connected to one of [15:54] the LAN ports, visited 192.168.0.1 [15:58] in a browser, and we're immediately [16:00] greeted by a change mode button. [16:02] Switching to access point mode [16:03] broadcasts a Wi-Fi network from [16:05] somewhere [music] else without handling [16:07] any routing. And we can still use the [16:09] built-in network switch to connect via [16:12] Ethernet. There are purpose-built access [16:14] points, too, of course, but it's easier [16:15] to find an old router. You probably even [16:17] have one. That's the whole point of this [16:19] is building something new out of what [16:21] was e-waste. Motherboards with wireless [16:23] cards may also be able to use them to [16:25] broadcast Wi-Fi, but we've seen warnings [16:28] from basically every router software [16:30] provider that this is janky and might [16:31] not work well. Let's get into the [16:33] software options. Finding and installing [16:35] a router software is easy. Some are [16:37] called firewalls and some are called [16:38] routers, but the ones we're covering are [16:40] capable of both. Basically, routers [16:42] route packets and firewalls inspect [16:44] them. There are a ton of options we're [16:45] going over today. pfSense, OPNsense, [16:47] OpenWRT, IPFire, RouterOS, DD-WRT, [16:51] Tomato 64, and then there's plenty more. [16:53] And just like any enthusiast community, [16:55] each of these has plenty of reasons that [16:57] they all completely hate each other. And [16:59] we'll start with the most hated. [17:01] pfSense. pfSense may be the biggest name [17:04] in this space. Its independent history [17:06] dates back to 2004. It's a fork of [17:09] MonoWall, and it's closely related to [17:11] the other major FreeBSD-based router [17:14] software, OPNsense. In Wendell's words, [17:17] quote, "They're ill-tempered, but do [17:18] good work, like the dwarves of [17:20] Middle-earth." End quote. Netgate is the [17:22] sponsor of the pfSense project, and they [17:25] haven't done well to endear themselves [17:27] to the community. Netgate was founded in [17:29] 2004 and sold hardware running MonoWall [17:31] initially. Netgate didn't take [17:33] leadership of the pfSense project until [17:35] 2012. It forked a pfSense version for [17:38] Netgate hardware that was later renamed [17:40] to pfSense Plus and sold for non-Netgate [17:43] hardware, but still maintains a free [17:45] community edition or CE. The CE has been [17:48] open source in the past, but that may be [17:51] over. [17:52] >> pfSense really had completely taken over [17:54] the universe, and a lot of the the work [17:58] that those folks do, they contribute [18:00] upstream, and they do a lot of [18:01] programming um for the underlying BSD [18:04] subsystem, and like they've really done [18:06] a lot of hard work. So, they really want [18:08] people to subscribe, even home users. [18:09] So, they're looking at, you know, the [18:10] numbers on a dashboard that's like [18:12] millions, and like I kind of get it cuz [18:13] it's like they're not wealthy beyond the [18:15] the Dreams of Avarice, but they are [18:17] holding up a significant portion of [18:19] internet infrastructure. [18:20] >> Open Sense is allegedly a banned word on [18:23] the pfSense subreddit. More [18:24] significantly, Netgate notoriously got [18:27] in trouble with the United Nations back [18:29] in 2017 for camping the Open Sense dot [18:32] com domain, which we understand to be [18:35] illegal, and [music] hosting a site with [18:38] a light-hearted [18:39] parody like, quote, "When your users [18:42] start complaining, it's probably the [18:44] firewall. Tell those whiny [ __ ] to [18:47] shut it. You're leading technology." All [18:49] caps, bold, and quote. And quote, [18:52] "Everything we do, from our product to [18:55] our documentation, was bold copied, [18:58] ripped off, or otherwise borrowed" in [19:00] scare quotes "from someone who had the [19:02] idea before us." End quote. Also, this [19:05] clip where Open Sense lead dev, Franco [19:08] Ficthner, who was born in former East [19:10] Germany, mind you, is depicted as Hitler [19:14] on the website that pfSense got in [19:17] trouble [19:18] with the UN for creating in a way that [19:22] made it seem like it might be open sense [19:24] except for how ridiculous this is. And [19:26] as for that clip, Jim Thompson of [19:29] Netgate is Franco Fistener's unstoppable [19:32] foe. Yikes. [19:36] Can't imagine why people hate them. [19:39] Really uh [19:41] big mystery. [19:44] Just can't imagine [19:46] why uh random caps lock and the generous [19:50] use of bold text. The only thing that's [19:52] missing is random blue and red letters [19:54] on a [19:55] yellow background or something like it's [19:57] an old front page website from the 2004. [20:01] And then [20:03] it would be complete. They would be [20:04] guessing the P stands for psychopaths. [20:06] But let's say you can look past the [20:09] pfSense guys possibly calling an [20:11] open-source alternative Hitlerian and [20:14] ignore the obsession with, as they say, [20:17] being ripped off. You're ready to [20:19] install pfSense. To start, click [20:21] download on pfSense.org/download [20:23] and select amd64, add it to cart for $0, [20:27] and now you have the disk image of the [20:29] Netgate installer, not an image of [20:31] pfSense, though. Checking out will then [20:33] force the creation of a Netgate account, [20:36] including billing information. Of all [20:37] the options here, pfSense is the only [20:39] one that requires an account with your [20:41] name, address, and phone number, which [20:42] flies in the face of privacy, which is a [20:44] lot of the reason we're doing this. You [20:46] could just lie about those details, [20:48] probably no one would ever know. [20:49] Uh moreover, this download is just the [20:51] Netgate installer, which then brings you [20:55] to the next step that still requires [20:57] internet to download and install the [20:59] community edition. So, there's no longer [21:01] an offline installer option. For pfSense [21:04] and every other option on our list, we [21:06] use Rufus to flash an image or ISO file [21:10] to a USB drive and then we boot it from [21:12] it. For non-Windows platforms, other [21:14] options like Belena Etcher exist. With [21:16] Rufus, plug in a flash drive that you're [21:18] okay with wiping, open the UI, select [21:21] the target flash drive under device, [21:23] select disk or ISO image under boot [21:25] selection, and select to find the ISO. [21:28] Leave everything else alone and click [21:30] start. At the end, you'll have a [21:31] bootable flash drive. Stick the flash [21:33] drive in the PC that will become your [21:35] router, then select the USB drive as a [21:38] temporary boot device or alter the boot [21:40] order as you would with any normal OS [21:42] install. Since this specific [21:43] installation requires an internet [21:45] connection, start out by plugging in [21:47] your internet line to the port where you [21:49] want it to stay. This will become the [21:51] WAN port for internet. It's also [21:53] possible to have a wireless WAN [21:54] connection, but we're not covering that [21:56] here. Once pfSense finishes booting up, [21:59] it pops up a short copyright notice. [22:02] Because of course it does, and then the [22:03] install can begin. Netgate hosts a full [22:06] walk-through of all the options, but [22:08] we'll cover them here. The advanced [22:10] options can be left alone. CE [22:11] repositories is for installing the free [22:13] version on pfSense plus eligible [22:15] hardware. Export network config enabled [22:18] sets up a config file with the options [22:20] specified during setup. CE low capacity [22:23] system is for less than 4 GB of storage. [22:26] Swap size is disk space for memory [22:28] operations and is set automatically. [22:31] Console serial is for accessing the [22:33] console through a serial port. Console [22:35] type should be fine set to EFI on any [22:38] remotely modern hardware, and ZFS pool [22:41] name can be set to anything. Next, [22:43] select the WAN interface, which will be [22:44] the one marked active. If using a [22:46] two-port NIC, note that the letter of [22:48] the interface is important. Our WAN will [22:50] be IX1, so the other port on the card [22:53] must be IX0 and EM0 must be the onboard [22:57] NIC. DHCP client is the easiest option [23:00] to try, but if your ISP requires you to [23:03] log in to access the internet, you'll [23:05] need to select PPPoE and enter [23:07] credentials. Virtual LANs are logically [23:10] separate networks that can operate over [23:12] shared wires, but in order to be useful, [23:14] they need more expensive managed network [23:17] switches as opposed to regular dumb [23:19] switches. Data packets are tagged with [23:21] which VLAN they belong to and the [23:23] managed switch understands which packets [23:25] belong to which connections. We're going [23:27] to avoid VLANs in this guide, but it's a [23:30] clear next step once you're ready to [23:31] invest more money and time. Use local [23:34] resolver only needs to be enabled in [23:35] order to use a local DNS resolver, which [23:38] we're not doing, so that stays off, too. [23:40] For the LAN interface, we'll select the [23:42] other port on our card, which is ix0, to [23:44] keep things simple. It's possible to [23:47] finish the installation without setting [23:48] up a LAN, but don't. This is similar to [23:51] the WAN setup. Static is fine for the [23:53] default interface mode because you [23:56] always want to know what your router's [23:57] IP address is within your LAN. The DHCPD [24:00] or the Dynamic Host Configuration [24:02] Protocol Daemon should be left running [24:04] unless you know that something else is [24:06] handling DHCP or you really want to [24:08] assign static IPs to everything, and the [24:11] default range is fine. The odd one out, [24:13] em0, is our onboard motherboard NIC, so [24:16] we'll assign that as an optional [24:18] interface for later. Continue and the [24:20] installer will try to connect to Netgate [24:22] servers, so it's not possible to proceed [24:24] past here without an active internet [24:26] connection. Select Install CE for the [24:28] free community edition. If you don't [24:30] already have an opinion on BSD file [24:32] systems, stick with ZFS as the default. [24:35] The older UFS is the other option. It's [24:38] generally agreed to be less demanding, [24:40] uses less memory, for example, and the [24:42] features it lacks aren't necessary for [24:44] our purposes. However, Netgate points [24:47] out that UFS, quote, can be fragile when [24:49] it comes to sudden interruptions such as [24:51] power loss, end quote. For the partition [24:53] scheme, MBR is only necessary for arm or [24:56] extremely ancient hardware. Otherwise, [24:59] the default option of GPT should be [25:00] fine, and no, we don't mean chat. UFS [25:03] can't do software RAID, so you just [25:05] select a disk, and that's it. If ZFS is [25:09] the selected file system, stripe, aka [25:11] RAID 0, is the correct choice for a [25:13] single disk. With stripe selected, you [25:15] can then pick a disk. The advanced [25:17] options are wipe disks, which is [25:19] unnecessary if you're working with the [25:21] single disk, and PSLC, or pseudo SLC [25:25] mode, single level cell, which is [25:27] irreversible and should only be enabled [25:30] if you really know what you're doing. [25:32] This can be bad if you do it wrong. We [25:35] would recommend leaving this alone if [25:36] you don't know what it means. This mode [25:38] increases endurance on drives that [25:40] support it, but the installer can't [25:43] check for support, and PSLC [25:46] halves the capacity on MLC disks and [25:50] cuts 2/3 on TLC. In most instances, you [25:55] should not use this feature. Next, pick [25:57] a version of the community edition to [25:58] install, probably the latest stable [26:00] release. Installation should take care [26:03] of itself at this point and will prompt [26:05] for a reboot. This is a good time to [26:07] re-enter BIOS and remove the [26:08] installation flash drive or change the [26:10] boot order. The next step is setup, [26:12] which is easiest to do from the web UI [26:14] rather than directly typing into the [26:16] pfSense console. With the router [26:18] running, connect a PC to the LAN port [26:21] and go to 192.168.1.1, [26:23] assuming you kept the default IP, in a [26:26] web browser. If you get a security [26:28] prompt, skip past it. The default [26:30] username and password are admin and [26:32] pfSense, all lowercase. You'll want to [26:34] change those later. For the host name, [26:36] enter whatever name you want. For normal [26:38] home use, leave the domain name as [26:40] home.arpa or add something to the front [26:43] like gn.home.arpa. [26:45] Override DNS is somewhat confusing [26:47] because it means that it allows the DNS [26:49] server list to be overridden by the ISP, [26:52] but it's simplest to leave this checked. [26:54] Leave the time server settings alone and [26:56] select the appropriate time zone. The [26:58] WAN settings were already established [27:01] during installation, so no changes [27:02] should be necessary. The LAN settings [27:04] were also already set, so we're good [27:06] there. Changing the default password is [27:08] vital and strength is a higher priority [27:10] than memorization. If you want to [27:12] protect against attackers that are [27:14] physically present, you could also put a [27:16] password on the console, too. We'd [27:19] recommend it. We have a spare interface [27:21] on the motherboard itself that we could [27:23] use for many different purposes, but [27:25] we'll set it up as a physically separate [27:27] LAN for untrusted devices. Netgate hosts [27:30] an extremely detailed step-by-step guide [27:32] for doing this with two separate paths [27:35] for open to create a normal LAN or [27:37] isolated to create a fully separate but [27:40] internet connected LAN where the devices [27:42] aren't allowed to talk to your other [27:44] networks or mess with your router, which [27:46] is pretty useful and cool. We followed [27:49] the second path to the letter with the [27:51] exception of naming our interface [27:53] untrusted and switching from ISC DHCP to [27:56] Kea DHCP because pfSense prompted us to. [28:00] At this point, any switches and or [28:02] access points can be connected into the [28:04] LAN port to start building your network. [28:06] Keep in mind the router updates are now [28:08] fully your responsibility though. It's [28:10] possible to set up a cron job to do that [28:12] automatically, but the whole point of [28:14] building a router is to reclaim control [28:16] of it. If it's been a while, you may [28:18] need to relearn how to do manual port [28:20] forwarding, which comes up less often [28:21] these days as many consumer routers have [28:24] universal plug and play or UPnP now. [28:26] UPnP lets programs handle port [28:28] forwarding without your input, which [28:30] kind of sucks for security. Manual port [28:32] forwarding can also suck for security [28:34] for different reasons, but Netgate [28:36] notes, quote, "There are many popular [28:38] programs and platforms which support [28:39] UPnP IGD and PCP such as Steam or Steam [28:43] Deck, Nintendo consoles, PlayStation [28:45] consoles, Xbox consoles, video [28:47] conferencing apps, torrent clients, and [28:50] more." End quote. If you run into [28:52] trouble with any of these or with [28:53] self-hosted servers like Plex, that may [28:56] be why. We think you should leave it [28:57] off, but the controls are in services, [28:59] UPnP, IGD, and PCP if you need it. Let's [29:03] move on to OPNsense, which is the one [29:04] that pfSense says ripped them off among [29:07] other [29:08] pleasant things. [29:09] >> Then there's OPNsense, which is the fork [29:11] of pfSense to try to peel away some of [29:14] the more um [29:16] let's call it graybeard opinion. Like [29:17] there's a there's there are [29:19] well-reasoned reasons for why they're [29:21] doing things, but they may be suboptimal [29:23] from a usability standpoint or [29:25] suboptimal from a I can vibe code a [29:27] better thing than this standpoint cuz [29:29] that is that is probably not untrue at [29:31] this point. And so the the OPNsense [29:33] people have forked that and try to [29:35] provide a better experience. But at the [29:36] same time, it doesn't appear to me that [29:39] the OPNsense people have put in the same [29:41] um infrastructure to support the [29:44] underlying pfSense ecosystem in terms of [29:46] upstream patches and contributions of [29:48] code and that kind of thing. And so like [29:50] there are good arguments here for both [29:53] things. And so it's like [29:55] >> Do you have a preference or is it [29:56] different tools, different jobs? [29:58] >> It's a little bit different tools, [29:59] different jobs. [29:59] >> Deciso is the steward of OPNsense, which [30:01] is a fork of pfSense dating back to [30:04] 2015. Deciso says that little of the [30:07] unaltered pre-split code remains, but [30:09] both OPNsense and pfSense are based on [30:12] FreeBSD upstream. Contributors to both [30:15] projects that work on FreeBSD has to [30:17] pretend that they aren't at each other's [30:19] throats all the time with mixed success. [30:22] Franco of OPNsense announced that he [30:25] officially retired from contributing to [30:26] FreeBSD in December 2025 after getting [30:30] suspended from the FreeBSD bug tracker. [30:32] Reading through the threads in question, [30:34] it's a wonder any work gets done at all [30:36] by anybody with great quotes like quote, [30:39] "Once upon a time, common sense was [30:41] used." End quote. Free BSD is what the [30:44] PlayStation OS is based on, by the way. [30:46] Underneath every piece of polished [30:48] corporate software, there are a bunch of [30:50] unpaid nerds treating a message board [30:53] like it's Game of Thrones. Who exactly [30:56] do you think you are in relation to [30:58] Gordon and Kristoff and the other people [31:00] actually doing work here? And why do you [31:02] think your tone and behavior are [31:04] appropriate in this situation? Find out [31:07] next time on [31:09] Game of Message Boards. [31:10] >> OPNsense is arguably more homelab [31:12] friendly than pfSense since it doesn't [31:14] funnel towards a subscription model. It [31:16] also doesn't require an account. It [31:18] doesn't require internet to set up, and [31:20] there's less risk that the free version [31:21] will just disappear one day. [31:23] Its marketing also has, as far as we can [31:26] tell, 100% fewer Hitlerian references as [31:31] compared to pfSense. So, [31:34] I That is not normally something we [31:36] review, but [31:38] seems like an improvement, I guess. On [31:40] the other hand, we did find pfSense's [31:42] documentation more helpful. Here's how [31:44] to set up OPNsense. Download the AMD64 [31:46] VGA image from the site. Doesn't need to [31:49] be on an AMD computer. Flash it to a USB [31:52] drive with Rufus, and boot from it. [31:54] Unlike pfSense, OPNsense defaults to [31:56] fully configuring itself, which could be [31:58] good or bad. Once it's finished booting, [32:00] OPNsense should already be functional [32:02] but read only. So, we want to put it on [32:04] permanent storage. Log in with the [32:06] username installer and the password [32:09] opnsense, all lower case, and select the [32:12] keyboard layout. We recommend sticking [32:13] to install ZFS for the same reasons as [32:16] with pfSense. The hybrid referenced in [32:18] the menu means that, quote, you can turn [32:20] UEFI on and off and the boot won't fail. [32:23] End quote. Pick stripe for the RAID [32:25] type, again, like pfSense. Select the [32:27] target disk and let the installation [32:29] proceed. There's an option to change the [32:31] root password, which you should [32:33] eventually do, but we'll skip that for [32:35] for [32:35] Once the system has rebooted, we can log [32:37] in with the username root and the [32:40] password open sense, all lowercase and [32:43] spelled without the first e because, of [32:45] course. The next setting we want to [32:46] change from the console is assign [32:48] interfaces. We can skip VLAN setup and [32:51] lag, lagg, or link aggregation. With our [32:54] 1 gigabit hardware we're setting this up [32:57] with, it might be worth bundling our [32:59] unused interface into a link aggregation [33:01] group, but it's unnecessary for a [33:03] first-time setup and would ideally [33:05] involve a managed network switch. Our [33:07] understanding is that lags only help [33:10] with bandwidth when multiple devices on [33:12] the network are saturating their [33:13] connections at the same time. Our [33:15] understanding is also that they are less [33:18] reliable in a lot of cases. We don't [33:20] have a ton of experience with link [33:21] aggregation, so we'll move along. [33:23] Assigning the interfaces requires more [33:25] trial and error than on pfSense. Our [33:27] labels are still ix0 and ix1, but we [33:30] don't have a clear indicator of which is [33:31] already connected, and auto detection [33:33] doesn't always help. We have a 50/50 [33:35] shot, so we'll just arbitrarily assign [33:38] ix0 and ix1 to be LAN and WAN and swap [33:42] the cables if that turns out to be [33:43] wrong. Not a big deal. While em0 [33:46] definitely gets assigned as an optional [33:48] interface. We can now plug a PC into the [33:51] LAN and go to 192.168.1.1 [33:54] in a browser to finish the setup. The [33:55] credentials should still be root and [33:58] open sense. Host name can be set to [34:00] whatever as can the domain, so we'll [34:02] leave those alone. Like pfSense, open [34:04] sense includes unbound DNS. It has some [34:07] nice optional features like block lists [34:09] for ads and security, so we'll leave it [34:11] on. The DNS sec options are good for [34:14] security, but the ISP's DNS servers need [34:17] to support it, so it's easier to leave [34:19] unchecked for now and experiment later. [34:21] WAN and LAN settings are preconfigured, [34:23] but on the deployment type step, [34:26] optimize for multi-WAN should be [34:27] unchecked since this is intended for [34:29] multiple separate internet connections. [34:31] We don't want to mess with any DNS [34:33] settings right now, so automatic DHCP [34:35] and DNS registration stays checked, and [34:38] optimizing for IPsec is unnecessary [34:41] unless you plan to set up VPNs, which is [34:43] a whole other subject. This is where we [34:45] would normally set up an isolated guest [34:47] LAN on the optional interface, but out [34:49] of all the software we tried, we had the [34:50] most trouble doing this on OpenSense. [34:53] There are plenty of guides to setting up [34:55] VLANs. Home network guides are popular, [34:57] as well as an official guide to setting [34:59] up a guest network on a separate [35:01] physical interface, but the [35:02] documentation seems to predate [35:04] OpenSense's switch to DNSmasq. Switching [35:07] to Kea DHCP may make things easier, but [35:10] we're not comfortable trialing and [35:12] erroring our way through providing [35:14] instructions to lots of people on the [35:16] internet for something that we're just [35:18] not sure about and don't have a lot of [35:20] experience with. Like pfSense, OpenSense [35:22] requires manually logging in and [35:24] checking for updates once in a while. [35:26] UPnP can be configured by selecting the [35:29] OS UPnP plugin through system, firmware, [35:31] and plugins, and accessing the controls [35:33] in services, UPnP IGD and PCP. OpenWRT [35:37] takes its name from the extremely famous [35:40] and legendary Linksys WRT54G, [35:43] which I had, probably a lot of you had [35:46] as well, and it was an extremely [35:48] widespread, long-lived router with a [35:52] family that became a home to third-party [35:55] software. Shortly after Cisco acquired [35:57] Linksys in 2003, the community dug up [36:00] that Linksys was using GPL code, [36:02] including the Linux kernel, and was [36:04] therefore obligated to release code [36:06] under the GPL. Cisco bought Linksys. [36:09] Linksys bought chips from Broadcom. [36:11] Broadcom got firmware from who knows [36:13] where. Under threat of legal action, [36:16] Linksys released the source code in what [36:18] became a historic victory for open [36:20] source. As a result, multiple projects [36:22] spawned for the purpose of allowing [36:24] users to do whatever the hell they [36:25] wanted with a WRT54G. [36:28] Several of which have grown into [36:29] general-purpose router firmware that [36:31] doesn't need a Linksys device and can [36:33] run on many devices up to and including [36:36] x86 computers. Let's install it. This is [36:39] the only distro we tried without a [36:40] dedicated installer. We just used Rufus [36:43] to directly flash the SSD. Hitting Alt F [36:46] in Rufus allows it to detect all drives [36:49] that are attached as removable storage, [36:51] not just flash drives. It's unlikely the [36:53] interfaces will be assigned correctly by [36:55] default. Try plugging your PC into each [36:57] of the ports until you can access [36:59] 192.168.1.1 [37:01] in a browser and then log in with the [37:03] username root and leave the password [37:05] field blank. Set those as soon as you [37:07] have the option. OpenWRT will ask about [37:10] automatically checking for updates, but [37:12] regardless of the choice, it won't [37:14] actually apply those updates until [37:16] manually approved. Once we've gotten [37:18] everything plugged in, we can go to [37:19] network interfaces and then devices. We [37:22] know we have our WAN and LAN cables [37:24] connected and eth0 and eth1 are marked [37:27] as having cables plugged in. So, eth2 or [37:30] Ethernet 2 must be the port on our [37:32] network card that's currently unused. [37:34] That lets us open the br-lan device, [37:37] switch it to eth2, save and apply, and [37:39] then move the LAN cable over to the [37:41] other port. For the easiest possible [37:43] setup of an untrusted LAN, we went to [37:46] devices and created a new bridge called [37:48] br-untrusted [37:50] with eth0, which is now unused, and [37:53] otherwise default settings. Then, we [37:55] went to firewall and created a new zone [37:57] called untrusted zone. Set the input to [38:01] accept, output to accept, and intra-zone [38:04] forward to reject. And then we set [38:07] forward to destination zones to only [38:09] WAN. Then we created a new interface, [38:12] set the device to br-untrusted, the IP [38:15] to 192.168.2.1, [38:17] the mask to 255.255.255.0, [38:21] set the firewall zone to untrusted zone, [38:23] and set up a DHCP server with default [38:25] settings. OpenWRT is extremely compact [38:29] and stripped down with minimal drivers, [38:31] so putting it on a full-blown PC for [38:34] actual hardware rather than a prefab [38:35] router is kind of weird. You could do it [38:38] if you don't care about installing extra [38:39] packages or doing anything beyond basic [38:41] routing, OpenWRT is fully capable, but [38:45] the senses have more room to grow. On [38:47] the other hand, OpenWRT seems to have [38:49] better support for integrated wireless [38:51] functionality than the FreeBSD-based [38:53] options, as long as the right drivers [38:54] are installed. IPFire is next. It bills [38:57] itself as {quote} a professional-grade [38:59] open-source firewall and security [39:01] platform, {end quote}. It's a fork of [39:03] IPcop, which is itself a fork of [39:06] SmoothWall, but IPcop hasn't had a new [39:08] release since 2015, and SmoothWall is [39:11] now going by its new name, pf Wall. [39:13] IPFire is Linux, like everything else [39:16] that isn't pfSense or OPNsense. Here's a [39:18] walk-through of IPFire. [39:21] I [39:22] really should have put the inflection [39:23] somewhere else on that. That's [39:25] IPFire. Now, that still kind of sounds [39:27] the same. [39:29] Uh where is our old fan that burns when [39:32] internet protocol when we need them? As [39:34] usual, download the IPFire image and use [39:36] Rufus to put it on a USB drive, then [39:38] boot from it. Pick a language, a disk, [39:40] and a file system. EXT4 is fine. Host [39:42] and domain names can be anything, so we [39:44] kept the defaults. Keep in mind that [39:46] there are separate passwords for root [39:48] user command line and admin for web [39:50] interface. IPFire is organized around [39:52] four color-coded networks. Red and green [39:55] are WAN and LAN, the most basic setup, [39:58] while orange and blue are optional DMZ [40:00] and WLAN networks. We'll pick red, [40:03] green, and blue as our network [40:05] configuration. Blue doesn't literally [40:07] need to be wireless, but it's set up [40:09] with more restrictive settings than the [40:11] safe green network, which is ideal for [40:13] setting up our separate IoT or guest [40:15] network. For drivers and card [40:17] assignments, we need some trial and [40:18] error. We know we want the gigabit NIC [40:21] to be blue, so we'll assign the two 10 [40:23] gigabit options to red and green [40:25] arbitrarily and switch the cables later [40:27] if they don't work. Following IPFire's [40:29] guide, we'll set the green IP to [40:31] 192.168.10.1. [40:33] We'll set blue to 192.168.11.1, [40:37] and then we'll set red to DHCP. [40:39] Continuing with the guide, we'll enable [40:41] the DHCP server with a start address of [40:43] 192.168.10.100 [40:46] and end of 192.168.10.200. [40:50] That's it for the console setup, and we [40:52] can then access the web UI by plugging [40:54] into the green interface and visiting [40:56] https://192.168.10.1:444 [41:03] in a browser. IPFire won't let you skip [41:05] the https or port number in our [41:07] experience. Going to network domain name [41:10] system showed that DNS was broken, which [41:12] probably has something to do with [41:14] running behind a bunch of other [41:15] networking hardware here in the office. [41:17] Our quick and dirty solution was to add [41:19] Cloudflare's 1.1.1.1 [41:21] DNS server, then uncheck use ISP [41:25] assigned DNS servers. The blue network [41:27] has MAC address filtering on by default, [41:30] which makes sense for an untrusted [41:31] network, so we'll leave that on. For [41:33] each device, we enter the MAC address, [41:35] not the IP, check enabled, and save. In [41:39] order to get the blue network online, we [41:41] had to go to network DHCP server and [41:44] copy the red network settings over to [41:46] blue, substituting our blue IP of [41:48] 192.168.11.x [41:51] instead, and enable it, and then go to [41:53] firewall blue access and add the MAC [41:56] address of our laptop. We still had DNS [41:58] issues because it seems like the [42:00] settings on the DNS page only applied to [42:02] the red network. So, we had to go back [42:04] to the DHCP server page and manually set [42:07] 1.1.1.1 [42:09] as the DNS server for the blue network. [42:11] The default settings for the blue [42:12] network is to block access to green, so [42:15] this gives us some isolation. You might [42:17] find yourself going back and forth [42:18] trying to get things to work a little [42:19] bit the first time. IPFire also [42:22] describes how to block access to the web [42:23] interface on the blue network by adding [42:25] two lines to the config file. You just [42:27] copy the code from that guide and [42:29] substitute in the correct blue network [42:30] IP. Again, that would be 192.168.11.x [42:34] for us. IPFire has a lot of easily [42:37] accessible graphs and logs for CPU and [42:39] memory sensors, as well as a tab that [42:41] lists known vulnerabilities associated [42:43] with the hardware installed in the [42:44] system. We think that's pretty cool. [42:46] Although IPFire exposes plenty of [42:48] settings, it's built with a very clear [42:50] network structure in mind. This may be [42:52] freeing for beginners who don't want to [42:53] do anything except get a router up and [42:55] running, but it may also be limiting in [42:57] the long run. We also get the impression [42:59] that the two senses completely dominate [43:01] the DIY router space by market share. [43:03] We're not 100% sure on that, but that's [43:05] what it seems like. So, community [43:07] support for smaller distros like IPFire [43:09] isn't as comprehensive. IPFire doesn't [43:12] support UPnP at all, so manual port [43:14] forwarding is a necessity. The settings [43:16] are under firewall, firewall rules, and [43:19] the process is described in IPFire's [43:21] documentation. Now, we're getting into [43:22] replacing ISP specific devices, the ones [43:25] that they sometimes prescribe to you [43:27] these days. If you're getting into [43:29] replacing your router for security and [43:30] privacy reasons, it's understandable [43:32] that you probably don't want to just [43:34] trust it as an access point either. So, [43:37] we asked Wendell about this to get some [43:39] background, and he pointed out that it's [43:41] generally possible to configure [43:44] self-hosted homebrew routers to report [43:46] suspicious activity and behavior and [43:49] traffic and block it through the user [43:50] interface, but he wasn't overall worried [43:53] about it. [43:53] >> Yeah, I mean, there's another concern [43:54] too of like eventuality of [43:58] forcing the rent of routing equipment [44:01] from ISPs, [44:02] >> Mhm. [44:02] >> where I mean, AT&T is a great example. [44:05] You and Patrick were working on [44:06] something where he he [44:09] came in one day and started ranting [44:10] about his AT&T box. [44:12] >> Yeah. [44:12] >> I think you know where it's going. So, I [44:14] mean, you can you get into that? [44:15] >> AT&T with their fiber really want to [44:18] control [44:19] the end point. And even if you use your [44:21] own custom router, the options in like [44:24] like the like the BGW gateways, for [44:26] example, the pass-through router option [44:29] there is still really limited. Like a [44:32] couple power users in a household can [44:34] saturate everything that that piece of [44:36] equipment can handle. And I think that's [44:38] what he was tripping over. And it's [44:39] like, "Oh, I can't replace this piece of [44:40] equipment." And it's it's true. Like [44:43] AT&T has an encryption certificate on [44:45] that device. And if you want to bypass [44:46] it, you have to get a special piece of [44:48] equipment, and you have to emulate the [44:50] serial number on from your gateway, and [44:53] you have to peel off the encryption [44:54] certificate from the AT&T gateway, and [44:57] stuff it onto a new piece of equipment [44:58] that's not, you know, brain-dead, and [45:01] then you have a reasonable internet [45:02] experience. [45:03] >> Now, before we get into this, a lot of [45:04] times this isn't necessary at all with [45:07] some internet service providers. For [45:08] example, Google Fiber will allow you to [45:11] just run a cable from the fiber jack [45:13] that they provide straight into a router [45:15] of your own choosing, and you can cut [45:17] them out completely. Not everyone lets [45:19] you do that, though. And companies like [45:21] AT&T have gotten more draconian over [45:22] time. [45:23] >> If you do have one of the cursed ISPs, [45:25] you should start by taking the easy [45:27] route before replacing anything. Look up [45:29] the device's name to check how to place [45:31] it in bridge mode or IP passthrough [45:33] mode, which would allow you to install [45:35] your own router behind the ISP router. [45:37] For example, on the BGW320-505, [45:41] we can access the web interface at [45:42] 192.168.1.254, [45:45] go to the firewall IP passthrough mode, [45:47] set the allocation mode to passthrough, [45:49] turn the gateway's Wi-Fi broadcast off, [45:52] and then plug our own router in. [45:53] >> The steps will vary by ISP and device. [45:56] AT&T is not our focus today, but they [45:57] set a pretty good example of the worst [45:59] things that an ISP can do to insert [46:01] themselves further into your privacy and [46:04] your network than necessary even as the [46:06] ones providing you the internet. So, to [46:08] fully replace an AT&T fiber box, you can [46:11] basically get what would effectively be [46:13] like a mimic in D&D [46:15] >> [laughter] [46:15] >> or Ditto I guess in Pokémon. And you can [46:18] get your own ONT or optical network [46:20] terminal. It's going to make it easier [46:22] for you to remember now [46:23] where the fiber meets the copper. [46:27] And when you put your own device in in [46:29] that spot for AT&T's, [46:31] it pretends to be the original most [46:34] commonly by using the 8311 community [46:36] firmware. It's kind of like when CEOs [46:40] like Mark Zuckerberg kill a human and [46:42] then wear their skin. They pretend to be [46:45] the original. That's what you're doing [46:47] to AT&T. [46:49] This is very serious. It's all things [46:51] that happen with your own ONT. pond.wiki [46:54] is an excellent resource for this [46:55] starting with its risk-reward summary. [46:57] As it says, most users can make do with [47:00] bridge and passthrough mode on ISP [47:02] equipment. Preferably, you buy a [47:03] pre-flashed ONT. We don't have any [47:06] third-party value-added sellers that we [47:08] can vouch for. There's a lot of them out [47:10] there. [47:11] Probably some of them you can't trust [47:12] and some of them you can trust more than [47:13] others, but a pre-flashed one's easier. [47:16] They're generally more than $100. It's [47:18] worth mapping out all the network [47:20] hardware beforehand to plan for [47:22] additional costs since at the absolute [47:24] minimum the router will need an SFP port [47:27] to connect the ONT which likely means [47:30] some SFP cables, switches, and adapters [47:32] as well. Involving fiber truly in your [47:35] local network will also make things more [47:36] expensive if you fully go that route. [47:39] Also, the ONTs tend to get extremely hot [47:41] to the extent that some sellers will [47:43] actually include additional stick-on [47:45] heat sinks. There are a bunch of bespoke [47:47] 3D printable 25-mm and 40-mm fan [47:50] brackets out there as well for each [47:51] individual ONT. We've printed a few. [47:53] Now, getting further into this would [47:55] would kind of a separate video topic on [47:56] its own. It's pretty complicated. It's [47:59] very hyper specific to one ISP. So, [48:01] we're going to move on. But, the point [48:03] is that even at the ISP level, there are [48:06] situations where you can replace the ISP [48:08] mandated devices if you're clever about [48:11] it and you look for things like what [48:13] we're talking about here. For example, [48:14] we want to go to guides on the wiki, [48:16] then the AT&T BGW320-505 [48:18] to match our provider and equipment, [48:20] open that specific guide, follow the [48:21] steps for the AXON USG PF that we [48:23] bought, check the AT&T fiber status page [48:25] to confirm our wavelength is 1270 [48:26] nanometers, install an OS and an SFP+ [48:29] card on our router, spoof the AT&T [48:31] gateway MAC address on the WAN port of [48:33] the router, set up SNAT to access the [48:35] LCT on the ONT before hooking up the [48:37] fiber, use the web configuration tool on [48:38] the ONT to clone the equipment ID, [48:40] software version, and other identifying [48:41] information of the original gateway, hot [48:43] swap the fiber to the new router, and [48:45] check whether any of that worked or if [48:47] we got a timeout from AT&T. Hopefully, [48:49] we're getting the point across that this [48:51] is an all-day project. When Patrick did [48:54] this for himself, personally, it took [48:56] him a Saturday to do. But, [48:59] the reward is that you're free of their [49:01] [ __ ] And that's a pretty big [49:02] reward. It's the point of all of this. [49:04] The wiki is helpful, but it's full of [49:06] jargon and abbreviations. We aren't [49:09] associated with the 8311 community, but [49:11] it may be helpful to join their Discord [49:13] server and speak to other users before [49:15] committing to this. Now, we have some [49:16] other options as well that hit our [49:18] radar, but we didn't want to explore [49:19] individually for this. We'll still list [49:21] them though to give you some more ones [49:23] to look into. RouterOS is one of those. [49:25] MikroTik software predates its hardware, [49:28] actually, going back to the foundation [49:29] of the company in 1996 and the first [49:32] release of the creatively named RouterOS [49:34] in 1999. Installing RouterOS doesn't [49:37] require any accounts or registration to [49:39] start, but a license key must be [49:41] registered after 24 hours of uptime. You [49:43] can get a free trial license by making [49:45] an account with MikroTik, but the [49:48] comparison table makes it clear that the [49:50] free license is heavily limited when it [49:52] comes to advanced features. The UI for [49:54] RouterOS is handled through a standalone [49:57] utility called WinBox, unlike the rest [49:59] of the browser accessible distros we're [50:01] covering here. It can run on Linux and [50:03] macOS despite the name. RouterOS on [50:06] non-MikroTik hardware requires some [50:08] setup before it'll provide an internet [50:10] connection, which the documentation [50:11] covers as router without default [50:13] configuration advanced users only, if [50:16] you need that. The next one is DD-WRT, [50:18] which is part of the same explosion of [50:20] Linux router firmwares as OpenWRT. It [50:22] supports a ton of prefab routers and x86 [50:25] hardware, but it feels like even less of [50:27] an intended use case than x86 OpenWRT. [50:31] If you want to try anyway, the image can [50:33] be found at downloads betas latest [50:36] x86-64 raw DD-WRT 64 public vga.image. [50:41] Every DD-WRT build since 2008 has been a [50:43] beta, so don't worry about that part. [50:46] The MonoWall website hosts a tool that [50:48] can be used to write the image file to a [50:50] disk. Tomato is yet another Linux-based [50:53] router firmware that owes its existence [50:55] to the WRT54G [50:57] via the HyperWRT firmware project. [50:59] FreshTomato is the current fork, [51:01] although it sounds like the developer is [51:02] struggling to keep it financially [51:04] viable. Like the rest of the WRT-related [51:07] projects, Tomato is intended for [51:09] embedded hardware, but there's an active [51:11] port called Tomato64, specifically [51:13] intended for x86-64 and arm64 hardware. [51:17] In other words, regular computers. [51:20] Tomato64 status as a port of a fork of a [51:23] fork doesn't give it the firmest [51:24] foundation, so it's not in our top [51:26] recommendations. All right, so that kind [51:27] of wraps it up. First of all, I'm really [51:30] excited about this. This is the type of [51:32] stuff that I got excited about [51:35] originally with building computers. It's [51:37] the idea of you can take some stuff and [51:40] scrap it together, like my first [51:42] computer is what I did. I'm sure this is [51:43] true for a lot of you, [51:45] and throw some parts together, get [51:47] something that you're proud of and [51:49] you're excited about even if it's not [51:52] the shiniest, fastest thing. And I say [51:55] that because [51:56] this is important to do [51:59] to really take these services in and [52:02] take over them. And we talk all the time [52:05] about you'll own nothing, but there are [52:07] ways you can fight back. We're trying to [52:09] do it. I would encourage you to [52:12] really even if it's only for your own [52:14] sanity to just kind of know what's going [52:16] on in your network. I would encourage [52:18] everyone to at least experiment with it. [52:19] Now, [52:20] a router can be a pretty frustrating [52:22] thing to [52:24] try to set up on your own without a ton [52:27] of experience because it controls your [52:28] network. So, obviously if you screw it [52:30] up or if it just doesn't work [52:32] or whatever, [52:34] now you're out internet at your house [52:35] and that's kind of a big deal. So, what [52:38] I would recommend is set aside time when [52:40] you know you're not going to be under a [52:41] ton of time pressure um where it's not [52:43] going to be super frustrating and urgent [52:45] to get back online. And ideally you [52:47] still keep your kind of old device on [52:48] standby. This is why I would prefer to [52:50] go the old computer route or uh some [52:53] secondary old router that I'm flashing [52:56] rather than my current primary one. In [52:57] other words, if I'm making the move [52:59] today personally, I leave my current [53:01] router and set up all exactly as it is [53:04] and I set up my new one and then I just [53:06] swap the cables and if it doesn't work, [53:09] I swap them all back as soon as I [53:10] definitely need to get back on the [53:11] internet so I can troubleshoot the [53:13] project later. That's how I would do it [53:14] just minimize the frustrations uh [53:16] because obviously this can be a pretty [53:17] big blocker to your network if um it [53:20] doesn't come online smoothly. But, this [53:22] is important stuff to do. It's a fun [53:24] project. There's really no stakes in it [53:27] uh and you could do it with e-waste or [53:30] with old routers and we think it's fun. [53:33] Now, I hate that this is the type of [53:35] thing that we have to look to for fun uh [53:37] because this was fun previously, too. [53:40] It's just like [53:42] the reason that we're looking to it now [53:44] is because beyond being fun, all of us, [53:47] I think, have become a lot more aware of [53:50] the practical reasons that we should be [53:53] doing this, which is you can't trust any [53:55] of these [ __ ] companies to just sell [53:57] you a thing and then do their job to [54:00] keep it secure so that you can use it [54:02] safely. [54:03] So, it's an awful reason that to go this [54:05] route, but it's at least a good reason [54:08] to go this route. And you know, if [54:10] you're looking for I want some of that [54:12] DIY spirit back that I can't afford to [54:16] get from PC DIY anymore because the [54:20] [ __ ] corrupt [ __ ] who run [54:22] everything in the space have ruined it, [54:24] then at least this is a way to still get [54:26] some of that and feel like [54:28] you're taking some action, you're doing [54:30] something that you can be proud of, [54:32] that's fun, it's like at least now I [54:35] know if something goes wrong, it's kind [54:38] of fully in my hands to deal with it and [54:41] I can learn something from that. Uh and [54:44] you know, you look at stuff like the LG [54:45] coverage we've done, the ASUS router [54:47] vulnerability coverage we've done over [54:49] now multiple years [54:51] uh from various researchers' work at [54:53] this point and it's just it the the [54:56] reasons to do this are just piling up [54:58] increasingly and I think now is a good [55:00] time to make this switch. If you've got [55:03] an old system lying around that really [55:04] has no purpose [55:06] other than maybe to just host something [55:08] on your network and be a an endpoint you [55:11] can ping to [55:13] to get something or do something or [55:14] command it to do something or throw a [55:16] network card in there and it's probably [55:17] pretty good by today's standards for [55:19] most home networks. So, [55:21] uh we're excited about that. There are [55:22] other options out there. Like I said in [55:24] the beginning, the disclaimer is that [55:26] we're new to sort of this category. Now, [55:29] I think we have a a pretty good sort of [55:31] starting point here, but there's a lot [55:33] of stuff we don't know and we welcome [55:35] the discussion in the comments. I really [55:37] want to see people learning from each [55:38] other. That would it would just really [55:39] make my day. It would be nice to see [55:41] like some actual discussion and you [55:43] know, people getting excited and doing [55:45] some of this stuff. So, um [55:47] just you know, get get this [ __ ] back [55:49] under our own control to the extent that [55:50] we can. The two pfSense DIY options, [55:53] OpenSense and pfSense, are the most [55:55] interesting to us because we've spent [55:57] too much time around Wendell and it's [55:58] easy to come up with a million side [56:00] projects to do and extensions to try [56:02] when you spend a lot of time around [56:03] Wendell. Which to be fair is the [56:05] highlight of my summer every time we get [56:06] to go visit Wendell in his bunker of [56:08] oddities. And we also recognize that [56:10] pfSense and OpenSense are massive [56:12] overkill for most home networks. In [56:14] which case, OpenWRT may make more sense. [56:17] If you've ever messed with regular [56:18] router firmware from companies like [56:20] Netgear and Linksys, OpenWRT feels [56:22] exactly like that. Probably feels pretty [56:24] familiar just with some more control. [56:26] IPFire is interesting, but its [56:28] guidelines on how it expects a network [56:30] to be set up feel like they'd become [56:32] overbearing if we left the beaten path. [56:35] Our best advice for safety is to go [56:36] through the first time setup for any of [56:38] these options slowly and look up each [56:40] individual option with your old setup on [56:42] standby. Even if you don't change a [56:44] single option from the defaults, [56:45] although you should definitely change [56:46] the passwords and usernames, it's good [56:48] to know why those defaults exist. Also, [56:50] always check for updates. So, that's it [56:52] for this one. Hopefully this gives some [56:54] kind of somewhere to direct the [56:58] just just how upsetting it is to see [57:00] look what they've done to my boy. Look [57:02] what they've done to the industry. [57:03] Hopefully gives somewhere you know, [57:05] positive to direct that. Um something [57:07] new to learn and we're excited to do [57:09] more of these. We have one on DIY VPNs [57:11] and a whole bunch of other stuff. DIY [57:12] basically cloud coming up. So, a lot of [57:15] cool projects. Please share what you'd [57:17] like to see in this series from us and [57:19] we'll work on it. It's all about taking [57:21] back ownership and to quote Louis [57:22] Rossmann, owning your [ __ ] [57:25] I can't put that in the title cuz [57:26] YouTube would definitely bury this [57:28] video, but I can say it in the video. [57:29] That's okay apparently. If you spell the [57:31] words, that's when it's a problem, but [57:34] if you say them, it's not a problem. So, [57:37] thanks for watching. Subscribe for more. [57:38] If you want to support this series [57:40] directly, you can go to [57:41] store.gamersnexus.net. [57:43] We need your help on this stuff. This is [57:45] a lot of work for us. It's a lot easier [57:46] for us to do stuff like this on PC DIY [57:49] cuz that's what we've been doing for [57:51] almost two decades as a company, not [57:53] even like individually more. Um, [57:56] you know, but this is new for us. So, we [57:57] could use your help as we continue to [57:59] expand the series. You can grab [58:00] something like our black market [58:02] documentary on Blu-ray from the AIGPU [58:04] black market or our LG investigation, [58:07] our factory tour series. You want [58:08] something educational with my favorites [58:10] burned to Blu-ray. Or you can grab our [58:12] mouse mats, mod mats, solder mats, and [58:14] more. Head over to the store for that. [58:16] Or patreon.com/gamersnexus. Thanks for [58:18] your support. Thanks for watching. Have [58:20] fun with this stuff. We'll see you all [58:21] next time.