Pannenkoek2012 Cuts Mario 64 Star Run to 0.5 A Presses via Glitch Grid
SM64 - Watch for Rolling Rocks - 0.5x A Presses (Commentated) [OUTDATED] — pannenkoek2012

pannenkoek2012

Entering a level with the A button held allows players to navigate parallel universes and execute elevator kicks without triggering a fresh jump input.

AI-assisted summary of SM64 - Watch for Rolling Rocks - 0.5x A Presses (Commentated) [OUTDATED] — original source. Check the original for full context.

Source published:

Key ideas

  • pannenkoek2012 collects the 'Watch for Rolling Rocks' star in Hazy Maze Cave using only 0.5 A presses, optimizing down from a previous 1 A press route via parallel universe movement and scuttlebug raising. (0:05)
  • A half A press is defined as entering the level with the A button already held down from an earlier action, allowing mid-air flutter kicks and slow-falling without adding a new physical press input. (0:05)
  • To traverse parallel universes (PUs) without falling into the void, Mario must accumulate de facto speed across four quarter steps per frame (1 QPU), requiring roughly 12 hours of in-place hyper speed walking on an underwater slope. (10:46)
  • The solitary half A press is strictly utilized to execute mid-air AB kicks while riding rising elevators, preventing Mario's hyper velocity from phasing straight through the moving platforms. (22:38)

Detailed notes

## Background Published on YouTube by pannenkoek2012 on January 12, 2016, this video documents a tool-assisted speedrun (TAS) collecting the 'Watch for Rolling Rocks' star in Super Mario 64's Hazy Maze Cave using only 0.5 A presses. The video description explains the technical concepts explored—including Scuttlebug transportation, Scuttlebug raising, hyper speed walking, and parallel universe movement—which cut down a previous 1 A press record.

## TL;DR pannenkoek2012 details the mechanics and execution behind collecting the 'Watch for Rolling Rocks' star with only half an A press, beginning with an explanation of why an A press can be split into discrete press, hold, and release phases. To reach the elevated star without jumping, he uses Scuttlebug transportation and room deactivation cycling to elevate an enemy in midair beneath a geometric floor-wall misalignment. He then utilizes hyper speed walking on an underwater slope, accumulating massive negative velocity out of bounds over a 12-hour period to access parallel universes. Navigating through blind PU space across a specific chain of floor triangles, Mario uses continuous mid-air kicks on a rising elevator before executing a precise vector launch to bounce off the suspended Scuttlebug and clip onto the star platform.

## Atmosphere & style The video carries the feel of a meticulous, deadpan academic lecture dissecting the arcane mathematical limits of the game's physics engine. Delivered with steady, calm narration and clear diagrammatic overlays, the presentation blends dense technical rigor with understated, dry humor when addressing viewer skepticism or casually detailing twelve-hour speed-charging routines. Watching it feels like witnessing an impossibly convoluted, highly cerebral puzzle unravel, creating a sense of quiet fascination as invisible coordinates and bizarre engine quirks align into a singular, flawless execution.

## Bulletin - [00:05](https://www.youtube.com/watch?v=kpk2tdsPh0A&t=5s) pannenkoek2012 collects the 'Watch for Rolling Rocks' star in Hazy Maze Cave using only 0.5 A presses, optimizing down from a previous 1 A press route via parallel universe movement and scuttlebug raising. - [00:05](https://www.youtube.com/watch?v=kpk2tdsPh0A&t=5s) A half A press is defined as entering the level with the A button already held down from an earlier action, allowing mid-air flutter kicks and slow-falling without adding a new physical press input. - [10:46](https://www.youtube.com/watch?v=kpk2tdsPh0A&t=646s) To traverse parallel universes (PUs) without falling into the void, Mario must accumulate de facto speed across four quarter steps per frame (1 QPU), requiring roughly 12 hours of in-place hyper speed walking on an underwater slope. - [22:38](https://www.youtube.com/watch?v=kpk2tdsPh0A&t=1358s) The solitary half A press is strictly utilized to execute mid-air AB kicks while riding rising elevators, preventing Mario's hyper velocity from phasing straight through the moving platforms.

## Key takeaways - [00:05](https://www.youtube.com/watch?v=kpk2tdsPh0A&t=5s) An A press consists of three physical phases—pressing, holding, and releasing—and holding A provides distinct utility like kicks, swimming, and slow-falling without initiating a jump. - [00:05](https://www.youtube.com/watch?v=kpk2tdsPh0A&t=5s) In a full A-Button Challenge run, carrying a held A press across level transitions rounds down to zero additional presses for actions that only require holding the button. - [03:40](https://www.youtube.com/watch?v=kpk2tdsPh0A&t=220s) Scuttlebugs dynamically update their home coordinate to their exact position whenever they collide with Mario, allowing players to transport them across a room. - [05:01](https://www.youtube.com/watch?v=kpk2tdsPh0A&t=301s) Leaving room activation boundaries freezes contained entities, allowing a Scuttlebug to be lunged upward repeatedly and locked in midair to gain height without falling. - [05:01](https://www.youtube.com/watch?v=kpk2tdsPh0A&t=301s) A 1x1 unit floor-wall collision misalignment on the star platform corner allows Mario to snap upward onto the platform surface if he enters within 79 units below the floor. - [08:00](https://www.youtube.com/watch?v=kpk2tdsPh0A&t=480s) Running uphill on submerged steep slopes induces hyper speed walking, causing Mario to accelerate backward downhill with unbounded negative speed. - [09:59](https://www.youtube.com/watch?v=kpk2tdsPh0A&t=599s) Redirecting Mario into low gate ceiling collision and subsequently into out-of-bounds space cancels displacement, allowing infinite speed accumulation in place. - [10:46](https://www.youtube.com/watch?v=kpk2tdsPh0A&t=646s) Converting 32-bit floating-point coordinates to 16-bit signed shorts for floor checks creates a repeating modulo grid of virtual floor geometry known as parallel universes (PUs). - [10:46](https://www.youtube.com/watch?v=kpk2tdsPh0A&t=646s) Parallel universes lack dynamic objects, elevators, enemies, stars, and wall collision, and entering them requires locking the camera in the main map to prevent console crashes. - [13:03](https://www.youtube.com/watch?v=kpk2tdsPh0A&t=783s) Because physics calculations divide each frame into four quarter steps, Mario must move at least four PUs per frame (1 QPU) so every step lands on valid terrain. - [13:03](https://www.youtube.com/watch?v=kpk2tdsPh0A&t=783s) A slope's 'sinking speed' is the exact raw speed required to yield a de facto ground displacement matching an integer multiple of a QPU. - [17:48](https://www.youtube.com/watch?v=kpk2tdsPh0A&t=1068s) Routing through six specific floor triangles with strictly decreasing steepnesses allowed the cavern ascent to rely entirely on the first sinking speed, saving 12 hours of speed charging. - [17:48](https://www.youtube.com/watch?v=kpk2tdsPh0A&t=1068s) Deviating slightly above or below a slope's sinking speed allows controlled relative forward or backward drift on the destination map, while angle offsets enable lateral steering. - [19:51](https://www.youtube.com/watch?v=kpk2tdsPh0A&t=1191s) Hitting ceilings, out of bounds, or changing slopes mid-frame stops Mario on an intermediate quarter step, causing him to become misaligned from the 4-PU grid. - [22:38](https://www.youtube.com/watch?v=kpk2tdsPh0A&t=1358s) Mid-air AB kicks executed by holding A and tapping B repeatedly recalculate vertical platform interactions, allowing Mario to ride rising elevators without phasing through them. - [23:10](https://www.youtube.com/watch?v=kpk2tdsPh0A&t=1390s) Mario concludes the run by offsetting his position by negative 10 PUs laterally and positive 3 PUs vertically, launching into the main map to bounce on the raised Scuttlebug and ground pound into the corner misalignment.

## Detailed walkthrough ### [00:05](https://www.youtube.com/watch?v=kpk2tdsPh0A&t=5s) The Concept of the Half A Press

pannenkoek2012 introduces his run to collect the star "Watch for Rolling Rocks" in Hazy Maze Cave using only 0.5 A presses. Before showing the run, he addresses the repeated confusion across his comment sections whenever he posts a video involving half A presses, despite having an explanatory note pinned in his video descriptions. To clarify the mechanic once and for all, he uses the course Wing Mario Over the Rainbow—specifically the task of reaching the first cannon platform—as an illustrative example. Reaching that cannon is impossible in zero A presses because Mario cannot travel far enough, and while one press is sufficient, it can actually be accomplished in half an A press by entering the course already holding the A button down.

```mermaid flowchart LR accTitle: The Three Phases of an A Press accDescr: Diagram showing the three sequential phases that comprise a single full A press. subgraph APress["Anatomy of an A Press"] direction LR P["Press A\n(Triggers jumps)"] --> H["Hold A\n(Slow falls, kicks, swimming)"] H --> R["Release A\n(No current utility)"] end ```

Anticipating skepticism from viewers, he responds directly to a common objection: “Now hold on, I know what you're thinking: 'An A press is an A press. You can't say it's only a half.' Well, TJ 'Henry' Yoshi, hear me out.” He breaks down an A press into three discrete physical phases: the press, the hold, and the release. While pressing the button is typically the only part that makes Mario jump, holding A provides substantial utility on its own, allowing Mario to perform flutter kicks, swim, slow-fall while twirling, and slow-fall using the Wing Cap. The release phase currently has no mechanical application in the challenge.

When looking at Wing Mario Over the Rainbow in isolation, the sequence requires holding A to float to the cannon platform, pressing A to fire from the first cannon, and pressing A again to launch from the second cannon, totaling three distinct interactions. In a complete A-Button Challenge (ABC) run, however, an earlier A press is already required to enter the level. Rather than naively counting four presses (one to enter plus three inside), the runner can simply keep the entry A press held as the stage loads, fulfilling the requirement for the floating section without pressing the button again. In this broader context, the level only adds two new presses to the overall run tally.

- **Terminology and Rounding:** On an isolated single-star basis, a 2.5 A press run rounds up to 3. In a full-game run, because the initial press leeches off a prior action and adds no new inputs, it effectively rounds down to 2. - **Visual Display:** As the gameplay begins in Hazy Maze Cave, an input display in the bottom-left corner confirms that the run starts with the A button already held down.

---

[03:40](https://www.youtube.com/watch?v=kpk2tdsPh0A&t=220s) Scuttlebug Transportation

pannenkoek2012 transitions into the first primary gameplay technique of the run: Scuttlebug transportation. In *Super Mario 64*, most enemies possess a defined home coordinate in 3D space and patrol a set radius around that point. When Mario steps within that patrol radius, the enemy lunges toward him. Scuttlebugs, however, possess a unique property where their home position is dynamic: whenever a Scuttlebug collides with Mario, its home updates immediately to its exact coordinate at the moment of impact. By intentionally luring a Scuttlebug to the outer perimeter of its detection boundary and letting it bump Mario, the player can steadily relocate the Scuttlebug and its home across the room.

```mermaid flowchart TD accTitle: Scuttlebug Transportation Loop accDescr: Step-by-step cycle used to relocate a Scuttlebug across a room. subgraph TransportLoop["Transportation Loop"] direction TB A["Lure Scuttlebug to edge of patrol radius"] --> B["Allow Scuttlebug to collide with Mario"] B --> C["Scuttlebug home updates to collision coordinate"] C --> D["Step back and repeat to shift home further"] end ```

This method has rigid environmental limitations. Scuttlebugs cannot be brought outside of their native room because they get caught on door boundaries. As pannenkoek2012 jokes, “So if your dream was to bring all the Scuttlebugs together for one big jamboree, I'm sorry, but it's not going to happen.” Furthermore, Scuttlebugs will spontaneously despawn if they collide with a wall while positioned too far below the vertical elevation of their current home—a failsafe programmed to prevent them from wandering after falling into pits. Navigating carefully around these constraints, pannenkoek2012 transports a Scuttlebug directly to the corner floor beneath the high Watch for Rolling Rocks star platform.

---

[05:01](https://www.youtube.com/watch?v=kpk2tdsPh0A&t=301s) Scuttlebug Raising and Corner Misalignment

With the Scuttlebug in position, pannenkoek2012 demonstrates Scuttlebug raising. Rooms in *Super Mario 64* deactivate when Mario leaves them; the Rolling Rocks room only renders and updates when Mario is physically inside it or standing within a small trigger zone outside the door, highlighted in yellow on his screen overlay. When Mario leaves this activation boundary, the entire room goes pitch black, and all contained entities freeze in place and become invisible. This room deactivation mechanic can be exploited to move the Scuttlebug vertically without allowing gravity to pull it back down:

```mermaid flowchart TD accTitle: Scuttlebug Raising Cycle accDescr: Procedure for raising a frozen Scuttlebug vertically using room activation triggers. subgraph RaisingCycle["Vertical Raising Loop"] direction TB S1["Mario enters Scuttlebug radius while room is deactivated;\nScuttlebug turns and begins lunge"] --> S2["Mario steps out of radius;\nScuttlebug faces its home coordinate"] S2 --> S3["Mario enters yellow door zone;\nScuttlebug executes upward lunge"] S3 --> S4["Mario leaves yellow zone at trajectory peak;\nScuttlebug freezes in midair"] S4 --> S5["Scuttlebug turns back toward home;\nRepeat cycle to gain height"] end ```

The Scuttlebug's detection radius is not a spherical boundary, but an infinite vertical cylinder. This geometry means that no matter how high the Scuttlebug climbs, Mario can endlessly trigger lunges from the ground level below. pannenkoek2012 purposefully activates the lunges only while Mario is outside the cylinder, forcing the Scuttlebug to lunge directly toward its home coordinate beneath it, producing a perfectly vertical ascent. Activating the Scuttlebug from inside the radius would make it track toward Mario at the door—which is faster, but ruins the required alignment beneath the star platform.

The objective is to raise the Scuttlebug directly adjacent to the platform's corner, taking advantage of a geometric floor-wall misalignment. Because the game engine computes collision checks for floors and walls using disparate mathematical logic, a tiny 1×1 unit seam exists at the edge where Mario can penetrate the area beneath the floor without being pushed outward by the adjacent wall. If Mario's position is less than 79 units beneath a floor inside this gap, the engine automatically snaps him upward onto the top surface.

---

[08:00](https://www.youtube.com/watch?v=kpk2tdsPh0A&t=480s) Hyper Speed Walking (HSWing)

To navigate the level and reach the elevated Scuttlebug, Mario must generate an immense amount of velocity via hyper speed walking (HSWing). Certain steep slopes in *Super Mario 64* are completely unstandable under normal conditions, causing Mario to slide down immediately. However, if those steep inclines are submerged beneath shallow water, Mario can walk upon them. Running uphill on an underwater steep slope causes an engine quirk: Mario runs backward downhill with exponentially increasing negative speed that possesses no theoretical upper bound.

Under standard conditions, this reverse acceleration quickly dumps Mario into deeper water, ending the glitch. Running almost parallel to the slope gradient preserves the speed briefly, but the geometry quickly terminates. Trapping Mario against a standard wall to build speed in place is also ineffective unless the wall is exactly perpendicular to the slope. Because walls act as rectangular pushboxes that eject Mario perpendicularly to their surface, moving into an angled wall causes the game to push Mario outward, resulting in net lateral movement that slides him straight into the pool.

```mermaid flowchart TD accTitle: Ceiling Collision Prevention in HSW accDescr: How the gate ceiling collision prevents Mario from sliding into water during HSW. subgraph GateMechanic["Gate Ceiling Lock"] direction TB M1["Mario builds reverse speed on underwater slope"] --> M2["Mario moves backward into gate underside"] M2 --> M3["Engine detects insufficient vertical clearance under ceiling"] M3 --> M4["Collision check cancels Mario's displacement;\nSpeed accumulates in place"] end ```

This limitation is solved by a routing discovery from community member Tyler Kehne: - **Ceiling Collision Exploitation:** The bottom edge of the nearby metal gate is coded as a low ceiling. Because the game engine prevents Mario from moving into spaces where his vertical hitbox does not fit, backing Mario into the underside of the gate causes the engine to cancel his displacement entirely, locking him in place while his speed continues to scale upward. - **Speed Redirection:** Mario cannot remain pinned under the gate indefinitely; exceeding a threshold velocity will cause his displacement per frame to surpass the collision check, causing him to break free and shoot into the water. To prevent this, Mario must turn to redirect his accumulated speed before breaking out.

[09:59](https://www.youtube.com/watch?v=kpk2tdsPh0A&t=599s) Building Infinite Speed Out of Bounds

Mario’s intended next position reaches past the wall and into out-of-bounds space once he builds up sufficient speed. Because Super Mario 64 refuses to place Mario out of bounds, the game cancels his translation entirely and leaves him standing in place. While ceiling collision functions similarly by holding Mario stationary, out-of-bounds space provides a critical structural advantage: unlike ceilings, out of bounds extends infinitely. Consequently, a player can accumulate unlimited velocity without risking breaking free from the geometry.

To execute this setup, pannenkoek2012 opens the gate, utilizes the gate's ceiling collision to generate an initial burst of velocity, and then redirects Mario’s angle directly toward out of bounds to farm the remainder of the required speed. Recognizing that spending half a day charging movement might seem completely absurd to a casual viewer, pannenkoek2012 prefaces the explanation with dry anticipation: “Now you're probably wondering what I'm going to need all this speed for after all I do build up speed for 12 hours but to answer that we need to talk about parallel universes and if you thought my other tangents were complicated just you wait.”

[10:46](https://www.youtube.com/watch?v=kpk2tdsPh0A&t=646s) Collision Math and the Parallel Universe Grid

While the game stores Mario’s exact position internally as a 32-bit floating-point number, it converts those coordinates into 16-bit signed shorts whenever evaluating floor triangle collisions. This conversion truncates any fractional portion of his coordinates and restricts the collision detection values to an integer range between -32,768 and +32,767 inclusive. Any positional values that exceed or fall below this boundary are mapped back inside via the modulo operator. Visually, the collision engine restricts its checks to a rigid, cubic bounding box centered on the main stage.

```mermaid flowchart LR accTitle: Parallel Universe Collision Modulo accDescr: Diagram showing how Mario's float position wraps into the original map box for collision. subgraph ActualSpace["Actual Space (Float)"] Pos["Mario's True Position<br/>Extends infinitely"] end subgraph ShortConversion["Collision Math"] Mod["Modulo & Truncation<br/>-32768 to +32767"] end subgraph CollisionBox["Floor Detection Box (Short)"] Floor["Original Map Box<br/>Floor Check Evaluated"] end Pos --> Mod Mod --> Floor ```

As long as Mario remains within this box, his actual floating-point coordinates and his floor detection coordinates align aside from fractional rounding errors. However, once Mario crosses the boundary of the box, his real position separates from his floor check position: his actual coordinates continue moving outward, while the collision engine loops back around inside the base box. If Mario stands far out in the void where no tangible geometry exists, but his floor check coordinates loop around to land on valid terrain in the base map, the game treats Mario as standing on solid ground.

As pannenkoek2012 summarizes the strange mechanics of this phenomenon: “So for all intents and purposes there is essentially land over here a copy of the original map and this is what we call a parallel universe or a pu and this applies to every one of these boxes so there's actually a grid of nearly infinite pus.”

- Parallel universes (PUs) repeat across a vast, near-infinite spatial grid, spaced roughly 65,536 units apart. - PUs contain purely virtual floor collision; they are visually invisible because graphics are rendered only within the original base map. - PUs contain no dynamic objects, no elevators, no item blocks, no enemies, no collectible items such as coins or stars, and no wall collision. - The Nintendo 64 hardware will hard-crash if Mario enters a PU while the camera is set to track him; players prevent crashes by locking the camera in place on the base map before departure, which renders PU navigation entirely blind.

[13:03](https://www.youtube.com/watch?v=kpk2tdsPh0A&t=783s) Quarter Steps, De Facto Speed, and Sinking Speeds

Reaching a neighboring parallel universe requires more than simply accumulating the gross spatial distance of a single PU. The Super Mario 64 physics engine subdivides every single frame of movement into four distinct quarter steps, checking for valid floor collision under Mario at every single step. If a quarter step lands in out-of-bounds void, the movement aborts. Consequently, the minimum viable displacement requires clearing four full parallel universes in a single frame so that every individual quarter step lands safely on valid terrain. The community designates this four-PU movement unit as a single "qpu" (quadruple parallel universe).

Furthermore, the actual distance Mario travels horizontally across the ground rarely equals his raw speed value. On sloped surfaces, Mario's displacement represents only a fractional portion of his speed, with steeper inclines reducing his ground movement significantly regardless of whether he faces uphill, downhill, or sideways. The true movement distance along the ground is termed Mario's "de facto speed." To clear one qpu of distance, the player cannot merely hold one qpu of raw speed; the de facto speed must match one qpu, meaning the raw speed must scale upward to compensate for the incline.

```mermaid flowchart TD accTitle: Sinking Speed Multiples accDescr: Flowchart illustrating how raw speed converts to de facto speed across slope angles to hit QPU intervals. subgraph SpeedConversion["Speed Conversion"] Raw["Raw Speed<br/>(Blue Vector)"] --> Slope["Floor Slope Factor<br/>(Steepness Scaling)"] Slope --> DeFacto["De Facto Speed<br/>(Green Vector)"] end subgraph SyncLogic["PU Synchronization"] DeFacto -->|"Matches 1 QPU Distance"| Sync1["1st Sinking Speed<br/>(Clears 1 QPU / frame)"] DeFacto -->|"Matches 2 QPU Distance"| Sync2["2nd Sinking Speed<br/>(Clears 2 QPU / frame)"] DeFacto -->|"Matches N QPU Distance"| SyncN["Nth Sinking Speed<br/>(Clears N QPU / frame)"] end ```

The specific raw speed value that causes Mario's de facto speed to land perfectly on an integer multiple of a qpu is called the "sinking speed." Because raw speed can only be accumulated while remaining on a hyper speed walking slope, any speed Mario carries upon leaving that slope will steadily degrade. Navigating a route across multiple surfaces requires planning around each slope's unique set of sinking speeds. Demonstrating this with his past run to the Secret Aquarium, pannenkoek2012 illustrates how stepping onto a steeper surface demands a higher sinking speed, creating points of failure if Mario's speed drops below the threshold. Rather than giving up, routes can step up to higher harmonic multiples: “These speeds allow Mario to move two qpu at once instead of one so now if I instead build up enough speed to reach the second sinking speed of that first slope then I'll actually have enough speed to meet each sinking speed in turn and complete the route.”

- Reaching the first sinking speed requires approximately 12 real-time hours of continuous speed accumulation on the slope. - Reaching the second sinking speed roughly doubles the setup time to around 25 hours. - Bypassing the second sinking speed represents a massive real-world optimization, as shaving off the higher tier is an immediate 12-hour time save.

[17:48](https://www.youtube.com/watch?v=kpk2tdsPh0A&t=1068s) Routing Hazy Maze Cave and Triangle Optimization

Executing the Watch for Rolling Rocks star with parallel universes poses a severe vertical constraint: while horizontal speed is effectively infinite, vertical mobility remains completely unchanged. To reach the star at the top of the cavern, Mario must physically climb terrain and ride moving platforms. The planned route begins on the hyper speed walking slope, travels up the incline leading away from the underground lake, ascends two separate moving elevators, advances onto the Amazing Emergency Exit platform at the peak of the cavern, and finally launches across to the star platform to bounce off the pre-positioned Scuttlebug.

The primary obstacle on this climb lies along the pathway leading up from the subterranean lake, a ramp constructed from dozens of small floor triangles, each with varying surface steepnesses. Confronted with a chaotic patchwork of sinking speed requirements, pannenkoek2012 surveyed the mesh geometry to find a viable path: “After careful observation and scrutiny I isolated six triangles which I named T1 through T6 these triangles have strictly decreasing steepnesses so we can meet each of their sinking speeds in turn.”

Because the six chosen triangles span the entire vertical rise without gaps and feature monotonically decreasing slope angles, Mario can step between them continuously as his speed degrades, allowing the entire route to function on the very first sinking speed rather than requiring a 25-hour hyper speed walking charge.

Finally, navigating parallel universes does not demand a mathematical lock on the exact sinking speed integer. Small deviations create controlled relative movement across the base map: - Moving with slightly less than the ideal sinking speed drifts Mario relatively forward on the destination map. - Moving with slightly more than the sinking speed drifts Mario relatively backward. - Greater deviations from the exact sinking speed magnify this relative drift. - Deflecting Mario's travel angle slightly away from pure cardinal axes allows relative lateral steering across the terrain.

[19:51](https://www.youtube.com/watch?v=kpk2tdsPh0A&t=1191s) QPU Alignment and Non-Four-PU Movement

While an intuitive reading of parallel universe travel suggests that Mario can only move in multiples of four PUs at once—since each frame consists of four quarter steps that must individually resolve—pannenkoek2012 points out that this is not strictly true. Mario can stop prematurely at an intermediate quarter step if a quarter step attempts to move out of bounds or underneath a ceiling. Because the game evaluates quarter steps sequentially and advances Mario only up to, but not including, the first invalid quarter step, hitting an invalid floor or ceiling halts the movement mid-frame.

Furthermore, shifting slopes during a quarter step fundamentally disrupts this math. Stepping onto a different incline alters Mario's de facto speed and recalculates the spatial displacement of subsequent quarter steps. As a result, the next quarter step will almost certainly fail to synchronize with the exact distance needed to land on an equivalent PU coordinate, forcing Mario to drop out of hyper speed walking and halt directly on the new slope.

```mermaid flowchart TD accTitle: Quarter-step Validation and QPU Alignment accDescr: Diagram showing how Mario's four quarter steps evaluate floor conditions to maintain or break QPU alignment.

subgraph Evaluation ["Per-Frame Movement Engine"] QS1["Quarter Step 1"] --> QS2["Quarter Step 2"] QS2 --> QS3["Quarter Step 3"] QS3 --> QS4["Quarter Step 4"] end

Evaluation -->|"Normal 4-step execution"| Aligned["Lands on QPU Grid<br>(Multiples of 4 PUs)"] Evaluation -->|"Step hits OOB, ceiling, or slope change"| Truncated["Halts at invalid quarter step"] Truncated --> Misaligned["QPU Misalignment<br>(Must correct before return)"] ```

To categorize these states, the set of parallel universes separated from the origin by exact multiples of four is designated the "QPU grid." When Mario rests on this grid, he is considered "QPU aligned." pannenkoek2012 explains that maintaining alignment or staying misaligned is relatively straightforward, but transitioning between the two requires deliberate environmental disruptions:

> “Remember moving a multiple of four PUs is easy, but moving a different amount requires special conditions like out of bounds or changing slopes, so if you're QPU aligned, it's easy to stay that way, and if you're QPU misaligned, it's easy to stay that way as well.”

If Mario becomes misaligned while traveling across the outer void, returning to the main course requires deliberate correction. Without nearby out-of-bounds geometry, and with slope transitions constrained to predetermined sequences, calculating the exact route to re-align with the origin map constitutes one of the steepest challenges in PU path planning.

- Moving multiples of four PUs is standard; moving non-multiples requires an invalid quarter step (out of bounds or ceilings) or a mid-frame slope change. - A slope change alters de facto speed, desynchronizing subsequent quarter steps from matching PU intervals. - The QPU grid comprises all PUs that sit at spatial coordinates in exact multiples of 4 PU distances from the main map. - Recovering QPU alignment to re-enter the main stage is mandatory, as interactive game objects exist only on the origin map.

---

[21:18](https://www.youtube.com/watch?v=kpk2tdsPh0A&t=1278s) Multi-Screen Setup and the Six-Triangle Ascent

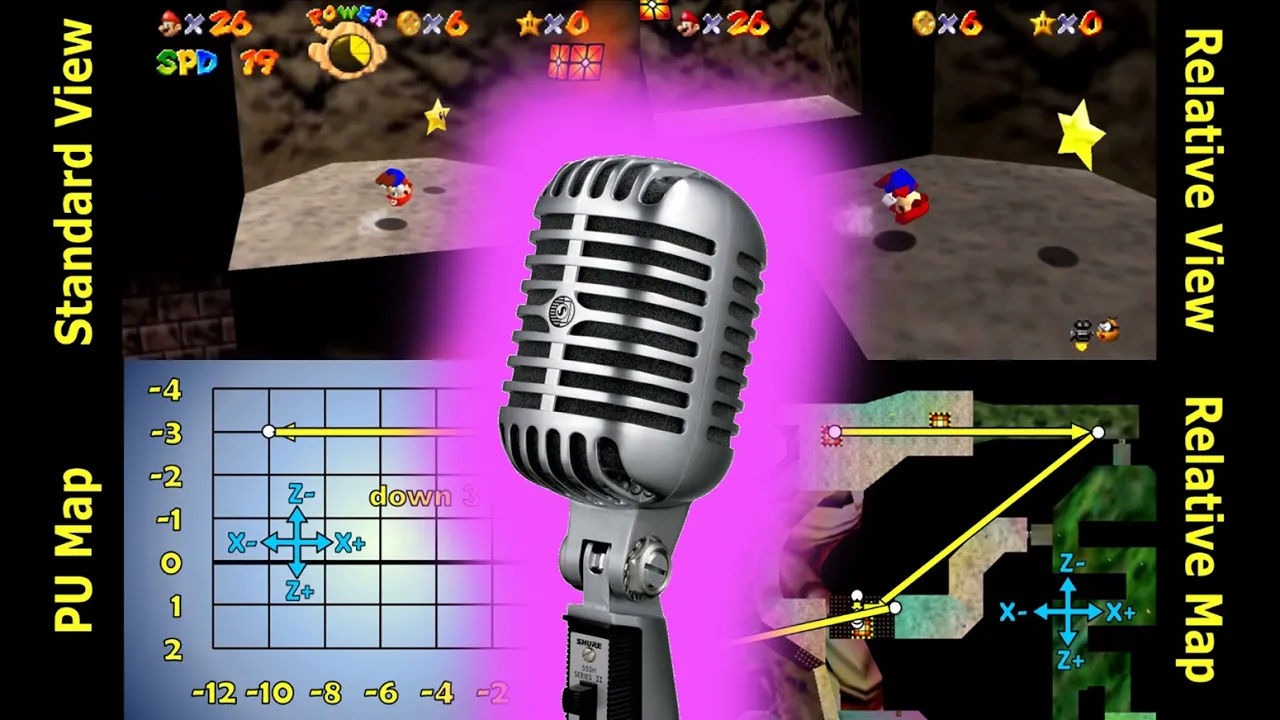
Before diving into the synchronized gameplay, pannenkoek2012 pauses with a comedic fake-out: “Okay, so now we're finally ready to resume the main video and watch the PU movement. Just kidding! First I need to explain what these screens are.” Because tracking an invisible character across billions of coordinate units is impossible on a standard camera view, a four-panel composite display is used to visualize the run:

- **Standard View**: Shows what the game engine renders on-screen. Because the camera is permanently anchored on the main map to prevent console rendering overflows and crashes, this window remains largely static. - **Relative View**: Demonstrates how the environment would appear if the camera were allowed to follow Mario directly and if PU terrain were rendered visible. - **Relative Map**: An overhead bird's-eye schematic showing Mario's exact relative position on the local floor geometry within whatever PU he currently occupies. - **PU Map**: A macro-level coordinate grid showing Mario’s location relative to the infinite matrix of PUs across the entire coordinate plane.

With the display explained, Mario begins his ascent out of the subterranean lake area across the six isolated floor triangles mapped out earlier. The technique requires boarding a designated triangle, throttling hyper speed down until it matches the triangle’s specific sinking speed, ascending along the incline, and then launching onto the next triangle.

Relative backwards movement is achieved by retaining slightly more speed than the slope's exact sinking speed, while lateral motion is driven by holding an angle slightly offset from cardinal directions. Because each transfer between differing floor slopes shifts Mario's QPU alignment, the path had to be mathematically engineered so that every fractional misalignment cancelled out:

> “And every time I move from triangle to triangle, my QPU alignment changes, but cleverly, I planned it in such a way that they'd all cancel out by the end, and I'd end up QPU aligned.”

Upon conquering the sixth triangle, Mario performs a rapid zigzag sequence across the PU map to race back toward the coordinate origin.

---

[22:38](https://www.youtube.com/watch?v=kpk2tdsPh0A&t=1358s) The 0.5 A Press: AB Kicks on the Rising Elevator

Re-entering the origin map is an absolute necessity because dynamic objects—including platforms, enemies, and elevators—do not populate parallel universes. Upon returning to the main stage, Mario approaches the rising elevator. If he stood passively on the lift, the immense speed checks and collision updates would cause him to phase straight through the floor and plummet into the abyss.

This specific hurdle is the sole justification for the half A press that defines the run:

> “By holding A, I can press B to do these little kicks; without these kicks, I go through the elevator, but with the kicks, I can ride it up to gain precious height.”

By keeping the A button held down continuously from an action initiated prior to the level entry, pressing B executes mid-air AB kicks. These rapid kicking animations repeatedly recalculate Mario's vertical platform interaction without triggering a fresh jump input, allowing him to securely adhere to the moving lift and ascend out of the lower cavern into the upper facilities.

---

[23:10](https://www.youtube.com/watch?v=kpk2tdsPh0A&t=1390s) The Final Launch, Scuttlebug Bounce, and Misalignment Clip

Reaching the top level initiates the climactic routing calculation. Mario executes a kick onto the Amazing Emergency Exit platform, realigns his angle, and readies a hyper-speed launch targeting the Scuttlebug suspended over the rolling rocks pit. The vector required to traverse from this platform to the Scuttlebug displaces Mario precisely 10 PUs rightward and 3 PUs downward on the PU grid.

To land squarely on the Scuttlebug in the physical, object-loaded main map rather than in an empty PU, pannenkoek2012 mirrors the final vector: he navigates Mario 10 PUs to the left and 3 PUs upward beforehand, while simultaneously fine-tuning Mario's sub-pixel position on the relative map so that the exit velocity hits the precise intercept coordinates.

After a brief “now, don't blink,” Mario flashes instantaneously across the void, bounces off the raised Scuttlebug to gain upward lift, and executes a ground pound directly into the geometry misalignment on the corner of the Watch for Rolling Rocks platform. The ground pound cancels his downward momentum at the apex and pulls him upward through the seam, placing him safely on the platform to collect the Power Star.

The video concludes with two visual breakdowns: 1. **Abridged Scuttlebug Raising**: A sped-up recap of the Scuttlebug’s ascent above its home boundary, showing the back-and-forth lunges, capped off with two final raising steps used exclusively to translate the enemy horizontally closer to the cliff edge so Mario could reach it. 2. **The Final PU Launch**: An alternate camera angle illustrating that once Mario crossed into the PU version of the rolling rock room, the Scuttlebug became active and began falling. Mario had only a razor-thin window of a few frames to bridge the vast multi-PU distance before the bug dropped too low for the bounce to work.

Reflecting on the final product, pannenkoek2012 expresses surprise at the sheer scope of the project:

> “Man, I did not expect this video to become 25 minutes long when I started commentating, but I guess there was just that much to explain.”

## Mentioned pannenkoek2012, Super Mario 64, Hazy Maze Cave, Watch for Rolling Rocks, Wing Mario Over the Rainbow, TJ 'Henry' Yoshi, Tyler Kehne, Nintendo 64, The Secret Aquarium

## Video description THIS VIDEO IS OUTDATED - SEE A BETTER VERSION OF THIS VIDEO HERE: https://youtu.be/aFx7woWkZbc

I collect the star Watch for Rolling Rocks in Hazy Maze Cave using 0.5 A presses. The A press is to perform AB kicks on the rising elevators. Without doing these kicks, Mario would go through the elevator, and so there'd be no way to navigate out of the lake area with QPU speed. For the record, this is TAS.

This video is an improvement from my previous video in which I collected this star in 1 A press. You can find that video here: https://youtu.be/yGic8wwhm6g. Since then, we discovered PU movement and scuttlebug raising, which made this strat possible.

For convenience, here are the informative parts of the video: 0:35 for half A presses 3:44 for scuttlebug transportation 5:01 for scuttlebug raising 8:07 for hyper speed walking (HSWing) 10:40 for parallel universes (PUs)

Here is a play by play of what I do. First, I use scuttlebug transportation to move a scuttlebug to the corner of the Watch for Rolling Rocks platform. Then, I use scuttlebug raising to raise him to about the height of the platform. Next, I use hyper speed walking to generate massive speed. Finally, I use PU movement to navigate to the top of the course, launch to the scuttlebug to bounce on him, and ground pound in the misalignment of the platform to get onto it. And from there, I collect the star.

If you want to see my workspace/calculations and read about the process of TASing this, I've chronicled it here: http://imgur.com/gallery/rK24p

.m64 stats: Length: 13 hours and 49.5 minutes Re-records: 6824 Frames: 2986271 (1493100 input)

This video is without a doubt the one that I've put the most time into out of all my videos. I knew this going in, and so I decided to keep a log of how much time I spent on each aspect of it (note: if my computer was doing work like compiling/recording and I could let it be, I didn't count that time). Here are the stats: Time to TAS: 12 hours Time to record/manage raw avis: 9 hours Time to create uncommentated version: 31 hours Time to add visuals/commentary: 75 hours

Update: The PU route used in this video actually crashes on console, as it turns out PU crashes can still occur even when locking the camera in the main map. Nevertheless, an alternate route has been found that avoids these PU crashes and has been console verified: https://youtu.be/T-G4ymVwajw

Commentated video playlist: https://youtube.com/playlist?list=PLmvvhlevqC2ftzAeEpTaI7eS6b4nPN3ji Uncommentated Version: https://youtu.be/X-zAWbM50JM ABC Playlist: https://www.youtube.com/playlist?list=PLmvvhlevqC2d6vis077yFHuLJHYtTtqe_ ABC Routes: https://docs.google.com/document/d/1ypRVVRyf4x-v8GqCSmKYnicrfKSIjao3Y1ZVl52RIyM/edit

[Source](https://www.youtube.com/watch?v=kpk2tdsPh0A)

中文简报

Pannenkoek2012利用漏洞网格将《马力欧64》力量之星通关按A次数缩减至0.5次 按住A键进入关卡可在不触发新跳跃输入的情况下穿行平行宇宙并执行升降机踢击。 pannenkoek2012详细解析了仅用半次A键获取“小心滚石”(Watch for Rolling Rocks)力量之星的机制与操作,首先解释了为何按一次A键可被拆分为按下、按住和释放三个独立阶段。为了在不跳跃的情况下到达高处的星星,他利用Scuttlebug运输与房间非激活循环机制,在一处几何地面与墙壁未对齐处的正下方将一只敌人抬升至空中。随后,他利用水下斜坡进行超速行走,在长达12小时的时间内在边界外积蓄巨大的负速度以进入平行宇宙。在盲视的平行宇宙空间中沿着特定的地面三角面链条穿行,马力欧在上升的升降机上连续进行空中踢击,随后执行一次精确的矢量弹射,从悬空的Scuttlebug上借力弹跳并卡入星星平台。 pannenkoek2012仅使用0.5次A键便收集到了迷宫洞窟中的“小心滚石”力量之星,通过平行宇宙移动和抬升Scuttlebug,对之前1次A键的路线进行了优化。 (0:05) 半次A键的定义是:在按住前一动作的A键不放的情况下进入关卡,从而允许在不增加全新物理按下输入的情况下进行空中踢击和缓降。 (0:05) 为了在穿越平行宇宙(PU)时不掉入虚空,马力欧必须在每帧的四个四分之一微步内积蓄有效速度(1 QPU),这需要在水下斜坡上进行大约12小时的原地超速行走。 (10:46) 这仅有的半次A键严格用于在乘坐上升的升降机时执行空中AB踢击,防止马力欧的极速直接穿透移动平台。 (22:38)

Reading summary

pannenkoek2012 demonstrates that collecting the "Watch for Rolling Rocks" star in Super Mario 64 requires only 0.5 A button presses by exploiting collision math, geometry quirks, and enemy behaviors. The strategy replaces standard jumping inputs with multi-hour speed accumulation, parallel universe navigation, and precise bounce mechanics. The Mechanics of the Half A Press (0:05) pannenkoek2012 separates an A press into three discrete physical phases: the press, the hold, and the release. While pressing triggers standard jumps, holding the button maintains utility across actions like swimming, flutter kicking, and twirling. In single-level isolation, entering a course with A held counts as a 0.5 press (conventionally rounded up to 1). In a full-game A-Button Challenge run, however, this input leeches off an earlier mandatory press, adding zero new actions and effectively rounding down. In Hazy Maze Cave, maintaining this continuous hold enables mid-air "AB kicks"—pressing B while holding A—which allows Mario to ride a moving elevator without clipping through the floor, avoiding any additional jump inputs. Scuttlebug Transportation and Vertical Elevation (3:40) Lacking jump inputs, the route uses an enemy Scuttlebug as an elevated bounce platform. Scuttlebugs possess dynamic home coordinates that update to the point of impact upon hitting Mario. By baiting collisions at the patrol boundary, pannenkoek2012 relocates the Scuttlebug to the star platform's base while avoiding room-exit boundaries and despawn zones. To raise the enemy vertically, the run exploits room deactivation triggers. When Mario steps outside the room's activation boundary at the door, contained entities freeze. Because a Scuttlebug's detection zone extends infinitely upward as a cylinder, Mario can trigger vertical lunges toward its home from ground level, stepping out of the boundary at the apex of each lunge to freeze the Scuttlebug in mid-air. Repeating this cycle lifts the enemy adjacent to a 1×1 unit floor-wall misalignment beneath the star platform. Hyper Speed Walking and Parallel Universes (8:00) Horizontal traversal relies on hyper speed walking (HSWing). Running uphill on steep slopes submerged in shallow water generates unbounded reverse acceleration. To prevent Mario from sliding into deep water, runner Tyler Kehne discovered that backing under a metal gate's low ceiling cancels displacement while accumulating speed. Mario is then redirected out of bounds, where infinite non-traversable space halts translation, enabling 12 hours of speed charging without boundary breach. The engine converts Mario's 32-bit floating-point coordinates into 16-bit signed shorts (-32,768 to +32,767) for floor collision checks via modulo arithmetic. Exceeding these bounds detaches Mario's true position from his floor check. When wrapped collision coordinates map to valid base-map terrain, the engine treats empty void space as solid ground. This duplicates collision data across a repeating grid of invisible "parallel universes" (PUs) spaced 65,536 units apart. Sinking Speeds and Triangle Route Optimization (13:03) Because the physics engine processes movement in four quarter steps per frame—each requiring valid ground—traversing PUs requires clearing four full universes (1 "qpu") per frame. Steeper inclines reduce horizontal travel to a lesser "de facto speed," requiring specific raw "sinking speeds" that synchronize ground displacement with integer multiples of a qpu. Higher harmonic sinking speeds require roughly 25 hours of charging. pannenkoek2012 avoids this 12-hour penalty by charting a path across six specific floor triangles (T1–T6) with monotonically decreasing slopes. Mario can step between them continuously as his accumulated speed naturally degrades, ascending out of the underground lake on the base sinking speed while mathematically canceling out intermediate QPU alignment shifts to permit a return to the main map. Elevator Transit, Vector Targeting, and Seam Clipping (22:38) Because dynamic objects and stars exist only on the base map, Mario returns to the origin. He boards the cavern's moving elevator using AB kicks to maintain platform interaction without clipping. Navigating the PU grid is tracked via a four-panel composite display visualizing standard views, relative views, and local and global maps. From the peak cavern platform, reaching the Scuttlebug requires a displacement of 10 PUs right and 3 PUs down. pannenkoek2012 pre-positions Mario 10 PUs left and 3 PUs up so the launch intercepts the falling Scuttlebug on the base map within a multi-frame window. Bouncing off the Scuttlebug provides vertical lift; Mario then ground-pounds into the 1×1 unit floor-wall misalignment seam, causing the engine to snap him 79 units upward onto the platform to collect the star. The run proves that the "Watch for Rolling Rocks" star can be collected with 0.5 A presses by combining coordinate truncation, geometric misalignments, and velocity accumulation. Although tagged by pannenkoek2012 as outdated due to subsequent community discoveries, the demonstration established fundamental techniques for parallel universe navigation and A-Button Challenge routing.

精炼阅读摘要

pannenkoek2012 在视频中系统阐释了在《Super Mario 64》中仅用 0.5 次 A 键按压获取“Watch for Rolling Rocks”能量星的完整理论与路线。该成就依托于“半次按键”判定、敌人运送提升机制、超高速行走以及平行宇宙碰撞网格的数学利用。 “半次 A 键”的机械定义与判定逻辑 (0:05) 针对社区长期存在的质疑,pannenkoek2012 将单次完整的 A 键交互拆解为按下(Press)、按住(Hold)与释放(Release)三个独立物理阶段。其中按下阶段主要触发跳跃,而按住阶段则具备维持浮空踢击、游泳、转动缓落及羽帽滑翔等实际功能。由于释放阶段在挑战中缺乏机制用途,只要玩家在进入关卡加载前就已经处于按住 A 键的状态,便能在不产生新按键输入的前提下借用前置操作的按住状态。 Scuttlebug 运送、垂直提升与边缘错位 (3:40) 为了在不额外起跳的情况下获得垂直高度,路线利用了 Scuttlebug 的独特仇恨机制。与拥有固定原点坐标的其他敌人不同,Scuttlebug 每次撞击 Mario 时,其原点坐标(Home)都会立即重置为碰撞发生时的实际坐标。利用这一特性将其诱导碰撞,可逐步横向运送到目标平台下方。但由于房间门边界阻隔以及高度过低碰撞墙壁会导致敌人消失的保护机制,运送范围被严格限制在原生房间内。 由于 Scuttlebug 的检测范围呈无限延伸的垂直圆柱体,且离开房间触发区域会导致该房间实体彻底冻结,玩家可通过反复进出门口特定触发区,在房间冻结与激活的交替间隙诱导其向正下方的原点垂直冲刺,从而实现无视重力的台阶式上升。最终敌人被定位在星标平台边缘极其狭窄的 1×1 单位地板与墙壁碰撞错位裂缝下方。在此位置,只要 Mario 处于平台表面下方 79 个单位以内,引擎就会将他直接向上修正吸附至顶层表面。 超高速行走与无限速度积蓄原理 (8:00) Mario 在浅水覆盖的陡坡上向上跑动时,游戏物理会引发反向向下加速且无理论上限的引擎缺陷。针对常规地形会导致 Mario 滑入深水或被非垂直墙壁法线推开的限制,路线采用了社区成员 Tyler Kehne 发现的铁门天花板碰撞方案:利用铁门下边缘判定为低矮天花板的特性,在垂直碰撞检测判定空间不足时直接抵消 Mario 的位移,使其在原地持续累积反向速度。 由于速度过高会导致单帧位移突破铁门天花板判定,Mario 在达到一定速度阈值后会转向对准关卡外部的虚空(Out of Bounds)。游戏引擎严禁将 Mario 放置在地图边界之外,因而会完全取消其位移并将他锚定在原地。无限延伸的出界空间彻底解除了碰撞溢出的风险,支持玩家连续挂机约 12 小时以蓄积穿透地图所需的天文数字速度。 平行宇宙碰撞数学与 QPU 路径规划 (10:46) 游戏在处理地板三角形碰撞时,会将 Mario 的 32 位浮点数坐标强制截断转换为 16 位有符号整数(范围在 -32,768 至 +32,767 之间),超出部分则通过取模运算映射回原始地图边界框。因此,当 Mario 实际坐标飞出基础地图后,只要取模计算后的碰撞检测点仍落在合法地形上,引擎就会判定其踩在实体地面上。这种相隔约 65,536 个单位、仅具有虚拟地面判定而无任何可见纹理、动态实体或墙壁的虚拟网格被称为平行宇宙(PU)。 引擎单帧移动被细分为 4 个连续的四分之一微步(Quarter Steps),且每一步都必须落在有效地面上才能完成整帧位移,导致单帧移动基准单位必须跨越 4 个完整平行宇宙(记作 1 qpu)。同时,斜坡会削减实际水平行进的“实际速度”(De Facto Speed),要求原始速度必须精确匹配特定斜坡的“下沉速度”(Sinking Speed)。为避免将挂机时间延长至 25 小时去匹配第二级下沉速度,pannenkoek2012 精确筛选出 6 块坡度单调递减的地板三角形(T1 至 T6),利用速度随时间自然衰减的特性逐级衔接,实现了在第一级下沉速度下的跨斜坡攀爬,并通过规划微小角度与下沉速度偏差修正了因微步中断引起的 QPU 错位。 升降梯 AB 踢击与终局镜像发射 (22:38) 由于所有动态平台与升降梯仅存在于原始地图,Mario 在穿行 PU 空间后必须回到原点。面对上升平台时,极高的速度判定会导致角色直接穿透电梯坠亡;此时唯一的 0.5 次 A 键发挥了关键作用——在全程按住 A 键的基础上连按 B 键触发空中 AB 踢击,反复刷新与运动平台的垂直交互判定,从而成功搭乘升降梯到达洞穴高处。 在顶部的 Amazing Emergency Exit 平台,Mario 瞄准预先悬空的 Scuttlebug 展开最终发射。从发射台到目标的绝对距离在 QPU 网格上体现为右偏 10 个 PU、下偏 3 个 PU。为了确保最终位移能精确落回到原始地图上的敌人实体,操作前需预先反向移动至左偏 10 个 PU、上偏 3 个 PU 的平行宇宙起点。发射瞬间,Mario 踩踏刚因房间激活而开始下落的 Scuttlebug 借力腾空,随即在最高点施展臀击(Ground Pound)抵消下落动量,利用碰撞裂缝被平台向上吸附,成功收录该关卡能量星。 该路线完整证明了 Watch for Rolling Rocks 关卡在 0.5 次 A 键条件下的理论与操作可行性,但也依赖于极端苛刻的条件:长达 12 小时的蓄速过程、无即时视觉反馈的盲操对齐,以及仅有数帧容错的跨 PU 拦截判定。作者在视频结尾坦言,实际技术解析的庞大体量远超最初预估。

Detailed notes — zh

## Background 该视频由知名 TAS 创作者 pannenkoek2012 于 2016 年 1 月 12 日发布在 YouTube 平台。视频简介详细说明了作者如何在《超级马里奥64》迷宫洞穴关卡中,仅消耗 0.5 次按 A 键拿到“注意滚石”(Watch for Rolling Rocks)这颗星星,并附带了 TAS 制作工时、按键帧数以及平行宇宙(PU)等关键技术解析与说明。 ## TL;DR 视频首先通过拆解单次按 A 的物理三阶段,深入辩驳并确立了“按住 A 键进入关卡即算作 0.5 次按 A”的挑战判定基准。随后,作者展示了利用敌人碰撞重置机制搬运刺儿头(Scuttlebug),并通过跨房间冻结加载反复“升空”刺儿头至目标平台下方。紧接着,作者详解了水下斜坡超高速行走(HSWing)蓄速 12 小时的原理,结合变量转换截断引出的平行宇宙(PU)与 QPU 步长数学模型,规划出一条由 6 个坡度递减三角形无缝衔接的行进路线。最终,马里奥凭借全程按住 A 键所触发的 AB 踢稳定踩住升降梯,并在宏观坐标精准反算后跨越虚空弹跳踩怪、砸地卡入平台判定缝隙,成功实现 0.5 次按 A 夺星。 ## Atmosphere & style 整部解说兼具顶尖学术讲座般的严谨冷峻与硬核游戏玩家特有的狂热执着,语调平静清晰、逻辑推导步步为营。面对极其晦涩的底层代码漏洞与多维空间跳跃,作者用生动的比喻与可视化四屏监控化繁为简,听感上如同在旁听一场打破三维空间常识的理论物理研讨会。当花费十数小时换来的毫厘级操作在极短数帧内严丝合缝地达成终局闭环时,会带给观众一种近乎神圣而震撼的智力解谜快感。 ## Bulletin - [00:05](https://www.youtube.com/watch?v=kpk2tdsPh0A&t=5s) pannenkoek2012 通过按住 A 键进入关卡的方式,在全流程挑战中实现了“0.5 次按 A”收集迷宫洞穴中的“注意滚石”星星。 - [03:44](https://www.youtube.com/watch?v=kpk2tdsPh0A&t=224s) 利用刺儿头撞击更新“家”的特性及房间加载的激活冻结机制,作者成功将刺儿头垂直抬升至目标平台下方充当跳板。 - [08:07](https://www.youtube.com/watch?v=kpk2tdsPh0A&t=487s) 在浅水陡坡与铁门天花板判定的限制下,马里奥通过超高速行走原地蓄速长达 12 小时以突破平行宇宙网格。 - [15:33](https://www.youtube.com/watch?v=kpk2tdsPh0A&t=933s) 通过精准匹配 6 个坡度递减的地面三角形同步速度,作者成功抵消了 QPU 对齐偏差并乘升降梯到达关卡顶端。 ## Key takeaways - [00:05](https://www.youtube.com/watch?v=kpk2tdsPh0A&t=5s) 一次完整的按 A 包含按下、按住和松开三个物理阶段,在全通挑战中利用上一场景继承的按住状态被定义为 0.5 次按 A。 - [03:44](https://www.youtube.com/watch?v=kpk2tdsPh0A&t=224s) 刺儿头被马里奥撞击后会将其“家”的锚点重置为当前坐标,使玩家能够逐步将其搬运到全图指定位置。 - [05:01](https://www.youtube.com/watch?v=kpk2tdsPh0A&t=301s) 利用房间加载边界的微小激活区域,可在刺儿头跳跃至最高点时将其冻结在空中,实现无高度上限的垂直升空。 - [05:01](https://www.youtube.com/watch?v=kpk2tdsPh0A&t=301s) 平台转角处由于地板碰撞与墙体碰撞计算差异存在错位漏洞,处于其下方 79 单位内的马里奥会被直接吸附到地板表面。 - [08:07](https://www.youtube.com/watch?v=kpk2tdsPh0A&t=487s) 浅水中的陡坡具有倒退跑动无速度上限的判定缺陷,结合闸门底部的天花板判定可实现原地超高速行走蓄速。 - [09:59](https://www.youtube.com/watch?v=kpk2tdsPh0A&t=599s) 将意图位置对准越界虚空可触发引擎的位置拒绝更新保护,使马里奥摆脱实体几何限制并安全蓄满 12 小时的速度。 - [09:59](https://www.youtube.com/watch?v=kpk2tdsPh0A&t=599s) 平行宇宙(PU)源于浮点坐标转为有符号短整型时的截断与取模运算,使主地图外的遥远虚空映射出虚拟地面复本。 - [13:03](https://www.youtube.com/watch?v=kpk2tdsPh0A&t=783s) 引擎单帧移动包含四个四分之一步独立陆地检测,单帧位移必须跨越 4 个 PU(即 1 QPU)才能防止马里奥在虚空中坠落。 - [13:33](https://www.youtube.com/watch?v=kpk2tdsPh0A&t=813s) 斜坡坡度会削减名义速度转化为水平位移的比例,仅当实际有效速度完美对齐 PU 网格时该速度才被称为同步速度。 - [15:33](https://www.youtube.com/watch?v=kpk2tdsPh0A&t=933s) 地下湖上行路径筛选出的 6 个三角形坡度严格递减,允许速度衰减的马里奥仅凭第一同步速度连续衔接,避免了 25 小时的蓄速开销。 - [19:51](https://www.youtube.com/watch?v=kpk2tdsPh0A&t=1191s) 遭遇出界、天花板判定或切换到新坡度斜坡会导致四分之一步提前中断,从而打破单帧必须跨越整倍数 QPU 的移动限制。 - [22:38](https://www.youtube.com/watch?v=kpk2tdsPh0A&t=1358s) 全程保持按住 A 键使马里奥能通过按 B 键连续施展空中踢击,从而产生有效碰撞踩住升降梯并获得宝贵的高度。 - [22:38](https://www.youtube.com/watch?v=kpk2tdsPh0A&t=1358s) 最终弹跳前需根据目标移动向量进行反向坐标预设,并在进入目标 PU 激活刺儿头下坠后的数帧极短窗口内命中跳板翻上平台。 ## Detailed walkthrough ### [00:05](https://www.youtube.com/watch?v=kpk2tdsPh0A&t=5s) “0.5次按A”的概念与争议 pannenkoek2012 开篇说明,本视频将详细拆解他如何仅用 0.5 次按 A 键(0.5 A-presses)就在迷宫洞穴(Hazy Maze Cave)中取得“注意滚石”(Watch for Rolling Rocks)这颗力量星星。然而,在正式进入游戏操作前,他必须先彻底澄清一个持久的争议。每次他发布标题含有“0.5 次按 A”的视频,评论区都会反复出现一模一样的质疑,询问半次按 A 究竟是什么意思。尽管他在每个视频简介的开头都附带了一整段长文解释,甚至特意写明“如果你好奇什么是半次按 A,在发问前请先阅读这段话”,但依然无济于事。他调侃道,或许大家需要的不是枯燥的文字说明,而是一个生动的具体范例。 为了讲明这个概念,他以隐藏关卡“彩虹上的飞行马里奥”(Wing Mario Over the Rainbow)为例,且不讨论整颗星星的收集,仅聚焦于关卡开局“到达大炮平台”这一必经阶段。如果有人认为到达该平台需要 0 次按 A,那是错误的,因为不用 A 键马里奥根本飞不了那么远;若说需要 1 次按 A,马里奥确实可以做到,但利用机制还能做得更好——只需 0.5 次。具体做法是:马里奥在进入该关卡时就已经按住了 A 键,随后直接利用这股按住状态飞抵大炮平台。 针对可能的质疑声,pannenkoek2012 模仿起观众的口吻并向观众喊话:“‘An A press is an A press. You can't say it's only a half.’ Well, TJ ""Henry"" Yoshi, hear me out.” 他解释道,一次完整的“按 A”在物理与逻辑上其实包含三个离散阶段: 1. **按下(Pressed)**:按键从抬起到被按下的那一瞬间; 2. **按住(Held)**:按键维持在按下状态的时间段; 3. **松开(Released)**:按键被释放弹回的瞬间。 这三个阶段结合在一起才构成一次完整的按 A。在常规游玩中,“按下”阶段最有用,因为它是唯一能触发马里奥主动起跳的信号;然而在某些特定场景下,单凭“按住”阶段就已足够生效。按住 A 键可以让马里奥在空中踢腿(little kicks)、在水中游泳、在旋转下落时减缓下坠速度,或是利用羽毛帽(Wing Cap)滑翔减速。至于“松开”按键的动作,目前在整个速通挑战中没有任何利用价值。 随后,pannenkoek2012 算了一笔账:在“彩虹上的飞行马里奥”中,从起点飞到大炮平台只需“按住 A”,从第一座大炮发射需要“按下 A”,从第二座大炮发射又需要“按下 A”。如果孤立地看这个关卡,表面上需要 3 次按 A。但若放在完整的“A 键挑战”(A Button Challenge,简称 ABC 全通挑战)全流程中,进入关卡本身之前就已经执行过按 A 动作(例如跳入画作或关卡入口)。一个天真的算法是把进关卡的 1 次加上关卡内的 3 次算作 4 次;但 TAS 路线可以将进关卡时按下的 A 键一路死死按住不放,直接带入关卡充当飞向大炮平台的“按住 A”。因为前半段操作只需要“按住”而不需要“重新按下”,它实际上寄生(leeched off)了前一个动作的按键。 因此,这个关卡对整个全通挑战而言只额外增加了 2 次按 A。为了精准描述这种“单关看向上取整为 3 次,全通上下文结合指向下取整为 2 次”的按键现象,社群将其定义为 2.5 次按 A。“In conclusion, since that first A press counts in some contexts, but adds no additional A presses in other contexts, we refer to it as a half A press.” 在本期视频开局左下角的操作监视器中可以看到,马里奥进图时 A 键就已处于被按住状态,因此它并不会为整个通关挑战增加额外的 A 键消耗。 ```mermaid flowchart TD accTitle: A Button Input Breakdown accDescr: 解释单次按A的三个物理阶段,以及按住状态在全流程中的继承逻辑。 subgraph SinglePress ["单次按 A 的物理构成"] P["1. 按下 (Pressed)<br/>触发跳跃等主动动作"] --> H["2. 按住 (Held)<br/>维持滑翔/游泳/踢腿"] H --> R["3. 松开 (Released)<br/>目前无特殊机制效用"] end subgraph FullGameTransfer ["全通挑战 (ABC) 中的按键寄生"] Prev["上一场景按下的 A 键"] -->|"维持按住状态带入关卡"| LevelStart["关卡开局 (无需重新按下)"] LevelStart -->|"利用按住状态完成位移"| HalfPress["计为 0.5 次按 A"] end ``` ### [03:44](https://www.youtube.com/watch?v=kpk2tdsPh0A&t=224s) 刺儿头搬运(Scuttlebug Transportation) 解释完核心概念后,画面回到马里奥在迷宫洞穴中的具体行动。此时使用的首个重要技巧名为“刺儿头搬运”(Scuttlebug Transportation)。与游戏中的大多数敌人一样,刺儿头(Scuttlebug)在三维空间中拥有一个初始的固定锚点坐标,称为“家”(Home)。它们会以这个家为中心,在特定半径范围内来回巡逻;一旦马里奥闯入该侦测半径,刺儿头就会主动扑向马里奥发起攻击。 绝大多数敌人的“家”是永久固定的,但刺儿头具有一种罕见的特殊机制:只要刺儿头撞击到马里奥,它的“家”就会立刻重置并更新为发生碰撞瞬间刺儿头所在的坐标点。利用这一特性,玩家可以诱导刺儿头走向其警戒半径的边缘,在边缘处主动与其碰撞,从而将刺儿头的“家”向目标方向推进一段距离。通过反复引诱与碰撞,便能将刺儿头连同它的“家”一路搬运到地图各处。 在实施该操作时有几个严苛的限制条件与技术细节: - 刺儿头无法被带出其原生的房间,它们会被门牢牢挡住。pannenkoek2012 调侃道:“‘So if your dream was to bring all the Scuttlebugs together for one big jamboree, I'm sorry, but it's not going to happen.’” - 刺儿头存在特殊的消失机制:如果刺儿头走到其当前“家”下方太深的位置并且撞到墙壁,它就会直接凭空消失。pannenkoek2012 解释,这大概是任天堂开发人员为了防止刺儿头跌入深坑后在底部乱跑而设置的清理代码。 - 在本段路线中,他细致地避开所有可能导致敌人消失的判定,将刺儿头精准搬运到了“注意滚石”星星悬空平台的正下方角落。 ### [05:01](https://www.youtube.com/watch?v=kpk2tdsPh0A&t=301s) 刺儿头升空(Scuttlebug Raising) 将刺儿头送到滚石平台正下方后,接下来执行的技巧被称为“刺儿头升空”(Scuttlebug Raising)。视频画面采用左右分屏,左侧显示鸟瞰俯视图,右侧显示侧视图。当马里奥离开滚石房间时,房间内的一切都会停止运作。这是因为马里奥64的房间加载机制规定,只有当马里奥身处该房间内部,或者站在门外极小的一片特定黄色区域内时,该房间内部的物体和敌人才是活跃状态。如果马里奥退到门外且不在黄色区域内,整个滚石房间就会陷入彻底的黑屏冻结,房内所有物体不可见且停止运动。 利用这个“激活/冻结”的时间差,可以通过极其精密的循环操作使刺儿头凭空踏步爬升: 1. **触发扑击**:马里奥在门外进入刺儿头的警觉半径。尽管此时刺儿头处于未激活状态(隐形且无法位移),但底层代码依然允许它转向马里奥并开启扑击动作(lunge)。 2. **重置朝向**:马里奥立刻退离该半径,处于冻结中的刺儿头会自动转回面向它的“家”。 3. **释放上升轨迹**:马里奥跨入黄色激活区域。刺儿头立即开始执行刚才锁定的扑击跳跃。 4. **冻结最高点**:在刺儿头跳跃达到抛物线最高顶点的一瞬间,马里奥瞬间撤出黄色区域,滚石房间再次被冻结。这使得刺儿头被锁死在最高处,完全不会下坠。 5. **归位与循环**:由于在刚才的微小位移中刺儿头越过了它的“家”,它会再次转身面向自己的锚点,为下一次上升做好准备。 ```mermaid flowchart TD accTitle: Scuttlebug Raising Cycle accDescr: 刺儿头升空操作的四步循环机制,利用房间激活区域冻结其下落。 A["马里奥进入警觉半径<br/>(刺儿头未激活但锁定扑击)"] --> B["马里奥退出半径<br/>(刺儿头转向面朝其‘家’)"] B --> C["马里奥踏入黄色区域<br/>(激活房间,刺儿头向上起跳)"] C --> D["到达抛物线顶点瞬间退出区域<br/>(房间再次冻结,锁定高度)"] D -->|"重复执行"| A ``` 只要不断重复这个循环,刺儿头就能一层一层往上“爬升”。pannenkoek2012 解释说,幸运的是刺儿头的侦测范围并非球体,而是一个在 Y 轴上下无限延伸的圆柱体(cylinder that extends up and down infinitely)。因此无论刺儿头被抬升到多高的高度,站在下方的马里奥永远都可以步入其感应区触发扑击,理论上抬升高度没有任何上限。 关于抬升的具体朝向,操作中有一个分歧点:pannenkoek2012 选择在激活刺儿头时,让自己身处其警戒半径**之外**。这样刺儿头只会向着它原本的“家”跳跃,从而沿着笔直的垂直线上升。如果选择在警戒半径**之内**激活,刺儿头就会朝向马里奥(即门口方向)扑击,这虽然省去了等待刺儿头调头的时间、抬升效率更快,但会导致它远离目标点。 他必须把刺儿头垂直抬升到平台角落的正下方,是因为该平台的转角顶部存在一处被称为“错位”(Misalignment)的引擎漏洞。在《超级马里奥64》的底层代码中,游戏对“地板碰撞”(Floor Collision)与“墙体碰撞”(Wall Collision)的检测逻辑存在计算差异。这种差异在特定几何转角处造成了一个 $1 \times 1$ 单位的判定缝隙。在这个缝隙内,马里奥可以钻入地板下方,而不会被周围的墙壁向外推开;更关键的是,游戏内置了吸附机制:如果马里奥身处地板下方小于 79 个单位的高度范围内,引擎就会直接将马里奥硬生生“吸附”并传送到地板表面之上。 ### [08:07](https://www.youtube.com/watch?v=kpk2tdsPh0A&t=487s) 超高速行走(Hyper Speed Walking) 当刺儿头在目标角落悬停至合适高度后,马里奥必须积蓄出常理无法想象的超高速度。为了产生这种速度,他使用的机制称为“超高速行走”(Hyper Speed Walking,简称 HSWing)。玩家通常知道游戏中有许多过于陡峭而无法站立的斜坡,马里奥踩上去只会无助地向下滑落;但鲜为人知的是,一旦这些陡坡浸泡在浅水区中,马里奥就可以在其上正常站立。 这种水下斜坡具有奇异的物理特性:若试图沿着斜坡向上跑,马里奥实际上会以一种完全没有速度上限的方式**向后倒退跑动**,且速度会呈指数级不断累加。但在常规环境下,玩家很难真正蓄出极速,因为马里奥会在极短时间内倒退冲入深水区导致状态被重置。虽然可以通过以近乎平行于斜坡但极其微弱地向上偏离的角度跑动来延长蓄速时间,但斜坡的长度终究有限,或者马里奥会因速度过快而无法转弯。 要实现原地蓄速,就必须找到障碍物卡住马里奥的位移: - 如果斜坡上方存在一面绝对垂直于坡度的墙壁,马里奥确实可以面壁蓄出相当可观的速度,但最终依然会发生穿墙穿透; - 如果墙壁与斜坡不垂直,马里奥就会沿着墙体滑入水中。其深层机制在于:游戏中的墙体本质上是向外施加垂直推力的矩形。当马里奥以某个夹角冲向墙壁时,底层系统首先算出他预期的下一帧坐标,墙壁再将该坐标沿法线向外推挤,合力导致马里奥产生沿着墙面的净位移,最终不可避免地滑落到水中。 正当该机制看似无法持久蓄速时,社区玩家 Tyler Kehne 找到了突破口:利用迷宫洞穴中的铁丝网闸门(Gate)。闸门的下沿在碰撞检测中被系统认定为“天花板”(Ceiling)。马里奥64的物理引擎极其厌恶让马里奥挤入紧贴天花板正下方的空间,判定马里奥无法容纳在该处。因此,当马里奥在斜坡上以倒退姿态撞向天花板时,引擎会判定该位移无效并直接拒绝移动马里奥。 利用这堵天花板的限制,马里奥终于得以在原地毫无阻碍地疯狂积攒速度。然而,即便是天花板也无法实现无上限的蓄速,一旦速度累加到单帧位移彻底跨越整个闸门厚度时,马里奥就会瞬间突破束缚飞出。为了不让速度失控穿帮,就必须在达到临界点前执行精准转向,将速度重定向。 - 关键机制总结:浅水中的特定陡坡具有倒退加速无上限的判定缺陷。 - 空间限制:利用闸门底部的天花板判定(Ceiling check)产生“位置拒绝更新”现象,从而将倒退位移彻底锁死在原地。 - 临界风险:单帧位移过大仍会发生量子穿透脱离闸门,必须在临界前通过方向重定向将速度转入下一阶段的应用。 ### [09:59](https://www.youtube.com/watch?v=kpk2tdsPh0A&t=599s) 越界蓄速与平行宇宙(PU)的数学原理 在利用超速行走(Hyper Speed Walking, HSW)积蓄速度时,马里奥移动时的意图下一步位置(intended next position)一旦穿过墙壁进入越界区域(out of bounds),游戏的保护机制便会被触发。由于底层程序拒绝将马里奥放置在越界虚空中,他不会产生位移,而是像被天花板阻挡一样卡在原地。然而与长度有限的天花板不同,越界区域在空间上是无限延伸的,这意味着玩家可以在完全不用担心“挣脱束缚”的前提下,毫无上限地持续积蓄速度。利用这一点,操作流程是先打开铁门,利用铁门天花板将速度提升到一定程度,随后微调马里奥的角度直面越界区域,把剩余的速度蓄满。 这引出了一个核心疑问:为什么需要花费足足 12 个小时去积蓄如此庞大的速度?正如 pannenkoek2012 所言:“Now you're probably wondering what I'm going to need all this speed for after all I do build up speed for 12 hours, but to answer that we need to talk about parallel universes, and if you thought my other tangents were complicated just you wait.”(你可能想知道我为什么需要这么高的速度,毕竟我足足积蓄了 12 个小时;但要回答这个问题,我们必须谈谈平行宇宙。如果你觉得我之前扯的那些技术细节已经够复杂了,那你且等着瞧吧。) 平行宇宙(Parallel Universe,简称 PU)的本质源于《超级马里奥64》底层的变量类型转换: 1. **坐标数据类型**:马里奥的实际物理位置在内存中是以单精度浮点数(Floating Point)存储的,可以包含任意精细的小数。 2. **地板判定截断**:当游戏运算马里奥是否踩在地面三角形(Floor Triangles)上时,系统会将该浮点数强制转换为有符号短整型(signed short)。 3. **坐标范围限制**:该短整型的有效取值区间严格限制在 $[-32768, 32767]$。所有超出该范围的数值都会通过截断小数和模运算(Modulo Operator)折叠映射回这个由 65536 个单位构成的空间立方体内。 ```mermaid flowchart TD accTitle: PU Floor Detection Logic accDescr: 流程图展示马里奥浮点坐标如何经短整型转换与取模映射到主地图地板检测。 subgraph Physics["马里奥物理坐标"] A["浮点数坐标 (任意小数 / 超大数值)"] end subgraph Conversion["碰撞检测转换"] B["截断小数并转为 Short Integer"] C["模运算限制在 [-32768, 32767]"] end subgraph Collision["地板判定结果"] D{"映射位置是否在主地图有效陆地上?"} E["判定为踩在陆地上 (允许站立 / 移动)"] F["判定为悬空 / 坠落"] end A --> B B --> C C --> D D -->|是| E D -->|否| F ``` 因此,只要马里奥物理坐标落在主地图箱体之外,他的“实际位置”与“地板检测位置”就会发生分离。如果马里奥身处极度遥远的虚空,但其坐标取模后映射回的主地图对应点正好是一片陆地,游戏便会认定马里奥此时稳稳踩在地面上。这就意味着主地图之外存在着无数个虚拟的陆地复本——每一个与主地图尺寸完全相同的虚拟空间网格单元,都被称为一个平行宇宙(PU)。 - 地板检测坐标边界:$[-32768, 32767]$(包含两端整数值)。 - 平行宇宙的网格特性:向外呈近乎无限的网格状分布,但实际空间间隔非常遥远。 - PU 的实际环境缺陷:平行宇宙完全没有贴图画面(全部不可见)、没有任何物体(无电梯、无道具箱)、没有敌人、没有金币或星星,甚至不存在任何墙壁碰撞。 - 硬件崩溃风险:在真实 N64 游戏机上,若让相机跟随马里奥离开主地图进入 PU,主机会立即死机(Crash)。防崩溃手段是在马里奥离开前,将相机视角彻底锁定在主地图内。 --- ### [13:03](https://www.youtube.com/watch?v=kpk2tdsPh0A&t=783s) QPU 与四分之一步移动检测 仅拥有足以跨越到隔壁 PU 的速度并不能完成穿越。游戏在处理马里奥单帧的位移时,会将其划分为四个“四分之一步”(Quarter Steps),并且在**每一个**四分之一步结束时都会独立检测马里奥脚下是否有陆地。如果马里奥单帧的速度只能跨越 1 个 PU,那么在第 1、第 2、第 3 个四分之一步时,他的坐标取模后会落在主地图陆地之外的真空中,导致直接判定失足下坠。 为了确保每个四分之一步都精准落在有效陆地上,单帧最基础的位移跨度必须一口气横跨 4 个 PU。这种“4 倍 PU 距离”被定义为一个 QPU(Quadruple PU)。只有以整倍数 QPU 的步长移动,四个检测点才能完美对齐对应网格的有效陆地。 ```mermaid flowchart LR accTitle: Single Frame 4 Quarter Steps in 1 QPU Movement accDescr: 一帧之内的四个四分之一步如何分别落在四个连续的平行宇宙中。 Start["起始点 (PU 0)"] -->|"Step 1 (1/4)"| PU1["PU 1 对应陆地"] PU1 -->|"Step 2 (2/4)"| PU2["PU 2 对应陆地"] PU2 -->|"Step 3 (3/4)"| PU3["PU 3 对应陆地"] PU3 -->|"Step 4 (4/4)"| PU4["目标点 (PU 4 / 1 QPU)"] ``` --- ### [13:33](https://www.youtube.com/watch?v=kpk2tdsPh0A&t=813s) 坡度、De Facto 速度与同步速度(Syncing Speed) 然而,马里奥移动的距离并不直接等同于其名义速度(Speed)。在平地上拥有 31 点速度的位移,与在陡坡上拥有同样 31 点速度的位移截然不同——坡度越陡,实际转化为水平行进的距离比例就越小。这一机制只取决于斜坡的陡峭程度(Steepness),与马里奥面对上坡、下坡还是侧向无关。 为此,pannenkoek2012 引入了速度与位移的区分: - **名义速度(Actual Speed)**:游戏内部记录的马里奥基础速度数值(在示意图中用蓝色表示)。 - **实际有效速度(De Facto Speed)**:经坡度削减后、实际推动马里奥前进的有效位移量(在示意图中用绿色表示)。 要想移动 1 个 QPU 的物理距离,需要的不是名义上的 1 QPU 速度,而是 **1 QPU 的 De Facto 速度**。由于坡度惩罚的存在,名义速度往往需要远高于 1 QPU 才能达成补偿。当一名义速度经由当前斜坡计算后,其 De Facto 速度的四个四分之一步恰好与 PU 网格对齐时,这一特定速度就被称为该斜坡的**同步速度(Syncing Speed)**。 同步速度具有整倍数性质: - **第一同步速度(Lowest / First Syncing Speed)**:单帧位移精准跨越 1 QPU。 - **高阶同步速度**:第一同步速度的任意整数倍(如 2 倍、3 倍等)也是合法的同步速度,分别对应单帧横跨 2 QPU、3 QPU 等更远的跨度。 --- ### [15:33](https://www.youtube.com/watch?v=kpk2tdsPh0A&t=933s) 路线规划:城堡秘密水族馆与滚石之星的坡度衔接 斜坡不同,其对应的同步速度集合就完全不同。在《进入秘密水族馆(The Secret Aquarium)》的路线中,马里奥需要相继穿越多种斜坡:HSW 蓄速坡道、水边斜坡、城堡门厅平地、城堡大厅斜坡楼梯,最后抵达二楼平地。由于离开蓄速坡道后便无法继续产生速度,名义速度只能随着移动逐步衰减。若最初仅积蓄到第一斜坡的“第一同步速度”,中途衰减后便会低于后续斜坡所需的同步速度,导致断层卡死。解决方案是直接蓄速到第一斜坡的“第二同步速度”(支持 2 QPU 跨度),虽然耗时成倍增加,但足以支撑一路衰减并依次满足各斜坡的同步要求。 然而,第一同步速度需要蓄速约 12 小时,第二同步速度则需要惊人的 25 小时!寻找一条完全依靠“第一同步速度”完成的路线,能够直接节省整整 12 个小时的运算时间。 在“Watch for Rolling Rocks”这颗星星的路线规划中,尽管马里奥拥有无限的水平速度,但垂直高度(Z轴向上)的位移完全无法通过 PU 纯水平移动来获得。为了从地下湖底爬上洞窟顶端,马里奥必须沿着斜坡向上跑并乘坐升降梯: ```mermaid flowchart TD accTitle: Watch for Rolling Rocks PU Routing Flow accDescr: 马里奥从蓄速坡道出发到达滚石平台的垂直提升路线。 A["HSW 蓄速斜坡 (Lake Area)"] --> B["地下湖向上通道 (T1 至 T6 连续三角形)"] B --> C["乘坐第一部升降梯"] C --> D["乘坐第二部升降梯"] D --> E["登上 Amazing Emergency Exit 紧急出口平台 (最高点)"] E --> F["对准角度发射向滚动岩石平台"] F --> G["借助预先放置的 Scuttlebug 产生致命额外弹跳"] G --> H["砸地利用角落错位卡上平台夺星"] ``` 地下湖向上的坡道极为复杂,由数十个坡度各异的地板三角形拼接而成。为了避免速度要求超标,pannenkoek2012 经过精密排查与计算,从中筛选出了 6 个关键三角形,命名为 **T1 至 T6**: - 这 6 个三角形的坡度陡度**严格递减**,因此马里奥在速度自然衰减的过程中,可以顺次满足它们每一个的第一同步速度。 - 它们在垂直高度上无缝衔接,覆盖了由底至顶的完整垂直落差,中间没有任何断层。 - 这一精妙的选点使得路线完全规避了 2 QPU 需求,成功将 TAS 蓄速时间锁定在 12 小时而非 25 小时。 在进入实战演示前,pannenkoek2012 补充了 PU 移动的核心微调机制:马里奥的速度不必与同步速度 100% 绝对一致。若速度略低于同步速度,马里奥在主地图坐标系中会表现为**相对向前移动**;若速度略高于同步速度,则会表现为**相对向后倒退**;偏离同步速度的差值越大,相对移动的位移就越显著。同理,微调马里奥面对的角度,哪怕只是极微小地偏离主轴方向,也能产生相对侧向位移,这是在无网格主地图坐标上实现精确定位的关键手段。 ### [19:51](https://www.youtube.com/watch?v=kpk2tdsPh0A&t=1191s) QPU 对齐与打破 4 PU 移动限制的物理机制 由于 QPU 跨越的距离极大,Mario 的朝向只要发生微小的偏角,横向偏差就会在 QPU 距离上被成倍放大,导致他被直接甩出数英尺远。听众基于之前的规则或许会认为,Mario 每次移动只能以 4 个 PU 为单位进行跳转,但事实并非如此。若某一个四分之一拍(quarter step)落在了出界区域(out of bounds)或天花板上方,该四分之一拍就会被判定为无效;由于 Mario 的移动机制是“执行到第一个无效四分之一拍前为止”,他实际上会提前停在中间的某个四分之一拍上,从而打破 4 PU 的步长限制。 此外,坡度变化也会干扰四分之一拍的连续性。如果在某个四分之一拍中踩到了不同的斜坡,Mario 的实际速度(de facto speed)就会改变,进而改变下一个四分之一拍的位移距离,导致步幅无法再与 PU 网格精准同步,使他最终滞留在新的斜坡上。为了便于理解,所有与主地图距离为 4 的倍数的 PU 被统称为“QPU 网格”(QPU grid);身处该网格上的状态被称为“QPU 对齐”(QPU aligned)。pannenkoek2012 强调了路线规划的严苛性:“管理你的 QPU 对齐是规划 PU 路线的诸多挑战之一。”(“So managing your QPU alignment is one of the many challenges of planning a PU route.”) ```mermaid flowchart TD accTitle: QPU 对齐机制与破坏条件 accDescr: 展示四分之一拍在遇到出界或斜坡变换时破坏 4 PU 规则的机制 subgraph Normal["常规 4 PU 循环"] A["保持 QPU 对齐"] --> B["4 个有效四分之一拍"] B --> C["位移整整 4 个 PU"] end subgraph Disruption["对齐破坏条件"] D["遇到出界或天花板"] --> E["四分之一拍提前终止"] F["踩到新斜坡变换实际速度"] --> G["步长与 PU 网格失步"] E --> H["产生非 4 整数倍位移"] G --> H H --> I["进入 QPU 失齐状态"] end I --> J["需靠预定斜坡序列或出界修正"] ``` - **QPU 网格定义**:距离主地图为 4 的整数倍的平行宇宙集合。 - **失齐修正难度**:一旦 QPU 失齐,如果周围没有出界边界,且斜坡序列已经被固定,想要重返主地图将极其困难。 ### [21:18](https://www.youtube.com/watch?v=kpk2tdsPh0A&t=1278s) 四屏监控界面与湖区斜坡导航 在正片正式演示前,画面展示了专门设计的四个分屏,以解决 PU 移动不可见的问题。由于主摄像机为了防止游戏崩溃而被固定在主地图上,“标准视图”(Standard view)几乎看不出 Mario 的动向;“相对视图”(Relative view)模拟了若摄像机跟随 Mario 且 PU 实体化时的第一视角;“相对地图”(Relative map)提供了单张地图范围内的俯视图;“PU 地图”(PU map)则标明了 Mario 在宏观 PU 网格中的实时坐标。 监控界面配置完成后,PU 移动正式展开。Mario 沿着从湖区向上延伸的路径前进,借助预先选定的 6 个地面三角形向上移动。他登上一个三角形后,让速度自然衰减至该斜坡对应的“沉降速度”(sinking speed),随后逆坡向上爬行,并跃迁到下一个三角形。在相对视角中,当他的速度略大于沉降速度时,就会呈现相对倒退的移动效果;朝向只要偏离正方向,就会发生横向移动。每次在不同三角形之间转移都会打乱 QPU 对齐状态,但整个路线经过了极为严密的数学计算,使得所有的对齐偏差在走完第 6 个三角形时刚好完全抵消,让 Mario 重新恢复 QPU 对齐。 - **四屏监控体系**: - **Standard view**:游戏原生主地图画面(防止游戏崩溃而锁定)。 - **Relative view**:Mario 在当前所处 PU 内的局部视角。 - **Relative map**:局部 PU 内的二维俯瞰坐标。 - **PU map**:在宏观平行宇宙网格中的具体 PU 坐标。 - **斜坡沉降与对齐抵消**:利用 6 个不同坡度的三角形逐步提升高度,并让不同坡度造成的 QPU 偏差相互抵消归零。 ### [22:38](https://www.youtube.com/watch?v=kpk2tdsPh0A&t=1358s) AB 踢升降梯与精准跃迁跳杀 抵达第 6 个三角形后,Mario 通过一连串微小的之字形移动(zigzag)向主地图靠拢。因为平行宇宙中不存在任何交互实体,想要搭乘升降梯就必须返回主地图。当 Mario 接触升降梯时,起初电梯并没有判定碰撞,直到他开始出腿踢击。pannenkoek2012 解开了“按住 A 键”这一限制条件的核心谜题:正是因为全程按住了 A 键,他才能在不松开 A 的情况下按 B 键使出连续的小踢击(AB kicks)。pannenkoek2012 指出:“没有这些踢击,我就会穿透升降梯,但有了这些踢击,我就能乘着它上升来获取宝贵的高度。”(“Without these kicks I go through the elevator, but with the kicks I can ride it up to gain precious height.”) 升降梯升至高位后进入收尾阶段。Mario 首先踢击跳上“惊人紧急出口”(Amazing Emergency Exit)平台,随后转身全力弹射冲向预先放置的 Scuttlebug。这一段终结跳跃的实际位移是向右 10 个 PU、向下 3 个 PU;为了精准降落在主地图的目标点上,他提前将自己的位置反向偏移到向上 3 个 PU、向左 10 个 PU 的位置,并同步校准了局部的相对坐标。瞬息之间,Mario 飞越长空踩中 Scuttlebug 弹跳借力,并在平台错位缝隙处施展下砸(ground pound),成功翻上“注意滚石”(Watch for Rolling Rocks)平台摘得星星。 视频尾声通过快放补充了此前因卡顿而不易看清的 Scuttlebug 升空全过程。在升空末尾,pannenkoek2012 特别进行了两次横向推移,将其送至平台边缘,补足了原本过远的距离。此外,侧面视角的 PU 移动回放表明,一旦 Mario 踏入该房间对应的 PU 镜像区域,Scuttlebug 就会被激活并开始下坠,留给 Mario 冲刺踩怪的窗口期仅仅只有屈指可数的数帧。pannenkoek2012 感慨原本没料到解说会拉长到 25 分钟,但这套复杂的技术体系确实需要如此详尽的剖析。 - **0.5 次 A 键的作用**:按住 A 键使得按 B 键可以触发空中踢击,利用踢击判定踩住升降梯,避免穿模下坠。 - **终局跃迁坐标反算**:目标移动向量为 (+10 PU X, -3 PU Y),因此初始起跳点必须设在 (-10 PU X, +3 PU Y)。 - **严苛的时间窗口**:进入该房间的 PU 版本瞬间,Scuttlebug 即被唤醒并开始自由落体,整个击打操作必须在极短的数帧之内精确命中。 ## Notable quotes > [00:05](https://www.youtube.com/watch?v=kpk2tdsPh0A&t=5s) In conclusion, since that first A press counts in some contexts, but adds no additional A presses in other contexts, we refer to it as a half A press. — pannenkoek2012 > [19:51](https://www.youtube.com/watch?v=kpk2tdsPh0A&t=1191s) So managing your QPU alignment is one of the many challenges of planning a PU route. — pannenkoek2012 ## Mentioned pannenkoek2012, 超级马里奥64, 迷宫洞穴, 彩虹上的飞行马里奥, TJ "Henry" Yoshi, A Button Challenge, Scuttlebug, Tyler Kehne, 秘密水族馆, Amazing Emergency Exit, N64 ## Video description THIS VIDEO IS OUTDATED - SEE A BETTER VERSION OF THIS VIDEO HERE: https://youtu.be/aFx7woWkZbc I collect the star Watch for Rolling Rocks in Hazy Maze Cave using 0.5 A presses. The A press is to perform AB kicks on the rising elevators. Without doing these kicks, Mario would go through the elevator, and so there'd be no way to navigate out of the lake area with QPU speed. For the record, this is TAS. This video is an improvement from my previous video in which I collected this star in 1 A press. You can find that video here: https://youtu.be/yGic8wwhm6g. Since then, we discovered PU movement and scuttlebug raising, which made this strat possible. For convenience, here are the informative parts of the video: 0:35 for half A presses 3:44 for scuttlebug transportation 5:01 for scuttlebug raising 8:07 for hyper speed walking (HSWing) 10:40 for parallel universes (PUs) Here is a play by play of what I do. First, I use scuttlebug transportation to move a scuttlebug to the corner of the Watch for Rolling Rocks platform. Then, I use scuttlebug raising to raise him to about the height of the platform. Next, I use hyper speed walking to generate massive speed. Finally, I use PU movement to navigate to the top of the course, launch to the scuttlebug to bounce on him, and ground pound in the misalignment of the platform to get onto it. And from there, I collect the star. If you want to see my workspace/calculations and read about the process of TASing this, I've chronicled it here: http://imgur.com/gallery/rK24p .m64 stats: Length: 13 hours and 49.5 minutes Re-records: 6824 Frames: 2986271 (1493100 input) This video is without a doubt the one that I've put the most time into out of all my videos. I knew this going in, and so I decided to keep a log of how much time I spent on each aspect of it (note: if my computer was doing work like compiling/recording and I could let it be, I didn't count that time). Here are the stats: Time to TAS: 12 hours Time to record/manage raw avis: 9 hours Time to create uncommentated version: 31 hours Time to add visuals/commentary: 75 hours Update: The PU route used in this video actually crashes on console, as it turns out PU crashes can still occur even when locking the camera in the main map. Nevertheless, an alternate route has been found that avoids these PU crashes and has been console verified: https://youtu.be/T-G4ymVwajw Commentated video playlist: https://youtube.com/playlist?list=PLmvvhlevqC2ftzAeEpTaI7eS6b4nPN3ji Uncommentated Version: https://youtu.be/X-zAWbM50JM ABC Playlist: https://www.youtube.com/playlist?list=PLmvvhlevqC2d6vis077yFHuLJHYtTtqe_ ABC Routes: https://docs.google.com/document/d/1ypRVVRyf4x-v8GqCSmKYnicrfKSIjao3Y1ZVl52RIyM/edit [Source](https://www.youtube.com/watch?v=kpk2tdsPh0A)

Source quotes

[0:05] pannenkoek2012: In conclusion, since that first A press counts in some contexts, but adds no additional A presses in other contexts, we refer to it as a half A press. [19:51] pannenkoek2012: So managing your QPU alignment is one of the many challenges of planning a PU route.

Original transcript

[0:05] in this video I'll be explaining exactly [0:07] what I do to collect watch for Rolling [0:09] rocks in 0.5 a presses but first we need [0:13] to clear something up because every time [0:15] I post a half a press video I get the [0:17] same comments over and over asking what [0:19] it means even though I always have a [0:22] whole paragraph in the description [0:23] explaining it which even starts with if [0:26] you're wondering what a half apress is [0:27] read this before commenting to ask but [0:29] but maybe what you guys need isn't a [0:31] paragraph maybe you guys need an example [0:34] so consider Wing Mario Over the Rainbow [0:37] not even the whole star just consider [0:39] getting to that Cannon platform which is [0:42] a necessary part of getting the star so [0:45] how many a presses does it take to get [0:46] there well if you say zero that's wrong [0:50] because then Mario can't go far enough [0:52] if you say one well it's true that Mario [0:54] can get there with one but we can do a [0:57] little better we can do it in half an [0:59] aess to do that we start the level [1:02] already holding a and then we use that a [1:04] press to reach the platform now hold on [1:07] I know what you're thinking an aess is [1:09] an aess you can't say it's only a half [1:12] well TJ Henry Yoshi hear me out an aess [1:16] actually has three parts to it when a is [1:19] pressed when a is held and when a is [1:23] released and together this forms one [1:25] complete aess now usually it's the [1:29] pressing that's used useful because [1:31] that's the only part that makes Mario [1:32] jump however sometimes it's sufficient [1:35] to just use the holding part which [1:37] allows Mario to do little kicks to swim [1:40] in water to fall slowly while twirling [1:43] and to fall slowly with the wingap and [1:46] as for the release well there's [1:47] currently no cases where that's useful [1:49] or important so don't worry about that [1:52] part now if we map out the required a [1:55] presses for Wing Mario Over the Rainbow [1:57] it would look like this we merely need [1:59] to hold hold a to reach the cannon [2:01] platform we need to press a to launch [2:03] from the first cannon and we need to [2:05] press a again to launch from the second [2:07] Cannon so how many a presses is that [2:09] total well it appears to be three and if [2:12] we were doing this star in isolation [2:15] then yeah it would be three but in a [2:17] full game a button challenge run there [2:19] are other a presses that occur earlier [2:21] in the Run such as this a press needed [2:24] to get into the course so if we take [2:27] that aess into consideration as well [2:29] then how many a presses would it take [2:31] the naive answer would be four one to [2:34] enter the course and the three within [2:35] the course that we established earlier [2:38] however we can do better we can actually [2:40] do it in three by simply holding out the [2:43] first a press to be used for the half a [2:45] press because the half a press only [2:47] required a to be held not actually [2:50] pressed so in this fashion Wing Mario [2:53] Over the Rainbow only adds on an [2:56] additional two a presses to the Run [2:58] since the first a press just leeches off [3:00] of a previous apress so to capture this [3:03] phenomenon we call it 2.5 a presses on a [3:07] single star basis you'd round that up to [3:09] three but in a full game Run you'd round [3:12] it down to two so in conclusion since [3:15] that first a press counts in some [3:17] contexts but adds no additional a [3:20] presses in other contexts we refer to it [3:23] as a half a press so going back to the [3:26] video you can see that I start the level [3:28] with the a button already held as [3:30] indicated in the bottom left corner and [3:33] so in the full game run this a press [3:35] will just leech off of a previous one [3:37] and so it won't incur an additional aess [3:40] okay glad that's explained now what am I [3:43] doing in the video here I'm using a [3:45] trick called scuttlebug Transportation [3:48] you see like most enemies Scuttle bugs [3:50] have a home which is just a point in 3D [3:53] space and they'll Patrol a certain [3:55] radius around that point so if Mario [3:58] enters that radius they'll lunge at him [4:00] to attack but unlike most other enemies [4:03] a Scuttle bug's home can change [4:05] positions because if a scuttlebug bumps [4:07] into Mario the Scuttle bug's home will [4:09] update to where the scuttlebug was when [4:11] the Collision occurred so by [4:14] strategically luring the scuttlebug to [4:16] the edge of its radius and bumping into [4:17] it we can effectively transport the [4:19] scuttlebug and its home so that's what [4:22] I'm doing here note that we can't [4:24] actually transport a scuttlebug to [4:26] outside of its native room they actually [4:29] get stuck at the the door so if your [4:31] dream was to bring all the Scuttle bugs [4:33] together for one big jamere I'm sorry [4:35] but it's not going to happen also worth [4:37] noting is that Scuttle bugs will [4:39] actually disappear if they walk into a [4:41] wall while too far below their current [4:43] home so I do have to be careful to avoid [4:46] that it's pretty weird if you've never [4:48] seen it before but I'm pretty sure they [4:50] did it so that if a Scuttle Bug jumps [4:52] into a hole it wouldn't just walk around [4:54] down there anyway I'm transporting the [4:56] Scuttle Bug to the corner right below [4:58] the watch for rolling Rockstar because [5:01] next I do a trick called Scuttle Bug [5:02] raising and here's how it works on the [5:05] left I show a bird's eyye view of the [5:07] scene and on the right I show A View [5:09] From the side now when Mario leaves the [5:12] rolling rocks room the Scuttle Bug [5:14] deactivates that's because the room and [5:16] everything in it are only active when [5:18] Mario's in the room or standing in a [5:20] small region right outside the door [5:23] indicated here in yellow so if Mario [5:26] isn't in the rolling rocks room or in [5:28] the yellow region then the room will be [5:30] completely black and everything in the [5:32] room will be invisible and won't move [5:34] conveniently this allows us to raise the [5:36] scuttlebug by performing The Following [5:38] steps first Mario enters the Scuttle [5:41] bug's radius although the scuttlebug is [5:43] invisible and can't move around it can [5:45] still turn towards Mario and activate a [5:47] lunge then Mario leaves the radius and [5:50] the skull buug returns to facing its [5:52] home next Mario enters the yellow region [5:55] to activate the scuttlebug the [5:57] scuttlebug will perform the lunge that [5:59] it started but cleverly we have Mario [6:02] exit the yellow region right when the [6:04] Scuttle Bug is at the peak of its [6:05] trajectory thereby deactivating it so it [6:08] won't fall down and finally since the [6:10] scut bug moved past its home it turns [6:13] around to face its home once more now [6:15] we've gotten all the height we could out [6:17] of the Scuttle bug's current lunge but [6:19] that's no problem because we can just [6:21] activate another lunge by repeating this [6:23] procedure activate a lunge while the [6:25] Scuttle Bug is deactivated reactivate [6:27] the Scuttle Bug just for the upwards [6:29] portion of its trajectory and then [6:31] repeat as simple as that so that's what [6:33] I do here and I have a second screen to [6:36] show it from the Scuttle bugs [6:37] perspective fortunately the scuttlebugs [6:40] radius isn't a sphere but a cylinder [6:42] that extends up and down infinitely so [6:45] really no matter how high the scuttlebug [6:47] gets we can continue to enter its area [6:49] to activate its lunges and move it [6:51] upwards there's no limit to how high we [6:53] can raise it now it's worth noting that [6:55] I only activate the Scuttle Bug while [6:57] I'm not inside its radius so the Scuttle [7:00] Bug will always lunge towards its home [7:02] and not towards Mario this causes the [7:04] Scuttle Bug to effectively travel [7:06] straight up above its home but [7:08] alternatively I could have activated the [7:10] scuttlebug while inside of its radius [7:12] and in that case the Scuttle Bug would [7:14] always lunge towards Mario instead of [7:16] towards its home so it would actually [7:18] make its way towards the door and then [7:19] travel straight up from there that [7:21] method's actually a little faster [7:23] because we wouldn't have to wait for the [7:24] scuttlebug to turn back towards his home [7:26] before each activation however it [7:29] wouldn't work for what we're doing [7:31] because we need the scuttlebug to be [7:32] right next to that corner in fact the [7:35] top of that corner has a special [7:36] property which we call a misalignment [7:39] basically in the game's code there's a [7:41] discrepancy between the way the game [7:43] handles Collision checking with floors [7:45] versus walls this results in a 1ex one [7:47] unit area where Mario can get under the [7:50] floor without being pushed away by the [7:52] walls and if Mario's less than 79 units [7:55] under a floor they'll snap right up onto [7:58] it so that'll be important later for [8:00] getting up there anyway now it's time to [8:02] build up some speed and I mean a lot of [8:05] speed so to get that speed we're going [8:07] to use a trick called hypers speed [8:09] walking and here's how it works you [8:12] probably already know that there are [8:13] some slopes in the game that are too [8:15] steep to stand on Mario just slides off [8:17] of them but did you know that you [8:19] actually can stand on these slopes if [8:21] they're submerged in shallow water in [8:23] fact the underwater portion of these [8:25] slopes has a special property if you try [8:27] running up pill on them you'll end end [8:29] up running backwards at an increasing [8:31] speed with no upper bound but in most [8:34] circumstances this would cause us to end [8:36] up in the water before building up any [8:38] real speed we can get a little more [8:40] speed by running nearly parallel to the [8:42] slope but ever so slightly uphill but [8:45] eventually the slope runs out or we move [8:47] too fast to round a corner but there are [8:50] some ways to have Mario walk while [8:51] staying in place for example if there's [8:54] a wall perpendicular to the slope then [8:56] we can use that that allows Mario to [8:59] build up up quite a bit of speed before [9:01] he breaks through however if the wall [9:03] isn't perpendicular to the slope then we [9:05] end up sliding down into the water [9:08] that's because walls are really just [9:09] rectangles that push Mario out [9:12] perpendicularly so if Mario moves into a [9:14] wall at an angle the game will calculate [9:17] his intended next position then the wall [9:19] will push that position out and then [9:21] Mario ends up having a net movement [9:23] along the wall so ultimately he'll end [9:26] up moving into the water so is all hope [9:29] lost well no because Tyler cany figured [9:32] out that we could actually make use of [9:33] the gate you see the bottom of the gate [9:36] is a ceiling and the game doesn't like [9:38] putting Mario too close to the area [9:40] right under a ceiling because it doesn't [9:42] think he fits so if we have Mario move [9:45] backwards into the ceiling the game will [9:47] choose not to move him so we're free to [9:49] build up speed in place but not infinite [9:52] speed because we'd end up breaking free [9:54] if our speed moved past the gate so what [9:56] do we do we turn to redirect our speed [9:59] at out of bounds notice that we now have [10:01] enough speed so that our intended next [10:03] position is past the wall and out of [10:05] bounds and since the game doesn't like [10:07] placing Mario out of bounds it doesn't [10:09] move him and instead just lets him stay [10:12] in place just like the ceiling but [10:14] unlike the ceiling out of bounds goes on [10:17] forever so we can essentially build up [10:19] as much speed as we want without having [10:21] to worry about breaking free so now I do [10:24] just that open the gate use the ceiling [10:26] of the gate to build up some speed and [10:28] then redirect my angle Le out of bounds [10:30] to build up the rest now you're probably [10:32] wondering what I'm going to need all [10:33] this speed for after all I do build up [10:36] speed for 12 hours but to answer that we [10:39] need to talk about parallel universes [10:42] and if you thought my other tangents [10:43] were complicated just you wait okay so [10:46] Mario's position is a floating Point [10:48] number but it's converted to a short [10:50] when the game uses it to test for [10:52] collision with floor triangles in other [10:54] words Mario's position can basically be [10:56] any decimal number but it's converted to [10:59] an integer between - [11:01] 32768 and postive [11:03] 32767 inclusive so any fractional [11:07] portion is truncated and numbers too big [11:09] or too small are moved into this range [11:11] using the modulo operator graphically [11:14] that means that the position used for [11:16] floor detection is always inside of this [11:18] box so if Mario's in that box then his [11:21] actual position and the position used [11:23] for floor detection are the same albe it [11:25] maybe off by a single fraction due to [11:27] the truncation but if Mario Le that box [11:30] then his actual position and the [11:31] position used for floor detection will [11:33] separate since the position used for [11:36] floor detection will just loop back [11:37] around to remain in the original box so [11:40] now I ask you this here's the course so [11:43] if Mario is standing way over here where [11:45] there's no land but the position used [11:47] for floor detection is on land can he [11:50] stand over here the answer is yes as far [11:53] as the game sees it Mario is in fact [11:55] above land over here because the game [11:57] actually checks for land over here so [12:00] for all intents and purposes there is [12:02] essentially land over here a copy of the [12:05] original map and this is what we call a [12:07] parallel universe or a pu and this [12:10] applies to every one of these boxes so [12:12] there's actually a grid of nearly [12:14] infinite pus here is a tocale diagram of [12:17] the Pu grid as you can see the pus are [12:20] actually pretty far apart but I'll be [12:22] taking some creative Liberties and [12:24] drawing them closer together for the [12:26] sake of clearer visuals now peus aren't [12:28] as glamorous as you might think the [12:30] graphics are only found on the original [12:32] map so the pus are completely invisible [12:35] furthermore pus have no objects like [12:38] elevators or item blocks no enemies no [12:41] items like coins or stars and not even [12:43] any walls so really it's pretty Barren [12:46] furthermore the N64 console will [12:48] actually crash if you go to a pu and let [12:51] the camera follow you but luckily we can [12:53] avoid that crash by fixing the camera in [12:56] place on the original map before leaving [12:58] it though that does make it even harder [13:00] to tell what's going on in the peus so [13:03] as you just saw you can travel to a pu [13:05] if you have enough speed but it's not as [13:08] simple as you might think if you have [13:10] just enough speed to reach the puu one [13:12] over it won't actually work that's [13:14] because the game actually checks if [13:16] Mario is above land at each quarter step [13:18] of his movement that means the simplest [13:21] pu movement is moving over four puus at [13:23] once that way each quarter step is above [13:25] land and therefore valid for Simplicity [13:28] we call this quadruple pu distance one [13:31] qpu now up until this point I've been [13:34] glossing over a very important detail [13:36] which I now need to clear up what if I [13:38] told you that distance Mario moves isn't [13:41] necessarily equal to his speed for [13:43] example look how fast Mario moves at 31 [13:46] speed on this flat slope and now compare [13:48] it to how fast he moves at the same [13:50] speed on this steeper slope in both [13:52] cases he has about the same speed but [13:55] clearly he's moving at different rates [13:57] that's because the distance mark moves [13:59] is only a portion of his actual speed [14:02] and this portion depends on the slope of [14:04] the ground the steeper the slope the [14:06] smaller this portion is note that it [14:08] only depends on the steepness not [14:11] whether Mario's facing uphill downhill [14:13] or sideways on the hill in these visuals [14:15] blue will represent Mario's actual speed [14:18] and green will represent the portion of [14:20] it that he moves which we call Mario's [14:22] def facto speed so in these three [14:25] pictures Mario has the same speed but he [14:28] has different facto speeds since he's [14:30] standing on slopes with different [14:32] steepnesses so if we want to move one [14:35] qpu it's not sufficient to have qpu [14:37] speed we need qpu de facto speed which [14:41] often means our actual speed will need [14:43] to be greater than one qpu to compensate [14:45] so to reiterate we need to increase our [14:48] speed until our deao speed syncs up with [14:50] one qpu and the speed needed to do this [14:53] is called the sinking speed so in this [14:56] diagram the blue arrow represents the [14:58] sinking speed when we have that speed [15:00] the quarter steps of the deao speed sync [15:03] up with the pus and we can move now what [15:06] I'm showing here is just the lowest or [15:08] first syncing speed aka the speed to [15:11] move exactly one qpu if we increase our [15:14] speed eventually our deao speed would [15:16] sync up again when it covers a distance [15:18] of Two qpu And so we'd be able to move [15:21] at that speed which is two times as fast [15:23] as before so in general any multiple of [15:26] the lowest sinking speed is itself a [15:28] sinking speed speed and will cover [15:30] multiple qpu at once so remember every [15:33] slope has a different set of sinking [15:35] speeds and this can make rounding tricky [15:37] for example in the video where I do pu [15:40] movement to reach the secret aquarium I [15:42] had to Traverse several different slopes [15:45] first this slope that I used for hypers [15:47] speed walking then this slope at the [15:49] edge of the water then the flat ground [15:51] of the castle foyer then the castle [15:53] stairs which is really a steep ramp and [15:55] then the flat round of the upstairs and [15:57] note that the stairs you see there are [15:59] actual stairs and not a ramp so they're [16:02] just flat ground here is a graph showing [16:04] the sinking speeds for each of these [16:06] slopes and so these are the speeds I [16:08] need in order to have pu movement while [16:10] standing on each of these slopes [16:12] naturally the steeper slopes have [16:14] greater sinking speeds now keep in mind [16:17] that I can only build up speed while I'm [16:19] on the hypers speed walking slope once I [16:21] leave it I can't generate any more speed [16:24] so my speed will only decrease from [16:26] there so to successfully perform this p [16:28] out I better have generated enough speed [16:31] to meet each slope sinking speed in turn [16:34] for example let's say I build up enough [16:36] speed to reach the first possible [16:37] sinking speed and I use that to go to [16:40] the next slope then I could let my speed [16:42] drop until I reach this slope's sinking [16:44] speed go to the next slope let my speed [16:47] drop again until I reach this slope [16:49] sinking speed go to the next slope but [16:51] then I have a bit of a problem I have [16:53] less than the required sinking speed and [16:56] no way to gain any more so is this route [16:58] just impossible well no because these [17:00] are just the slopes first sinking speeds [17:03] but remember any multiple of these will [17:05] work as well so now let's factor in each [17:08] slope's second sinking speed as well [17:10] these speeds allow Mario to move two qpu [17:13] at once instead of one so now if I [17:15] instead build up enough speed to reach [17:17] the second sinking speed of that first [17:19] slope then I'll actually have enough [17:21] speed to meet each sinking speed in turn [17:23] and complete the route and if that [17:25] didn't work we could have considered [17:26] each slope's thirdd sinking speed and so [17:29] on until we did get it to work however [17:31] which sinking speed we need to reach [17:33] initially is kind of a big deal because [17:35] reaching that first sinking speed takes [17:37] about 12 hours and reaching that second [17:39] sinking speed takes about 25 hours so if [17:42] there's a way to use a lower sinking [17:44] speed initially then that's a 12-hour [17:46] save so how much speed will we need to [17:49] generate for the watch for Rolling [17:50] Rockstar well keep in mind that even [17:53] with access to unlimited horizontal [17:55] speed we don't have any improved [17:57] vertical mobility so to get to the top [17:59] of the course we need to travel up [18:01] slopes and ride up elevators so this [18:04] will be the basic route start on the [18:06] hypers speed walking slope navigate [18:08] along the path up from the lake ride up [18:10] this elevator ride up this other [18:12] elevator make our way onto the amazing [18:14] emergency exit platform which is the [18:17] highest point we can reach and then [18:18] launch to the watch for Rolling rocks [18:20] platform by itself that's still won't be [18:23] enough height but the Scuttle Bug we [18:25] positioned will provide the extra bounce [18:27] we need so so this is the graph of the [18:29] sinking speeds of these slopes [18:32] unfortunately we run into a bit of an [18:34] issue with the path up from the lake [18:36] that area is actually made up of dozens [18:38] of floor triangles that each have [18:40] different slopes but that didn't stop me [18:42] after careful observation and scrutiny I [18:45] isolated six triangles which I named T1 [18:48] through T6 these triangles have strictly [18:51] decreasing steepnesses so we can meet [18:53] each of their sinking speeds in turn [18:56] additionally their heights span the [18:58] entire ver vertical distance we need to [18:59] cover to go from bottom to top without [19:02] leaving any gaps in between so by using [19:04] the slopes of those six triangles we can [19:07] complete the blueprint for our route [19:09] allowing us to utilize the first syncing [19:11] speed of that initial slope so building [19:13] up speed only takes 12 hours instead of [19:16] 25 now we're almost ready to go back to [19:18] the video but there's just some final [19:20] points I want to make for example you [19:22] don't need to have exactly the sinking [19:24] speed to Traverse pus if you have [19:26] slightly less than the sinking speed [19:28] you'll move relatively forwards in the M [19:31] if you have slightly more than the [19:32] sinking speed you'll move relatively [19:34] backwards in the m and the further you [19:36] deviate from the sinking speed the [19:38] greater this relative movement will be [19:40] additionally if you adjust your angle [19:42] slightly away from the cardinal [19:44] direction you can move relatively [19:46] sideways but keep in mind that even the [19:48] smallest possible angle deviation will [19:51] be magnified over the qpu distance and [19:53] thus Mario will be sent multiple feet to [19:56] the side now based off what I've told [19:58] you you might think you can only travel [20:00] multiples of four pus at a time but [20:03] that's not actually true for example if [20:05] one of your quarter steps is out of [20:07] bounds or over a ceiling then that [20:09] quarter step will be invalid and since [20:11] Mario moves up to but not including the [20:14] first invalid quarter step he can in [20:16] fact end up stopping prematurely at one [20:18] of the quarter steps separately if you [20:21] change slopes during a quarter step your [20:23] deao speed will change and you'll alter [20:25] the distance of the next quarter step [20:28] and so most most likely it will no [20:30] longer syn up with a pu and you'll end [20:32] up stopping on the new slope finally for [20:34] Simplicity the set of pus that are [20:37] multiples of four away we call the qpu [20:39] grid and if Mario's on the qpu grid then [20:43] we say he's qpu aligned remember moving [20:46] a multiple of four pus is easy but [20:48] moving a different amount requires [20:50] special conditions like added bounds or [20:52] changing slopes so if your qpu aligned [20:55] it's easy to stay that way and if your [20:57] qpu Miss misaligned it's easy to stay [21:00] that way as well now if you become qpu [21:03] misaligned you'll need to correct that [21:05] in order to return to the main map but [21:07] that can be difficult if you're not near [21:09] at of bounds and your sequence of slope [21:11] changes is predetermined so managing [21:13] your qpu alignment is one of the many [21:16] challenges of planning a pu route okay [21:18] so now we're finally ready to resume the [21:20] main video and watch the Pu movement [21:23] just kidding first I need to explain [21:24] what these screens are these extra [21:26] screens will help you follow along [21:28] during the view movement the standard [21:30] view is just the view that the game [21:31] shows but since I fixed the camera on [21:33] the main map to prevent the game from [21:35] crashing this screen won't tell you very [21:37] much the relative view shows where I am [21:39] in each pu this is what it would look [21:41] like if I let the camera follow Mario [21:43] around and if puus weren't invisible the [21:46] relative map also shows where I am in h [21:48] puu but from an overhead perspective and [21:50] finally the Pu map shows where I am in [21:52] the Pu grid okay so now let's really [21:55] start so as I explained earlier I [21:58] navigate up the path from the lake using [21:59] the six triangles I isolated and I've [22:02] marked them in the relative map so you [22:03] can follow along so basically I get onto [22:06] a triangle let my speed drop until I'm [22:09] around the sinking speed for that [22:10] triangle slope then navigate uphill on [22:12] the triangle and then move to the next [22:14] triangle using what I taught you you [22:16] should be able to follow along with my [22:18] movement for example I'm able to move [22:20] relatively backwards because I have [22:22] slightly more than the sinking speed [22:24] whenever I move sideways it's because [22:26] I'm slightly angled away from the [22:27] cardinal direction [22:29] and every time I move from triangle to [22:30] Triangle my qpu alignment changes but [22:33] cleverly I planned it in such a way that [22:35] they'd all cancel out by the end and I'd [22:37] end up qpu aligned so right now I'm on [22:39] the sixth triangle so I do a little [22:41] zigzag to bring me back towards the main [22:43] map as you can see on the Pu map screen [22:46] remember I need to return to the main [22:48] map in order to access the elevator [22:50] since there are no objects in p as you [22:53] may have noticed right there the [22:54] elevator didn't register me until I [22:56] started kicking and that's actually the [22:58] reason why I've been holding a this [23:00] entire time by holding a I can press B [23:03] to do these little kicks without these [23:05] kicks I go through the elevator but with [23:07] the kicks I can ride it up to gain [23:09] precious height okay so now we're [23:11] closing in on the end the final movement [23:13] I do will be a kick onto the amazing [23:15] emergency exit platform then turn and [23:17] launch myself towards the Scuttle Bug [23:19] that movement will bring me 10 puu to [23:21] the right and 3 puu down but since I [23:23] want to end up on the main map I reverse [23:25] that displacement and so position myself [23:27] 3pu up and 10p left while doing that I [23:30] simultaneously position myself in the [23:32] correct relative part of the map to make [23:34] the movement work okay now don't [23:38] blink and there we go by bouncing on the [23:40] skull bug and ground pounding in the [23:42] misalignment I achieved just enough [23:44] height to get onto the rolling rocks [23:45] platform here I shown a bridged version [23:48] of the Scuttle Bug raising in case [23:50] earlier viewing was too choppy to follow [23:52] as you can see the Scuttle Bug moves [23:54] back and forth above its home at the end [23:56] you can see I do two special r Rings [23:58] purely to move him sideways and closer [24:00] to the corner since he ended up being [24:02] too far away for the bounce to work and [24:04] here I show an alternate angle of the [24:06] final pu movement the Scuttle Bug [24:08] actually became active once I entered [24:10] the Pu version of this room so I really [24:13] only had a handful of frames to get over [24:15] here before he fell too far and there [24:17] you have it watch for Rolling rocks done [24:19] in 0.5 a presses man I did not expect [24:22] this video to become 25 minutes long [24:25] when I started commentating but I guess [24:27] there was just that much to explain [24:29] hopefully you were able to follow along [24:31] with my explanations and visuals learned [24:33] something new and had an enjoyable [24:35] experience so thanks for watching