CuriousMarc Connects 1930 Teletype to Linux Shell via Custom Interface
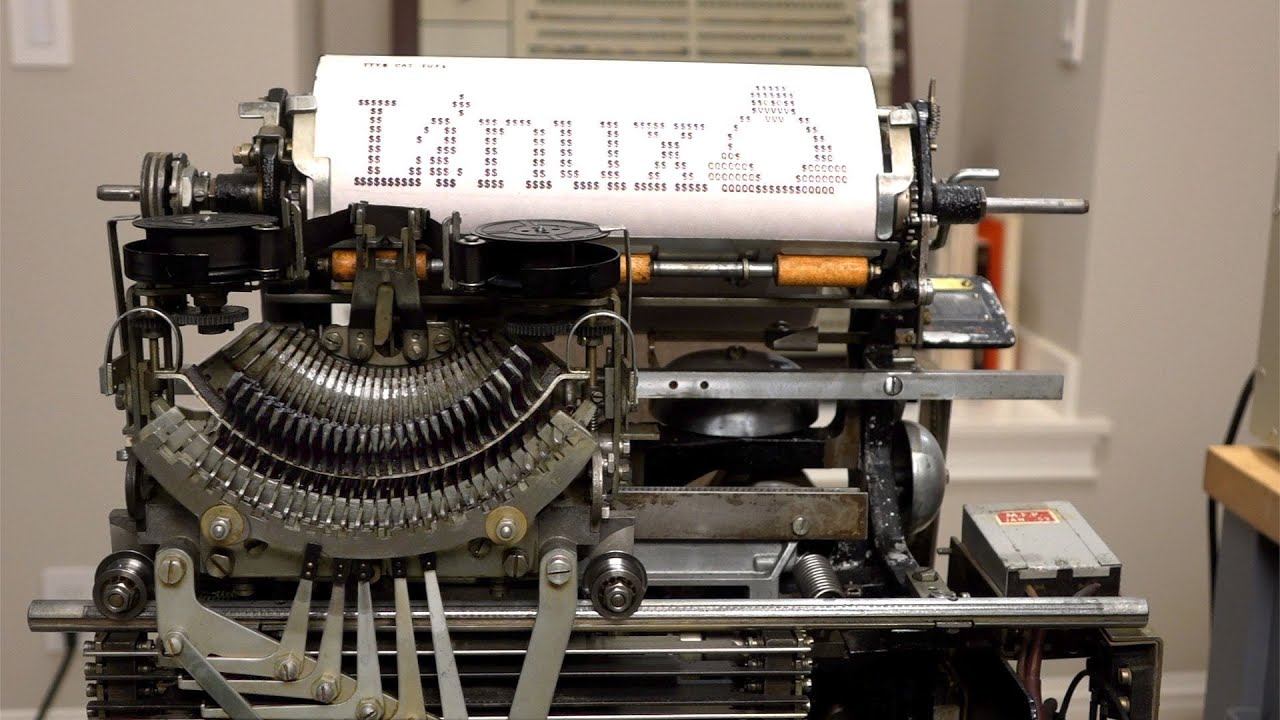
Using a 1930 Teletype as a Linux Terminal — CuriousMarc

CuriousMarc

Bridging a 1930 mechanical teletype to modern Linux requires downclocking microcontroller hardware to 45.5 baud and remapping unused keys to bypass broken uppercase terminal support.

AI-assisted summary of Using a 1930 Teletype as a Linux Terminal — original source. Check the original for full context.

Source published:

Key ideas

  • A restored 1930 Teletype Model 15 was successfully adapted to function as an interactive Linux terminal using custom hardware and microcontroller bridging. (0:08)
  • Interfacing modern 5 V logic required an optoisolated analog circuit capable of handling a 60 mA, 120 V DC current loop and clamping inductive spikes with a 120 V TVS diode. (1:49)
  • To achieve the non-standard 45.5 baud rate, an Atmel microcontroller's hardware clock fuse was reconfigured to divide internal clock speed down from 16 MHz to 2 MHz. (4:23)
  • Because Baudot code lacks lowercase letters and modern Linux all-caps terminal modes fail, the teletype's BLANK key was mapped in custom firmware as an uppercase shift modifier. (5:44)

Detailed notes

## Background Published on YouTube by CuriousMarc on April 13, 2020, this video fulfills viewer requests to connect a restored 1930 vintage Model 15 Teletype to a modern computer running Linux. The project tackles the physical and logical challenges of interfacing an antique 5-bit electromechanical machine with a contemporary operating system.

## TL;DR CuriousMarc details the full engineering pipeline required to run a Linux terminal session on a 1930s Teletype Model 15 over a high-voltage 60 mA current loop. He constructs an optoisolated analog interface with transient voltage suppression and programs an Atmel microcontroller—underclocked to 2 MHz via hardware fuses—to bridge 8-bit ASCII at 9600 baud down to 5-bit Baudot at 45.5 baud. After overcoming missing lowercase support and login quirks via a custom BLANK-key prefix technique, he connects to a rugged Dolch portable running Linux. Marc logs into a shell, edits text using the vintage line editor 'ed', and prints out elaborate mechanical ASCII art.

## Atmosphere & style The presentation carries an infectious, hands-on workshop energy blending dry engineering humor with genuine reverence for early telecommunications technology. Marc's meticulous troubleshooting feels intimate and unhurried as he solders circuits, rewires fuse bits, and works through protocol mismatches. The viewing experience is defined by the mesmerizing, rhythmic clatter of mechanical relays, whirring distributors, and hammering typebars creeping across yellow paper at 45.5 baud, creating a delightfully tangible bridge across a century of computing history.

## Bulletin - [00:08](https://www.youtube.com/watch?v=2XLZ4Z8LpEE&t=8s) A restored 1930 Teletype Model 15 was successfully adapted to function as an interactive Linux terminal using custom hardware and microcontroller bridging. - [01:49](https://www.youtube.com/watch?v=2XLZ4Z8LpEE&t=109s) Interfacing modern 5 V logic required an optoisolated analog circuit capable of handling a 60 mA, 120 V DC current loop and clamping inductive spikes with a 120 V TVS diode. - [04:23](https://www.youtube.com/watch?v=2XLZ4Z8LpEE&t=263s) To achieve the non-standard 45.5 baud rate, an Atmel microcontroller's hardware clock fuse was reconfigured to divide internal clock speed down from 16 MHz to 2 MHz. - [05:44](https://www.youtube.com/watch?v=2XLZ4Z8LpEE&t=344s) Because Baudot code lacks lowercase letters and modern Linux all-caps terminal modes fail, the teletype's BLANK key was mapped in custom firmware as an uppercase shift modifier.

## Key takeaways - [00:08](https://www.youtube.com/watch?v=2XLZ4Z8LpEE&t=8s) The 1930 Teletype Model 15 relies on an electromechanical rotating distributor for transmission and an electromagnet-driven mechanical linkage for character decoding. - [00:08](https://www.youtube.com/watch?v=2XLZ4Z8LpEE&t=8s) The vintage terminal operates on a 60 mA current loop driven by ~120 V DC, requiring robust galvanic isolation to interface with modern low-voltage digital electronics. - [00:08](https://www.youtube.com/watch?v=2XLZ4Z8LpEE&t=8s) Baudot signaling transmits 5-bit characters at a pokey 45.5 baud rate, presenting major protocol incompatibilities with modern 8-bit ASCII systems. - [01:49](https://www.youtube.com/watch?v=2XLZ4Z8LpEE&t=109s) Optocouplers combined with full-wave bridge rectifiers provide polarity-insensitive isolation, while a 120 V TVS clamp absorbs destructive inductive kickback spikes. - [01:49](https://www.youtube.com/watch?v=2XLZ4Z8LpEE&t=109s) Corrections to online schematics were necessary, including replacing a 100-ohm resistor with a 1 kΩ power resistor to prevent the optocoupler from incinerating under 120 V. - [03:28](https://www.youtube.com/watch?v=2XLZ4Z8LpEE&t=208s) Preliminary interface actuation was verified without software using an HP 8018A Serial Data Generator programmed with test bit pulses. - [04:23](https://www.youtube.com/watch?v=2XLZ4Z8LpEE&t=263s) Firmware was developed in bare-metal C via Eclipse to maintain register-level control of the Atmel microcontroller's built-in 5-bit UART mode. - [04:23](https://www.youtube.com/watch?v=2XLZ4Z8LpEE&t=263s) Reprogramming the Atmel clock divider fuse to run at 2 MHz was necessary because the standard 16 MHz clock could not scale dividers low enough for 45.5 baud. - [05:44](https://www.youtube.com/watch?v=2XLZ4Z8LpEE&t=344s) Software flow control (XON/XOFF) is essential to buffer transmission and prevent data loss when bridging modern computers to a mechanical 45.5 baud device. - [05:44](https://www.youtube.com/watch?v=2XLZ4Z8LpEE&t=344s) Modern Linux implementations fail to support legacy all-caps terminal flags, prompting a custom firmware solution that uses the Baudot BLANK key as an uppercase escape prefix. - [08:20](https://www.youtube.com/watch?v=2XLZ4Z8LpEE&t=500s) Full-duplex operation on the teletype requires splitting the transmit and receive loops into independent lines, drawing 120 mA total from the high-voltage bench supply. - [12:18](https://www.youtube.com/watch?v=2XLZ4Z8LpEE&t=738s) Linux serial terminal attachment requires disabling default ANSI color escape codes in shell aliases to avoid printing garbage characters on the mechanical paper feed. - [12:18](https://www.youtube.com/watch?v=2XLZ4Z8LpEE&t=738s) Programming directly on the Model 15 is constrained by the 5-bit Baudot alphabet, which completely lacks syntax symbols like plus signs, backslashes, and equals signs. - [12:18](https://www.youtube.com/watch?v=2XLZ4Z8LpEE&t=738s) The classic Unix line editor 'ed' operates effectively on the Model 15, matching the historical paper-terminal workflow under which Unix was originally developed.

## Detailed walkthrough ### [00:08](https://www.youtube.com/watch?v=2XLZ4Z8LpEE&t=8s) The 1930 Teletype Model 15 and Baudot Code

Marc begins by explaining that he is taking advantage of the coronavirus shelter-in-place downtime to tackle some unfinished projects. One recurring request from viewers was to hook up the vintage Model 15 Teletype—restored over a year earlier—to a modern computer running Linux. Introduced in 1930, the Model 15 is a purely electromechanical contraption that remained in widespread military and commercial Telex service until the 1960s. The transmit mechanism utilizes a rotating contact distributor to encode bits, while the receive side relies on a dizzyingly intricate mechanical linkage governed by a single electromagnet to decode pulses and type them directly onto a roll of paper.

```mermaid flowchart LR accTitle: Current Loop Architecture accDescr: High-voltage current loop connecting transmitter contacts to receiving electromagnet.

subgraph Loop ["60 mA High-Voltage Loop (~120 V)"] direction LR TX["Transmit Contacts<br>(Rotating Distributor)"] RX["Receive Magnet<br>(Electromechanical Decoder)"] end

TX -->|"Overcomes Wire Resistance"| RX ```

Connecting such an antique to modern hardware presents an immediate electrical and logical challenge. Marc emphasizes the fundamental mismatch between the eras: “So at first blush, it is rather incompatible with modern computers.” The teletype operates on a 60-milliamp current loop energized at around 120 volts DC to overcome wire resistance across long distances—a signaling standard that predates ASCII by decades. Instead of modern 8-bit bytes, it relies on 5-bit Baudot coding running at a pokey transmission speed of just 45.5 baud (bits per second).

- **Year introduced:** 1930 (used heavily through the 1960s for military and commercial Telex) - **Signaling line:** 60 mA current loop driven by ~120 V DC - **Character encoding:** 5-bit Baudot code (predates ASCII) - **Data rate:** 45.5 baud (bits per second)

---

[01:49](https://www.youtube.com/watch?v=2XLZ4Z8LpEE&t=109s) Designing the Analog Interface Circuit

To bridge the high-voltage loop with low-voltage digital electronics, Marc constructs an isolation interface based on a design found online. The circuit isolates the fragile modern components from the high-voltage loop using optocouplers (essentially solid-state relays). The transmit stage features an optocoupler paired with a 120 V transient voltage suppressor (TVS) clamp to swallow inductive kickback spikes caused by the mechanical coils that would otherwise destroy the optoisolator. On the receiver side, a full-wave bridge rectifier makes the input completely polarity-insensitive before passing through an optoisolator into the 5 V logic rail.

Marc spots two critical drafting errors in the schematic he retrieved from the internet. The original diagram specified a 100-ohm resistor on the receive loop, which Marc notes would immediately incinerate the optocoupler under 120 volts, requiring a substitution to a beefy 1 kΩ power resistor. Furthermore, a pull-up resistor was drawn on the wrong transistor branch. After correcting these flaws, Marc solders together the board, yielding safe 5 V logic-level receive and transmit lines.

- **Isolation method:** Optocouplers / solid-state relays for galvanic separation - **Spike protection:** 120 V TVS diode to absorb inductive relay kickback - **Polarity handling:** Full-wave bridge rectifier on the input - **Schematic corrections:** Replaced an incorrect 100 Ω resistor with a 1 kΩ power resistor; fixed a misplaced resistor on the output transistor branch

---

[03:28](https://www.youtube.com/watch?v=2XLZ4Z8LpEE&t=208s) Testing with the HP 8018A Serial Data Generator

Before writing microcode, Marc needs to verify that the analog interface board can actually energize and trip the teletype's mechanical selector unit. Because he does not yet have a microcomputer configured to emit 5-bit serial streams at 45.5 baud, he turns to a piece of vintage test gear: an HP 8018A Serial Data Generator.

Marc programs the instrument's 2-kilobit internal memory to send simple 1-bit and 2-bit pulse patterns down the loop. When triggered, the generator pulses the interface, successfully actuating the receiver magnet and proving that the analog current switch operates reliably.

---

[04:23](https://www.youtube.com/watch?v=2XLZ4Z8LpEE&t=263s) Arduino Baudot Translator and Clock Fuses

With the hardware verified, Marc moves on to the protocol translation task: converting standard 8-bit ASCII characters into 5-bit Baudot sequences and vice versa. Marc explains that rather than using the standard Arduino IDE and libraries, he works inside the Eclipse IDE writing bare-metal C to retain full low-level control of the Atmel microcontroller's hardware registers.

```mermaid flowchart TD accTitle: Arduino Hardware Translation Flow accDescr: Microcontroller translation between PC ASCII and Teletype Baudot.

subgraph Arduino ["Atmel MCU (Clock Divided by 8 to 2 MHz)"] direction TB ASCII["8-bit ASCII Buffer<br>(Full Duplex / USB / Serial)"] BAUDOT["5-bit Baudot Engine<br>(45.5 Baud UART)"] ASCII <-->|"Protocol Translation"| BAUDOT end

PC["Dolch Linux PC<br>(9600 Baud RS-232)"] <-->|"ASCII"| ASCII BAUDOT <-->|"45.5 Baud / Current Loop"| TTY["Model 15 Teletype"] ```

The primary engineering obstacle on the microcontroller is clock speed. Modern microcontrollers are designed to run fast, whereas 45.5 baud is exceedingly slow. While the internal Atmel UART hardware natively supports 5-bit frame lengths, the standard 16 MHz system clock cannot scale its baud rate dividers low enough to reach 45.5 baud. Marc resolves this by reprogramming the Atmel chip's hardware configuration fuses:

> “So this bit is on and instead of having your standard Arduino running at 16 megahertz, it divides it internally down to 2 megahertz and that's slow enough to cover all the way down to 45.5 Bauds.”

The completed microcontroller board and analog interface are packaged inside a custom blue project box equipped with a front panel, USB interface, and serial break-outs.

---

[05:44](https://www.youtube.com/watch?v=2XLZ4Z8LpEE&t=344s) Interface Testing and Lowercase Emulation

Marc hooks the blue interface box to a computer running a serial terminal emulator on COM4 to test character transmission. The teletype is initially set up in half-duplex, powered by an external high-voltage supply. Marc notes that flow control is mandatory due to the vast speed discrepancy, advising: “You want to turn Xon-Xoff if you send big files.” When typing rapid bursts on the modern keyboard, the interface box buffers the stream and rhythmically clatters out the characters at 45.5 baud.

A major complication of 5-bit Baudot is that it has no concept of lowercase letters; it offers only 32 unique character codes, shifting between "letters" (LTRS) and "figures" (FIGS). Although classic Unix was developed on ASR 33 teletypes and historically included all-caps terminal modes, modern Linux distributions do not properly support them:

> “Of course the original UNIX did support all caps - heck, that's how it was developed, on ASR 33 Teletypes - but this feature seemed not to be functional in modern distributions. Although the -U option is still there, it sure didn't work.”

To solve this, Marc invents a firmware workaround: using the Baudot "BLANK" key as a capital-letter prefix modifier. Typing normally outputs lowercase characters to Linux, while tapping the BLANK key immediately before a letter capitalizes it. Marc demonstrates by entering `BLANK c u r i o u s BLANK m a r c`, which prints as `CURIOUSMARC` on the upper-case-only paper roll but appears correctly formatted as `CuriousMarc` on the receiving computer terminal.

- **Baudot limitation:** 5 bits allow only 32 combinations; lowercase letters do not exist in the character set - **Linux caps bug:** Modern `getty` / `stty` uppercase flags (`-U`) fail on contemporary kernels - **Firmware solution:** The "BLANK" teletype key acts as an escape prefix that forces the subsequent letter into uppercase in the outgoing ASCII stream

---

[08:20](https://www.youtube.com/watch?v=2XLZ4Z8LpEE&t=500s) Linux Serial Setup on the Dolch Rugged Portable

Marc brings in a rugged vintage Dolch luggable computer running Linux to serve as the host system. For this setup, he converts the teletype configuration from half-duplex to full-duplex. This requires separating the transmit and receive loops into two independent circuits, drawing a total of 120 mA (60 mA per loop) from the high-voltage bench supply.

Marc turns to the Linux command line to configure the serial port and spawn a terminal handler. He points out that getting old serial terminal semantics right on modern Linux requires precise command-line parameters:

```bash stty -F /dev/ttyS0 9600 ixon ixoff sbin/agetty ttyS0 tty33 ```

He sets the port baud rate to 9600 (the speed between the Linux PC and the Arduino box, which in turn bridges to 45.5 baud), enables software flow control (`ixon ixoff`), and launches `agetty` with the terminal profile set to `tty33` (the profile for the classic Teletype Model 33 ASR).

---

[10:00](https://www.youtube.com/watch?v=2XLZ4Z8LpEE&t=600s) Logging into the Teletype Terminal

Marc sits at the Model 15 keyboard and hits return to wake up the system. The mechanical carriage fires into action, and the paper types out a login prompt:

> “We have a shell prompt!”

Marc attempts to log in as root using his BLANK-key prefix technique to provide the lowercase letters. The first attempt fails with an authorization error because standard user accounts cannot log in directly as root without elevation. Marc modifies his command on the host side, prepending `sudo` to spawn a root session, and tries again.

On the second attempt, Marc types in his username. The terminal holds back echoes for the password entry—proving Linux security semantics are intact even over a 1930 apparatus—and grants access:

> “Okay, doesn't echo my password, that's correct. Oh we're in! Oh no, it's going to give a disclaimer. It's going to take forever at 45.5 Bauds.”

The login banner and system disclaimer creep onto the yellow roll of paper character by character, taking tens of seconds to crawl across the page at 45.5 baud.

---

[12:18](https://www.youtube.com/watch?v=2XLZ4Z8LpEE&t=738s) Running Shell Commands and the `ed` Line Editor

Once the shell settles, Marc inputs `unalias ls`. He explains that modern Linux distributions alias `ls` to include ANSI color escape codes by default, which would flood the mechanical teletype with garbage characters. Executing `ls` successfully lists the files in the home directory.

However, arbitrary programming on a Model 15 is virtually impossible because the 5-bit Baudot code omits fundamental programming syntax. As Marc observes:

> “So what can you do? Well, probably not very much, because you can't do any programming, because you don't have even - there's no plus sign, there is no equal sign, there is no backlash, so you're really really limited in what character you can input into this thing.”

To perform useful work, Marc launches `ed`, the venerable Unix line editor designed specifically for slow, paper-printing teletypes where full-screen screen editors like `vi` or `nano` are impossible. Marc issues the `a` (append) command, writes text, toggles between figure and letter shift states (typing `FIGS.` to terminate insertion and returning to `LTRS`), selects line 2, and edits it with the `c` (change) command. He verifies the file's contents on disk using `cat test`:

> “It works! Can you imagine developing the whole Unix system line by line on the line editor? Now those guys deserve a medal.”

| Characteristic | Modern Linux Terminal | Teletype Model 15 | |:--- |:--- |:--- | | **Data Encoding** | UTF-8 / 8-bit ASCII | 5-bit Baudot (Baudot-Murray code) | | **Typical Line Speed** | 115,200 baud to gigabit | 45.5 baud (~60 words per minute) | | **Available Characters** | 1,000,000+ code points | 32 codes (shifted by FIGS/LTRS modes) | | **Missing Syntax** | None | `=`, `+`, `\`, `{`, `}`, `<`, `>`, lowercase | | **Display Medium** | Phosphor CRT / LCD matrix | Single-ply paper roll via inked ribbon | | **Primary Text Editor** | `nano`, `vi`, `emacs` | `ed` (standard line editor) |

---

[15:02](https://www.youtube.com/watch?v=2XLZ4Z8LpEE&t=902s) ASCII Art and Conclusion

Marc demonstrates the quintessential historical use case for early hard-copy computer terminals: printing text art. He streams a prepared file containing ASCII art of the Roadrunner cartoon character. Printing a single graphic takes minutes of mechanical hammerings and paper feeding at 45.5 baud, but the graphic renders cleanly onto the roll.

Reflecting on the successful hack, Marc wraps up the experiment with satisfaction:

> “Not that it's useful or anything, but it can be done: a 1930 Baudot teletype as a terminal for Linux.”

He concludes by teasing that for their next telecommunications stunt, they might attempt connecting a computer to Linux using Morse code.

## Notable quotes > [12:18](https://www.youtube.com/watch?v=2XLZ4Z8LpEE&t=738s) Can you imagine developing the whole Unix system line by line on the line editor? Now those guys deserve a medal. — Marc

> [15:02](https://www.youtube.com/watch?v=2XLZ4Z8LpEE&t=902s) Not that it's useful or anything, but it can be done: a 1930 Baudot teletype as a terminal for Linux. — Marc

## Mentioned Teletype Model 15, Linux, Baudot code, ASCII, HP 8018A Serial Data Generator, Arduino, Atmel, Eclipse IDE, ASR 33 Teletype, Dolch, ed, agetty, stty, CuriousMarc, Eric Volpe, Roadrunner, Saturn V

## Video description Commenters requested that we use our restored vintage 1930 Model 15 Teletype as a terminal for Linux. Hooking up a 5-bit mechanical contraption that predates computers by eons to a modern OS, even one that is terminal friendly, is not without some challenges. But hey, they are both clever, lovely, and digital! Should work, right? It had to be tried.

[edit] And now you can hear the bell(s)! Actually a whole episode on it: https://youtu.be/b2QPy-igBLA Teletype Model 19 Restoration Playlist: https://www.youtube.com/playlist?list=PL-_93BVApb5-9eQLTCk9xx16RAGEYHH1q My TTY interface box hardware and software details are available on my website at: https://www.curiousmarc.com/mechanical/teletype-model-19

Here are the ASCII art files: https://www.curiousmarc.com/mechanical/teletype-model-19#h.p_nvMSAvzNbrCq

I realized after making the video that the analog interface circuit should be credited to TeleTweety (Eric Volpe), who has all kinds of fantastic teletypes running twitter and other things at his home: https://www.youtube.com/user/teletweety He tweets from his teletype (in all caps!) at @teletweety

Chapters: 0:00 Intro 0:30 1930 'Model 15' Teletype Overview 1:52 Making the analog interface 3:28 Test using the HP 8018A Serial Data Generator 4:23 Arduino Software 5:44 Finished interface test 8:20 Linux hookup 10:00 1st Login attempt, no cigar 10:53 2nd Login attempt, success! 12:18 Using the line editor 'ed' on the teletype 15:02 Printing ASCII Art! 16:00 Saturn V rocket printout

Our sponsor for PCBs: https://www.pcbway.com Support the team on Patreon: https://www.patreon.com/curiousmarc Buy shirts on Teespring: https://teespring.com/stores/curiousmarcs-store Learn more on companion site: https://www.curiousmarc.com Contact info: https://www.youtube.com/curiousmarc/about

[Source](https://www.youtube.com/watch?v=2XLZ4Z8LpEE)

中文简报

CuriousMarc通过自制接口将1930年代电传打字机接入Linux Shell 将1930年代的机械电传打字机桥接至现代Linux系统,需要将微控制器硬件降频至45.5波特率,并重映射未使用的按键以规避失效的大写终端支持。 CuriousMarc详细介绍了通过高压60 mA电流环在1930年代的Teletype Model 15上运行Linux终端会话所需的完整工程流程。他构建了一个带有瞬态电压抑制的光隔离模拟接口,并对Atmel微控制器进行编程——通过硬件熔丝将主频降至2 MHz——以将9600波特率的8位ASCII码转换为45.5波特率的5位博多码。在通过自创的BLANK键前缀技术解决小写支持缺失和登录异常问题后,他连接到了一台运行Linux的Dolch加固型便携机。Marc登录进入Shell,使用复古行编辑器“ed”编辑文本,并打印出了精致的机械ASCII艺术图。 一台修复后的1930年代Teletype Model 15借助自制硬件和微控制器桥接,成功用作交互式Linux终端。 (0:08) 与现代5 V逻辑接口连接需要一个光隔离模拟电路,该电路能够处理60 mA、120 V DC电流环,并使用120 V TVS二极管钳位感应尖峰。 (1:49) 为了实现非标准的45.5波特率,Atmel微控制器的硬件时钟熔丝被重新配置,将内部时钟频率从16 MHz分频降至2 MHz。 (4:23) 由于博多码缺乏小写字母,且现代Linux全大写终端模式失效,电传打字机的BLANK键在定制固件中被映射为大写切换修饰键。 (5:44)

Reading summary

Marc demonstrates that a 1930 Teletype Model 15 can function as an interactive Linux console by overcoming significant electrical mismatches, timing constraints, and 5-bit character set limitations. Bridging High-Voltage Loops to Digital Logic (1:49) The Model 15 relies on an electromechanical 60 mA current loop energized at approximately 120 V DC to overcome line resistance over long distances, a standard incompatible with modern 5 V logic rails. To isolate sensitive digital components, Marc assembled an interface using optocouplers for galvanic separation, an input full-wave bridge rectifier to eliminate polarity concerns, and a 120 V transient voltage suppressor diode to absorb inductive kickback spikes generated by the teletype's mechanical coils. During assembly, Marc corrected errors in an online schematic, replacing an under-rated 100 Ω resistor with a 1 kΩ power resistor to prevent the optocoupler from burning out under 120 V. Initial signaling and coil actuation were verified using an HP 8018A serial data generator before introducing microcontrollers. Protocol Translation and Clock-Rate Workarounds (4:23) Translating standard 8-bit ASCII to the teletype's 5-bit Baudot code required an Atmel microcontroller running bare-metal C code to manage the low-level hardware registers. However, standard microcontrollers cannot divide their 16 MHz system clocks down far enough to support the teletype's 45.5-baud transmission speed. Marc resolved this by reconfiguring the Atmel chip's hardware configuration fuses to divide the internal clock by eight down to 2 MHz, bringing 45.5 baud within the UART divider range. Baudot encoding presents another obstacle: it provides only 32 codes and lacks lowercase characters. Because modern Linux distributions fail to properly handle the historical uppercase terminal flag (-U), Marc introduced a firmware workaround using the teletype's BLANK key as an escape modifier. Normal keystrokes transmit lowercase characters to Linux, while pressing BLANK immediately prior to a letter outputs an uppercase character. Configuring Linux for Teleprinter Hardware (8:20) Integrating the teletype with a rugged Dolch portable Linux PC required converting the machine from half-duplex to full-duplex operation, separating transmit and receive lines into two independent circuits drawing 120 mA total. To manage terminal communication, Marc used stty on the host PC to establish a 9600-baud link to the microcontroller box with software flow control (ixon ixoff) enabled, buffering bursts to avoid overwhelming the 45.5-baud teleprinter. The terminal session was spawned using agetty configured with the tty33 terminal profile. Linux security semantics remained intact, with the teletype correctly suppressing character echoes during password prompts, although printing the login banner and system disclaimer required tens of seconds at 45.5 baud. Interactive Limitations and Line-Based Editing (12:18) Operating a modern shell via a paper-printing teletype requires explicit adjustments. Marc disabled command colorization by unaliasing ls, preventing ANSI escape sequences from generating gibberish on the paper roll. Software development is strictly constrained because 5-bit Baudot lacks basic programming characters, including plus signs, equal signs, backslashes, and curly braces. Practical file editing was demonstrated using ed, the standard Unix line editor originally designed for paper consoles, where Marc appended text, shifted between letters and figures modes, and modified lines before printing ASCII art of the Roadrunner cartoon. Marc acknowledged that using a 1930 electromechanical teletype as a terminal offers no practical utility today due to missing syntax characters and sluggish 45.5-baud speeds, but the project validates that foundational Unix terminal abstractions can still span nine decades of computing hardware.

精炼阅读摘要

CuriousMarc 展示了如何通过自制模拟隔离接口与微控制器固件协议转换,将一台1930年生产的纯机电式 Teletype Model 15 电传打字机成功接入运行 Linux 系统的现代计算机,使其充当全功能控制台终端。 电气隔离与信号电平转换设计 (1:49) Teletype Model 15 是一台纯机电架构设备,采用约 120 V 直流高压驱动的 60 mA 电流环路来克服远距离线路电阻,这与现代低压数字逻辑存在根本性的电气冲突。为连接现代硬件,Marc 制作了一套隔离接口板,使用光电耦合器实现电流环与 5 V 逻辑电平之间的电隔离。针对机械电感线圈在断开时产生的反向电动势脉冲,发送端并联了 120 V 瞬态电压抑制(TVS)二极管加以吸收,以防击穿光耦器件;接收端则采用全波桥式整流器,消除环路极性接反的影响。在装配过程中,Marc 还修正了网传电路图中的两处严重缺陷:将原本在 120 V 电压下会立即烧毁光耦的 100 Ω 电阻更换为 1 kΩ 大功率电阻,并重新校正了输出端晶体管支路错画的上拉电阻。 低波特率限制与微控制器固件适配 (4:23) 在通信协议层面,Model 15 依赖 5 位 Baudot 编码,数据传输速率仅为 45.5 波特(bit/s),远慢于现代通信标准。Marc 使用 Atmel 微控制器编写纯 C 语言固件进行 8 位 ASCII 与 5 位 Baudot 间的双向映射。由于微控制器在默认 16 MHz 晶振下其硬件分频器无法下调至 45.5 波特,Marc 重新配置了芯片的硬件时钟熔丝位,将其内部时钟 8 分频降至 2 MHz,从而驱动内部 UART 在极低波特率下生成 5 位数据帧。此外,在连接 Linux 主机时,电传机由半双工改为全双工模式,发送与接收拆分为两条独立的电流环,由外部高压电源总计提供 120 mA 电流驱动。 字符集受限与 Linux 系统端配置突破 (5:44) 5 位 Baudot 编码仅能表示 32 种状态,依靠“字母(LTRS)”和“数字/符号(FIGS)”两种换挡模式切换,本身不存在小写字母编码。尽管早期的 Unix 系统开发基于全大写电传机,但 Marc 发现现代 Linux 发行版中 `getty` 和 `stty` 的大写转换参数(如 `-U` 选项)已失效。为此,他在微控制器固件中设计了一种按键转义机制:打字机默认向主机输出小写 ASCII 字符,若先敲击 Baudot 编码中的“BLANK”空白键,则将其后紧跟的一个字母转换为大写,以此满足 Linux 区分大小写的认证要求。在主机端,Marc 使用 `stty` 将串口速率设为 9600 波特(连接 Arduino 转换盒),强制启用 `ixon ixoff` 软件流控制以避免数据溢出,并启动 `agetty` 加载 `tty33` 终端配置文件。 终端会话交互与行编辑器操作验证 (10:00) 成功建立终端连接后,Linux 登录提示符被直接打印在纸卷上,且密码输入阶段不回显字符,验证了系统安全机制在机电设备上的完整性。登录后,Marc 执行 `unalias ls` 禁用了现代 Linux 默认注入的 ANSI 颜色转义字符,以防乱码破坏机械打印。由于 5 位 Baudot 字符集完全缺失加号(+)、等号(=)、反斜杠(\)以及各类括号等现代编程基础符号,电传机无法胜任常规开发工作。Marc 随后启动了早期 Unix 专为纸张终端设计的 `ed` 行编辑器,成功完成了文本追加(`a`)、切换状态换挡输入句号退出编辑、定位第 2 行修改(`c`)以及通过 `cat` 命令检查文件内容等一整套基础编辑流程。 该实验最终以 45.5 波特的速率打印出了一副完整的 Roadrunner ASCII 艺术图。Marc 指出,将近一个世纪前的机电装置改造成现代 Linux 终端虽然在实际应用中没有任何现实效用,但在技术实现上证明了早期电传通讯协议与现代类 Unix 操作系统底层设计之间依然保留着完整的兼容性路径。

Detailed notes — zh

## Background 该视频由复古科技博主 CuriousMarc 于 2020 年 4 月 13 日发布在 YouTube 平台上。视频记录了作者应观众请求,尝试将一台早于现代计算机诞生的 1930 年代 5 位机械式 Model 15 电传打字机改造为现代 Linux 系统终端的完整硬核折腾过程。 ## TL;DR Marc 详细展示了将一台运行在 120V/60mA 高压电流环、仅支持 5 位博多码(Baudot)及 45.5 波特率的 1930 年 Model 15 电传打字机接入 Linux 的全流程。他首先设计了包含光耦隔离与 TVS 钳位保护的模拟接口电路,修正了网络图纸的电阻错误,并利用 HP 8018A 数据发生器验证硬件。随后他通过修改 Atmel 微控制器的熔丝位将时钟降频至 2MHz 以支持超低波特率,并编写纯 C 语言固件实现了大小写前缀映射与协议转换。最终,他在运行 Linux 的便携机上配置串口、流控及 agetty 登录服务,成功在打字机纸面上完成登录鉴权、使用古老的 ed 行编辑器修改文本,并打印出经典的哔哔鸟与土星五号 ASCII 字符画。 ## Atmosphere & style 整个视频洋溢着极客工坊特有的专注与探索趣味,节奏轻快而技术硬核。伴随着 Model 15 沉重而清脆的机械敲击声,Marc 展现出从容耐心的极客风范,在遭遇硬件缺陷或权限报错时既有严谨的工程排查,又不乏幽默自嘲。当古老的打印纸卷慢吞吞敲出登录提示与精美字符画时,观众能深刻感受到一种跨越近一个世纪的技术浪漫与历史敬意。 ## Bulletin - [00:08](https://www.youtube.com/watch?v=2XLZ4Z8LpEE&t=8s) CuriousMarc 成功通过自制接口盒将 1930 年制造的 5 位博多码(Baudot)Teletype Model 15 电传打字机接入现代 Linux 系统,作为交互控制台运行。 - [04:23](https://www.youtube.com/watch?v=2XLZ4Z8LpEE&t=263s) 为适配 Model 15 的 45.5 波特率极限,固件开发中通过修改 Atmel 芯片熔丝位将时钟由 16MHz 降频至 2MHz,克服了标准串口分频器的下限限制。 - [05:44](https://www.youtube.com/watch?v=2XLZ4Z8LpEE&t=344s) 针对纯大写博多码字符集与现代 Linux 的兼容问题,作者在固件中将打字机的 BLANK 键作为大小写前缀切换符,实现了混合大小写命令及用户名的输入。 - [10:00](https://www.youtube.com/watch?v=2XLZ4Z8LpEE&t=600s) 打字机以 45.5 波特率成功登入系统后,顺利执行了经典行编辑器 ed 文本修改,并连续打出了哔哔鸟与土星五号两幅大型 ASCII 字符艺术图。 ## Key takeaways - [00:08](https://www.youtube.com/watch?v=2XLZ4Z8LpEE&t=8s) Teletype Model 15 是一台纯机械结构的 5 位博多码(Baudot)电传打字机,采用 120V/60mA 电流环传输,波特率仅为 45.5 bps。 - [01:49](https://www.youtube.com/watch?v=2XLZ4Z8LpEE&t=109s) 模拟接口电路采用光耦与全桥整流器实现电气隔离与极性无感接入,并配备 120V TVS 二极管吸收电磁铁反冲高压。 - [01:49](https://www.youtube.com/watch?v=2XLZ4Z8LpEE&t=109s) 网络开源图纸存在严重错误,若采用原图标注的 100Ω 限流电阻,接入 120V 高压时会瞬间烧毁光耦,作者将其修正为 1kΩ 大功率电阻并纠正走线。 - [03:28](https://www.youtube.com/watch?v=2XLZ4Z8LpEE&t=208s) 在固件开发前,利用古董 HP 8018A 串行数据发生器注入 5 位、45.5 波特率串行码,验证了模拟隔离硬件的正常动作。 - [04:23](https://www.youtube.com/watch?v=2XLZ4Z8LpEE&t=263s) Atmel 微控制器通过配置熔丝位激活内部 8 分频,将系统主频从 16MHz 降至 2MHz,从而使硬件 UART 能够输出 45.5 极低波特率。 - [05:44](https://www.youtube.com/watch?v=2XLZ4Z8LpEE&t=344s) 现代 Linux 发行版已弃用传统纯大写终端支持,作者将打字机的 BLANK 键映射为前缀切换符,解决了仅有大写键盘下的多大小写输入难题。 - [08:20](https://www.youtube.com/watch?v=2XLZ4Z8LpEE&t=500s) 全双工运行模式下,打字机的发送与接收回路彼此独立,高压电源的总回路电流达 120mA(每路 60mA)。 - [08:20](https://www.youtube.com/watch?v=2XLZ4Z8LpEE&t=500s) Linux 主机通过 stty 将 /dev/ttyS0 设定为 9600 波特率并开启 XON/XOFF 流控,并运行 agetty 将终端类型设为兼容机械终端的 tty33。 - [10:00](https://www.youtube.com/watch?v=2XLZ4Z8LpEE&t=600s) 初次交互登录因缺少权限受阻,改用 sudo 启动 agetty 后成功登入系统,密码输入时终端正确静音且不回显机械打印。 - [12:18](https://www.youtube.com/watch?v=2XLZ4Z8LpEE&t=738s) 登录后必须执行 unalias ls 取消默认彩色输出,否则不支持转义序列的电传打字机将打印出大量 ANSI 乱码。 - [12:18](https://www.youtube.com/watch?v=2XLZ4Z8LpEE&t=738s) Model 15 键盘严重缺乏加号、等号和反斜杠等编程符号,但依然能够通过经典行编辑器 ed 完成盲操文本追加与按行替换。 - [15:02](https://www.youtube.com/watch?v=2XLZ4Z8LpEE&t=902s) 系统成功驱动打字机逐行敲印出哔哔鸟与土星五号 ASCII 字符画,证明了跨越近一个世纪的技术桥接方案具有完全的功能完整性。 ## Detailed walkthrough ### [00:08](https://www.youtube.com/watch?v=2XLZ4Z8LpEE&t=8s) 1930 年 Model 15 电传打字机概述 Marc 利用新冠疫情居家避疫(shelter-in-place)的闲暇时间,清理一批未完成的项目。其中一个来自观众的热门建议,是把一台历史悠久的 5 位博多码(Baudot)电传打字机连接到现代计算机系统(如 Linux)。这台大约在一年前完成修复的设备是 1930 年推出的 Teletype Model 15。作为一款纯机械设备,它在 1930 年代至 1960 年代极其流行,广泛应用于军事通信和商业 Telex 专线服务中。 在发射端,该设备依赖旋转触点对数据位进行机械编码;在接收端,则由一组驱动电磁铁的精巧机械结构进行解码,并将字符直接打在纸卷上。发射触点与接收电磁铁之间通过约 120V 高压驱动的回路连接,以克服长距离电缆的电阻,运行电流设定在 60 毫安(mA),这种传输方案即经典的 60mA 电流环(current loop)。尽管这种设计在现代看来极为原始,却能在数英里的距离上实现非常可靠的传输。然而,它远早于 ASCII 字符集诞生,使用的是仅有 5 个数据位的博多码,传输速率极慢,仅有 45.5 bps(即 45.5 波特率)。正如 Marc 所说:“So at first blush, it is rather incompatible with modern computers.” ```mermaid flowchart LR accTitle: 电传打字机与现代系统互连架构 accDescr: 展示从现代计算机经由 Arduino 转换盒与高压电流环最终连接至 Model 15 电传打字机的数据流向。 subgraph Modern["现代系统"] PC["Linux 主机 / PC<br/>(9600 波特率, 8-bit ASCII)"] end subgraph Converter["接口转换盒"] MCU["Atmel / Arduino<br/>(熔丝分频降至 2 MHz)"] Opto["光耦隔离与电平转换<br/>(整流桥 / TVS 钳位保护)"] MCU --- Opto end subgraph Vintage["复古电传设备"] Loop["120V / 60mA<br/>高压电流环"] TTY["Teletype Model 15<br/>(45.5 波特率, 5-bit Baudot)"] Loop --- TTY end Modern <-->|"RS-232 / USB 串口"| Converter Converter <--> Vintage ``` ### [01:49](https://www.youtube.com/watch?v=2XLZ4Z8LpEE&t=109s) 设计模拟接口电路与修复设计缺陷 要让现代微控制器与 Model 15 通信,第一步是搭建一个能够在 120V/60mA 高压电流环与常规 5V 逻辑电平之间互相转换的接口电路。Marc 从网络上找到了一份兼顾极性不敏感特性的电路方案: - **发射部分**:低压数字信号点亮光电耦合器(光耦)中的 LED(本质相当于固态继电器),同时配备 120V 瞬态抑制二极管(TVS)电压钳位元件,用于消除电磁铁断开时反冲并烧毁光耦的高压尖峰。 - **接收部分**:电路巧妙地设计了全桥整流器,使得接线无需严格区分电流环的极性,信号随后经过光耦传回 5V 逻辑端。 然而,Marc 仔细检查网络图纸后发现了两处致命错误:“Except they had two mistakes in it and that can't be a 100 Ohms - 100 Ohms with a 120V on it will definitely fry your opto-isolator.”另外,图纸上的一个电阻也被画在了晶体管错误的支路上。Marc 修正了这些缺陷:将限流电阻更改为安全的 1kΩ 大功率电阻,并调整了晶体管支路的走线,最终引出稳定的 +5V、地、Rx 和 Tx 接口。 ### [03:28](https://www.youtube.com/watch?v=2XLZ4Z8LpEE&t=208s) 使用 HP 8018A 串行数据发生器测试接口 为了在编写微控制器固件之前验证这套模拟电路的接收功能,Marc 需要一个能够输出 5 位、45.5 波特率串行信号的信号源。他请出了一台古董测试设备——拥有 2K 位的 HP 8018A 串行数据发生器。他在 HP 8018A 上设置位模式(bit pattern),先输入 1 位,加载字数据,再追加第 2 位,然后将序列数据直接输出至刚搭建好的电路中。伴随着 Model 15 机械装置发出的清脆敲击声,打字机成功动作,证明了模拟隔离电路运作正常。 ### [04:23](https://www.youtube.com/watch?v=2XLZ4Z8LpEE&t=263s) Arduino 固件编写与时钟降频技巧 接下来需要构建一台能将一侧的标准 8 位 ASCII 字符转换成另一侧 5 位 Baudot 码的转换盒。Marc 没有使用标准的 Arduino IDE,而是在 Eclipse IDE 中直接用纯 C 语言为 Atmel 芯片编写底层代码,以便获得对硬件寄存器的绝对控制。 这里最大的技术难题在于微控制器的波特率下限:Atmel 芯片虽然原生支持 5 数据位模式,但在常规的 16MHz 系统时钟下,硬件串口的分频器无法设置出低至 45.5 波特率的时钟。Marc 采取的解决办法是修改芯片的熔丝位(fuses),激活“内部时钟 8 分频”(divide clock by 8 internally)选项: - 系统时钟从标准的 16MHz 降低到 2MHz。 - 时钟降低后,硬件 UART 能够精确向下覆盖到 45.5 波特率。 随后,Marc 将这块配置好的微控制器与模拟隔离电路统一装进一个带有前面板开关和接线端口的定制蓝色机箱中。 ### [05:44](https://www.youtube.com/watch?v=2XLZ4Z8LpEE&t=344s) 转换盒联调与大小写输入技巧 在演示测试中,该转换盒通过 USB 端口供电和传输数据,同时引出标准串口以及连接电流环的高压电源线。在半双工模式下接入系统后,Marc 在 PC 端打开终端软件(COM4,开启 XON/XOFF 流控以应对大量数据传输时的缓冲区溢出),敲击键盘,Model 15 随即开始打字,同时展现出明显的内部缓冲区排队输出特征。 由于博多码仅支持大写字母,Marc 在固件中引入了一个巧妙的小写字母输入模式(lowercase mode)。最初的 UNIX 确实支持纯大写终端(毕竟当年开发就是在 ASR-33 电传打字机上进行的),但现代发行版中的相关选项(如 `-U`)早已失效。Marc 设计的方案是将打字机上的空白键(BLANK)作为大小写前缀切换符:“what I elected to do is to use the blank key as a prefix.” - 示例:如果输入 `BLANK` + `C` + `U` + `R` + `I` + `O` + `U` + `S` + `BLANK` + `M` + `A` + `R` + `C`; - 打字机纸面上受机械限制仍打印全大写,但发送给现代接收端的 ASCII 码则正确转换成了大小写分明的 `CuriousMarc`。 ### [08:20](https://www.youtube.com/watch?v=2XLZ4Z8LpEE&t=500s) 连接 Linux 主机与串口配置 为了让打字机成为真正的控制台,Marc 搬出一台运行旧版 Linux 的 Dolch 便携工控机。此时转换盒切换到全双工模式:由于打字机的发送与接收为相互独立的回路,高压电源需要同时为两个回路供电,总电流上升至 120mA(每个回路 60mA)。 在 Linux 侧,Marc 配置位于 `/dev/ttyS0` 的串口。他使用 `stty` 命令设定波特率为 9600(连接转换盒一侧的高速串口),并开启软件流控(`ixon ixoff`)。紧接着,为了启动交互式登录会话,他需要运行 `agetty`(Alternate Get TTY)服务,并将终端类型参数指定为兼容机械打字机的 `tty33`(即 Teletype ASR-33)。 ### [10:00](https://www.youtube.com/watch?v=2XLZ4Z8LpEE&t=600s) 首次登录失败与以 root 权限成功登入 在配置好 `agetty` 并切换至转换盒的小写模式后,打字机纸面上终于打印出了登录提示符(shell prompt)。Marc 满怀期待地敲入用户名,但在第一遍尝试时遭到了系统拒绝,提示必须具备 root 权限才可运行该终端进程。 意识到遗漏后,Marc 迅速通过 `sudo` 重新拉起 `agetty` 监听服务。在第二次尝试中,他在打字机上小心敲入用户名,由于终端在密码输入阶段正确关闭了字符回显(echo),打字机保持静止;回车后,系统成功通过鉴权,正式登入系统!由于波特率仅有 45.5,登录后的系统免责声明与欢迎信息(disclaimer)在纸卷上一行一行慢吞吞地敲打出来,Marc 忍不住吐槽这速度简直要打到天荒地老。 ### [12:18](https://www.youtube.com/watch?v=2XLZ4Z8LpEE&t=738s) 单行编辑器 ed 实战与字符集局限 进入控制台后,Marc 首先输入了 `unalias ls`。这是因为现代发行版中 `ls` 默认绑定了彩色显示选项,而输出 ANSI 颜色转义序列会导致缺乏转义支持的电传打字机吐出一堆无法识别的乱码。 在 Model 15 上进行实际交互会受到字符集的严重制约:键盘上连最基本的加号(`+`)、等号(`=`)、反斜杠(`\`)等符号都没有,根本无法进行代码编写。不过,它非常适合用来运行古老的行编辑器 `ed`: - 输入 `ed` 进入编辑器并执行 `a`(追加文本模式)。 - 输入两行内容后,通过数字换挡(FIGS)输入点号 `.`,再切回字母换挡(LTRS)退出编辑模式。 - 通过切换数字状态访问第 2 行,敲入 `c` 指令修改第二行内容为 `"At the teletype"`。 - 最后调用 `cat test` 查看文件内容,终端精确回显修改后的文本。 面对这极其繁琐且全盲的操作体验,Marc 感叹当年 Unix 先驱的不可思议:“Can you imagine developing the whole Unix system line by line on the line editor? Now those guys deserve a medal.” ### [15:02](https://www.youtube.com/watch?v=2XLZ4Z8LpEE&t=902s) 打印 ASCII 艺术画与总结 在行式打印终端时代,人们最热衷的娱乐之一就是打印 ASCII 艺术画。Marc 将存储在系统中的 ASCII 字符画发往打字机。打字机以极其缓慢但极具机械美感的节奏,逐行打出了经典的“大笨狼与哔哔鸟”中的跑路鸟(Roadrunner)形象,随后还打出了一幅巨大的土星五号(Saturn V)运载火箭全景图。 在视频结尾,Marc 总结道,将一台 1930 年的博多码电传打字机接入 Linux 成为终端虽然在实用性上毫无价值,但这项工程验证了跨越近一个世纪的技术桥接是完全可行的。他向观众打趣道,下次他们或许可以尝试更极端的挑战——直接用莫尔斯电码(Morse code)来登录并控制 Linux。 ## Notable quotes > [12:18](https://www.youtube.com/watch?v=2XLZ4Z8LpEE&t=738s) Can you imagine developing the whole Unix system line by line on the line editor? Now those guys deserve a medal. — Marc ## Mentioned Teletype Model 15, Linux, Baudot code, ASCII, HP 8018A, Arduino, Atmel, Dolch, agetty, ed, CuriousMarc, Eric Volpe, TeleTweety, Teletype Model 19, Teletype ASR-33, Saturn V ## Video description Commenters requested that we use our restored vintage 1930 Model 15 Teletype as a terminal for Linux. Hooking up a 5-bit mechanical contraption that predates computers by eons to a modern OS, even one that is terminal friendly, is not without some challenges. But hey, they are both clever, lovely, and digital! Should work, right? It had to be tried. [edit] And now you can hear the bell(s)! Actually a whole episode on it: https://youtu.be/b2QPy-igBLA Teletype Model 19 Restoration Playlist: https://www.youtube.com/playlist?list=PL-_93BVApb5-9eQLTCk9xx16RAGEYHH1q My TTY interface box hardware and software details are available on my website at: https://www.curiousmarc.com/mechanical/teletype-model-19 Here are the ASCII art files: https://www.curiousmarc.com/mechanical/teletype-model-19#h.p_nvMSAvzNbrCq I realized after making the video that the analog interface circuit should be credited to TeleTweety (Eric Volpe), who has all kinds of fantastic teletypes running twitter and other things at his home: https://www.youtube.com/user/teletweety He tweets from his teletype (in all caps!) at @teletweety Chapters: 0:00 Intro 0:30 1930 'Model 15' Teletype Overview 1:52 Making the analog interface 3:28 Test using the HP 8018A Serial Data Generator 4:23 Arduino Software 5:44 Finished interface test 8:20 Linux hookup 10:00 1st Login attempt, no cigar 10:53 2nd Login attempt, success! 12:18 Using the line editor 'ed' on the teletype 15:02 Printing ASCII Art! 16:00 Saturn V rocket printout Our sponsor for PCBs: https://www.pcbway.com Support the team on Patreon: https://www.patreon.com/curiousmarc Buy shirts on Teespring: https://teespring.com/stores/curiousmarcs-store Learn more on companion site: https://www.curiousmarc.com Contact info: https://www.youtube.com/curiousmarc/about [Source](https://www.youtube.com/watch?v=2XLZ4Z8LpEE)

Source quotes

[12:18] Marc: Can you imagine developing the whole Unix system line by line on the line editor? Now those guys deserve a medal.

Source quotes

[12:18] Marc: Can you imagine developing the whole Unix system line by line on the line editor? Now those guys deserve a medal. [15:02] Marc: Not that it's useful or anything, but it can be done: a 1930 Baudot teletype as a terminal for Linux.

Original transcript

[0:08] It's a long time we haven't seen the five bit  Baudot teletypes and I'm taking advantage of [0:14] the Coronavirus shelter-in-place to finish  some loose end projects. And one of them was [0:22] a suggestion that we should connect this to a  modern machine, maybe a Linux one. As you might [0:28] remember from the restoration over a year ago this  model 15 teletype is an entirely mechanical device [0:34] which was introduced in 1930. It was very  popular until the 1960s, used for military [0:41] communications and commercial telex service. On  the transmit side it uses a rotating contact to [0:49] encode the bits. On the receive side it uses  a mind-bogging-ly clever mechanical system [0:55] driven by an electromagnet to decode the  bits and print them onto the roll of paper. [1:05] The transmitted contact and receiver magnet are  linked by a line driven by a high voltage to [1:14] overcome the wire resistance, usually around 120  volts, and running at 60 milliamps current. The [1:21] scheme is called a 60 milliamp current loop. As  primitive as it looks, it can transmit reliably [1:27] for many miles. This of course predates ASCII  coding by a very long shot. Instead it uses the [1:35] earlier Baudot coding with only 5 bits, at the  very pokey rate of only 45.5 bits per second or [1:43] Bauds as it became known. So at first blush, it  is rather incompatible with modern computers. [1:49] First thing is to make a circuit that goes from  the 60 milliamp high voltage current loop to [1:55] a regular 5-volt logic and what I like in this  circuit I got on the Interwebs is that it takes [2:02] care of the polarity. This is the low voltage  and digital signal. You light up your little [2:08] LED in your opto-coupler, it's basically a modern  equivalent of a relay, it's a solid state relay. [2:14] And a voltage clamp to get rid of the relay spikes  that will invariably come back and ruin your opto [2:20] isolator. I like the receiver circuit too and it  cleverly puts a full bridge rectifier so you are [2:26] not sensitive to the polarity of the loop. And  same thing, opto-isolator and off you go to the [2:31] 5 volt circuitry. Except they had two mistakes in  it and that can't be a 100 Ohms - 100 Ohms with a [2:37] 120V on it will definitely fry your opto-isolator.  And here also the resistor is in the wrong branch [2:44] of a transistor. And here's the circuit. You  see the transmit with the polarity insensitive [2:50] opto-isolator and the 120 volt TVS and in the  receive section you have the power resistor, [3:00] the full-bridge bridge rectifier, the  1k resistor - and not the 100 Ohms - the [3:07] simple opto-isolator and the resistor in the  right branch of the circuit. And out it comes: [3:13] plus minus 5 volts, Rx and TX. I wanted to give  it the a whirl and try it on the Teletype here. [3:19] Except that I need a source of 5-bit 45.5 Bauds  and I haven't made that contraption yet. But i [3:28] have the HP 8018 serial data generator.  So what this antique instrument can do, [3:36] is generate a serial bit stream. And you have  a giant memory of 2 K bits. Let's do a 1 bit [3:45] pattern. Load word. Here is our bit. I  can add another bit. Here are 2 bits. [4:01] And let's send [it] out to the teletype. [4:14] So okay my interface works, let's write some  modern Arduino stuff. So my job here is to [4:24] make a contraption that takes regular  ASCII eight bits on one side and spit [4:32] out some Baudot bits on the other side. I  usually put the hardware I built over here, [4:37] or I will put my interface, [but] it's  already taken out, it's already put in [4:41] a box. And on the software side I use the  Eclipse IDE and I program the devices in [4:47] straight C. I don't use at all the Arduino  stuff, which gives me more control. And in [4:54] particular the trick here was to slow down the  Atmel enough so it could do baudot at 45.5. It [5:04] turns out [that] the Atmel chip supports 5  bits, but to get it to go down that slow, [5:12] you have to go into the fuses and flip this little  one here that says "divide clock by 8 internally". [5:20] So this bit is on and instead of having your  standard Arduino running at 16 megahertz, [5:27] it divides it internally down to 2 megahertz and  that's slow enough to cover all the way down to [5:33] 45.5 Bauds. I put the Arduino and the interface  in a blue box and wired it to a front panel. [5:46] Okay, demonstration! So I use the USB either  as an input or for power, actually it does [5:54] both .Then also put the serial port in  it. Here I have my high voltage supply [6:06] for the loop. And I'll put myself in  half duplex, power in, here we go. [6:24] Okay, it's on. If I turn to over here, let me  make a terminal. And it's using - I think I am [6:41] on COM4. You want to turn Xon-Xoff if you send  big files. All right so now we type on this. [6:53] And it goes back to the other end. [7:04] And notice that it has a lot of buffering. [7:12] And the extra feature I have added is lowercase  mode. Of course the original UNIX did support [7:21] all caps - heck, that's how it was developed, on  ASR 33 Teletypes - but this feature seemed not to [7:28] be functional in modern distributions.  Although the -U option is still there, [7:33] it sure didn't work. And for the  occasional capitalization I need, [7:39] what I elected to do is to use the blank  key as a prefix. Let's do CuriousMarc and [7:47] I'll capitalize CuriousMarc. So, I'll  do blank c-u-r-i-o-u-s blank m-a-r-c [7:50] and of course here it's all caps, it's the  only thing it can do. But on the receive side [8:09] it did capitalize it properly. So were these  modifications I think I can log into Linux. So [8:21] here's the setup: on the right it's my Dolch which  has booted an old version of Linux. Now the box [8:29] is set up in full-duplex. The transmit, which is  powered by this box, and the receive comes to this [8:38] other box, because I have to power the receive  loop separately. Since it's not half-duplex, [8:43] there are two independent loops. So they are both  connected to my high [voltage] supply. Now it [8:50] powers two loops so I have 120 mA instead of 60.  Okay. And actually if I turn this on, that should [9:00] be OK. So, that where we need the Linux-Fu to come  in, and I always get it wrong. I have two serial [9:12] ports ttyS0 and ttyS1, and I'm on S0 I believe. So  it would be set TTY dash F slash /dev/ttyS0 9600. [9:29] And I want xOn Xoff, so ixon ixoff. So now I  have to generate a login shell so sbin/agetty, [9:44] "Alternate Get TTY". ttyS0. I'm  gonna tell it what type of terminal, [9:53] I'll try tty33 which is ASR 33. That should do  it. I put myself in lowercase mode here. So... [10:04] We have a shell prompt! That's where we'll [10:22] see if my lowercase trick works. [10:36] Cannot possibly work without effective root? [10:46] Ah, I have to do sudo. Okay, all right, almost  there. sudo, Super User do, okay. Try it again. [11:15] Allright, try again. USER. [11:21] Okay, doesn't echo my password,  that's correct. Oh we're in! [11:31] Oh no, it's going to give a disclaimer.  It's going to take forever at 45.5 Bauds. [11:57] All right! So I should have a computer at the  other end of this old mechanical contraption. [12:23] So. Oh, let's do UNALIAS LS, because I know this  distribution does color by default, which will [12:42] give me all all the extra characters I don't want.  So do LS, let's see what's in this directory. [13:02] Okay. So what can you do? Well, probably not  very much, because you can't do any programming, [13:12] because you don't have even - there's  no plus sign, there is no equal sign, [13:23] there is no backlash, so you're really really  limited in what character you can input into [13:29] this thing. But I could do a little bit of single  line editing. Let's try it. Let's do ED. ED, okay, [13:40] single line editor. This - no. Append. There  we go. And I go second line. So ED being the [14:01] original editor for Teletypes, one line at  a time. And to get out of it it's FIGS-dot, [14:11] I have to go back to LTRS, or  I'll forget. All right. And now [14:17] I want to change the second line, so  I would go to line two. FIGS 2 LTRS [14:30] "At the teletype". Now I want to change it,  I do C. Then I do CAT TEST. It works! Can you [14:51] imagine developing the whole Unix system line by  line on the line editor? Now those guys deserve [15:01] a medal. What people used to do a lot is print  ASCII art. They are very nice, takes forever to [15:06] print though. ROADRUNNER. And here is Roadrunner  and my whole Unix session. There! Not that it's [15:27] useful or anything, but it can be done:  a 1930 Baudot teletype as a terminal for [15:34] Linux. Alright commenters: I think have  done it, and don't miss the next episode [15:41] as we might well try to connect to  Linux using Morse code this time.