Barium Sulfate Paint Chills Surfaces 3C Below Ambient Air in Sun
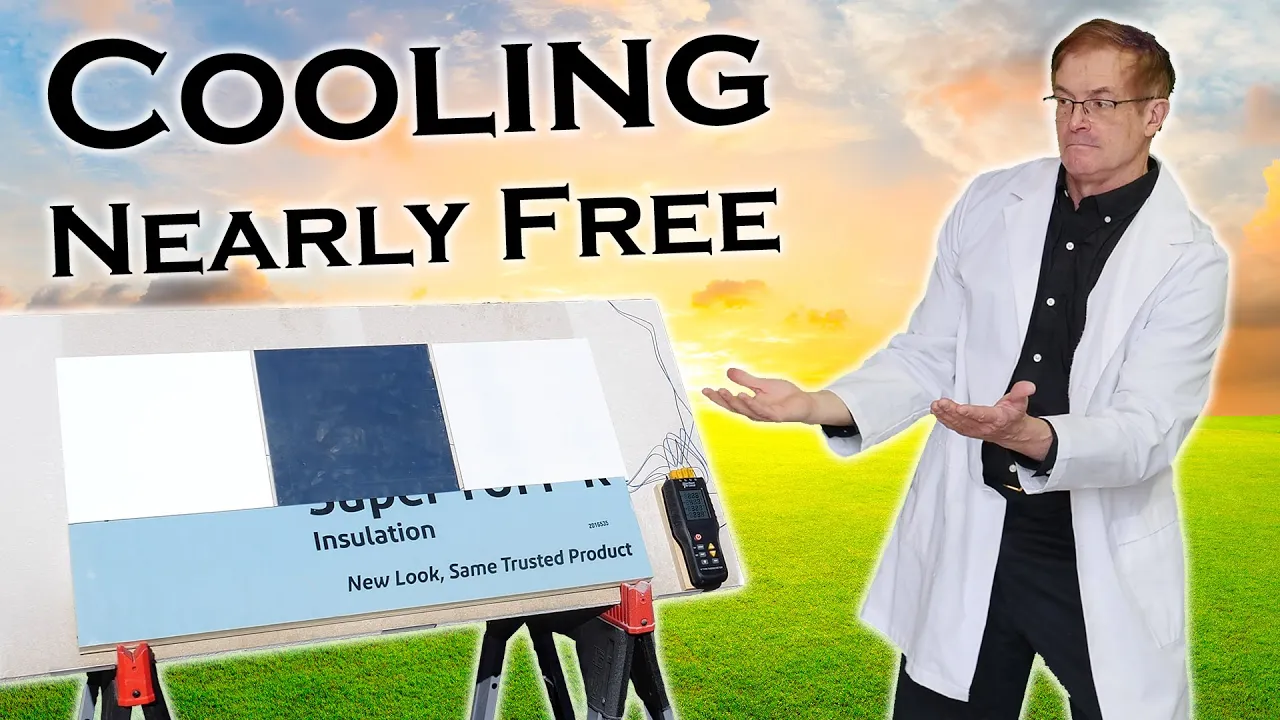
Revolutionary Paint: How to Make Surfaces Stay Cool in the Sun — Tech Ingredients

Tech Ingredients

Blending multi-sized barium sulfate nanoparticles into an acrylic binder creates a coating that reflects 99% of solar energy and emits mid-infrared heat, driving outdoor metal 3 °C below ambient air without power.

AI-assisted summary of Revolutionary Paint: How to Make Surfaces Stay Cool in the Sun — original source. Check the original for full context.

Source published:

Key ideas

  • A specialized radiative cooling paint formulated with dense barium sulfate nanoparticles and an acrylic binder achieves passive, sub-ambient cooling (~3 °C below ambient temperature) in direct sunlight. (46:47)
  • Barium sulfate acts as both a near-lossless solar scatterer (>99% visible reflectance via multi-crystal scattering) and a microscopic infrared nano-antenna (>96% emissivity around the 10 µm thermal window). (3:00)
  • Reaching maximum packing density requires multimodal particle sizing synthesized across varying temperatures (0 °C for ~10 nm up to 95 °C for several hundred nm) to overcome the ~64% geometric density limit of uniform spheres. (13:06)
  • Outdoor trials in November sunlight demonstrated that the custom paint stayed 3 °C below ambient air, whereas bare aluminum ran 20 °C hotter and commercial white paint sat 8–10 °C above ambient. (46:47)

Detailed notes

## Background This guide was published on YouTube by Tech Ingredients on March 3, 2023. Serving as a detailed follow-up to a previous project that showcased a custom liquid cooling panel, the video provides comprehensive instructions on formulating and applying the specialized, ultra-reflective radiative cooling paint that enables sub-ambient thermal performance.

## TL;DR The video outlines the chemical synthesis, physical principles, and application techniques required to fabricate a passive radiative cooling 'super paint' using barium sulfate and an acrylic PMMA binder. By utilizing multimodal particle sizing and controlling precipitation conditions, the coating reflects over 99% of solar radiation while behaving as a microscopic nano-antenna that emits heat into the infrared atmospheric window. Applied in roughly 27 thin passes to reach a 0.5 mm thickness on an acid-etched aluminum substrate, the coating demonstrates true daytime sub-ambient passive refrigeration. Real-world outdoor testing under direct sunlight proves the treated panel stays approximately 3 °C cooler than ambient air, heavily outperforming both bare aluminum and commercial white paint.

## Atmosphere & style The presentation carries the warm, highly instructional atmosphere of an advanced DIY garage laboratory, blending rigorous chemical theory with practical workshop resourcefulness. The host delivers the tutorial with engaging enthusiasm, accessible dry humor, and a genuine delight in science, even casually sipping medical barium sulfate suspension on camera to prove its non-toxicity. The pace transitions from meticulous bench-scale chemistry into an authentic, slightly gritty workshop endurance test as the host and cameraman grind through hours of repeated spray passes, culminating in an outdoors, data-driven payoff that feels both technically satisfying and deeply validating.

## Bulletin - [46:47](https://www.youtube.com/watch?v=dNs_kNilSjk&t=2807s) A specialized radiative cooling paint formulated with dense barium sulfate nanoparticles and an acrylic binder achieves passive, sub-ambient cooling (~3 °C below ambient temperature) in direct sunlight. - [03:00](https://www.youtube.com/watch?v=dNs_kNilSjk&t=180s) Barium sulfate acts as both a near-lossless solar scatterer (>99% visible reflectance via multi-crystal scattering) and a microscopic infrared nano-antenna (>96% emissivity around the 10 µm thermal window). - [13:06](https://www.youtube.com/watch?v=dNs_kNilSjk&t=786s) Reaching maximum packing density requires multimodal particle sizing synthesized across varying temperatures (0 °C for ~10 nm up to 95 °C for several hundred nm) to overcome the ~64% geometric density limit of uniform spheres. - [46:47](https://www.youtube.com/watch?v=dNs_kNilSjk&t=2807s) Outdoor trials in November sunlight demonstrated that the custom paint stayed 3 °C below ambient air, whereas bare aluminum ran 20 °C hotter and commercial white paint sat 8–10 °C above ambient.

## Key takeaways - [00:00](https://www.youtube.com/watch?v=dNs_kNilSjk&t=0s) Passive radiative cooling operates with an effectively infinite energy efficiency ratio (EER) because heat rejection requires zero ongoing power input. - [01:14](https://www.youtube.com/watch?v=dNs_kNilSjk&t=74s) Daytime passive cooling requires an engineered surface that simultaneously reflects over 99% of incoming solar irradiance while emitting over 96% in the mid-infrared (~10 µm) window. - [03:00](https://www.youtube.com/watch?v=dNs_kNilSjk&t=180s) Barium sulfate is biologically inert, inexpensive, and features an electronic vibrational structure that naturally resonates at room-temperature thermal infrared frequencies. - [04:36](https://www.youtube.com/watch?v=dNs_kNilSjk&t=276s) The optical scattering mechanism of barium sulfate functions like snow, using internal refraction and external facet reflection across non-absorbing crystals to bounce virtually all sunlight away. - [08:06](https://www.youtube.com/watch?v=dNs_kNilSjk&t=486s) Uncontrolled precipitation yields large, jagged crystalline aggregates; adding an EDTA surfactant chelates barium ions to force uniform, smooth, spherical nanoparticle formation. - [09:37](https://www.youtube.com/watch?v=dNs_kNilSjk&t=577s) Using sodium sulfate rather than sulfuric acid as the sulfate donor avoids corrosive hydrochloric acid byproducts, yielding safe, dilute table salt solution. - [09:37](https://www.youtube.com/watch?v=dNs_kNilSjk&t=577s) Allowing the precipitated suspension to rest overnight improves particle quality through Ostwald ripening, smoothing and polishing the crystal faces naturally. - [13:06](https://www.youtube.com/watch?v=dNs_kNilSjk&t=786s) Multimodal densification using batches produced at 0 °C, 30 °C, 60 °C, and 95 °C fills interstitial voids between particles, pushing solids loading far beyond the ~64% limit of uniform spheres. - [17:53](https://www.youtube.com/watch?v=dNs_kNilSjk&t=1073s) Standard epoxies and polyurethanes fail as binders because their lack of volatile components forces high resin ratios; polymethyl methacrylate (PMMA) dissolved in dimethylformamide (DMF) allows ultra-high solids loading. - [17:53](https://www.youtube.com/watch?v=dNs_kNilSjk&t=1073s) Slow-evaporating solvents like DMF are required to build a 0.5 mm thick film across 20 to 30 individual spray coats without clogging guns or producing stringy polymer strands. - [26:40](https://www.youtube.com/watch?v=dNs_kNilSjk&t=1600s) A relatively low molecular weight acrylic resin (~80,000–100,000 MW) heated to ~70 °C provides the ideal balance of solubility, wetting, and mechanical binding. - [30:32](https://www.youtube.com/watch?v=dNs_kNilSjk&t=1832s) Targeting a fluid viscosity of 100 to 150 centipoise (7–8 seconds in a Zahn #3 cup) ensures optimal flow and atomization for HVLP spray application. - [33:15](https://www.youtube.com/watch?v=dNs_kNilSjk&t=1995s) Aluminum substrates require a strict three-stage surface preparation protocol—solvent degreasing, mechanical sanding, and acid-etch priming—to defeat the rapidly reforming aluminum oxide layer. - [37:13](https://www.youtube.com/watch?v=dNs_kNilSjk&t=2233s) Recoating must occur within a specific window when the surface turns matte and dry to the touch but retains faint solvent traces to ensure strong interlaminar acrylic bonding without vapor blistering. - [37:13](https://www.youtube.com/watch?v=dNs_kNilSjk&t=2233s) Diffuse scattering from a dead-matte paint finish reflects the exact same percentage of solar energy as a mirror-like specular gloss finish. - [46:47](https://www.youtube.com/watch?v=dNs_kNilSjk&t=2807s) In live outdoor testing, the 27-coat barium sulfate panel remained roughly 3 °C below ambient outdoor air, outperforming commercial super white paint by over 11 °C.

## Detailed walkthrough ### [00:00](https://www.youtube.com/watch?v=dNs_kNilSjk&t=0s) Radiative Cooling and the Concept of Super Paint

In a previous project, the channel demonstrated an engineered cooling device capable of chilling circulating water below the ambient air temperature simply by radiating thermal energy out into the surrounding environment. While that panel utilized just a couple of watts of electrical power to pump and circulate the fluid, the actual thermodynamic cooling mechanism was entirely passive. Because it expends zero energy to perform the heat extraction itself, its effective energy efficiency ratio (EER) is virtually infinite.

The enabling breakthrough behind this thermal panel is a specialized surface coating or "super paint" engineered to radiate heat while defying daytime solar loading. Because this coating can be manufactured from straightforward, relatively inexpensive ingredients, the host sets out to explain both the foundational physics governing how it works and how anyone can fabricate it in a home laboratory. As the host notes regarding the initial prototype's validation: “Now if you're interested in this technology you might want to take a look back at that video because we go through the engineering we build the device we test it and it really worked.”

- Power consumption of the fluid pump: A couple of watts - Effective Energy Efficiency Ratio (EER): Infinite (passive heat rejection) - Goal: Formulate an inexpensive, DIY-accessible high-performance radiative cooling coating

---

[01:14](https://www.youtube.com/watch?v=dNs_kNilSjk&t=74s) The Physics of Emissivity and Solar Rejection

All physical objects emit electromagnetic radiation based on their temperature. At typical terrestrial, body, and room temperatures, this thermal glow peaks within the infrared spectrum at roughly 10 microns (10,000 nanometers). The effectiveness with which a physical surface radiates this thermal energy is defined as its emissivity. Common everyday substances—such as human skin, textiles, timber, concrete, plastics, and conventional commercial paints—typically exhibit thermal emissivity ratings ranging between 75% and 90%. However, maximizing radiative cooling requires driving that emissivity percentage as high as possible.

Operating such a passive radiative system under direct sunlight introduces an opposing technical challenge: rejecting the massive influx of daytime solar energy, which can deposit up to 1,000 watts (1 kilowatt) per square meter onto an exposed surface. Surfaces must simultaneously exhibit near-perfect reflectance across the solar spectrum while maximizing emissivity in the mid-infrared. Historically, achieving both properties simultaneously required alternating multi-layer dielectric optical thin films—similar to laser optics—manufactured using multi-million-dollar chemical vapor deposition (CVD) vacuum chambers with painfully slow throughput. Highlighting the breakthrough alternative, the host explains: “So there's been a lot of recent interest focused on this one material that performs both functions better than any other known substance it's widely available it's non-toxic and it's cheap barium sulfate.”

```mermaid flowchart TD accTitle: Radiative Cooling Mechanism Dual Balance accDescr: Diagram illustrating the simultaneous solar reflection and infrared heat emission requirements. subgraph SolarInput["Incident Solar Radiation"] Sun["Sun (~1,000 W/m²)"] -->|"Broadband visible & near-IR"| Surf["Surface Coating"] end subgraph OpticalBehavior["Dual-Mode Performance"] Surf -->|"Reflection (>99%)"| SpaceReflect["Reflected into Sky / Space"] Surf -->|"Thermal Emissivity (>96% at ~10 µm)"| IRRadiate["Radiated into Infrared Window"] end ```

---

[03:00](https://www.youtube.com/watch?v=dNs_kNilSjk&t=180s) Barium Sulfate: From Medical Milkshakes to Nano-Antennas

Barium sulfate ($\text{BaSO}_4$) is mined globally at a scale of roughly 10 million tons per year in the form of the mineral barite. While raw barite often resembles quartz and displays streaks of pink, blue, or green due to various mineral impurities, chemically pure barium sulfate is entirely colorless and optically crystal clear. It is also exceptionally benign biologically; despite barium being a heavy metal, barium sulfate's insolubility makes it safe enough for clinical use.

For decades, radiologists and gastroenterologists have utilized barium sulfate suspensions as a drinkable contrast agent. Because barium has a high atomic weight, it is radiopaque, showing up crisply on plain flat-plate x-rays to delineate the internal morphology of the gastrointestinal tract, revealing ulcers, diverticula, and tumors. To prove its safety, the host drinks a dose from an actual medical diagnostic cup on camera, deadpanning: “It's literally safe to drink.” After tasting it, he chuckles and notes that “it's not bad even comes in strawberry.”

Beyond its non-toxic profile, the crystal lattice of barium sulfate exhibits an electronic vibrational structure that naturally resonates at the exact frequencies corresponding to room-temperature thermal vibrations. As a result, every individual crystal behaves like a microscopic nano-antenna, radiating thermal energy straight out into the environment with an emissivity exceeding 96%.

- Global mining production of barite: Approximately 10 million tons per year - Medical application: Diagnostic radiopaque contrast agent for gastrointestinal x-rays - Resonant thermal emission: Operates as a nano-antenna in the mid-infrared (~10 µm) with >96% efficiency

---

[04:36](https://www.youtube.com/watch?v=dNs_kNilSjk&t=276s) The Optical Scattering Mechanism: The Snow Effect

The reason barium sulfate exhibits world-class solar reflectance comes down to its sheer optical clarity, operating on the exact physical mechanism that makes snow one of the most reflective substances on Earth. Liquid water is clear, yet when transformed into millions of crystalline snowflakes, it scatters incoming light in all directions without absorbing it.

When incoming sunlight strikes an optically pure crystal of barium sulfate or a snowflake, a fraction of the photon flux reflects directly off the crystal facets and scatters away, while another fraction enters the crystal, refracts through it, and exits in scattered directions. Light scattered backward toward the source constitutes direct reflection. Meanwhile, light refracted deeper into the bulk material encounters another crystal boundary, repeating the refraction and scattering sequence indefinitely. Because the material itself does not absorb visible wavelengths, the scattering process is essentially lossless, progressively bleeding light back toward the sky until virtually all of it escapes. Pure, dry barium sulfate powder achieved via this multi-scattering mechanism boasts a total visible reflectivity exceeding 99%.

---

[05:48](https://www.youtube.com/watch?v=dNs_kNilSjk&t=348s) Basic Double Displacement Synthesis of Barium Sulfate

To synthesize barium sulfate in the laboratory, one can mimic industrial pathways where mined barite is first converted into water-soluble barium chloride ($\text{BaCl}_2$) using heat and carbon. The host prepares a 0.2 molar ($0.2\text{ M}$) aqueous solution of barium chloride. He clarifies the concept of molarity for the audience by noting that barium chloride has a molecular weight of approximately 208 g/mol; dissolving 208 grams in one liter produces a $1\text{ M}$ solution, so a $0.2\text{ M}$ concentration corresponds to a one-fifth molar strength.

```mermaid flowchart LR accTitle: Precipitation Double Displacement Reaction accDescr: Flowchart of the reaction between barium chloride and sulfuric acid producing barium sulfate and hydrochloric acid. subgraph Reactants["Aqueous Reactants"] A["BaCl₂ (aq)"] B["H₂SO₄ (aq)"] end subgraph Products["Products"] C["BaSO₄ (s) ↓ (Precipitate)"] D["2 HCl (aq)"] end A --> E["Double Displacement"] B --> E E --> C E --> D ```

Pouring the clear barium chloride solution into glass Petri dishes, the host introduces a sulfate donor using a dropper filled with 20% sulfuric acid ($\text{H}_2\text{SO}_4$). The instant the acid droplets hit the liquid, opaque white clouds billow outward through a classic double displacement reaction:

$$\text{BaCl}_2 + \text{H}_2\text{SO}_4 \rightarrow \text{BaSO}_4\downarrow + 2\text{HCl}$$

Barium ions bind with sulfate ions to form an insoluble barium sulfate precipitate that drifts down to the bottom, leaving aqueous hydrochloric acid behind. Delighting in the vivid reaction, the host smiles and exclaims: “I love this chemistry is fun something to show your kids.”

---

[08:06](https://www.youtube.com/watch?v=dNs_kNilSjk&t=486s) Controlling Particle Morphology with EDTA Surfactants

Although the basic sulfuric acid precipitation creates real barium sulfate, the host warns that the resulting material is unsuitable for ultra-reflective radiative cooling paint. The rapid, uncontrolled precipitation spawns irregular, multi-micron-sized crystalline aggregates resembling microscopic jagged boulders. These large, uneven particles pack together poorly, leaving voids that degrade solar scattering and optical reflectivity. Achieving maximum performance requires dense particle packing, which demands smooth, spherical, nanometer-scale particles spanning a curated distribution of sizes.

The standard chemical technique for tailoring particle geometry is adding a surfactant (surface-active agent) to moderate crystallization. The host credits another YouTube creator, saying: “And that's exactly what NighthawkInLight did several months ago when he was covering this technology if you're interested in the subject take a look at his video it's very well done and it's interesting I think you'll like it.”

A chelating surfactant such as ethylenediaminetetraacetic acid (EDTA) temporarily bonds with and coordinates the barium ions in solution. When nucleation begins, the EDTA shields the growing seeds and carefully meters the rate at which free barium ions reach the crystal face. This controlled growth suppresses rapid jagged clustering, forcing the precipitate to assemble into uniform, round, nanometer-scale spheres.

- Goal: Nanometer-scale, smooth, spherical particles with varied size distribution for dense packing - Problem with unmoderated reaction: Generates large, jagged multi-micron aggregates - Solution: Introduce EDTA to sequester and meter barium ion availability during precipitation

---

[09:37](https://www.youtube.com/watch?v=dNs_kNilSjk&t=577s) Nanopowder Precipitation, Centrifugation, and Particle Aging

To execute the controlled synthesis, the host mixes 0.2 molar barium chloride with an equimolar amount of EDTA surfactant. Because EDTA has a molecular weight roughly 50% greater than barium chloride, the recipe requires approximately 1.5 times the weight of EDTA relative to the barium chloride salt. Rather than using sulfuric acid—which would yield corrosive hydrochloric acid as a byproduct—the host uses sodium sulfate ($\text{Na}_2\text{SO}_4$) as the sulfate donor. This substitution yields harmless, dilute table salt ($\text{NaCl}$) in solution, making downstream handling far safer and simpler.

$$\text{BaCl}_2 + \text{Na}_2\text{SO}_4 \xrightarrow{\text{EDTA}} \text{BaSO}_4\downarrow + 2\text{NaCl}$$

Upon pouring the sodium sulfate into the stirred barium chloride/EDTA mixture, the clear liquid flashes into a silky, milky white suspension of barium sulfate nanopowder within seconds. To collect the solids, a magnetic wand secures the stir bar inside the beaker while the suspension is decanted into 50 mL centrifuge tubes, carefully balancing the weights across rotor buckets.

The tubes are spun in an Amazon-sourced benchtop centrifuge at 4,000 RPM for several minutes to compress the nanopowder into a dense pellet. The host points out with amusement that this particular centrifuge was purchased for around $300 from Amazon's "foodie" section—a department catering to modernist cuisine and molecular gastronomy. Although limited to 4,000 RPM, it can spin up to 300 milliliters per batch, providing rapid turnaround.

The host reveals a final culinary parallel: the raw nanopowder suspension actually improves if left to sit prior to centrifugation. When left undisturbed overnight, the particles undergo Ostwald ripening and surface restructuring, rounding off remaining asperities. As the host remarks: “And in keeping with the food theme what's another interesting fact about this suspension is that it ages like fine wine if before I did this step we simply turned out the lights and came back the next day overnight the suspension will allow the barium sulfate to slightly rearrange and the particles become even smoother even rounder and almost polished so it doesn't add any more work but if you're a little more patient you're going to get a little bit better result and that's exactly what he found.”

- EDTA to barium chloride mass ratio: ~1.5:1 (equimolar concentration) - Preferred sulfate donor: Sodium sulfate (leaves dilute $\text{NaCl}$ instead of $\text{HCl}$) - Centrifuge specs: 4,000 RPM, 300 mL maximum batch capacity, cost ~$300 - Ripening behavior: Overnight resting allows crystalline surfaces to smooth out and polish naturally

[13:06](https://www.youtube.com/watch?v=dNs_kNilSjk&t=786s) The Principle of Densification and Particle Sizing

Controlling the precipitation reaction using EDTA yields much smaller, spherical nanoparticles that noticeably enhance paint performance, but reaching the true state of the art requires taking advantage of densification. This principle, which also gives ultra-high-performance concrete its strength, governs how particles pack inside a fixed volume. If a container is filled with uniform spheres, simply pouring them in yields roughly 60% solids loading, and even the tightest, neatest packing maxes out at approximately 64% due to the unavoidable geometric voids between them. The size of the particles does not change this ratio; smaller uniform spheres leave smaller voids, but proportionally more of them. To pack beyond that physical limit, medium-sized particles must be introduced to occupy the voids between the larger spheres, followed by even tinier nanoparticles to pack the remaining gaps between the medium ones, asymptotically approaching 100% solids loading.

```mermaid flowchart TD accTitle: Multimodal Densification and Synthesis Process accDescr: Step-by-step process of producing multi-sized barium sulfate nanoparticles at different temperatures and compounding them into paint.

subgraph Synthesis["1. Temperature-Controlled Batches"] T0["0°C Batch: ~10 nm"] T30["30°C Batch: Intermediate"] T60["60°C Batch: Intermediate"] T95["95°C Batch: Several 100 nm"] end

subgraph Processing["2. Separation & Drying"] Cent["Centrifuge & Decant"] Dry["Oven Dry at 100°C–150°C"] end

subgraph Compounding["3. Paint Formulation"] Blend["Blend Multi-Size Powders"] Mix["Disperse in DMF + PMMA Binder"] end

T0 --> Cent T30 --> Cent T60 --> Cent T95 --> Cent Cent --> Dry Dry --> Blend Blend --> Mix ```

Because the barium chloride and sodium sulfate reaction is highly temperature-dependent, tuning the temperature directly tunes the particle diameter. Executing the synthesis near 0°C produces uniform, spherical barium sulfate nanoparticles around 10 nanometers across. Running the reaction near 95°C yields smooth nanoparticles measuring several hundred nanometers. By producing four separate batches—at 0°C, 30°C, 60°C, and 95°C—and blending them together, one creates a diversified particle distribution engineered for ultra-high-density loading. As the presenter explains: “now if we want to get to the actual state of the art the highest possible performance that anybody's been able to achieve we have to kick this thing up one more not and to do so we have to take advantage of a principle called densification”.

- Uniform particle packing density limit: ~60% poured, ~64% optimally packed. - Bimodal and multimodal distributions fill interstitial voids, pushing density toward theoretical maximums. - Reaction temperatures: 0°C (~10 nm particles), 30°C, 60°C, and 95°C (several hundred nm particles).

---

[15:46](https://www.youtube.com/watch?v=dNs_kNilSjk&t=946s) Harvesting and Drying the Barium Sulfate Nano Powder

After spinning down the synthesis mixture in the centrifuge, the barium sulfate settles into a firm white pellet at the base of the tubes, leaving the clear supernatant liquid above. Rather than cleaning out the tube after every single spin, the supernatant is simply decanted off, and fresh reaction solution can be poured directly over the existing pellet to run another cycle. Stacking multiple runs inside the same centrifuge tube saves substantial cleanup time before reaching diminishing returns.

Once the tube holds a sufficient accumulation of material, a stirring rod is used to extract the dense barium sulfate paste. The paste is spread onto a plate and dried in an oven set between 100°C and 150°C for several hours, leaving behind a fine, dry nano powder. This cycle is repeated across each temperature run, after which all the fractions are combined into a master blend. The presenter quips to the audience about the resulting fine white powder: “and when you're done you mix everything together and you have your white powder and no comment no jokes in the comment section this this really is barium sulfate”.

- Supernatant is poured off, leaving the concentrated barium sulfate pellet behind. - Centrifuge tubes can be refilled and spun repeatedly to accumulate larger pellets per tube. - Drying parameters: 100°C to 150°C for 2 hours in an oven.

---

[17:53](https://www.youtube.com/watch?v=dNs_kNilSjk&t=1073s) Choosing the Binder and the Solvent: Acrylic and Dimethylformamide

Transforming the dry powder into paint requires a binder, but standard high-end coatings like two-part epoxy or polyurethane resin systems fail in this role. Because epoxies and polyurethanes contain virtually no volatile components, the ultra-dense powder quickly turns into an unworkable paste and then a stiff putty long before achieving the necessary solids loading. Adding extra resin to thin it out is unacceptable because no resin matches the optical properties of barium sulfate; maximizing performance demands minimizing binder content. The solution is polymethyl methacrylate (PMMA) acrylic resin dissolved in a volatile solvent. With an evaporative solvent, the liquid volume can be adjusted arbitrarily to achieve the exact viscosity needed for spreading or spray application, after which the solvent fully evaporates, leaving behind only the minimum polymer needed to bind the particles together.

The choice of solvent is equally critical. Dimethylformamide (DMF) performs best chemically, but it carries two major drawbacks: an unpleasant fishy odor reminiscent of dissecting frogs, and a very slow evaporation rate. Standard paint solvents like acetone, methyl ethyl ketone (MEK), and toluene smell comparatively pleasant and fruity, but they evaporate far too fast. Fast-evaporating solvents cause the high-solids mixture to gum up during application, and running them through a paint gun results in stringy messes that look like cotton candy or chopped fiberglass. Slow evaporation is mandatory because the coating relies purely on backscattering rather than opacifiers or pigments, necessitating 20 to 30 individual coats to reach a total film build of roughly 0.5 mm (5 to 10 times thicker than standard paint). Defending this heavy application schedule against skeptical trade painters, the presenter emphasizes: “this system is completely dependent on scattering and so you need a thick enough build so that all the light gets scattered back toward the source rather than get through and be absorbed by the substrate so you need a build thickness about a half a millimeter thick which is 5 to 10 times as thick as a typical spray of paint or stain”.

| Solvent Candidate | Evaporation Speed | Odor Profile | Spray / Application Behavior | |:--- |:--- |:--- |:--- | | **Dimethylformamide (DMF)** | Slow | Foul, fishy (similar to biological specimen preservative) | Allows uniform leveling; permits building 20–30 coats without clogging | | **Acetone / MEK / Toluene** | Very Fast | Pungent, sweet, fruity, perfumy | Gums up rapidly; produces stringy "cotton candy" or chop-gun-like strands from sprayers |

---

[21:27](https://www.youtube.com/watch?v=dNs_kNilSjk&t=1287s) Paint Formulation, Equipment Hacks, and Sourcing Nano Powders

Before compounding the paint, a key chemical ratio must be observed: the addition of sodium sulfate to barium chloride requires equimolar amounts. If a reaction uses half the volume of sodium sulfate solution relative to the barium chloride, the sodium sulfate must be mixed at twice the molar concentration (for instance, a 0.4 M sodium sulfate solution paired with a 0.2 M barium chloride solution). When scaling up from laboratory beakers to multi-liter batches intended for whole roofs or astronomical observatories, standard lab hotplates become impractical. A KitchenAid stand mixer serves as an ideal bulk mixer, but because KitchenAid discontinued their heated mixing bowl attachment, a DIY alternative is required: eight 12-volt, 12-watt self-adhesive flexible polyimide heater strips wired to the exterior base of the metal mixing bowl provide roughly 100 watts of heating power, easily elevating the mixture to the target 70°C.

For the demonstration batch, 130 grams of dimethylformamide is weighed out and placed on a magnetic stirring plate, followed by 80 grams of dry barium sulfate nano powder. Because fine nano powders easily become airborne during handling, wearing a protective respirator mask is essential. The barium sulfate does not dissolve in DMF; rather, the magnetic stir bar physically shears and disperses aggregates and clumps formed during drying and transport to produce a silky, uniform suspension. Preparing nano powders from scratch is time-consuming, but commercial alternatives exist: Airtech Pvt. Ltd. in India sells bulk nano powder for under $4,000 per ton, and a test sample performed nearly as well as laboratory-synthesized powder. Alternatively, US Nano in Texas provides consistently high-grade nano powders with fast domestic delivery, though at a significantly higher cost of roughly $300 per kilogram. Regarding the dispersion process, the presenter notes: “what we're doing is we're using the mixing bar to sort of beat up and break up any kind of lumps or clumps that might have formed during storage or Transportation or drying and and we want as even and smooth a distribution throughout the liquid as possible”.

- Stoichiometric balance: Equimolar reagent quantities (e.g., half volume of 0.4 M $\text{Na}_2\text{SO}_4$ to 1 volume of 0.2 M $\text{BaCl}_2$). - Mixer modification: 8 flexible polyimide heater strips (12 V, 12 W each; ~100 W total) affixed to a stainless steel mixer bowl to reach ~70°C. - Batch ratio demonstrated: 130 g dimethylformamide (DMF) to 80 g blended barium sulfate nano powder. - Commercial suppliers: Airtech Pvt. Ltd. (<$4,000/ton) vs. US Nano (~$300/kg).

[25:40](https://www.youtube.com/watch?v=dNs_kNilSjk&t=1540s) Mixing the Barium Sulfate Suspension

The presenter begins by letting the barium sulfate powder mix into the solvent on the magnetic stir plate. While the mixture can be stirred for as long as desired without damaging it, standard practice is to let it run for 20 to 30 minutes at approximately 300 RPM using a 50 mm stir bar. For a larger batch using the overhead mixer, running the same duration at a low speed yields an equally uniform, even dispersion.

```mermaid flowchart TD accTitle: Barium Sulfate and PMMA Dispersion Workflow accDescr: Step-by-step process of mixing barium sulfate powder into solvent, adding PMMA beads, and dissolving them under heat.

subgraph Prep ["1. Initial Dispersion"] A["BaSO4 in Solvent"] --> B["Stir 20–30 min @ 300 RPM<br/>(50 mm stir bar)"] B --> C["Break up soft powder lumps"] end

subgraph Dissolution ["2. Polymer Addition & Heating"] C --> D["Slowly add 14 g PMMA beads"] D --> E["Heat to ~70 °C on hot plate"] E --> F["Manual stirring as viscosity climbs"] end

subgraph Quality ["3. Final Adjustment"] F --> G["Weigh container to find lost solvent"] G --> H["Top off solvent to reach target viscosity"] end ```

As the powder blends into the vortex, small lumps appear on the surface. The presenter clarifies that simple magnetic stirring cannot break apart hard aggregate crystals that form during raw chemical synthesis, but it easily breaks down softer, clumping powder fragments. The stir plate is left to run for about half an hour to complete this initial wetting and de-agglomeration stage.

[26:40](https://www.youtube.com/watch?v=dNs_kNilSjk&t=1600s) Adding PMMA and Polymer Molecular Weight

Once the barium sulfate is well-suspended, it is time to add the polymer binder: 14 grams of polymethyl methacrylate (PMMA). Because these are 200-micron beads rather than a fine nano-powder, a respirator mask is not required for this step. The host explains that PMMA is a polymer made up of varying chain lengths, with molecular weights ranging from roughly 10,000 to several million. Higher molecular weight versions provide superior thermal and structural properties—the kind used to make rigid sheets like Lucite and Plexiglas—but they are exceptionally difficult to dissolve in mild solvents.

For paint formulation, a relatively low molecular weight resin (around 80,000 MW) is ideal. The specific product shown is Elvacite 2028, manufactured by Lucite International and distributed in the United States by Mitsubishi Chemical. While inexpensive per pound, it is typically sold in commercial 55 lb bags. The team obtained their supply by reaching out directly with phone calls and emails to request a sample, prompting the host to joke: “Like the man said, politics is the ultimate science.” For viewers purchasing retail quantities, PolySciences sells a comparable product called PMMA 100, which designates an approximate molecular weight of 100,000.

The resin beads must be sprinkled into the stirring vortex very slowly. Dumping the entire measure in at once would cause the beads to fuse into a single rubbery lump: > “I'm adding this very, very slowly even though if I were just to dump this right in the container it would eventually dissolve, we'd end up with a gumball sort of flopping around inside of here and the reduced surface area would actually slow down the dissolution so by going slower we're actually going to be done faster.”

[28:40](https://www.youtube.com/watch?v=dNs_kNilSjk&t=1720s) Heating, Viscosity Evolution, and Solvent Compensation

With the PMMA slowly added, the hot plate is turned on to bring the mixture up to an ultimate target of roughly 70 °C. The dial setting is not critical, so long as the solution reaches temperature. Initially, the suspension appears slightly grayish and translucent rather than brilliant white. This is an optical effect caused by the un-dissolved, translucent polymer beads swirling in the liquid. As the beads dissolve, they form a clear syrup resin that wets and binds the barium sulfate, causing the liquid to turn noticeably whiter and thicker.

Eventually, the rising viscosity overwhelms the magnetic stir bar, causing it to decouple and freeze up. While an overhead motorized mixer would power right through, on the stir plate one must switch to manual agitation with a glass stirring rod or a temperature probe.

The host shares a critical bench-chemistry tip for maintaining consistency when working with volatile solvents: > “Whenever you're doing any kind of a synthesis that involves a solvent, before you get started weigh all of your individual components—the beaker, the stirring bar, the stirring rod, a spoon, anything that you might use—weigh them, write them down and put them in your back pocket because when you do the synthesis, depending on the temperature of the room, the chemicals that that you're using, how long you stir it, you're going to lose a little bit of that solvent and you don't know exactly what it's going to be, but at the end when you add up all those weights and you find that you're down, say, 5 grams, it's easy enough to just put a little bit more solvent in there, bring yourself up to the same viscosity each time so it makes it very repeatable.”

[30:32](https://www.youtube.com/watch?v=dNs_kNilSjk&t=1832s) Measuring Viscosity with a Zahn Cup

After the stir bar "gives up the ghost," stirring continues by hand until the temperature probe reads 70–72 °C and the polymer completely dissolves. The target fluid viscosity is between 100 and 150 centipoise (cP)—roughly 100 to 150 times thicker than water, visually resembling a texture midway between light and heavy cream.

To take the guesswork out of the formulation, especially for beginners, viscosity should be measured with an efflux cup such as a Ford/Wagner cup or a Zahn cup:

| Measurement Tool / Spec | Description & Procedure | |:--- |:--- | | **Instrument Used** | Zahn #3 cup (a calibrated 44 mL cup with a precision orifice in the base) | | **Measurement Procedure** | Submerge cup fully into liquid; lift vertically out while starting a stopwatch; stop the timer the moment the continuous stream breaks into individual droplets | | **Target Zahn #3 Time** | **7 to 8 seconds** (corresponds to ~100–150 cP) | | **Spraying Performance** | Delivers optimal "Goldilocks" flow for high-volume low-pressure (HVLP) spray guns | | **Storage & Shelf Life** | Indefinite storage in an airtight jar; re-stir or agitate prior to spraying to eliminate stratification |

[33:15](https://www.youtube.com/watch?v=dNs_kNilSjk&t=1995s) Aluminum Surface Preparation: Cleaning, Sanding, and Etching

To coat the radiant cooling panel, the operation moves from the lab bench to a large warehouse. Painting raw aluminum presents notorious adhesion challenges that require meticulous three-step surface preparation before applying any paint or structural epoxy:

```mermaid flowchart LR accTitle: Aluminum Surface Preparation Process accDescr: Three sequential steps for preparing raw aluminum: degreasing, sanding, and chemical etching.

A["1. Degrease"] -->|"Acetone / Brake Cleaner<br/>Wipe until paper is clean"| B["2. Mechanical Sanding"] B -->|"150-grit palm sander<br/>Creates tooth, removes debris"| C["3. Chemical Etch"] C -->|"Acid etch primer<br/>Lifts Al2O3, deposits Zn/Fe"| D["Ready for Coating"] ```

1. **Degreasing:** Raw mill aluminum is coated in processing oils and grease. Using a disposable paper towel wetted with a grease-cutting solvent like acetone or automotive brake cleaner, the plate is wiped repeatedly until the towel comes away spotless. Sanding without degreasing first would simply grind the oil into the metal, creating a contaminated slurry. 2. **Mechanical Sanding:** The panel is abraded using an orbital palm sander loaded with 150-grit sandpaper. Sanding expands the surface area and imparts mechanical "tooth" for the coating to grip. 3. **Overcoming the Oxide Layer:** Aluminum is chemically aggressive; bare metal reacts with atmospheric oxygen within milliseconds, forming a microscopic layer of aluminum oxide ($Al_2O_3$). The host compares this passive oxide layer to “the flour on a pizza board—little ball bearings” that prevent paint from latching directly to the base metal. Mechanical sanding temporarily cuts through it, but the film regenerates almost instantly. 4. **Self-Etching Primer:** The standard solution is an acid-etching primer containing phosphoric acid. The acid eats through the aluminum oxide, stripping it away while simultaneously depositing a stable, less reactive metallic barrier layer (such as zinc or iron phosphate) to ensure a bulletproof adhesive bond.

The presenter notes a specialized workshop alternative: spreading liquid epoxy directly onto the degreased aluminum and wet-sanding it straight into the bare substrate with an abrasive Scotch-Brite pad or sandpaper. Because the wet epoxy shields the freshly abraded surface from air, oxidation cannot occur, yielding the absolute highest bond strength possible. However, because this technique is messy, it is best reserved for small brackets or one-off parts rather than large sheets.

[36:24](https://www.youtube.com/watch?v=dNs_kNilSjk&t=2184s) Spraying Ultra-Thin HVLP Coats

The primed aluminum panel is set up for paint application using an HVLP (high-volume low-pressure) spray gun. The host bypasses basic gun tuning, pointing out that ample setup guides already exist online, but emphasizes the single most crucial painting discipline: applying extremely thin, multiple passes rather than heavy wet coats.

As the compressor runs and the first whisper-thin coat is laid down across the panel, the host stresses that laying on ultra-thin layers actually saves substantial time over the entire duration of the project by enabling rapid flash-off and preventing entrapment of evaporating solvent.

[37:13](https://www.youtube.com/watch?v=dNs_kNilSjk&t=2233s) Evaluating Dryness Between Coats and Interlaminar Bonding

Applying thin layers rather than heavy coats ensures maximum surface area for solvent evaporation, prevents unsightly runs, and avoids excessive waiting between layers. To gauge when a coat is ready for the subsequent application, the host relies on sensory cues rather than a rigid timer. First, the solvent sheen must vanish: wet paint looks glossy and reflective, but as the solvent flashes off, the finish turns completely flat and matte. Second, touching an inconspicuous area with a gloved finger should yield no transfer whatsoever. Third, a quick sniff test should confirm that a faint trace of solvent odor remains. Timing this sweet spot is critical for coating longevity. Reapplying prematurely traps solvent, allowing vapor pressure to push up blisters and bubbles under subsequent coats. Conversely, allowing the surface to turn bone-dry prevents the new solvent from chemically biting into and melting the underlying acrylic, destroying the interlaminar adhesion required to prevent delamination.

```mermaid flowchart TD accTitle: Recoat Window Evaluation Logic accDescr: Three-step sensory check determining whether paint is ready for another layer or outside the optimal recoat window. subgraph Checks["Sensory Evaluation"] A["Visual: Gloss disappears to flat matte"] --> B["Touch: Gloved finger comes away clean"] B --> C["Sniff: Faint trace of solvent odor remains"] end subgraph Decisions["Application Timing"] C -->|"Optimal timing"| D["Apply next coat: Solvent bites into acrylic for interlaminar bond"] C -->|"Too early (wet)"| E["Risk: Trapped solvent vapor blisters & bubbles"] C -->|"Too late (bone dry)"| F["Risk: Poor interlaminar adhesion, peeling & cracking"] end ```

After roughly 20 minutes of drying, the test panel displays an ultra-matte surface, passes the clean glove wipe, and still gives off a faint whiff of solvent. Addressing the matte appearance, the host dispels a common misconception regarding paint sheen and reflectivity, noting that surface texture does not dictate total solar reflectance. As he explains: “The gloss paint produces a specular reflection you can almost see your face in it but the matte paint will scatter the light nevertheless they both reflect the same percentage it's kind of a surprising fact and this is a very matte surface.” With the criteria satisfied, the loud compressor fires back up to deposit the second coat.

- Trapped solvent produces blisters and pinhole bubbling as rising vapor pressure attempts to escape through freshly laid acrylic coats. - Complete desiccation between passes prevents the incoming solvent from chemically etching the preceding layer, drastically elevating the risk of eventual cracking or peeling. - Specular reflection (mirror-like bounce from glossy finishes) and diffuse reflection (scattered bounce from matte finishes) can reflect the identical total fraction of incoming solar radiation.

---

[40:02](https://www.youtube.com/watch?v=dNs_kNilSjk&t=2402s) Speeding Up Dry Times and Managing Long Spray Sessions

Faced with dozens of coats ahead, the host opts to expedite the drying intervals by introducing an electric fan, though he warns viewers about the hazards of doing so outside an industrial spray booth. A fan creates turbulent air currents that can lift settled floor sweepings and blow dust directly onto the tacky panel. Furthermore, pointing high-velocity air at close range causes differential drying across the panel, leaving uneven moisture zones. To mitigate these threats, the fan is positioned far back, elevated well off the ground, and set to run exclusively on its lowest speed to deliver a gentle, non-focused draft.

Even with the process moving along, building up the required thickness is an endurance test. Each application pass lasts only one to two minutes, followed by a twenty-minute lull. With 95 percent of the day spent waiting around, the host suggests pairing paint days with secondary workshop projects or enlisting a partner to swap shifts, joking: “I'll do the first two hours and then my cameraman will do the last eight hours you know just to be fair.” The session continues through sustained snack breaks, banter over tools and production budgets, and repetitive spraying intervals that stretch deep into the evening. By the time the final layer is laid down, reference to a handwritten notepad confirms that approximately 27 consecutive coats have been applied to build the requisite barrier.

- Forced air increases particulate contamination risks on wet paint films unless the fan is elevated, placed at a distance, and operated at low speed. - The duty cycle of the painting process involves 1–2 minutes of spraying contrasted against 20-minute passive flash-off intervals. - The completed test workpiece accumulated roughly 27 individual sprayed coats before reaching the target film thickness.

---

[44:29](https://www.youtube.com/watch?v=dNs_kNilSjk&t=2669s) Outdoor Temperature Testing: Setup and Live Comparison

Following an overnight cure, a night of sleep, and several cups of coffee, the testing phase moves outdoors into the sunlight to evaluate whether the formulation can achieve genuine daytime radiative cooling. Three experimental panels of equal dimensions are arranged side by side under full sun: 1. An aluminum panel coated with the custom high-solids radiative cooling paint (~27 coats). 2. A bare, untreated aluminum plate. 3. An aluminum panel coated with commercial Rust-Oleum high-brightness white paint.

To gather precise comparative data, individual contact thermal probes are affixed to the backside of each panel and wired into a multi-channel digital thermocouple thermometer: channel 1 monitors the ultra paint panel, channel 2 tracks the bare aluminum panel, and channel 3 monitors the commercial Rust-Oleum panel. A fourth standalone probe hangs freely in the shade behind the test backer to establish the real-time ambient air temperature benchmark. The array is powered on and left to equilibrate in the autumn sunlight before logging final thermal performance metrics.

---

[46:47](https://www.youtube.com/watch?v=dNs_kNilSjk&t=2807s) Test Results: Sub-Ambient Cooling and Real-World Implications

Once thermal equilibrium is established, the digital thermometer reveals a striking divergence in performance across the three samples. The panel coated in the custom radiative cooling paint measures approximately 3 °C colder than the ambient outdoor air temperature. In stark contrast, the bare aluminum plate absorbs significant energy and runs roughly 20 °C hotter than ambient air, while the panel coated in standard Rust-Oleum super white sits 8 °C to 10 °C above ambient.

| Surface / Panel Sample | Thermal Performance Relative to Ambient Air | |:--- |:--- | | **Custom Radiative Ultra Paint** | **~3 °C below ambient (sub-ambient cooling)** | | **Rust-Oleum Commercial Super White** | ~8 °C to 10 °C above ambient | | **Bare Aluminum Plate** | ~20 °C above ambient |

The host emphasizes that this test takes place under exceptionally conservative real-world conditions. Conducted during a New England afternoon in November, solar intensity is considerably lower than peak summer values, which compresses the performance spreads that would otherwise widen significantly under high-intensity summer sun or at equatorial latitudes. Furthermore, the test setup lacks parasitic thermal shielding: the panels are fully exposed to ambient infrared radiation radiating off surrounding trees, nearby buildings, and the camera crew, while convective wind actively tries to heat the sub-ambient panel up to air temperature while cooling the hotter panels down. As the host underscores: “Meaning if you were to put this on an actual structure or a building or the roof of your house in Tunisia you would have those surfaces cooler than the surrounding air given realworld conditions pretty impressive.”

Wrapping up the demonstration, the host notes that while building the paint requires careful formulation, high-purity pigments, and diligent application, the ability to achieve sub-ambient passive refrigeration on standard architectural building materials represents a transformative technology. He concludes by thanking viewers and encouraging channel subscriptions to fund ongoing experimental hardware builds.

- Testing conditions: New England autumn (November afternoon), unshielded from ambient terrestrial infrared or convective wind warming. - Despite convective air currents constantly working to add heat back into sub-ambient objects, the ultra-paint panel maintained a continuous 3 °C depression below ambient air.

## Mentioned Tech Ingredients, Barium sulfate, EDTA, Polymethyl methacrylate (PMMA), Dimethylformamide (DMF), NighthawkInLight, KitchenAid, Airtech Pvt. Ltd., US Nano, Lucite International, Mitsubishi Chemical, PolySciences, Elvacite 2028, Zahn cup, Ford/Wagner cup, Rust-Oleum

## Video description This a follow-up to our most recent video https://youtu.be/5zW9_ztTiw8 where we show you our custom built liquid panel that when placed outside, cools down to lower than ambient temperature. Today's video shows you how to create and use the specialty paint that makes the panel possible.

Find us on Patreon and our website: https://www.patreon.com/techingredients https://www.techingredients.com/

[Source](https://www.youtube.com/watch?v=dNs_kNilSjk)

中文简报

硫酸钡涂料在阳光下使表面降温至环境气温以下3℃ 将多重粒径的硫酸钡纳米颗粒混入丙烯酸基料中制成的涂层,能反射99%的太阳能并辐射中红外热量,无需用电即可使室外金属比环境气温低3℃。 该视频概述了利用硫酸钡和丙烯酸PMMA基料制备被动辐射制冷“超级涂料”所需的化学合成、物理原理与施工技术。通过采用多峰粒径分布并控制沉淀条件,该涂层可反射超过99%的太阳辐射,同时作为微观纳米天线向红外大气窗口辐射热量。经过约27次薄喷在酸蚀铝基板上达到0.5毫米厚度后,该涂层展现了真正的日间低于室温被动制冷效果。在直射阳光下的实际室外测试证明,经处理的面板比环境气温低约3℃,性能显著优于裸铝和市售白色涂料。 一种由高密度硫酸钡纳米颗粒和丙烯酸基料配制而成的专用辐射制冷涂料,可在阳光直射下实现低于环境温度的被动制冷(比环境气温低约3℃)。 (46:47) 硫酸钡既是近乎无损的太阳光散射体(通过多晶散射实现>99%的可见光反射率),又是微观红外纳米天线(在10微米热窗口附近的发射率>96%)。 (3:00) 为了突破均质球体约64%的几何密度限制,需要通过在不同温度下合成多峰粒径分布(从0℃下的约10纳米到95℃下的数百纳米),从而实现最大堆积密度。 (13:06) 11月阳光下的室外测试表明,该定制涂料比环境气温低3℃,而裸铝温度高出20℃,市售白色涂料则高出环境温度8至10℃。 (46:47)

Reading summary

Tech Ingredients demonstrates how to formulate and apply a high-performance, DIY-accessible radiative cooling "super paint" using barium sulfate, achieving passive sub-ambient cooling by reflecting solar energy and radiating heat into space. Physics of Radiative Cooling and Barium Sulfate (1:14) Passive radiative cooling requires a surface to simultaneously reject solar radiation (which can deposit up to 1,000 W/m²) and maximize thermal emissivity in the mid-infrared spectrum (around 10 microns). While multi-layer dielectric thin films historically achieved this, barium sulfate (BaSO4) has emerged as a highly effective, non-toxic, and inexpensive alternative. Its crystal lattice naturally resonates at room-temperature thermal frequencies, acting as a microscopic nano-antenna with over 96% thermal emissivity. Furthermore, its optical clarity enables a lossless multi-scattering "snow effect," yielding a total visible reflectivity exceeding 99% in dry powder form. Controlling Particle Size and Densification (8:06) Standard chemical precipitation of barium sulfate via double displacement (mixing barium chloride and a sulfate donor) yields large, jagged, multi-micron aggregates that pack poorly and degrade reflectivity. To resolve this, the host introduces a chelating surfactant, ethylenediaminetetraacetic acid (EDTA), which coordinates barium ions to slow crystallization, producing uniform, nanometer-scale spheres. To achieve maximum performance, the formulation leverages "densification"—blending nanoparticles synthesized at different temperatures (0°C, 30°C, 60°C, and 95°C) to create a multimodal size distribution. This allows smaller particles to fill the geometric voids between larger ones, pushing solids loading past the ~64% physical limit of uniform spheres. Formulating the Paint with PMMA and DMF (17:53) Turning the synthesized nanopowder into paint requires a polymethyl methacrylate (PMMA) acrylic binder dissolved in a volatile solvent. Standard resins like epoxies fail because they lack volatile components, turning the high-solids mixture into an unworkable putty. Dimethylformamide (DMF) is selected as the solvent because its slow evaporation rate allows the paint to level smoothly and prevents clogging during the application of 20 to 30 individual coats, which are required to build a 0.5 mm thick scattering layer. The host recommends using a low molecular weight PMMA (around 80,000 to 100,000 MW) and adjusting the final mixture with a Zahn #3 efflux cup to achieve a target viscosity of 100 to 150 centipoise (a 7 to 8-second drop time). Surface Preparation, Application, and Performance (33:15) Applying the paint to raw aluminum requires a meticulous three-step preparation: degreasing with acetone, mechanical sanding with 150-grit sandpaper, and applying a self-etching phosphoric acid primer to strip the rapidly regenerating aluminum oxide layer. The paint must be sprayed in thin, multiple passes (the test panel used 27 coats) to allow proper solvent flash-off and prevent blistering. In outdoor testing under a November New England sun, the custom-painted panel achieved true sub-ambient cooling, measuring approximately 3 °C colder than the ambient air. In comparison, a bare aluminum plate ran 20 °C hotter than ambient, and a panel coated in commercial high-brightness white paint remained 8 °C to 10 °C above ambient. The host concludes that while the paint requires careful formulation, high-purity pigments, and diligent application, the ability to achieve passive sub-ambient refrigeration on standard architectural building materials represents a transformative technology.

精炼阅读摘要

Tech Ingredients展示了一种基于硫酸钡(BaSO₄)与丙烯酸树脂的自制辐射制冷涂料配方,其结合极高的太阳光反射率与中红外热发射率,在日光直射下实现了低于环境温度的无源被动制冷。 日间辐射制冷机理与硫酸钡的光学优势 (1:14) 物体在常温环境下主要以约10微米波长的红外波段向外辐射热量。常规材料如皮肤、混凝土和普通涂料的热发射率通常在75%至90%之间。实现日间无源制冷的核心难点在于,地表暴露物体每平方米需承受高达1000瓦的太阳光热负荷,涂层必须在极度反射太阳光谱的同时,在红外窗口最大化向外辐射热能。传统方案依赖昂贵且生产极慢的化学气相沉积(CVD)多层介电薄膜,而化学纯硫酸钡提供了低成本的高性能替代路径。 硫酸钡在自然界以重晶石矿形式年开采约1000万吨,高纯度粉末在光学上完全无色透明,且因极低溶解度而具备生物惰性,常被用作胃肠道X光显影剂。在物理机制上,其晶格电子振动与常温热振动频率精确共鸣,单个微晶如同纳米天线,红外发射率超过96%;而在可见光波段,其纯净晶体通过类似积雪的多重无损折射与无序散射机制将入射光逐层退回天空,纯干燥粉末的总反射率超过99%。 粒径控制与多峰堆积紧实化原理 (8:06) 基础的双置换沉淀反应虽然能直接生成硫酸钡,但未受控的沉淀会迅速聚结成不规则的微米级碎屑,松散堆叠产生的内部空隙会显著削弱太阳光散射。为了使粒子均匀致密,配方引入EDTA(乙二胺四乙酸)作为螯合表面活性剂与钡离子结合,减缓成核生长速率,强制其结晶为规则的光滑纳米微球。同时,反应物采用硫酸钠代替硫酸酸液,避免了生成腐蚀性盐酸,使废液仅为稀食盐水,并在沉淀后静置过夜利用奥斯特瓦尔德熟化使晶体表面自发圆滑。 为达到顶尖性能,涂层必须克服单一直径颗粒几何堆积率的物理上限(浇筑堆积约60%,致密极限约64%)。借鉴超高性能混凝土的紧实化原理,制备过程利用反应温度与晶体尺度的强相关性:在0℃下制备约10纳米的微粒,在95℃下制备数百纳米的粒子,并结合30℃和60℃批次,混合形成多峰粒径分布。中等颗粒填充大颗粒间隙,微细纳米颗粒再填补残余孔隙,大幅提升固体填充率。 黏合剂与溶剂选择及涂料调配标准 (17:53) 在涂料配制中,环氧树脂和聚氨酯等无挥发份树脂会导致高固体份粉末迅速固化为硬腻子,且增加树脂含量会降低整体光学性能。理想的选择是溶于挥发性溶剂的低分子量(约80,000至100,000 MW)聚甲基丙烯酸甲酯(PMMA)珠粒,溶剂挥发后仅保留最低限度的聚合物骨架包裹颜料。溶剂方面,虽然二甲基甲酰胺(DMF)具有刺鼻气味且挥发缓慢,但丙酮、丁酮或甲苯等快干溶剂会在高固体份喷涂时迅速拉丝结块,而慢挥发特性允许涂层均匀流平并连续构建厚度。 示范批次中采用130克DMF分散80克级配硫酸钡纳米粉,由于粉末在空气中极易扬尘,操作必须佩戴防尘口罩。在磁力搅拌分散团聚体后,极其缓慢地加入14克PMMA珠粒,并加热至约70℃至72℃使树脂完全溶解。为确保适合HVLP喷枪雾化,涂料黏度需控制在100至150厘泊,即使用3号蔡恩杯(Zahn #3)测量其流出时间达到7至8秒;调配过程中可通过预先称重所有容器工具,在加热后补足挥发的溶剂量以锁定黏度标准。 铝板表面预处理与多层厚膜喷涂工艺 (33:15) 在将涂层应用于辐射降温铝板时,必须解决裸铝容易脱漆的问题。首先需用丙酮或刹车清洁剂彻底脱脂,防止打磨时油脂压入金属深层;其次使用150目砂纸机械打磨增加物理锚固面积;最后喷涂含有磷酸的自酸蚀底漆,以穿透裸铝表面毫秒级生成的氧化铝薄层并钝化基底。对于小件单品,也可在裸铝上涂布环氧树脂直接湿磨以完全隔绝空气氧化,但大型板材通常依赖酸蚀底漆底涂。 由于无源制冷涂层完全依靠多重背向散射阻挡阳光,必须累积喷涂20至30道极薄涂层,最终形成约0.5毫米的膜厚(普通漆层的5至10倍)。喷涂间歇需严格把控:通过目测高光消失转为完全哑光、指触无粘连且仅保留微弱溶剂残留气味作为重涂窗口。若未干即喷会导致挥发气体顶起漆膜起泡,彻底干透则会丧失溶剂溶解底层丙烯酸的层间咬合力;演示中通过远距离低速风扇辅助干燥,经过27道连续喷涂完成了试验面板。 户外实测表现与真实环境制冷效果 (44:29) 完成充分固化后,测试面板被移至新英格兰11月的秋季阳光下,与未处理的裸铝板以及涂有市售Rust-Oleum超白漆的铝板进行并排对照测试。多通道数字热电偶温度计的监测数据显示:在完全相同的日光照射下,未处理裸铝板吸收大量热能,其温度比环境气温高出约20℃;市售商用超白漆面板的温度比环境气温高出8℃至10℃;而涂有定制多峰硫酸钡涂层的辐射制冷面板,其实测温度持续比室外环境气温低约3℃。 该测试环境并未设置防止杂散热量进入的遮挡设施,测试板不仅受到周边树木、建筑物乃至测试人员的环境红外辐射影响,空气对流风也在持续加热处于亚环境温度的板面。主持人指出,在高纬度秋季日光较弱且缺乏热屏蔽的苛刻条件下实现3℃的绝对降温,证明了该配方在实际建筑屋顶等场景下具备极高可行性,若应用于日照强烈的低纬度或盛夏环境,其制冷潜力和降温差距还会进一步放大。 该项目证实了利用廉价易得的化学原料与常规工坊设备,能够自主制备出打破常规热平衡的高性能日间被动辐射制冷涂层。该技术面临的主要工艺限制在于极耗时间的数十道手工极薄喷涂流程、DMF溶剂的气味与挥发控制,以及多尺度纳米颗粒级配的合成门槛;然而其在实际环境对流冲刷下仍保持低于室温3℃的实测结果,为低能耗建筑降温提供了无需电力驱动的有效技术路径。

Detailed notes — zh

## Background 该视频由 YouTube 频道 Tech Ingredients 于 2023 年 3 月 3 日发布。视频是此前自制户外被动降温液体面板项目的后续,详细展示了如何亲手调制并喷涂使该面板实现低于环境温度的关键特种“超级涂料”。 ## TL;DR 视频深入探讨了日间被动辐射制冷的物理机制,揭示了硫酸钡(BaSO₄)凭借独特的晶格共振纳米天线效应与多重光散射特性,能够兼顾超高红外发射率与 99% 以上可见光反射率的奥秘。主讲人通过化学实验演示了表面活性剂(EDTA)对晶粒圆整度的调控,并基于混凝土致密化原理提出多温区分级合成方案以填充颗粒空隙。随后,视频详细演示了将硫酸钡纳米粉末与 PMMA 树脂及 DMF 溶剂混合制浆、铝板基材严格的前处理,以及长达数十层的薄喷工艺与干燥判断法。最终在深秋的户外实测中,该特种涂层在阳光直射下成功比环境气温低约 3°C,表现远超吸热升温的裸铝板与市售顶级商业白漆。 ## Atmosphere & style 整个视频洋溢着浓郁的“车库硬核极客”与严谨实验室科学相融合的探究氛围,主讲人沉稳自信且不失幽默,甚至能一边调侃溶剂的恶臭和漫长的喷漆苦力,一边信手拈来深奥的光学与物理理论。镜头语言扎实接地气,从自制加热搅拌设备到现场即兴喝草莓味钡餐,充满了亲手实操的粗砺感与探索乐趣。随着长达二十多层涂装耐力战的推进,疲惫感在次日阳光下亮出实测温度计的那一刻化为巨大的成就感,带给观众一种由纯粹原理推导直达工程奇迹的硬核爽感。 ## Bulletin - [02:44](https://www.youtube.com/watch?v=dNs_kNilSjk&t=164s) 利用硫酸钡(BaSO₄)在可见光波段超 99% 的高反射率及在 10 微米波段超 96% 的红外发射率,可制备出零能耗实现日光下被动辐射制冷的超级涂料。 - [13:06](https://www.youtube.com/watch?v=dNs_kNilSjk&t=786s) 实验表明,采用多温区(0°C、30°C、60°C、95°C)分级合成不同粒径硫酸钡纳米颗粒并混合,可突破单一均质颗粒 64% 的堆积密度上限,渐近逼近 100% 固含量致密化。 - [44:29](https://www.youtube.com/watch?v=dNs_kNilSjk&t=2669s) 在深秋低纬度日光实测中,该超级涂层板在无遮蔽条件下表面温度比环境气温低约 3 °C,而市售超白商业油漆则比气温高 8 至 10 °C。 - [30:32](https://www.youtube.com/watch?v=dNs_kNilSjk&t=1832s) 配方采用低分子量 PMMA(如 Elvacite 2028)配合 DMF 溶剂以最大化降低树脂用量,并通过 3 号蔡恩杯控制黏度在 7 至 8 秒(100 至 150 cP)以适配 HVLP 喷涂。 ## Key takeaways - [00:00](https://www.youtube.com/watch?v=dNs_kNilSjk&t=0s) 室温物体热辐射峰值位于 10 微米波段,而普通商业油漆发射率仅 75% 至 90%,难以抵御每平方米高达 1 kW 的直射太阳热负荷。 - [02:44](https://www.youtube.com/watch?v=dNs_kNilSjk&t=164s) 硫酸钡的晶格振动频率与室温热辐射波段共振,充当向深空辐射热量的纳米天线,且纯净晶体对可见光无损多重散射,反射率超 99%。 - [05:48](https://www.youtube.com/watch?v=dNs_kNilSjk&t=348s) 基础复分解反应生成的微米级团聚体会严重削弱反射性能,必须引入 EDTA 等表面活性剂调控结晶,抑制粗糙大颗粒并获得平滑球形微晶。 - [08:42](https://www.youtube.com/watch?v=dNs_kNilSjk&t=522s) 悬浮液静置过夜具有陈化重排效应,硫酸钡纳米微粒表面可在液体中自发抛光,显著提升后续致密堆积性能。 - [13:06](https://www.youtube.com/watch?v=dNs_kNilSjk&t=786s) 单一粒径颗粒自然堆积密度极限仅约 60% 至 64%,通过 0°C 至 95°C 梯度温区合成制备纳米至数百纳米多级级配,可实现极限致密化。 - [17:53](https://www.youtube.com/watch?v=dNs_kNilSjk&t=1073s) 涂料配方必须尽量减少树脂比例,由于环氧与聚氨酯无溶剂易结块,配方改用可调节黏度的 PMMA 树脂,并采用慢挥发的 DMF 溶剂避免喷嘴结胶拉丝。 - [26:40](https://www.youtube.com/watch?v=dNs_kNilSjk&t=1600s) 加入 PMMA 微珠时必须缓慢逐次加入以防形成低比表面积胶球,通过称重补偿法补齐挥发溶剂以保证各批次黏度一致性。 - [30:32](https://www.youtube.com/watch?v=dNs_kNilSjk&t=1832s) 使用 3 号蔡恩杯精确监控漆液流经时间在 7 到 8 秒(对应黏度 100~150 cP),是实现高流量低压(HVLP)喷枪均匀雾化的最佳工艺参数。 - [33:15](https://www.youtube.com/watch?v=dNs_kNilSjk&t=1995s) 铝基材因毫秒级氧化层阻碍粘接,必须执行溶剂脱脂、150 目机械打磨以及含磷酸酸洗防蚀底漆三道预处理以确立界面结合力。 - [36:24](https://www.youtube.com/watch?v=dNs_kNilSjk&t=2184s) 该涂层全依赖纯散射机制,厚度需达到约 0.5 毫米,必须采用多达 20 至 30 层的“极薄多层”喷涂策略,防止内部溶剂封死鼓泡。 - [37:13](https://www.youtube.com/watch?v=dNs_kNilSjk&t=2233s) 层间重喷的最佳窗口期需结合视觉消光、手套触碰无粘连以及嗅觉仍留有微弱溶剂味三种感官标准,完全“骨干”会导致层间附着力骤降而起皮开裂。 - [40:02](https://www.youtube.com/watch?v=dNs_kNilSjk&t=2402s) 电风扇辅助干燥存在扬尘污染未固化表面与差异化干燥的风险,若使用须架高、调至低档并后撤远离板面。 - [44:29](https://www.youtube.com/watch?v=dNs_kNilSjk&t=2669s) 户外对比实测证实,裸铝板比室温高 20 °C,市售优质超白漆比室温高 8~10 °C,而特种辐射制冷板即使在不利的空气对流加热下仍比气温低约 3 °C。 ## Detailed walkthrough ### [00:00](https://www.youtube.com/watch?v=dNs_kNilSjk&t=0s) 辐射冷却的物理原理与超级涂层的核心机制 在探讨辐射制冷的开篇,主讲人回顾了前一期关于冷却装置的成果:他们曾制作出一款利用水循环将温度降至环境温度以下的设备,该设备仅依靠几瓦电量驱动水泵循环,底层的热辐射释放过程则完全是被动且不耗能的,其有效能效比(EER, Energy Efficiency Ratio)理论上是无穷大。这项技术的心脏,正是一种能够实现被动辐射制冷的专用“超级涂料(super paint)”。它的物理基础源于一个自然规律——所有物理实体都在向外发出电磁辐射,在人体温度与室温(即我们周围环境的典型温度)下,这一热辐射的能量峰值出现在红外波段的 10 微米(即 10,000 纳米)附近。 任何实际物理表面向外辐射这一能量的效率被称为“发射率(emissivity)”。主讲人指出,日常生活中常见的材料(如皮肤、布料、木材、混凝土、塑料以及普通商业油漆)的发射率大致在 75% 到 90% 之间。然而,要实现极限冷却,发射率必须尽可能逼近理论极值。更为严苛的挑战在于:若想在白天也实现这一冷却效果,涂层必须同时将太阳光几乎全部反射掉,因为暴露在阳光下的物体每平方米可承受高达 1 千瓦(1 kW/m²)的太阳辐射能量输入。高红外发射率与极高的可见光反射率往往是互相矛盾的;虽然利用类似激光光学器件的多层介电质薄膜(Multi-layer dielectric films)配合化学气相沉积(CVD)设备可以兼顾两者,但这类仪器价值数百万美元且加工通量极其缓慢,根本不具备现实实用性。 - 室温及体温热辐射的波长峰值约为 10 微米(10,000 纳米)。 - 绝大多数普通材料的发射率介于 75% 至 90% 之间。 - 阳光直射带来的热负荷最高可达每平方米 1 kW。 - 传统的多层介电薄膜技术虽能兼顾两项性能,但设备成本动辄数百万美元,处理速度极慢,缺乏实际可行性。 ### [02:44](https://www.youtube.com/watch?v=dNs_kNilSjk&t=164s) 神奇材料硫酸钡(Barium Sulfate)及其光学特性 在这场针对特殊冷却材料的探索中,一种同时兼具极致红外发射和极高反射能力的物质脱颖而出,那便是硫酸钡(BaSO₄)。它储量丰富、无毒且价格极为低廉。全世界每年作为重晶石(barite)开采的硫酸钡大约有 1000 万吨。重晶石外观类似石英,常因伴生杂质而呈现粉、蓝、绿等不同色泽;但在纯净状态下,硫酸钡晶体完全无色透明,质感如纯水一般。由于其极高的安全性与重原子(钡)对 X 光的阻隔能力(不透放射线),几十年来放射科和胃肠科医生常将其调制成“钡餐奶昔”,供患者饮用以勾勒胃肠道轮廓,筛查肿瘤、憩室或溃疡。主讲人现场甚至端起一杯草莓味的钡餐悬浮液喝了一口,调侃道:“它甚至还有草莓味的。” 硫酸钡能够成为顶级被动冷却涂层的关键,在于其特殊的晶体电子结构:其晶格振动频率正好与室温下的热振动频率产生共振。因此,涂层中的每一个硫酸钡微晶都像是一个微型的纳米天线(Nano antenna),能以超过 96% 的超高发射率将热辐射倾泻到外太空中。而在可见光反射方面,由于纯硫酸钡晶体极度透明且不吸收可见光,光线在触及晶体时一部分在表面反射散射,另一部分折射进入内部后再次被散射。无法吸收光线的透明颗粒会让光在晶体间不断无损反射折射,最终几乎全部向光源方向散射出来。这种机制与纯水凝固成积雪后成为自然界第二高反射率物质的原理完全一致,使纯硫酸钡粉末在可见光波段的反射率能够超过 99%。 ```mermaid flowchart TD accTitle: 硫酸钡双重冷却机制 accDescr: 硫酸钡微晶利用电子共振向外辐射红外热能,同时通过无损的多重散射反射阳光。 subgraph IR["红外热辐射发射 (冷却源)"] A["室温热振动 (~10 微米)"] --> B["硫酸钡晶体电子结构共振"] B --> C["纳米天线效应: >96% 高发射率射入太空"] end subgraph VIS["太阳可见光反射 (隔热源)"] D["入射太阳光 (~1 kW/m²)"] --> E["高纯度透明晶体表面散射与折射"] E --> F["晶体间无损多重散射"] F --> G[">99% 可见光完全反射回光源方向"] end ``` 主讲人针对硫酸钡的独特优势总结道: > “纯硫酸钡粉末在可见光波段的反射率超过 99%。” ### [05:48](https://www.youtube.com/watch?v=dNs_kNilSjk&t=348s) 基础化学合成的局限性与大颗粒聚合体问题 硫酸钡在工业上通常是将重晶石通过高温和碳还原为水溶性的氯化钡(BaCl₂)。主讲人演示了在家庭实验室中合成硫酸钡的基础复分解反应。他准备了浓度为 0.2 摩尔/升(0.2 M)的氯化钡水溶液。为了形成硫酸钡沉淀,需要加入硫酸根供体,这里主讲人选用了 20% 浓度的稀硫酸(H₂SO₄)。当他用滴管将稀硫酸滴入盛有氯化钡溶液的培养皿中时,溶液中瞬间泛起剧烈的白色沉淀烟絮,硫酸根离子迅速与钡离子结合,析出不溶于水的白色硫酸钡粉末并下沉,而上清液中留下的是氢离子与氯离子构成的稀盐酸溶液。 尽管该化学反应观赏性极强,主讲人也兴奋地直呼“化学真有趣”,但他随即明确指出,这种未受控制的直接沉淀反应生成的硫酸钡根本无法用作超级涂料。原因在于无约束的剧烈析出会形成跨越数微米直径的巨大、不规则团聚体(Aggregates),主讲人形象地将其称为微观“石块”。这些形状粗糙的巨大块状物无法实现高密度的紧密堆积,而紧密堆积是获得极致反射性能的核心前提。要制造顶级涂层,我们需要的是纳米级尺寸、表面光滑且呈规则球形的颗粒,同时还需要该纳米尺度内具备多种梯度级配的粒径,以填充颗粒间的空隙。 - 0.2 M 氯化钡的制备:氯化钡分子量约为 208,若配制 1 摩尔溶液需在 1 升水中溶解 208 克,0.2 M 即加入五分之一摩尔量。 - 基础复分解反应方程式:$\text{BaCl}_2 + \text{H}_2\text{SO}_4 \rightarrow \text{BaSO}_4\downarrow + 2\text{HCl}$。 - 直接酸碱沉淀的缺陷:晶核生长失控,生成数微米级的不规则大颗粒,无法紧密堆叠,反射率大打折扣。 - 超级涂料所需理想粉体:纳米级尺寸、高圆球度、表面光滑,并具有合理的粒径分布范围。 ### [08:42](https://www.youtube.com/watch?v=dNs_kNilSjk&t=522s) 表面活性剂调控结晶与离心提取纳米粉末 为了避免形成大块无规则聚集体,主讲人介绍了加入表面活性剂(Surfactant)调控析出晶型的方法。该策略借鉴了 YouTuber “NighthawkInLight” 早先在该技术探索中的做法。表面活性剂(类似洗涤剂的表面活性成分)在溶液中能够包裹并部分隔离钡离子。当极小的初始晶核形成时,表面活性剂限制了钡离子的供给速率,促使硫酸钡晶体以平滑、圆润的近球形结构缓慢生长,彻底抑制了粗糙大块颗粒的生成。 在具体配制时,主讲人先在 0.2 M 的氯化钡溶液中加入等摩尔比的乙二胺四乙酸(EDTA)作为表面活性剂。由于 EDTA 的分子量比氯化钡高出约 50%,在称重配置时其用量约为氯化钡质量的 1.5 倍。随后,在硫酸根供体的选择上,主讲人弃用了之前使用的稀硫酸,改用硫酸钠(Na₂SO₄)溶液。这样反应后的副产物是极低浓度的食用盐(氯化钠,NaCl)溶液,而非强腐蚀性的稀盐酸,更加温和安全。加入硫酸钠后,溶液立刻变成了均匀如牛奶般的乳白色纳米硫酸钡悬浮液。 ```mermaid flowchart LR accTitle: 表面活性剂调控合成流程 accDescr: 展示从添加表面活性剂 EDTA 到离心机收集硫酸钡纳米粉的完整实验流程。 subgraph Mixing["溶液调配与沉淀反应"] A["0.2 M 氯化钡溶液"] --> B["加入 0.2 M EDTA (络合钡离子)"] B --> C["加入硫酸钠溶液 (替代稀硫酸)"] C --> D["瞬时生成乳白色微纳悬浮液"] end subgraph Separation["收集与陈化优化"] D --> E["装入 300 mL 大容量离心管 (注意平衡)"] E --> F["4,000 RPM 离心沉淀"] D -.->|"静置过夜 (自重排与抛光)"| E end ``` 主讲人使用磁铁固定住搅拌子,将乳浊液分别注入几根离心管中,并仔细调整液面使其重量平衡,以防离心机发生剧烈震动损坏。他将离心管放入一台从亚马逊网站“美食/分子料理”专区购买的价值约 300 美元的离心机中,以 4,000 RPM 的转速运行数分钟进行固液分离。主讲人特别分享了一个关于这种悬浮液的有趣细节:它就像优质葡萄酒一样能够“越陈越香”。如果在离心之前关掉电灯、将悬浮液静置过夜,微粒会在溶液中自发微调重排,使纳米颗粒变得更加光滑、圆润,几乎像是被精心抛光过一般。这一步不需要额外的操作,只需要付出一点点耐心,就能获得更为完美的纳米晶粒质量。 关于添加表面活性剂对结晶微观形态的影响,主讲人强调: > “表面活性剂控制着钡的可用性,因此它倾向于以更平滑、更圆、更接近球形的外观生长,并且它抑制了这些大颗粒岩石状聚集体的形成。” - 反应原料配比:0.2 M 氯化钡溶液中加入等摩尔的 EDTA(重量比约为氯化钡的 1.5 倍)。 - 沉淀剂改良:使用硫酸钠替代硫酸,副产物为中性的氯化钠,极大地简化了后处理的危险性与繁琐度。 - 分离设备参数:使用 300 美元的低成本桌面离心机,单次最高通量 300 毫升,最高转速 4,000 RPM。 - 陈化效应(Aging):悬浮液静置过夜可促使硫酸钡纳米颗粒表面自然重排并自抛光,进一步提升颗粒圆整度与致密堆积潜力。 ### [13:06](https://www.youtube.com/watch?v=dNs_kNilSjk&t=786s) 颗粒致密化原理与多温区分级合成 为了实现材料的最高性能,必须超越单一尺寸纳米颗粒的局限,转向“致密化”(densification)原理。主讲人指出,这与赋予超高性能混凝土惊人强度的机制完全一致:如果在特定体积内仅填充单一尺寸的均质颗粒,无论如何用力压实,最高的堆积密度(density loading)也只有 64%;若只是自然倾倒,填充率通常仅在 60% 左右。这是由于颗粒间存在不可避免的空隙所致。即使换成更小的均质颗粒,空隙尺寸虽然缩小,但数量相应增加,空隙所占的体积比例完全没有变化。 ```mermaid flowchart TD accTitle: 颗粒级配致密化流程 accDescr: 展示大颗粒空隙被中颗粒填充,再被超微颗粒进一步填满以逼近极限密度的过程 subgraph Step1["初级堆叠 (~60-64%)"] L["大粒径硫酸钡颗粒"] V1["颗粒间固有空隙"] end subgraph Step2["二级填充 (中等粒径)"] M["中等粒径颗粒 (30℃/60℃ 批次)"] V2["残余微细空隙"] end subgraph Step3["极限致密化 (~100% 固含量)"] S["超细纳米颗粒 (0℃ 批次 ~10nm)"] F["超高密度固态涂层"] end L --> V1 V1 -->|"填充空隙"| M M --> V2 V2 -->|"再次填补极小缝隙"| S S --> F ``` 破解这一物理限制的方法是引入不同粒径梯度的颗粒。利用中等尺寸颗粒填补大颗粒之间的空隙,再利用极微小的纳米颗粒填补中等颗粒之间的空隙,从而“渐近逼近 100% 的固含量堆积”。主讲人强调:“If we want to get to the actual state of the art the highest possible performance that anybody's been able to achieve we have to kick this thing up one more notch and to do so we have to take advantage of a principle called densification.” 硫酸钡合成反应具有极高的温度敏感性,这为制造不同粒径提供了便利: - 在 0°C 低温环境下反应,会生成直径约为 10 纳米的光滑规则球形纳米颗粒; - 在 95°C 高温环境下反应,则会生成粒径达数百纳米的光滑纳米颗粒; - 实施分批次合成法:分别在 0°C、30°C、60°C 和 95°C 条件下制备不同批次,最后混合在一起,即可获得多级粒径分布的超高密度配方。 --- ### [15:46](https://www.youtube.com/watch?v=dNs_kNilSjk&t=946s) 纳米粉末的沉淀提取与烘干处理 在离心机停止旋转后,主讲人打开容器展示分离结果:试管底部沉积着致密纯白的硫酸钡纳米粉末沉淀块(pellet),上方则是澄清的废弃上清液(supernatant)。随后主讲人小心倒出上清液,将白色固态颗粒截留在底部。在实际操作中,不必每轮都将容器清洗干净,可以直接倒入新配制的反应溶液连续进行多次离心,使底部的沉淀块层层累积增厚。虽然最终会遇到边际效益递减的情况,但这能节省大量反复装卸和清洗的时间。 当沉淀量达到容器负荷上限后,用搅拌棒将浓稠的硫酸钡湿膏掏出,平摊在平底耐热盘上。随后将其放入烤箱,在 100°C 至 150°C 的温度下烘烤数小时彻底脱水,即可得到成品硫酸钡纳米粉末。主讲人对不同温度批次重复该提取烘干过程,最终将所有不同粒径的粉末掺混均匀。面对镜头前大碗的细腻纯白粉末,主讲人打趣道:“And no comment no jokes in the comment section this this really is barium sulfate.” --- ### [17:53](https://www.youtube.com/watch?v=dNs_kNilSjk&t=1073s) 树脂载体与溶剂的选择权衡 要制成反射涂料而非糕点,必须添加粘结剂(binder)。高端油漆通常采用环氧树脂(epoxy)或聚氨酯(polyurethane)体系,但主讲人明确指出,这两者在本应用中表现极差。环氧与聚氨酯基本不含挥发组分,加入超致密纳米粉末后会迅速变稠结块,过早形成厚重的糊状物甚至油灰状软膏(putty),根本无法实现超高固含量;更不能通过多加树脂来稀释,因为任何树脂系统的辐射制冷性能都远不如硫酸钡本身,配方目标是让树脂含量越少越好。 最佳方案是采用丙烯酸树脂——聚甲基丙烯酸甲酯(PMMA)。将其溶于适量溶剂后混入粉末,可通过增减溶剂量任意调节粘度,以满足涂覆或高压喷涂需求。待溶剂挥发完毕后,仅留下极少量的树脂将纳米颗粒牢牢粘连。 在溶剂筛选上,文献普遍推荐二甲基甲酰胺(DMF),但主讲人对其极为排斥: - **气味极其恶劣**:不同于丙酮、甲乙酮(MEK)或甲苯那类带有些许果香与香水味的强溶剂,DMF 散发着刺鼻的臭鱼腥味,主讲人形容它就像解剖烂青蛙时的气味; - **挥发过慢**:这导致每喷涂一层都要等待极长时间才能涂下一层。为了通过光散射反射全部入射光而非让光穿透被基底吸收,涂层必须依靠纯散射机理,厚度需达到 0.5 毫米(约是普通油漆喷涂厚度的 5 到 10 倍),需要叠喷 20 到 30 层; - **快速挥发溶剂的不可行性**:若改用挥发过快的替代溶剂,高浓度粉末在涂抹时会迅速结胶,使用喷枪喷涂时喷嘴喷出的东西甚至会像棉花糖或玻璃纤维喷枪喷出的纤维团一样乱飞。 权衡利弊后,二甲基甲酰胺(DMF)依然是目前唯一可行的妥协选择。 --- ### [21:27](https://www.youtube.com/watch?v=dNs_kNilSjk&t=1287s) 涂料配比、自制加热搅拌设备与工业原料采购渠道 在正式配料前,主讲人补充了前期合成反应的摩尔比细节:硫酸钠与氯化钡必须保持等摩尔比反应。例如,若硫酸钠溶液体积仅为氯化钡的一半,其摩尔浓度就需要提高到 0.4 M,以匹配 0.2 M 的氯化钡溶液。 对于需要喷涂大型设备、建筑物或天文观测台(astronomical observatory)的大规模配制,主讲人展示了自己的核心生产工具——KitchenAid 台式厨师机。KitchenAid 曾推出过配套的自加热搅拌碗,但因极易损坏目前已停产。主讲人展示了一个简易改装方案: - 从亚马逊购买 12V / 12W 的自粘柔性聚酰亚胺加热膜(flexible polyimide heater strips); - 在不锈钢搅拌碗底部贴上 8 张加热贴片(总功率约 100 瓦),按需串联或并联,支持 AC 或 DC 供电; - 该功率足以在反应后期将整体温度提升至所需的 70°C 维持数分钟。 而在本次小规模演示中,主讲人改用常规实验室加热搅拌台:容器中装入 130 克 DMF 溶剂(主讲人闻到气味时再次嫌弃地皱眉叹气),加入 80 克硫酸钡纳米粉末。主讲人特别提醒,在室内近距离接触超细纳米粉体时务必佩戴口罩。搅拌子的作用不是“溶解”粉末——因为硫酸钡对 DMF 完全惰性不溶,而是利用机械剪切力打碎在储存、运输和干燥过程中产生的结块,使其均匀悬浮分散。 主讲人还透露,若不想亲自动手合成,也可以直接采购: - **印度 Airtech Pvt. Ltd.**:纳米粉末售价极具性价比,每吨不到 4000 美元。主讲人团队通过邮件联系并获取了测试样品,实测性能与自制粉末非常接近; - **美国德克萨斯州 US Nano**:发货快、品质极高,但价格昂贵,售价高达约每公斤 300 美元。 主讲人总结道:“A couple of emails and some schmoozing and they were kind enough to send us a sample we tested it and it works almost as well as the stuff that we made ourselves and it will certainly save you some steps if you want to buy it directly.” ### [25:40](https://www.youtube.com/watch?v=dNs_kNilSjk&t=1540s) 硫酸钡悬浮液的磁力搅拌与分散 在将配料加入容器后,溶液随着磁力搅拌棒持续旋转。主讲人指出,尽管哪怕一直搅拌下去也不会对材料造成任何损害,但他习惯求稳:“It's not going to hurt anything, but typically I usually just play it safe and I give it about 20 to 30 minutes at around 300 RPM with the 50 mm stirring bar and that has always worked.”(这样搅下去不会坏事,但我通常求稳,用50毫米的搅拌棒以约300 RPM的转速搅拌20到30分钟,这一招百试百灵)。如果是在大型容器中调配大批量涂料,同样采用低速搅拌相同的时间,即可获得极佳且均匀的悬浮分布。 随着物料逐渐混入,液体中会浮现一些细小的块状物。主讲人提醒,这种常规搅拌并不能打碎硫酸钡在合成过程中形成的坚硬团聚体(aggregates),因为那些结构过于顽固;但对于粉末倒入时聚成的松散小结块,搅拌棒完全能够轻松将其打散。随后,烧杯被留在搅拌台上自转半小时左右。 - 搅拌参数:50 mm 磁力搅拌棒,转速约 300 RPM,时间 20~30 分钟。 - 适用范围:不仅适用于小烧杯实验,扩大批量时低速搅拌同样能实现均匀分散。 - 局限性:能打破松散的粉末结块,但无法打散合成阶段产生的致密团聚体。 --- ### [26:40](https://www.youtube.com/watch?v=dNs_kNilSjk&t=1600s) 加入聚甲基丙烯酸甲酯(PMMA)树脂与溶解技巧 搅拌完成后,主讲人开始向体系中加入 14 克聚甲基丙烯酸甲酯(PMMA)。由于所使用的不是纳米粉末,而是直径约 200 微米的小珠粒,因此操作时无需佩戴防尘口罩。主讲人解释道,PMMA 属于聚合物,分子量取决于单体链的长短,范围通常可从 1 万一直延伸至数百万。诸如有机玻璃(Plexiglas)或聚甲基丙烯酸甲酯板材(Lucite)所用的超高分子量版本,虽然具备更优异的热学与结构机械性能,但溶解难度极大。因此,本次配方选用的是分子量相对较低(约 80,000)的甲基丙烯酸甲酯树脂——Elvacite 2028。该材料由 Lucite International 生产,在美国由三菱化学(Mitsubishi Chemical)代理分销。 这种树脂本身的单价并不高,但工业供货通常要求购买 55 磅的整大包。主讲人幽默地提到,他们是通过几封邮件和数通电话与厂家沟通,最终对方十分慷慨地寄送了一份小样,正如俗话所说:“Like the man said, politics is the ultimate science.”(正如那位智者所言,人际交际才是终极的科学)。普通制作者如果想直接小批量采购,可以从 Polysciences 公司购买名为 PMMA 100(代表分子量约为 100,000)的同类树脂。在加料手法上,主讲人强调必须以极慢的速度少量、逐次倒入。如果贪图省事直接一股脑把颗粒倒进去,树脂就会在液体里迅速抱团,变成一颗像泡泡糖一样在杯底滚动的大胶球;其表面积大幅缩减后,反而会极大地拖慢溶解进度。因此,加料动作放得越慢,整批树脂彻底溶解的总耗时反而越短。 - 原料用量:14 克 PMMA 树脂颗粒(粒径约 200 微米)。 - 选用型号:Elvacite 2028(分子量约 80,000),替代品可选 Polysciences 出品的 PMMA 100。 - 加料策略:必须极缓慢分散加入,防止颗粒粘结抱团形成低比表面积胶球。 --- ### [28:40](https://www.youtube.com/watch?v=dNs_kNilSjk&t=1720s) 加热控温与溶剂损失的称重补偿法 加料完成后开始加热搅拌台。主讲人说明加热板的具体档位无关紧要,因为最终目标只需将液体升温至约 70°C。刚开始时,混合物看起来并没有预想中那种极致纯净的雪白,反而略带半透明或轻微发灰。这是由于 PMMA 仍以透明微珠的形式在液体中悬浮翻滚;随着温度升高、微珠彻底溶解,它们会化为一层包裹并粘结硫酸钡的稀薄树脂糖浆,液体随即会变得越来越白,黏度也会急剧增加。黏度最终会大到磁力搅拌子无法维持自转,届时就需要换用手动搅拌棒辅助搅拌。 ```mermaid flowchart TD accTitle: PMMA Dissolution and Viscosity Increase Process accDescr: Flowchart illustrating the physical and visual transitions of PMMA as it heats to 70C and dissolves into resin syrup. A["PMMA 固体微珠 (200微米) + 悬浮液"] -->|"加热至约 70°C 搅拌"| B["微珠逐渐溶胀并解聚"] B --> C["形成透明薄糖浆基质"] C --> D["体系外观转为纯白"] C --> E["黏度大幅攀升 (阻停磁力搅拌子)"] E --> F["手动搅拌棒介入辅助"] ``` 针对任何涉及易挥发溶剂的化学调配,主讲人分享了一个极其关键的实用实验室技巧:“Something else to keep in mind whenever you're doing any kind of a synthesis that involves a solvent: before you get started, weigh all of your individual components... write them down and put them in your back pocket.”(做任何涉及溶剂的合成时,务必牢记一点:动手之前,把烧杯、搅拌棒、搅拌子、量勺等每一件会用到的器具单独称重,记在纸上揣进后兜里)。因为在加热和长时间搅拌过程中,受室温、通风和化学特性的影响,总会损失一部分溶剂。调配结束后,只要把整体连同器具再次称重并比对差值,发现少了比如 5 克溶剂,只需直接补加 5 克纯溶剂即可。这种方法能确保每一次制备出的涂料黏度保持高度一致,具备极佳的可重复性。 - 目标升温:约 70°C(允许在 70~72°C 浮动)。 - 外观与物性转变:由发灰半透明逐步转为纯白,黏度逐渐增大。 - 质量补正法:预先称量全部接触器材皮重,最终根据总失重补充等量挥发溶剂,确保批次一致性。 --- ### [30:32](https://www.youtube.com/watch?v=dNs_kNilSjk&t=1832s) 黏度测量与蔡恩杯(Zahn Cup)标准 随着溶液变得越发浓稠,磁力搅拌子终于在几分钟前彻底“罢工”停转,主讲人随即拿起带温度传感器的金属搅拌棒进行手动辅助,此时温度计显示约 70~72°C。此时 PMMA 已完全溶解,体系所追求的目标黏度在 100 到 150 厘泊(centipoise)之间。主讲人形象地解释,这相当于纯水黏度的 100 到 150 倍,肉眼观察其质感介于淡奶油与浓奶油之间。初次制作该涂料时,必须借助专业工具精准测量黏度,以建立准确的手感认知。 测量黏度通常可选用瓦格纳杯(Wagner cup)或主讲人更偏爱的蔡恩杯(Zahn cup)。这类黏度杯在油漆耗材商店或网店均可购得,其结构为一个容量严格标定为 44 毫升的金属杯,杯底正中央开有标准孔径;依据开孔直径的不同,分为 1 号、2 号、3 号杯等规格。本次测试采用的是 3 号蔡恩杯(Zahn 3)。测试时,将杯体完全浸没入油漆液体中直至灌满,在杯体迅速提离液面的瞬间按下秒表计时;目光紧盯底部流出的漆液细流,直到细流由连续线状初次断开为独立的液滴时,立即按下秒表停表。这一测量结果即为“蔡恩时间”(Zahn time)。对于 3 号蔡恩杯,最佳的目标时间是 7 到 8 秒,这对应了最适宜高流量低压(HVLP)喷枪作业的“刚刚好”理想黏度(Mama Bear viscosity)。调配好的涂料可以装罐密封,能够长期储存;若存放时间过长,喷涂前只需重新放入搅拌机中搅拌旋转片刻,消除分层沉淀即可。 - 目标黏度:100~150 cP(厘泊),质感类似稀/浓奶油。 - 测量工具:3号蔡恩杯(Zahn 3),标准容量 44 mL。 - 测量终点定义:漆液细流由连续柱状初次断开成滴落状的瞬间。 - 目标喷涂参数:蔡恩时间 7~8 秒,最适合 HVLP 喷枪。 --- ### [33:15](https://www.youtube.com/watch?v=dNs_kNilSjk&t=1995s) 铝板基材的前处理:除脂、打磨与防氧化层破坏 合成完毕后,制作团队将所有物料和喷涂设备转移到了空间更充裕的仓库车间。主讲人指出,在铝材表面喷漆存在极高的技术挑战,必须通过严苛的表面预处理才能让底漆与环氧胶获得优良的附着力。整个基材预处理分为环环相扣的三大步骤:除油除脂、机械打磨与化学转化(酸洗底漆)。 ```mermaid flowchart LR accTitle: Aluminum Surface Preparation Flowchart accDescr: Step-by-step process of cleaning, sanding, and priming an aluminum surface for high adhesion paint. subgraph S1["第一步:溶剂脱脂"] A["丙酮 / 刹车清洗剂"] --> B["纸巾单向擦拭"] B --> C["擦至纸巾洁白无黑斑"] end subgraph S2["第二步:机械打磨"] D["150目 掌上砂磨机"] --> E["粗化表面 增加微观机械齿"] end subgraph S3["第三步:钝化破坏与界面"] F["磷酸自蚀底漆"] --> G["咬蚀氧化铝膜 沉积金属锌/铁"] end C --> D E --> F ``` 首先,从供应商处拿到的原始铝板必须用丙酮或刹车清洗剂这类能溶解油脂的溶剂进行彻底擦洗。推荐使用一次性纸巾蘸取溶剂擦拭,擦完会带下一层黑色污渍;随即将脏纸巾扔掉换新,反复操作直到纸巾完全保持洁白,才算彻底去除了铝板表面的防锈油脂。只有除净油脂后,才能进入第二步打磨;如果在油污未除的情况下直接打磨,磨下的金属碎屑会与油脂混合成黏糊糊的泥浆糊在砂纸上。打磨建议使用装配 150 目砂纸的掌上震动砂磨机。打磨的目的在于将光滑的镜面转变为微观粗糙的粗糙面,这不仅大幅增加了胶粘剂与油漆接触的有效表面积,更形成了细微的“机械齿”(tooth),让涂层能物理锁合在金属基底上。 主讲人着重分析了铝材难喷的深层化学原因:“Aluminum is particularly difficult as a metal because it's so reactive. What happens is the oxygen in the atmosphere reacts with the aluminum and forms a thin layer of aluminum oxide on the surface, and that doesn't bond well to adhesives or paints. It's almost like the flour on a pizza board—little ball bearings, and it prevents bonding.”(铝作为一种金属极其棘手,因为它的化学活性太强了。空气中的氧气会迅速与铝反应,在其表面生成一层氧化铝薄膜,而它与胶水或油漆的粘接性极差;这层氧化膜就像披萨面板上撒的面粉一样,好比无数微型滚珠轴承,彻底破坏了粘接)。虽然砂纸打磨能够磨掉氧化层,但由于铝的极高活性,暴露在空气中的裸铝在短短数毫秒内就会重新生成氧化膜,仅靠机械打磨根本无法将其消除。 因此第三步必须使用酸洗防蚀底漆(etching primer)。这类底漆通常含有磷酸等强酸成分,喷涂后会直接“咬”入铝基体,剥离氧化铝层,并在金属表面沉积留下一层活性较低的金属涂层(如锌或铁),干透后能提供极强的界面结合力。另外,主讲人还分享过一个不用底漆的独家替代小窍门:在清洗干净的铝板上倒一小团环氧树脂,然后用百洁布(Scotch-Brite)或砂纸直接隔着环氧树脂对铝面进行湿法打磨;由于环氧树脂隔绝了空气中的氧气,铝表面被磨掉氧化层后无法再度氧化,从而形成结合强度最高的附着层。但这种操作手法较为黏乱,通常仅适用于单件小零件,对于大面积板材仍应遵循标准底漆工艺。 - 清洁溶剂:丙酮或汽车刹车分泵清洗剂(Brake Cleaner)。 - 机械研磨:150 目砂纸配合手持砂磨机,增加物理锚固微观齿。 - 界面失效机理:裸铝毫秒级自发氧化形成的致密氧化铝层,扮演了阻止附着的“滑石粉”角色。 - 结合方案:采用含磷酸的酸蚀底漆(Etching Primer)或环氧树脂隔绝氧气湿磨法。 --- ### [36:24](https://www.youtube.com/watch?v=dNs_kNilSjk&t=2184s) 喷枪作业与“极薄多层”喷涂策略 板材完成前处理并干燥后,主讲人启动了高流量低压(HVLP)喷漆枪开始正式喷涂作业。喷枪开动时伴随着强烈的马达轰鸣与气流声,主讲人在此过程中持续推进走枪,在铝板表面完成了第一道涂层的均匀铺设。 完成第一遍喷涂后,主讲人关闭喷枪并总结了核心喷涂要领:这只是极其漫长过程中的第一层,后续还需要反复喷涂大量层数。操作该涂料的关键原则就是“宁薄勿厚”,每一次走枪都必须喷得极其轻薄。主讲人强调,在整个项目的全局耗时来看,单次喷得极薄反而能大幅节省总工时,因为极薄的涂层溶剂挥发极快,能有效避免流挂、气泡和干燥过慢等问题。 - 设备规格:高流量低压喷枪(HVLP spray gun)。 - 喷涂手法:极薄多道(Multiple ultra-thin coats),单层厚度必须严格控制以加快溶剂闪干。 ### [37:13](https://www.youtube.com/watch?v=dNs_kNilSjk&t=2233s) 喷涂层数控制与层间干燥的感官判断法 在涂装特种辐射制冷涂料时,绝对不能为了图快而一次性喷涂极厚的涂层。极厚的涂层不仅容易导致流挂(runs),而且漆膜内部的溶剂极难挥发,导致层间等待时间过长,最终根本无法节省时间。相反,分多次喷涂薄层能提供更大的表面积让溶剂挥发。在等待第一层干燥并准备喷涂第二层时,主讲人介绍了一套依靠人体感官来精准判断涂层状态的方法: ```mermaid flowchart TD accTitle: 漆层干燥检测流程 accDescr: 通过视觉哑光、触觉无残留以及嗅觉残留溶剂三个步骤判断是否适合喷涂下一层 subgraph S1["第一步:视觉观察"] A["观察漆面反光状态"] --> B{"是否由高光潮湿变为哑光?"} B -- 否 --> A B -- 是 --> C["进入触觉检测"] end subgraph S2["第二步:触觉测试"] C --> D["在不显眼处用手指轻擦表面"] D --> E{"手指是否完全干净无粘滞?"} E -- 否 --> C E -- 是 --> F["进入嗅觉检测"] end subgraph S3["第三步:嗅觉确认"] F --> G["凑近闻气味"] G --> H{"是否仍能闻到轻微溶剂臭味?"} H -- 完全无味(骨干) --> I["严重超时:层间缺乏互溶,易剥离脱层"] H -- 仍有刺鼻异味 --> J["最佳时机:立即喷涂下一层"] end ``` 第一步是**视觉检查**:漆液刚喷上时,溶剂会让表面呈现湿润的高光泽(glossy/wet)质感,当光泽消退并转变为非常平整的哑光(flat matte)表面时,就是一个极佳的信号。第二步是**触觉测试**:在不显眼的边缘区域用戴着手套的手指擦拭涂层,手指拿开后必须完全干净,没有任何黏附。第三步是**嗅觉测试**:凑近轻轻闻一下,主讲人皱着眉头直呼“天哪,这东西真臭(man that stuff stinks)”,但此时涂层仍需散发轻微的溶剂气味,这才是最佳窗口期。 掌握层间喷涂的时间窗口极其微妙。喷涂得太快会导致下层未挥发的溶剂被封死,后续受热产生的溶剂蒸气压会在漆膜中形成微小气泡或起泡(blisters);而等待时间太长以致于涂层彻底“骨干”(bone dry),新喷涂层中的溶剂就无法充分渗透并轻微溶蚀下层的丙烯酸树脂基底,从而无法形成良好的层间结合强度(interlaminar strength)。主讲人警告道:“如果你在表面彻底骨干的情况下喷涂,可能会导致起皮和开裂(If you do it with the surface bone dry you may get peeling and cracking)。” 大约等待了20分钟后,漆面呈现出漂亮的哑光状态。主讲人借此分享了一个反直觉的光学知识:高光漆与哑光漆在反射率百分比上可以完全一致。高光漆产生的是镜面反射(specular reflection),光滑得几乎能照出人脸;而哑光漆则是将光线向各个角度散射,但二者反射的总能量比例是相同的。通过手套擦拭无残留、嗅闻仍有微臭的测试后,第二道涂层正式开喷。 --- ### [40:02](https://www.youtube.com/watch?v=dNs_kNilSjk&t=2402s) 漫长的多层喷涂流水线与风扇辅助的风险平衡 多层喷涂是一场旷日持久的耐力战。喷涂一层仅需一两分钟,但每层之间需要静置等待20分钟,这意味着全天95%的时间都在干等。为了加快进度,主讲人决定“作弊”——引入一台电风扇加速空气流动以缩短干燥时间,但他明确提醒观众不要轻易模仿:“我并不建议大家这么做,因为这存在一点风险(I'm not advising you to do this because it's going to be a little bit risky)。” 引入风扇的风险主要有两个: - **扬尘附着问题**:当前作业环境并非专业无尘喷漆房(spray booth),尽管地面打扫过,风扇产生的湍流仍会吹起地面扬尘,未完全固化的黏性漆面极易吸附灰尘颗粒,破坏表面平整度与光学纯度。 - **差异化干燥(Differential drying)**:如果风扇距离工件过近,气流在板面上的分布不均匀会导致局部干燥速度不同,造成涂层各区域物理状态不一致。 为了降低这些负面影响,主讲人采取了折中措施:将风扇架高脱离地面以防卷起地面积灰、将风速调至低档(low speed),并将风扇大幅后撤以避免直吹形成局部聚焦强风。 由于全天需要从清晨一直喷涂到深夜,主讲人建议大家必须提前做好全天候作战的规划: - **穿插其他并行项目**:利用每层之间漫长的20分钟空档去处理其他工作,避免整天无所事事地干等。 - **轮班作业与协作**:最好找个搭档或摄影师轮班倒,主讲人开玩笑地提议“为了公平起见,前两个小时我来喷,最后八个小时留给摄影师(I'll do the first two hours and then my cameraman will do the last eight hours, you know just to be fair)”。 - **充足的物资后勤**:现场展示了大量零食补给、饮料以及各类工具,确保中途无需离开现场中断流程。 随着一层又一层的喷涂推进,现场进入了机械而漫长的重复循环。在喷涂完最后一层(大约第27层)后,疲惫不堪的主讲人甚至记不清具体喷了多少层,翻看记事小本后才确认大约喷了22至27层之多。 --- ### [44:29](https://www.youtube.com/watch?v=dNs_kNilSjk&t=2669s) 真实阳光下的对比控温测试:超强辐射制冷涂层的降温奇迹 经过一夜的休息并喝了几杯咖啡后,团队返回仓库室外,对彻底固化后的样品进行严苛的日光下热性能对比测试。测试装置共架设了三块不同处理的面板,每块面板背面均贴有高精度热电偶探头(thermal probe),并接入四通道数字温度计中进行实时监控: | 通道编号 | 测试对象 | 表面处理情况 | |:---: |:--- |:--- | | **通道 1** | 特种涂料板(Ultra Paint) | 喷涂了多达27层自制超白辐射制冷涂层 | | **通道 2** | 裸铝板(Bare Aluminum) | 未经处理的抛光裸铝板 | | **通道 3** | 商业白色漆板(Rust-Oleum) | 喷涂了市售顶级超亮白(super bright)Rust-Oleum商业油漆 | | **通道 4** | 环境气温探头(Ambient Air) | 悬挂于测试支架后方背阴处,测定实时环境空气温度 | 经过数分钟的日照热平衡后,读数呈现出惊人的对比差异: - **裸铝板**吸热极其严重,表面温度比环境气温高出了整整 **20 °C** 左右。 - 喷涂了市售优质超白涂料的 **Rust-Oleum 商业漆板**,其表面温度依然比环境气温高出 **8 °C 至 10 °C**。 - 喷涂了自制特种涂料的 **Ultra Paint 面板**,在烈日直射下其温度竟然比周围环境气温低了约 **3 °C**,成功实现了日光下的被动辐射致冷(Passive Daytime Radiative Cooling)。 主讲人强调,这是一次极其严苛且偏向保守的极限测试:测试地点处于高纬度的**新英格兰地区**,时间正值**11月深秋的午后**。此时太阳高度角较低、太阳辐射绝对强度较弱,导致不同面板之间的温差被严重压缩。“如果这项测试是在夏季进行,或者是在低纬度的南方地区,温差表现将会显著拉大得多(They would be even more significantly different if we were in the summer here or if we weren't in New England, we're in southern or lower latitudes)。” 此外,测试面板完全暴露在开阔环境中,没有任何防辐射屏蔽: - 它们不断吸收来自周围环境的漫反射热辐射,包括周围树木、建筑、摄像师以及主讲人身体释放的红外辐射。 - 对流换热在起反向破坏作用:由于空气温度高于裸铝板与商业漆板,周围流动的冷空气本在拼命帮那两块发烫的板子散热降温;而对于温度已经低于气温的特种涂料板,吹拂的空气反而一直在试图“加热”它。在如此不利的对流和辐射加热双重夹击下,特种漆依然顽强地维持在室温以下3度。 主讲人总结道,这意味着如果将这种涂料直接涂刷在突尼斯等炎热地区的建筑物屋顶或外墙上,建筑物表面在真实自然工况下将完全处于低于周围气温的凉爽状态。这种涂料原料易得、制作成本可控,在未来的建筑节能与被动冷却领域将产生颠覆性的重大影响。最后,主讲人向支持频道的观众表达了真诚的感谢,并呼吁大家订阅支持后续高成本硬核科研项目的推进。 ## Notable quotes > [02:44](https://www.youtube.com/watch?v=dNs_kNilSjk&t=164s) 纯硫酸钡粉末在可见光波段的反射率超过 99%。 — 主讲人 > [28:40](https://www.youtube.com/watch?v=dNs_kNilSjk&t=1720s) Something else to keep in mind whenever you're doing any kind of a synthesis that involves a solvent: before you get started, weigh all of your individual components... write them down and put them in your back pocket. — 主讲人 ## Mentioned Tech Ingredients, NighthawkInLight, KitchenAid, Airtech Pvt. Ltd., US Nano, Lucite International, Mitsubishi Chemical, Polysciences, Rust-Oleum, 硫酸钡 (Barium Sulfate), 乙二胺四乙酸 (EDTA), 聚甲基丙烯酸甲酯 (PMMA), 二甲基甲酰胺 (DMF), 蔡恩杯 (Zahn Cup), 高流量低压喷枪 (HVLP) ## Video description This a follow-up to our most recent video https://youtu.be/5zW9_ztTiw8 where we show you our custom built liquid panel that when placed outside, cools down to lower than ambient temperature. Today's video shows you how to create and use the specialty paint that makes the panel possible. Find us on Patreon and our website: https://www.patreon.com/techingredients https://www.techingredients.com/ [Source](https://www.youtube.com/watch?v=dNs_kNilSjk)

Source quotes

[2:44] 主讲人: 纯硫酸钡粉末在可见光波段的反射率超过 99%。 [28:40] 主讲人: Something else to keep in mind whenever you're doing any kind of a synthesis that involves a solvent: before you get started, weigh all of your individual components... write them down and put them in your back pocket.

Original transcript

[0:00] [Music] [0:19] hi in our last video on cooling we built [0:22] a device that chilled circulating water [0:26] to below the ambient temperature simply [0:29] by radiating the energy away into the [0:32] environment it used just a couple of [0:35] watts of electricity to circulate the [0:37] water but the underlying process is [0:39] passive it uses no energy and so its [0:42] effective eer is infinite now if you're [0:46] interested in this technology you might [0:47] want to take a look back at that video [0:49] because we go through the engineering we [0:51] build the device we test it and it [0:54] really worked at the heart of that [0:57] device is a specialized coating or super [0:59] paint that enables it to work and today [1:02] as I promised we're going to go through [1:04] the how and why it works and because [1:07] it's relatively simple and inexpensive [1:10] I'm going to show you how to make it [1:12] yourself now the underlying principle [1:14] that makes this possible is the fact [1:16] that all physical objects glow they emit [1:20] electromagnetic radiation and at body [1:23] temperature room temperature the [1:25] temperature of the world around us that [1:27] energy Peaks at around 10 m microns or [1:30] 10,000 nanm in the [1:33] infrared the efficiency with which any [1:36] actual physical surface emits that [1:38] radiation is called the [1:40] emissivity and typical materials like [1:43] skin cloth wood concrete plastic [1:47] commercial paints all emit with an [1:50] efficiency between about 75 and 90% but [1:54] to make this work we want that number as [1:56] high as possible at the same time if [1:59] we're going to use this system both [2:01] night and day we need this coating to [2:04] reject or reflect as much of the Sun's [2:07] light as possible because the sun can [2:09] dump as much as a kilowatt onto every [2:11] square meter of surface exposed to it [2:14] now there are a number of materials that [2:15] will perform either function pretty well [2:18] but it tends to be mutually exclusive [2:22] it's been known for years how to [2:23] manufacture surfaces that will do both [2:26] functions at the same time quite well [2:28] using multi-layer d electric films like [2:30] you're building laser Optics but they [2:33] require multi-million dollar laboratory [2:35] style chemical vapor deposition [2:37] equipment and the throughput the [2:39] processing speed is quite slow it really [2:41] isn't practical so there's been a lot of [2:44] recent interest focused on this one [2:47] material that performs both functions [2:49] better than any other known substance [2:52] it's widely available it's [2:54] non-toxic and it's [2:57] cheap barium sulfate [3:01] it is mined all over the world at about [3:03] 10 million tons per year as a mineral [3:05] called berite it looks a lot like quartz [3:09] and it's often contaminated with other [3:10] minerals so it can have various Hues [3:13] from pinks to Blues to Greens it's [3:15] pretty but in its pure form barium [3:18] sulfate is absolutely colorless and as [3:21] clear as the purest water in addition [3:25] it's [3:26] non-toxic for decades [3:28] gastroenterologists and Radiologists [3:31] have prepared milkshakes containing [3:33] barium sulfate powder the patient drinks [3:36] it and it coats the inner lining of the [3:38] GI tract and because barium has such a [3:41] high atomic weight it's radioopaque so [3:44] even with conventional flat plate x-rays [3:48] the barium sulfate will coat the [3:49] interlining of the GI tract outlining [3:52] the morphology that can show tumors [3:55] diverticula ulcers it's literally safe [3:59] to drink [4:09] it's not bad even comes in [4:13] Strawberry for our purposes however what [4:16] is important is that the berium sulfate [4:18] Crystal has an electronic structure that [4:21] allows it to resonate at the same [4:23] frequency as the thermal vibrations that [4:26] occur around room temperature and so [4:28] each of the crystals operates as a [4:30] little Nano antenna that emits that [4:33] radiation into the environment at an [4:35] over 96% efficiency at the same time [4:39] what makes it so reflective in the [4:41] visible is the fact that it is so [4:44] clear as I said it's as clear as the [4:47] purest water and it's the same principle [4:50] that makes pure water the second most [4:52] reflective material known when it is [4:54] converted into [4:56] snow when light strikes a snowflake or a [5:00] crystal of berium sulfate some of the [5:02] light reflects off the surface of the [5:04] Crystal and is scattered away some of [5:06] the light enters the crystals and is [5:08] refracted and again scattered away the [5:11] light that is scattered back toward the [5:13] source we call that the reflection but [5:15] the light that is scattered deeper into [5:17] the material simply encounters other [5:19] crystals where the process repeats over [5:23] and over and over again and because both [5:26] substances are so clear they don't [5:28] absorb the light and this process is [5:31] virtually lossless it just continues to [5:34] bleed away light toward the source until [5:37] eventually all of it is gone pure barium [5:40] sulfate powder has a reflectivity in the [5:43] visible of over [5:45] 99% so obviously we got to get our hands [5:48] on some of that stuff and it's actually [5:51] easy to make and kind of fun what [5:53] happens industrially is they will [5:56] convert the berite into barium chloride [5:58] using heat and carbon and barium [6:01] chloride is a water soluble salt so you [6:05] can prepare an aquous solution of barium [6:08] sulfate by adding it to water and in [6:10] this case2 molar for those of you [6:13] unfamiliar with the term it's sort of a [6:15] measure of the concentration of [6:16] particles in a volume of water so if you [6:19] have a molecule that has a molecular [6:21] weight of say 208 barium chloride and [6:25] you add 208 grams of it to a liter of [6:29] water you'll have a one molar solution [6:31] this is a 1/5 molar or2 mol solution if [6:36] I take this barium chloride and I pour [6:39] it into these [6:47] dishes in order to form the barium [6:51] sulfate we need a sulfate donor and in [6:53] this case we're going to use 20% [6:56] sulfuric acid if I take this dropper [7:00] and pull up some of the [7:02] acid and drop it [7:04] in you see this neat [7:07] reaction it's kind of [7:12] cool I love [7:19] chemistry What's Happening Here is that [7:22] the sulfate from the sulfuric acid is [7:25] grabbing onto the barium ions forming [7:27] water insoluble berium sulfate that's [7:31] the powder that's drifting down to the [7:32] bottom of the dish What's Left Behind is [7:35] the hydrogen from the acid and the [7:37] chloride from the barium chloride [7:39] forming water soluble barium chloride [7:42] solution so we've done a double [7:44] displacement barium chloride becomes [7:46] barium sulfate and sulfuric acid becomes [7:48] hydrochloric [7:53] acid I love [7:55] this chemistry is fun [8:01] something to show your [8:03] kids that is barium sulfate however that [8:07] won't work the problem is this [8:10] uncontrolled reaction generates rather [8:13] large multim Micron diameter irregular [8:17] Aggregates rocks and that's not [8:21] conducive to very dense packing which is [8:23] necessary to produce the highest [8:25] performance highest reflectivity [8:27] material optimally what we want want is [8:30] much smaller particles in the nanometer [8:32] range we want them smooth and round and [8:35] regular and we also want them over [8:37] variety of sizes in that nanometer range [8:40] as I'll explain in just a second now it [8:42] appears to be that the simplest and most [8:44] reliable way to do that is to modify [8:46] this reaction with a surfactant that [8:49] stands for surface active agent it's a [8:52] family of chemicals that are similar to [8:55] detergents many com commercial [8:56] detergents have surfactants in them what [8:59] the surfactant does is it surrounds or [9:02] isolates the barium ion in solution so [9:05] when you get that very tiny initial [9:07] nucleation site where the barium sulfate [9:09] begins to crystallize the surfactant [9:11] controls the Ava availability of the [9:13] barium and so it tends to grow in a much [9:16] smoother rounder more spherical shape [9:19] and it inhibits the formation of these [9:21] large aggregate rocks it really works [9:25] and that's exactly what Nighthawk and [9:26] light did several months ago when when [9:29] he was covering this technology if [9:31] you're interested in the subject take a [9:33] look at his video it's very well done [9:35] and it's interesting I think you'll like [9:36] it basically what he did is he took the [9:39] barium chloride [9:41] solution2 molar and he adds to it the [9:45] surfactant [9:47] EDTA and you want to use an equal molar [9:49] amount so if this is2 molar barium [9:51] chloride you want to add2 molar Eda it [9:55] has a molecular weight that's about 50% [9:57] greater than the barium chloride so you [9:59] want to use about 1 and 1/2 times the [10:01] weight of the barium chloride when [10:03] you're making up the solution then [10:06] you're going to repeat the double [10:07] displacement [10:09] reaction what I have here is sodium [10:12] sulfate I could use the sulfuric acid [10:17] however when we're done what happens at [10:19] the end is we're left with hydrochloric [10:21] acid in solution when we use sodium [10:24] sulfate What's Left Behind is very [10:26] dilute table salt sodium chloride and [10:29] it's easier to deal with later on when I [10:31] add this solution you'll see what [10:42] happens you immediately form this Milky [10:46] suspension of barium Nano powders berium [10:49] sulfate nanop powders and we're [10:50] basically [10:52] done even though the surfactant slows [10:54] the reaction we're talking milliseconds [10:56] to seconds this is already complete and [10:59] so to concentrate this what we do is we [11:02] get a magnet to hold on to the stirring [11:05] bar and we fill up some centrifuge [11:15] tubes okay and we want to try to get [11:18] this reasonably even so that we don't [11:20] explode our centrifuge [11:29] that's pretty close I [11:35] hope we'll cap these [11:45] up we'll throw these in the [11:51] centrifuge and we'll run this up to [11:53] 4,000 RPM for a few [11:57] minutes this is kind of a neat piece of [11:59] of equipment we got this a few years ago [12:01] on Amazon I think it cost us about [12:04] $300 and it's actually marketed in the [12:07] foodie section on Amazon you know that [12:11] area where you try to mix technology and [12:13] chemistry and food preparation kind of a [12:16] geeky activity and we might cover some [12:18] of that stuff in a future video but [12:21] basically it isn't a very high [12:23] performance unit it only goes to 4,000 [12:25] RPM but it has a very high capacity [12:28] it'll handle up to 300 milliliters in a [12:30] run and every few minutes so the [12:32] throughput is is really good and in [12:35] keeping with the food theme what's [12:36] another interesting fact about this [12:38] suspension is that it ages like fine [12:42] wine if before I did this step we simply [12:45] turned out the lights and came back the [12:47] next day overnight the suspension will [12:51] allow the barium sulfate to slightly [12:54] rearrange and the particles become even [12:56] smoother even rounder and almost [12:59] polished so it doesn't add any more work [13:01] but if you're a little more patient [13:02] you're going to get a little bit better [13:04] result and that's exactly what he found [13:06] when he produced the much smaller much [13:10] rounder Nano particles due to the [13:13] controlled reaction with the EDTA and [13:16] added this to a paint he got a higher [13:17] performance out of the [13:19] material now if we want to get to the [13:21] actual state of the art the highest [13:24] possible performance that anybody's been [13:26] able to achieve we have to kick this [13:28] thing up one more not [13:30] and to do so we have to take advantage [13:31] of a principle called [13:34] densification I've covered this in a [13:36] previous [13:37] video on our thermal grease and [13:40] basically it's the same principle that [13:42] lends such strength to ultra high [13:44] performance concrete if you take a [13:47] volume and you fill it with uniform siiz [13:49] particles no matter how neatly you try [13:52] to pack them down the highest density [13:55] loading you're going to get is [13:58] 64% and if you just pour them in you're [14:01] going to be closer to 60% it's because [14:03] of the [14:04] unavoidable voids between the particles [14:07] and it doesn't matter what size [14:09] particles you use as long as they're [14:10] uniform smaller particles will have [14:13] smaller voids but they'll be more of [14:15] them the ratio doesn't change however if [14:18] you take mediumsized particles like [14:21] these you can fill in the gaps between [14:25] the larger [14:26] particles and increase the dens [14:30] loading by filling in those [14:32] voids increasing the density inside of [14:36] the same volume and if we go even [14:39] further and add even tinier particles we [14:42] can fill in the voids between the [14:43] medium-sized particles etc etc etc [14:47] asymptotically approaching a 100% solids [14:51] loading that's what we need for the [14:53] ultimate coating and it turns out we can [14:56] do that with a little modification of [14:58] this reaction because it's so [14:59] temperature [15:01] sensitive if we run the same thing that [15:03] I just showed you with all the reagents [15:05] down at about 0° cus will produce nice [15:08] regular spherical barium sulfate nanop [15:11] particles in about the 10 nanometer [15:14] diameter range if we run the reaction up [15:16] at around 95° C we'll produce nice [15:20] smooth nanop particles in the several [15:22] hundred nanometer range and so the trick [15:25] is you just do it in batches you do a 0 [15:27] degree batch 30° batch 60° batch and a [15:30] 95° batch and when you're done you mix [15:34] everything together to produce this [15:36] Diversified size of very nice Nano [15:39] particles that give you the ultra high [15:41] dense coating that we're looking [15:46] for all [15:49] right we open this guys [15:52] up and you can see in the bottom of the [15:56] container the white pellet of the barium [15:59] sulfate Nano [16:00] powder and on top the supernant hold [16:06] it I just want to make sure I [16:15] get got [16:17] it now what you [16:19] do simply take off the [16:27] caps and pour out the [16:34] supernant and What's Left Behind is [16:38] those pellets of Nano powder now you [16:41] don't even have to clean this out [16:44] initially what you can simply do is take [16:47] more of the solution and pour it right [16:49] on top and do it again you can do this [16:51] several times building up the pellet at [16:55] the base eventually you get to a law of [16:57] diminishing returns but the point is it [17:00] saves a step when you're all done or [17:02] you've got as much use as you think you [17:04] can get in there then simply take a [17:07] stirring [17:08] Rod put it [17:11] inside pull out your barium sulfate [17:14] paste put it down onto a [17:19] plate put it in an oven and run it at [17:23] 100 to 150° C for a couple of hours to [17:26] dry it out and you have your batch of [17:29] barium sulfate Nano powder then you [17:31] simply repeat the operation for each of [17:34] the different size ranges you want and [17:37] when you're done you mix everything [17:38] together and you [17:41] have your white [17:43] powder and no comment no jokes in the [17:46] comment section this this really is [17:49] barium [17:51] sulfate [17:53] now we're not making a pastry we're [17:55] making a paint and so we need a binder [17:57] or something to hold hold this together [18:00] and typically for high-end paints you'll [18:03] use an epoxy resin or a polyurethane [18:06] resin system they're a poor choice for [18:09] this application because they have [18:10] virtually no volatiles so what happens [18:14] is when you mix in this ultra dense [18:16] powder it will very quickly thicken up [18:19] and form a paste and then a putty long [18:22] before you get to a very high solids [18:24] loading and you might think oh well go [18:27] ahead and just add some more some more [18:29] resin thin it out you can't do that [18:32] because none of the resin systems works [18:35] as well as the barium sulfate you want [18:37] as little resin as possible so the [18:40] better choice is to use an acrylic [18:45] polymethylmethacrylate what you do is [18:47] you take this polymethylmethacrylate and [18:49] you dissolve it in an appropriate [18:52] solvent and you then blend in your [18:54] powder and because you can use an [18:56] arbitrary amount of solvent you can [18:58] bring it to just the right viscosity for [19:00] spreading or for the very densest best [19:03] coats spraying and then when you're done [19:06] the solvent evaporates away leaving [19:08] behind just enough of the resin to stick [19:13] your balls [19:14] together so to speak now there's been a [19:17] lot of research on this topic and I've [19:19] studied a number of papers looking for a [19:21] good solvent because it turns out what [19:25] is the best solvent dimethyl formamide [19:29] I don't like it so much the problem is [19:33] it [19:33] stinks Alternatives like acetone [19:36] methylethyl Ketone taluan all have [19:40] strong odors but I know you're familiar [19:42] with them they're kind of fruity they're [19:43] kind of perfumy they're not bad dimethyl [19:46] formamide smells like bad fish anybody [19:50] who has dissected a frog has smelled [19:52] something similar it's not really [19:53] Pleasant the second issue is it [19:56] evaporates rather slowly so that when [19:58] you lay down a coat you have to wait a [20:01] fair period of time before you can lay [20:03] down a subsequent coat and the reason [20:05] that's a problem is because you've got [20:07] to use a lot of coats like 20 to 30 [20:12] coats now I know you painters out there [20:14] are like he's crazy there's no way you [20:16] ever need to do that yeah actually you [20:18] do here because with typical stains or [20:21] paints they include a pacifiers or [20:24] absorbers to manage the light this [20:27] system is completely depend depent on [20:29] scattering and so you need a thick [20:31] enough build so that all the light gets [20:33] scattered back toward the source rather [20:35] than get through and be absorbed by the [20:38] substrate so you need a build thickness [20:40] about a half a millimeter thick which is [20:42] 5 to 10 times as thick as a typical [20:45] spray of paint or [20:48] stain the problem is if you go to the [20:51] other solvents they evaporate too [20:53] quickly so when you put this superdense [20:56] powder into them and you start to spread [20:58] them they quickly gum up or if you use [21:00] the preferred technique of spraying them [21:02] it's even worse what ends up coming out [21:04] of the end of the gun looks like cotton [21:06] candy or the output from a chop gun if [21:09] you're doing a fiberglass boat bill it's [21:11] a mess it doesn't work [21:14] so it's dimethyl formamide we've got our [21:18] powder we've got our resin system and we [21:20] have our solvent let's go ahead and cook [21:23] up a [21:27] batch okay before we start the synthesis [21:29] one little reminder something I [21:31] neglected to mention is that when you're [21:33] adding the sodium sulfate to the barium [21:35] chloride you want to use the same number [21:37] of moles so in the case that we used [21:39] half the volume we actually used A4 [21:42] molar sodium sulfate solution to the2 [21:45] molar barium chloride but we had twice [21:48] as half the amount of [21:50] volume for the synthesis that I'm going [21:52] to demonstrate we're going to do a small [21:54] volume because I'm want to show you the [21:55] techniques as well as the ratios of the [21:57] different materials [21:59] but if you're going to be doing a large [22:00] volume you want to cover a large piece [22:02] of equipment multi lers you're going to [22:04] cover a building maybe an astronomical [22:06] Observatory you want to use this [22:08] high-tech piece of scientific [22:11] equipment this thing is great and it's [22:14] what we used and what's a shame is [22:17] KitchenAid used to make a heated bowl [22:19] for this mixer so you could heat and mix [22:22] at the same time problem is ours broke [22:26] and it looks like KitchenAid [22:28] discontinued them maybe because they all [22:30] broke but there's a relatively simple [22:33] hack that you can perform and that's [22:35] what we did for our synthesis if you go [22:38] on Amazon you can pick [22:41] up these self [22:45] adhesive flexible poly imid heater [22:49] strips they come in a variety of sizes [22:51] and shapes this particular one is 12 [22:54] Watts 12 volts you simply peel off the [22:57] backing [22:59] stick it onto the side of your bowl and [23:01] then you can wire this up in series or [23:04] in parallel however you want to do it [23:06] for the current and voltage that you [23:08] want to use you can use AC DC in this [23:11] case the 100 Watts eight strips that [23:13] we've got mounted on the bottom is [23:15] sufficient to bring the temperature of [23:17] the reaction up to about 70° C for a few [23:20] minutes near the end which is what we [23:21] want to do in this case we're going to [23:23] use a hot plate now in this container I [23:28] have [23:29] 130 G of the dimethyl [23:34] formamide oh [23:38] smells smells and to this I'm going to [23:42] add 80 gram of the barium sulfate powder [23:45] and whenever you're dealing with a nano [23:48] powder especially when you're inside and [23:50] you're in close proximity it's always a [23:53] good idea to wear a mask [24:01] now when I add this barium [24:04] sulfate what I'm doing is I'm not [24:07] dissolving it in the [24:11] dimethylformamide because it's [24:12] completely inert in the solvent it won't [24:15] dissolve what we're doing is we're using [24:17] the mixing bar to sort of beat up and [24:19] break up any kind of lumps or clumps [24:22] that might have formed during storage or [24:25] Transportation or drying and and we want [24:29] as even and [24:30] smooth a distribution throughout the [24:33] liquid as possible and that's what the [24:35] the stirring bar will do now another [24:37] interesting thing is you don't actually [24:39] have to make this stuff like we just [24:41] showed you you can actually buy it found [24:45] a company in India called Airtech pvt [24:50] limited and they will sell this Nano [24:52] powder and it's not expensive it's less [24:56] than $4,000 [24:59] per [25:01] ton but a couple of emails and some [25:04] schmoozing and they were kind enough to [25:06] send us a sample we tested it and it [25:09] works almost as well as the stuff that [25:10] we made ourselves and it will certainly [25:12] save you some steps if you want to buy [25:15] it directly there's a company down in [25:17] Texas called us [25:19] Nano and we've used them for years to [25:22] provide Nano powders for a lot of our [25:24] projects super high quality great [25:26] delivery and very high prices you'll end [25:29] up paying about [25:32] $300 per kilogram [25:35] so it is what it [25:37] is now as we put this [25:40] in and this moves around like this we [25:44] could mix this as long as we want it [25:46] it's not going to hurt anything but [25:48] typically I usually just play it safe [25:50] and I give it about 20 to 30 minutes at [25:54] around 300 [25:55] RPM with the 50 mm stirring bar and that [25:59] has always [26:02] worked if you're doing the large [26:05] quantity I do the same number of minutes [26:07] at low speed and again that gives you a [26:10] very nice [26:11] even distribution but you can see as it [26:14] goes in there are little [26:16] lumps this will not break up the [26:18] Aggregates that can form during [26:20] synthesis they're just too robust but [26:22] these tiny little bits of powder they'll [26:24] break up nicely [26:35] all right so let's just let that spin [26:36] for half an hour or so and we'll get [26:39] back to [26:40] you okay now I'm going to add the [26:42] polymethyl methacrylate and we're going [26:44] to use 14 gam of [26:47] that and because it's not a nano powder [26:49] I don't need to use the uh mask these [26:52] are small 200 Micron beads now poly mic [26:57] polymethyl meth acrylate is a polymer [27:00] and so it comes in a variety of [27:02] different molecular weights depending on [27:03] how long the monomer chains are it can [27:06] go anywhere from about 10,000 to several [27:09] million and the very high molecular [27:11] weight versions have better thermal and [27:13] structural properties like for lucite [27:15] and plexiglass but they're also harder [27:17] to dissolve this is a relatively low [27:20] 880,000 molecular weight [27:23] methylmethacrylate resin called alacite [27:27] 2028 it's manufactured by Lite [27:30] International and it's distributed in [27:33] the US by Mitsubishi [27:35] chemical [27:38] and it's also not expensive but you have [27:41] to buy 55 lb bags so we [27:46] contacted them via email a couple of [27:49] phone calls and again they were kind [27:51] enough to send us a [27:54] sample like the man [27:56] said politics is the ultimate [28:00] science if you want to buy this directly [28:03] you can buy a very similar [28:06] material from a company called poly [28:08] Sciences it's called [28:10] pmma 100 probably for 100,000 molecular [28:15] weight and I'm adding this very very [28:18] slowly even though if I were just to [28:20] dump this right in the container it [28:22] would eventually dissolve we'd end up [28:24] with a gumball sort of flopping around [28:26] inside of here and the the reduced [28:28] surface area would actually slow [28:31] down the dissolution so by going slower [28:34] we're actually going to be done [28:39] faster all right so let's start heating [28:42] this [28:43] up and doesn't really matter what to [28:45] turn the plate to because the ultimate [28:46] goal is to get this to about 70° C now [28:50] the first thing you'll notice when you [28:51] look at this is that it doesn't look [28:53] quite as super duper bright white as you [28:55] might hope it looks actually a little [28:57] translucent or a little grayish that's [29:00] simply because the polymethyl [29:01] methacrylate is still in beads these [29:03] little translucent beads moving around [29:05] in here as this heats up and they [29:07] dissolve forming a thin syrup resin to [29:10] bond the barium sulfate this will get [29:13] whiter and it will also get more viscous [29:15] it'll get thicker eventually it will get [29:18] viscous enough that it will overcome the [29:21] stirring bar and we're going to have to [29:22] take over with the stirring rod that's [29:24] not a problem with this guy this guy [29:26] will just keep on cranking so it's it's [29:28] really great to use but nevertheless [29:31] you'll see those changes occur over time [29:33] as this gets thicker something else to [29:35] keep in mind whenever you're doing any [29:37] kind of a synthesis that involves a [29:40] solvent before you get started weigh all [29:44] of your individual components the beaker [29:46] the stirring bar the stirring Rod a [29:48] spoon anything that you might use weigh [29:50] them write them down and put them in [29:52] your back pocket because when you do the [29:55] synthesis depending on the temperature [29:56] of the room the chemicals that that [29:58] you're using how long you stir it you're [30:00] going to lose a little bit of that [30:01] solvent and you don't know exactly what [30:03] it's going to be but at the end when you [30:06] add up all those weights and you find [30:07] that you're down say five gram it's easy [30:10] enough to just put a little bit more [30:11] solvent in there bring yourself up to [30:14] the same viscosity each time so it makes [30:16] it very repeatable now as this stuff [30:19] heats up it will begin to get thicker [30:21] and the viscosity will go up it's going [30:23] to take us a little bit of time but when [30:25] I start to take over with the mixing bar [30:27] we'll see what kind of temperatures we [30:32] have all right so the stirring Rod gave [30:35] up the ghost a couple of minutes ago and [30:37] I went over and took over with the uh [30:40] temperature probe and you can see we're [30:42] probably pretty close to about 70 71 72 [30:46] it's not super important because we're [30:48] just [30:49] dissolving the polymethyl myth [30:51] acly and ultimately as you can see we've [30:55] gotten this thicker we're looking for a [30:58] viscosity around 100 to 150 [31:01] centio which fancy word represents about [31:05] 100 to 150 times the viscosity of pure [31:09] water and from appearances it looks a [31:13] lot like something between light and [31:15] heavy cream and the first couple of [31:18] times you do this you're actually going [31:19] to want to measure this just to get a [31:21] feeling for where you're at and there's [31:22] a couple ways to do that one is you can [31:25] use what's called a Wagner cup or my [31:28] favorite you can use a Zan cup you can [31:32] get these online you can get these from [31:35] painting supply houses and what they [31:37] consist of is a calibrated volume 44 [31:40] milliters in this cup and then at the [31:42] bottom there's a hole and the diameter [31:45] of the hole changes depending on whether [31:47] or not it's a Zan one Zan 2 Zan 3 this [31:50] is a Zan 3 cup what you do is you take [31:54] this cup and you submerge it into the [31:56] liquid like this [31:59] fill it up and then get ready with your [32:01] timer just make sure it's full and as [32:05] soon as you pull it out start your [32:07] timer and then you watch the stream and [32:11] as soon as it breaks up not the last [32:14] drops but breaks up into individual [32:16] drops you stop your timer that's your [32:19] Zan time and what you're looking for is [32:22] a 7 to 8 second Zan time and a z 3 cup [32:26] and that gets you to that Mama Bear [32:27] viscosity that's best for spraying with [32:30] a high volume low pressure spray gun [32:33] like we [32:33] have and you're basically done you can [32:37] take this material put it in a jar cap [32:39] it up and keep it indefinitely if you're [32:41] going to keep it for a long time you [32:43] might want to throw this into a stir and [32:45] swirl it around a little bit just to [32:47] break up any kind of stratification or [32:49] any settling that can occur before you [32:51] put it in your gun so now we're ready [32:54] let's lay down some coats [32:59] so after we finished the synthesis we [33:02] decided that the best place to do the [33:04] actual painting would be down at the [33:05] large Warehouse so we gathered up all [33:08] the supplies and the equipment we [33:10] brought them down there the next day and [33:12] we set everything [33:12] [Music] [33:15] up now painting aluminum presents [33:18] certain challenges and you need to do a [33:20] proper Surface Prep to get the very best [33:22] adhesion for paints as well as adhesives [33:25] like boxy the first thing that you want [33:28] to do is when you get the raw material [33:30] from the supplier you want to clean it [33:32] off and you want to use a solvent like [33:35] acetone or brake cleaner that will [33:38] dissolve grease and if you take a piece [33:41] of paper towel which is the best choice [33:43] because you're going to throw this away [33:45] and put a little bit of the solvent on [33:48] here wipe the aluminum down [33:54] thoroughly and you'll see that you get [33:56] some black throw this away do another [33:59] round until the paper towel comes off [34:02] clean then you know you've gotten rid of [34:03] all the grease and that's going to set [34:05] you up for the next stage now the next [34:09] stage is you want to sand the surface a [34:12] palm sander with about 150 grit is a [34:14] good middle of the road uh roughness and [34:17] by cleaning it off first you don't [34:19] create a mud as you're trying to sand [34:21] this thing off the reason for sanding it [34:24] is you want to turn a smooth surface [34:26] into a a rough surface because it has a [34:29] lot more surface area to bind to the [34:32] adhesive and it also gives some tooth [34:34] that allows the adhesive or the paint to [34:36] lock into it gives you a much better [34:39] better [34:39] bonding aluminum is particularly [34:42] difficult as a metal because it's so [34:44] reactive what happens is the oxygen in [34:46] the atmosphere reacts with the aluminum [34:49] and forms a thin layer of aluminum oxide [34:52] on the surface and that doesn't Bond [34:53] well to adhesives or paints it's almost [34:55] like the flower on a pizza board little [34:58] ball bearings and it prevents ponding [35:00] you do remove [35:02] that when you sand it but because it [35:05] reacts so quickly with the atmosphere in [35:07] milliseconds it replaces itself so [35:09] you're not going to keep it off so the [35:12] final step is to use an etching primer [35:16] these things usually contain an acid [35:17] like phosphoric acid and will actually [35:20] eat into the aluminum lifting the [35:22] aluminum oxide away and then depositing [35:25] or leaving a less reactive metal as a [35:27] coating like zinc or iron once that's [35:30] dry you've got a very good very tight [35:33] Bond you're probably not going to get [35:34] any kind of failure with your Coatings [35:36] there's another little trick that I've [35:38] shown in previous videos that you can [35:40] use especially if you want to save the [35:41] time and not use the primer and actually [35:43] get the ultimate bond strength is if you [35:45] take a little bit of epoxy and you put a [35:48] dollop down on the clean aluminum then [35:51] take an abrasive pad like a scotchbrite [35:53] pad or a piece of sandpaper actually [35:56] sand the epoxy into the surface that [36:00] gets rid of the oxide layer and because [36:02] the epoxy provides a barrier for the [36:04] oxygen it doesn't oxidize this will [36:07] produce the strongest surface the [36:09] strongest bond saves you the time with [36:11] the primer but it's messy so it's better [36:13] for small parts or one-offs if you're [36:15] going to do that so that's basically [36:18] what we did in order to uh prepare this [36:21] panel for the coating for the spraying [36:24] now I'm going to turn on the gun and [36:26] what we're using is a high volume low [36:28] pressure sprayer there's lots of videos [36:30] out there about how to set these things [36:32] up and get them working properly I'm not [36:33] going to go through that with you but [36:35] the trick with using this thing is [36:37] putting on very thin coats you're not [36:40] going to be able to hear me for a little [36:41] bit so let's [36:42] just get this going [37:02] that's one coat and we're going to need [37:04] to do a lot of coats now you want to put [37:07] this on super thin because you'll [37:09] actually save time over the Long Haul of [37:12] the whole project because a very thin [37:13] layer has more uh more surface area to [37:16] be able to evaporate also if you just [37:18] put on a super super thick layer you [37:20] could get runs and in addition you're [37:22] going to wait so long between layers [37:24] you're not going to ultimately save time [37:27] so let let this thing dry and then we'll [37:29] come back and I'm going to show you how [37:30] we're going to do the second coat and [37:32] the way that we're going to know when [37:34] the the paint is ready for the next coat [37:37] is we're going to use our senses and [37:39] we're going to do a little bit of a test [37:41] one is that the solvent in the paint is [37:45] uh makes it look glossy makes it look [37:47] shiny wet when that goes away and you're [37:51] left with a very flat matte surface [37:54] that's that's a good sign the next thing [37:56] is if you find an area that you don't [37:58] care very much about you can wipe your [38:00] finger on this when you think you're [38:02] pretty close your finger should come [38:04] away completely clean and then [38:08] finally give a little sniff you still [38:12] man that stuff stinks you still should [38:15] smell a little bit of the solvent and [38:17] now you're ready for the second coat one [38:19] of the problems with doing this too [38:22] quickly is that if you're leaving [38:24] solvent behind subsequent layers the [38:26] vapor pressure of the solvent can create [38:29] little bubbles or blisters and if you do [38:32] this and you uh wait too long this gets [38:34] bone dry then the solvent in the paint [38:38] may not have enough availability to be [38:41] able to stick into the underlying [38:43] acrylic to actually melt it slightly and [38:45] create good interlaminar strength if you [38:48] don't do that if you do it with a the [38:50] surface bone dry you may get peeling and [38:52] cracking so we just going to have to [38:54] wait a little bit of time [39:02] all right it's been about 20 minutes and [39:03] it looks pretty good very matte surface [39:07] interesting thing about that is that [39:08] gloss paint and matte paint can have [39:11] exactly the same reflectivity the gloss [39:14] paint produces a specular reflection you [39:17] can almost see your face in it but the [39:19] matte paint will scatter the light [39:22] nevertheless they both reflect the same [39:25] percentage it's kind of a surprising [39:27] fact and this is a very matte [39:31] surface so now let's put on the [39:35] glove do a little wipe [39:38] test and completely clean so that's good [39:41] and then the sniff [39:43] test yeah still a little bit of that [39:45] foul odor so we're perfect ready to [39:50] paint it's going to be loud again [40:02] okay so that's coat number [40:05] two this is going to take a very long [40:08] time and so I've decided to cheat a [40:10] little bit I'm not advising you to do [40:12] this because it's going to be a little [40:13] bit [40:18] risky I'm going to add a [40:21] fan the fan will speed up the drying [40:23] time and keep us here a little bit less [40:26] time the reason it's a little bit risky [40:28] is because this isn't a proper spray [40:30] booth and although we've swept the floor [40:32] and it's pretty clean in here the Fan's [40:34] turbulent can churn up dust that can [40:38] eventually be blown by the fan onto the [40:40] tacky surface and get the dust to adhere [40:43] to the surface so it is a little bit of [40:44] a risk the other thing is if the fan is [40:47] pretty close you can get differential [40:49] flow across the surface and differential [40:52] drying so that you don't have a uniform [40:54] level of dryness for the next coat so to [40:57] mitigate those risks I'm going to put [40:59] the fan up off the floor I'm going to [41:01] turn it to low speed and I'm going to [41:03] move it far back so that we don't get [41:05] that kind of focused [41:10] flow now another thing to keep in mind [41:13] is that the paint here it only takes a [41:18] minute or two to apply and 20 minutes [41:20] intervals between and so even though [41:23] we're going to start very early in the [41:24] morning and we're going to finish late [41:26] in the evening 95% of the time we're not [41:29] actually doing anything so you might [41:30] want to arrange to have projects that [41:32] you can do at the same time that you can [41:35] periodically interrupt to allow you to [41:37] put the coats of paint on that way [41:38] you're not wasting a whole day another [41:41] thing you can do is have a buddy or [41:43] somebody that you can work with like a [41:45] cameraman that can allow you to spell [41:47] each other or to do it in shifts you [41:49] know I'll do the first two hours and [41:51] then my cameraman will do the last eight [41:53] hours you know just to be fair you also [41:56] want to make sure you have plenty of [41:57] supplies I want to have some food uh [41:59] make sure that you're not going to run [42:00] out of anything in the [42:02] meantime and you have to allow for the [42:04] fact that you [42:09] might need to make sure that you're [42:21] prepared do you do this on our budget uh [42:25] slightly [42:28] what else did you [42:30] get [42:32] thanks oh also you might need this [42:36] oh tool [42:40] man yeah Refreshments so it's going to [42:43] be a long day but it's going to be a [42:45] good day [43:04] uh okay let's see how we're doing [43:07] [Applause] [43:15] here [43:18] okay [43:21] yeah it's [43:25] dry okay we're [43:28] ready all right last [43:39] [Applause] [43:41] coat okay um that's [43:44] like 20 [43:47] or it's 20 or wait a minute I wrote it [43:50] down I wrote it down I wrote it down [43:57] uh yeah like I use like 22 [44:01] or uh 20 [44:06] 27 yeah it's like uh 27 that's [44:12] enough yeah that'll do [44:19] it after we recovered we managed to make [44:22] it home got a good night's sleep had a [44:24] few cups of coffee then returned to the [44:26] warehouse where we did [44:29] this all right it's time to test the [44:32] panels I've prepared three panels with [44:35] different Coatings one has the Super [44:38] paint that we applied [44:40] yesterday one is just a bare aluminum [44:43] panel and one has the commercial [44:46] Rustoleum paint the super bright [44:48] Rustoleum paint placed on it on the back [44:52] of each of these panels I've attached a [44:54] thermal probe and we're going to be [44:56] measuring the the relative temperatures [44:58] of these panels in the sunlight so I'm [45:00] going to hook these things up to a [45:03] thermometer [45:42] and now we'll plug this thing [45:45] in number one which is the farthest [45:49] panel that's the ultra [45:51] paint number two which is the aluminum [45:55] panel [45:59] and number [46:01] three which is the rum [46:07] panel come on [46:09] honey all right and number four which is [46:14] just a bare [46:16] probe hanging in the shade behind the [46:20] board so we'll measure air temperature [46:22] with that [46:23] probe let's turn this guy on [46:28] and we're going to give this a couple of [46:30] minutes for everything to equilibrate [46:33] and then we'll see just basically what [46:34] kind of relative performance we [46:38] [Music] [46:47] get wow pretty [46:50] impressive all [46:52] right so as you can see the panel that [46:55] we coated with the ultra paint is about [46:58] 3° cooler than the Ambient Air [47:00] Temperature the aluminum plate is [47:03] substantially hotter about 20° C hotter [47:07] and the uh panel that is painted with a [47:09] rum super white commercial paint is [47:12] still about 10° warmer 8° warmer than [47:16] the surrounding air temperature and this [47:18] is a very conservative test because here [47:21] in New England in November in the [47:24] afternoon the solar intensity is [47:26] relatively low as a result the [47:29] differential between the panels is much [47:31] more compressed they would be even more [47:33] significantly different if we were in [47:36] the summer here or if we weren't in New [47:37] England we're in southern or lower [47:40] latitudes in addition we also have not [47:43] protected these panels from any of the [47:45] surrounding radiation the infrared given [47:47] off by the trees the buildings the [47:49] cameraman me and we also have to allow [47:52] for the fact that the air temperature [47:54] here being cooler than the these two [47:57] panels over here is attempting to to [48:00] cool off those panels as the wind blows [48:02] across here it's trying to bring those [48:04] panels down to air temperature at the [48:06] same time it's trying to warm the panel [48:09] that's below air temperature which is [48:11] pretty impressive meaning if you were to [48:13] put this on an actual structure or a [48:15] building or the roof of your house in [48:18] Tunisia you would have those surfaces [48:21] cooler than the surrounding air given [48:23] realworld conditions pretty impressive [48:27] and as I've shown you this paint is [48:29] relatively easy to make and can be [48:32] pretty expensive this is going to be a [48:35] big [48:36] deal if you like the kind of stuff that [48:38] we're doing on this channel please [48:41] consider taking just a few seconds and [48:43] subscribing it really helps out the [48:45] channel I know a lot of content creators [48:48] beg you to subscribe but the reason they [48:51] do that is because it's so important to [48:53] us it takes a lot of time effort and [48:56] money for us to do these projects we've [48:59] got a lot of projects on the board and [49:01] the bigger we grow the more we can [49:03] afford to bring you in any case I want [49:07] to thank you very much for watching you [49:09] have a wonderful afternoon and we'll see [49:11] you [49:12] soon wow [49:31] [Music]