Andrew Price Cuts Blender 3.0 Onboarding to Core 20% Hotkeys
Blender Guru
Mastering a foundational 20% of navigation shortcuts drives up to 90% of 3D production work, rendering menu gizmos and comprehensive tool memorization counterproductive for beginners.
AI-assisted summary of Blender 3.0 Beginner Tutorial - Part 1 — original source. Check the original for full context.
Source published:
Key ideas
- Mastering 3D does not require memorizing every tool; applying the Pareto principle, roughly 20% of Blender's core features handle 80% to 90% of practical project requirements. (0:00)
- The default 3D Viewport operates as a performance-optimized staging area, meaning realistic light transport, cast shadows, and surface shaders are only calculated upon triggering a render (F12) or switching display modes. (1:15)
- Transform workflows favor single-key hotkeys—G (Grab), R (Rotate), and S (Scale)—constrained along X, Y, and Z vectors over slower graphical toolbar gizmos. (2:45)
- Snapping to cardinal axes automatically switches Blender into orthographic projection, eliminating perspective foreshortening to facilitate precise technical alignment. (11:21)
Detailed notes
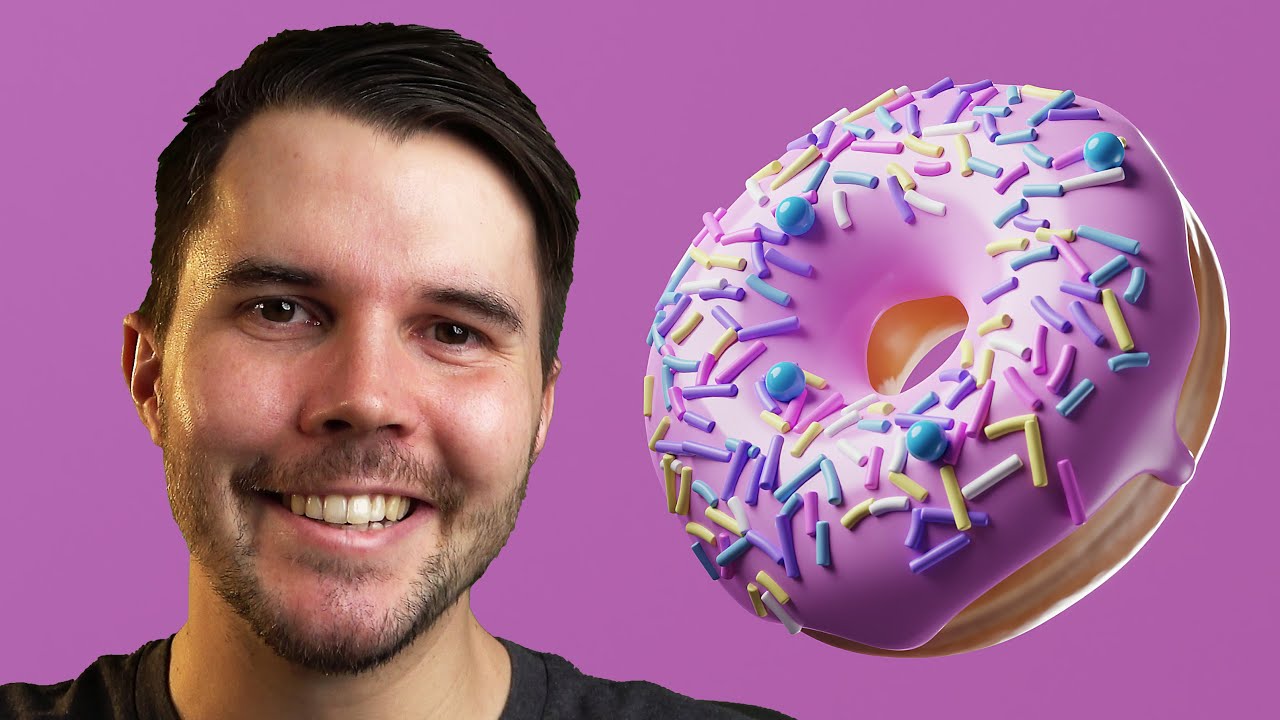
## Background Published on YouTube by Blender Guru (Andrew Price) on December 3, 2021, this video kicks off a beginner tutorial series for Blender 3.0. According to the description, the series guides viewers through core features like modeling, lighting, materials, geometry nodes, and rendering while crafting a 3D donut.
## TL;DR In this foundational lesson, Andrew Price demystifies Blender's complex interface by focusing on the essential 20% of features used in the vast majority of 3D workflows. He breaks down the 3D Viewport and explains the rendering pipeline using the default scene's cube, lamp, and camera. Viewers learn critical transformation shortcuts—grab (G), rotate (R), and scale (S)—along with axis snapping and cancellation methods. Finally, the video covers comprehensive viewport navigation, orthographic versus perspective modes, and the roles of the Properties panel and the Outliner before preparing learners to model a donut in Part 2.
## Atmosphere & style The lesson feels encouraging, accessible, and grounded, deliberately counteracting the overwhelming visual complexity of Blender's interface. Andrew's delivery is breezy and conversational—punctuated by humorous offhand moments, like swatting at an annoying studio fly—while maintaining clear, structured pedagogical clarity. His pragmatic, reassuring demeanor reassures complete beginners that they don't need to memorize the entire program to start making compelling 3D art.
## Bulletin - [00:00](https://www.youtube.com/watch?v=nIoXOplUvAw&t=0s) Mastering 3D does not require memorizing every tool; applying the Pareto principle, roughly 20% of Blender's core features handle 80% to 90% of practical project requirements. - [01:15](https://www.youtube.com/watch?v=nIoXOplUvAw&t=75s) The default 3D Viewport operates as a performance-optimized staging area, meaning realistic light transport, cast shadows, and surface shaders are only calculated upon triggering a render (F12) or switching display modes. - [02:45](https://www.youtube.com/watch?v=nIoXOplUvAw&t=165s) Transform workflows favor single-key hotkeys—G (Grab), R (Rotate), and S (Scale)—constrained along X, Y, and Z vectors over slower graphical toolbar gizmos. - [11:21](https://www.youtube.com/watch?v=nIoXOplUvAw&t=681s) Snapping to cardinal axes automatically switches Blender into orthographic projection, eliminating perspective foreshortening to facilitate precise technical alignment.
## Key takeaways - [00:00](https://www.youtube.com/watch?v=nIoXOplUvAw&t=0s) The Pareto principle applies directly to digital art: learning a core 20% of Blender's vast toolset enables completion of 80% to 90% of typical 3D projects. - [01:15](https://www.youtube.com/watch?v=nIoXOplUvAw&t=75s) Fresh Blender scenes initialize with three foundational entities: a mesh object (Cube), a light source (Lamp), and an image framing device (Camera). - [01:15](https://www.youtube.com/watch?v=nIoXOplUvAw&t=75s) Pressing F12 triggers CPU or GPU ray calculations to transform the simplified viewport staging setup into a photorealistic 2D rendered image. - [02:45](https://www.youtube.com/watch?v=nIoXOplUvAw&t=165s) Using direct hotkeys—G for grab, R for rotate, and S for scale—provides a significantly faster and more fluid modeling workflow than relying on on-screen toolbar gizmos. - [02:45](https://www.youtube.com/watch?v=nIoXOplUvAw&t=165s) Transformations can be restricted to specific dimensions by pressing X, Y, or Z after the command, or by holding the middle mouse button to snap to the nearest axis. - [05:08](https://www.youtube.com/watch?v=nIoXOplUvAw&t=308s) Any active transform operation can be canceled immediately without altering object placement by pressing Escape or executing a right-click. - [06:20](https://www.youtube.com/watch?v=nIoXOplUvAw&t=380s) Viewport navigation relies fundamentally on the middle mouse button: dragging orbits the scene, Shift + MMB pans laterally, and Ctrl + MMB executes smooth zooming. - [06:20](https://www.youtube.com/watch?v=nIoXOplUvAw&t=380s) Laptop users lacking a middle mouse button can enable 'Emulate 3 Button Mouse' in preferences to orbit with Alt + Left Click, or use the on-screen navigation gizmo. - [08:31](https://www.youtube.com/watch?v=nIoXOplUvAw&t=511s) Pressing Numpad Period (.) or using the tilde (~) pie menu instantly centers and frames the viewport on the selected object, resetting the orbit pivot point. - [10:00](https://www.youtube.com/watch?v=nIoXOplUvAw&t=600s) Numpad shortcuts 1, 3, and 7 snap the viewport to front, side, and top views, while holding Alt while orbiting snaps directly to the nearest cardinal axis. - [11:21](https://www.youtube.com/watch?v=nIoXOplUvAw&t=681s) Orthographic mode removes perspective distortion by simulating an infinite focal length, ensuring parallel lines never converge during precision modeling. - [13:00](https://www.youtube.com/watch?v=nIoXOplUvAw&t=780s) Adjusting material properties in the Properties panel does not reflect in the default viewport because it runs in a simplified display mode to preserve system performance. - [14:12](https://www.youtube.com/watch?v=nIoXOplUvAw&t=852s) The Outliner acts as a project inventory organized into collections, providing a structured hierarchy to locate, rename, and manage duplicated scene elements. - [14:55](https://www.youtube.com/watch?v=nIoXOplUvAw&t=895s) Pressing Numpad 0 toggles the camera view, locking the viewport to the exact framing that will appear in the final render output.
## Detailed walkthrough ### [00:00](https://www.youtube.com/watch?v=nIoXOplUvAw&t=0s) Introduction to Blender and the 80/20 Rule
Opening Blender for the first time is often intimidating; anyone attempting to explore the software without guidance quickly realizes that even moving a basic shape feels impossible without assistance. However, Andrew Price reassures newcomers that mastering 3D does not require memorizing every single button or feature visible on the screen. Having used Blender for 18 years, Andrew points out that there are entire sections of the program—such as Python scripting—that he has never touched simply because his work does not require them. While comically battling an annoying fly in his studio, he emphasizes that the Pareto principle applies directly to digital art.
Andrew explains: “If you're familiar with the 80-20 rule, I think there's really about 20% of Blender's features that you'll use in 80 or 90 percent of projects.” This fundamental 20% forms the backbone of the tutorial series. Rather than teaching abstract theory, the series adopts a project-based learning approach: building a complete 3D donut from scratch. Andrew notes that this marks his third iteration of the famous donut tutorial series, which he refreshes whenever a major Blender milestone is released, ensuring that viewers who follow through to the end will finish with a polished, portfolio-ready render.
[01:15](https://www.youtube.com/watch?v=nIoXOplUvAw&t=75s) The 3D Viewport and the Rendering Principle
The large primary window occupying the center of the screen is the 3D Viewport, the workspace where users will spend roughly 90% of their production time composing, modeling, and arranging scenes. By default, every fresh Blender project opens with three distinct entities: - **A Cube:** The standard mesh geometry sitting at the origin. - **A Lamp:** Represented visually as a ball suspended from a piece of string, acting as the scene's light source. - **A Camera:** A distinct triangular, arrow-like wireframe object that dictates the framing of the final image.
Pressing **F12** (or navigating to **Render > Render Image**) instructs Blender to capture a snapshot through the camera's lens. While the rendered result may initially resemble the viewport layout, Andrew explains that it contains full computational data—including calculated surface illumination, realistic drop shadows, and material properties. In his words: “What you build in the 3D viewport is sort of like a simplified version of what it is you're trying to create.” The viewport acts as an interactive staging ground; only during the rendering stage does the computer’s CPU or GPU crunch numbers, bouncing light rays throughout the digital environment to generate the final photorealistic image.
```mermaid flowchart LR accTitle: Viewport to Final Render Workflow accDescr: Simple diagram showing how viewport assets are rendered into a final 2D image via the CPU or GPU. subgraph Setup["3D Viewport Staging"] A["Default Cube (Mesh)"] B["Default Lamp (Light)"] C["Default Camera (Framing)"] end subgraph Engine["Processing Engine"] D["F12 Render Command"] E["CPU / GPU Light Calculations"] end subgraph Output["Final Output"] F["Rendered 2D Image with Lighting & Shadows"] end Setup --> D D --> E E --> F ```
[02:45](https://www.youtube.com/watch?v=nIoXOplUvAw&t=165s) Moving Objects and Axis Snapping
To manipulate an object, beginners often reach for the dedicated **Move** tool located on the left-hand toolbar. Selecting this tool summons a 3D transform gizmo over the cube, featuring colored directional arrows for constrained movement and a central white circle for unconstrained screen-space dragging. While functional, Andrew advises abandoning the toolbar gizmo entirely in favor of direct hotkeys, which drastically increase modeling speed.
The primary hotkey for translation is **G** (standing for "grab"). Striking **G** instantly attaches the active object to the cursor without needing to hold down a mouse button: - The cursor does not need to hover over the target mesh to initiate the grab. - A single left-click confirms and commits the object to its new position. - Precise alignment along specific axes is achieved by pressing an axis letter immediately after hitting **G**: - **X:** Constrains movement along the left/right axis (represented by red lines). - **Y:** Constrains movement along the forward/backward axis (represented by green lines). - **Z:** Constrains movement along the up/down vertical axis (represented by blue lines). - Alternatively, pressing and holding the middle mouse button (scroll wheel) while moving the mouse draws an on-screen guide line that snaps the movement to the nearest axis.
[05:08](https://www.youtube.com/watch?v=nIoXOplUvAw&t=308s) Rotate, Scale, and Canceling Transforms
Transformations extend beyond translation into rotation and scaling, both of which follow the same intuitive single-key logic: - **Rotate (R):** Pressing **R** allows free rotation based on the current viewing angle. Pressing an axis key (**X**, **Y**, or **Z**) restricts rotation to that specific vector. - **Scale (S):** Pressing **S** resizes the mesh uniformly, while combining **S** with an axis key scales the geometry along a single dimension. - **Canceling an Action:** If a transformation goes awry, pressing **Escape** or executing a single right-click immediately cancels the operation and returns the object to its previous state.
Andrew highlights that while toolbar hover tooltips show shortcuts like `Shift + Spacebar` to summon popover menus, memorizing **G**, **R**, and **S** provides the fastest, most fluid workflow in 3D production.
| Hotkey | Action | Secondary Modifiers | Cancel Operation | |:--- |:--- |:--- |:--- | | **G** | Grab / Move | Press **X**, **Y**, or **Z** to lock axis; or hold **MMB** to snap | **Right-Click** or **Esc** | | **R** | Rotate | Press **X**, **Y**, or **Z** to rotate around axis | **Right-Click** or **Esc** | | **S** | Scale | Press **X**, **Y**, or **Z** to scale along axis | **Right-Click** or **Esc** |
[06:20](https://www.youtube.com/watch?v=nIoXOplUvAw&t=380s) Viewport Navigation: Orbiting and Laptop Workarounds
Exploring the 3D scene requires mastering viewport navigation rather than just moving physical objects. Clicking and holding the middle mouse button (**MMB** / scroll wheel) while dragging allows the user to orbit around the current pivot point in 3D space. Recognizing that laptop users on trackpads lack a dedicated middle mouse button, Andrew provides immediate workarounds: - **On-Screen Navigation Gizmo:** Users can click and drag directly on the coordinate axis gizmo located in the top-right corner of the viewport to orbit manually. - **Emulate 3 Button Mouse:** Navigating to **Edit > Preferences > Input** and toggling **Emulate 3 Button Mouse** allows trackpad users to orbit by holding **Alt** while left-clicking and dragging.
While in user preferences, Andrew also recommends adjusting the **Resolution Scale** under interface settings for high-resolution displays. On 4K monitors, default text and icons appear tiny; holding **Ctrl** while dragging the scale slider snaps to clean increments, with Andrew personally favoring around 1.4 for his daily work (though setting it larger for tutorial visibility). He briefly notes the existence of an "Industry Compatible" keymap designed for migrating Autodesk Maya or 3ds Max users, but strongly advises sticking with Blender's native shortcuts to follow along with standard community resources.
[08:31](https://www.youtube.com/watch?v=nIoXOplUvAw&t=511s) Panning, Zooming, and Focusing on Objects
Beyond orbiting around a fixed point, navigating large scenes requires panning and zooming: - **Panning:** Holding **Shift + Middle Mouse Button** shifts the camera view laterally, repositioning the focal center to explore different quadrants of the scene. Trackpad users can achieve this by clicking and dragging the hand icon in the top-right overlay. - **Zooming:** Scrolling the mouse wheel steps the view in and out. For a smoother, non-stepped zoom, users can hold **Ctrl** while clicking and dragging the middle mouse button, avoiding the jagged steps of a standard wheel. Andrew urges viewers: “Do invest in a mouse, please. You will need it for 3D.” - **Focusing / Frame Selected:** When an object is moved far away from the center of the viewport, panning manually to locate it is tedious. Selecting an object in the scene and pressing the **Numpad Period (.)** key instantly zooms and centers the viewport directly on the selected mesh, resetting the orbit pivot. For laptop keyboards lacking a dedicated number pad, Andrew begins introducing the tilde key (`~`) pie menu alternative.
[10:00](https://www.youtube.com/watch?v=nIoXOplUvAw&t=600s) Aligning the View to Axes and Orbiting Controls
Andrew Price reviews the essential viewport navigation hotkeys: orbiting with the middle mouse button, panning with Shift plus middle mouse, zooming with Ctrl plus middle mouse or the scroll wheel, and focusing on an object via the tilde key (`~`) pie menu or the dedicated view-selected options. A frequent stumbling block for beginners is tumbling around until the entire scene ends up upside down. To right the view, users can simply click the axis labels on the navigation gizmo in the upper corner of the viewport.
Alternatively, dedicated Numpad shortcuts allow users to snap straight to standard views: Numpad 1 for front view, Numpad 3 for side view, and Numpad 7 for top view. These shortcuts do not work with the top row of number keys unless "Emulate Numpad" is enabled in preferences. Users coming from sculpting software will also appreciate a familiar trick: holding Alt while orbiting with the middle mouse button will instantly snap the viewport to the nearest cardinal axis.
- **Numpad 1**: Front view - **Numpad 3**: Side view - **Numpad 7**: Top view - **Alt + Middle Mouse Button**: Snaps rotation to the nearest axis while orbiting - **Tilde (`~`)**: Opens a pie menu with options for Top, Right, Side, and Focus View Selected
[11:21](https://www.youtube.com/watch?v=nIoXOplUvAw&t=681s) Orthographic vs. Perspective View
When aligning directly to an axis, Blender automatically drops into orthographic mode. In this mode, perspective distortion disappears entirely—it functions as though looking through a lens with an infinite focal length, stripping all depth foreshortening so that parallel lines remain parallel and back faces vanish cleanly behind front faces.
Users can toggle back and forth between perspective and orthographic mode at any time by pressing Numpad 5, or by clicking the orthographic toggle icon inside the navigation gizmo area. Blender defaults to orthographic mode when snapping to an axis because technical alignment and precision modeling usually demand an undistorted view.
> “It's like looking at it with like a focal length of like infinity, right? So there's no depth in our scene right now, which is actually really handy.” — Andrew Price
[13:00](https://www.youtube.com/watch?v=nIoXOplUvAw&t=780s) Properties Panel and Material Preview Limitations
On the right-hand side of the screen sits the Properties panel, which houses settings for the scene, active tools, render engines, and whatever object is currently selected. Selecting the camera reveals camera settings, while selecting a mesh object like the default cube surfaces material properties. Andrew cautions against trying to memorize every single slider and field right away, advising beginners to learn features only as a specific project demands them.
When changing a material's base color to red in the Properties panel, the cube in the viewport remains a flat gray. Andrew explains that the standard 3D viewport operates in a simplified display mode to maximize performance, meaning material shaders and complex lighting will not appear there by default. To preview true material colors and lighting, users must either switch viewport shading modes or press F12 to trigger a full render.
> “I think the best way to learn is to just do for something that you need to do.” — Andrew Price
[14:12](https://www.youtube.com/watch?v=nIoXOplUvAw&t=852s) The Outliner and Camera View
Directly above the Properties panel sits the Outliner, which maintains a running inventory of every element present in the 3D scene. The default scene contains three objects (a cube, a light, and a camera) organized inside a collection. Andrew likens collections to standard file folders used to structure and organize complex scenes. Double-clicking any item in the Outliner lets users rename it immediately.
Duplicating an object using the shortcut Shift + D instantly registers a new entry in the Outliner, making it an invaluable tool for finding and selecting lost objects. Pressing Numpad 0 toggles the camera view, framing the scene through the active rendering camera. Alternatively, users can enter the camera view by clicking the camera icon in the viewport navigation controls, picking it from the View menu, or selecting it via the tilde (`~`) pie menu. Objects can be deleted from the scene by pressing either X or the Delete key.
```mermaid flowchart TD accTitle: Entering Camera View in Blender accDescr: Diagram illustrating the four different ways to switch the viewport into camera view.
Root["Switch to Camera View"] --> K["Numpad 0"] Root --> I["Camera Icon (Viewport UI)"] Root --> M["View > Viewport Menu"] Root --> P["Tilde (~) Pie Menu"] ```
[15:28](https://www.youtube.com/watch?v=nIoXOplUvAw&t=928s) Shortcut Cheat Sheet and Next Steps
Acknowledging the sheer volume of hotkeys introduced in this opening lesson, Andrew provides a free downloadable Blender Shortcut Hotkey PDF linked in the description. The reference sheet spans three to four pages and covers the most critical everyday hotkeys, designed to be kept open on a secondary monitor while working. While formerly an incentive for joining his mailing list, the PDF is now completely free to access without subscribing, though viewers can still sign up for his weekly newsletter covering 3D industry news, tutorials, and artwork. With the core navigation, interface panels, and transforms covered, Andrew encourages viewers to open a fresh, clean scene in Blender and proceed directly to Part 2 to begin modeling the donut.
## Notable quotes > [00:00](https://www.youtube.com/watch?v=nIoXOplUvAw&t=0s) If you're familiar with the 80-20 rule, I think there's really about 20% of Blender's features that you'll use in 80 or 90 percent of projects. — Andrew Price
> [08:31](https://www.youtube.com/watch?v=nIoXOplUvAw&t=511s) Do invest in a mouse, please. You will need it for 3D. — Andrew Price
> [01:15](https://www.youtube.com/watch?v=nIoXOplUvAw&t=75s) What you build in the 3D viewport is sort of like a simplified version of what it is you're trying to create. — Andrew Price
## Mentioned Blender, Andrew Price, Blender Guru, Python, Autodesk Maya, 3ds Max, Poliigon, YouTube, Twitter, Instagram, Facebook, ArtStation
## Video description UPDATE 2023: There's a new version of this tutorial remade for Blender 4.0: https://www.youtube.com/watch?v=B0J27sf9N1Y&list=PLjEaoINr3zgEPv5y--4MKpciLaoQYZB1Z&index=1
Blender tutorial series showing you how to use the most common features, like modelling, lighting, materials, geometry nodes and rendering - whilst making a donut.
Download the Blender Shortcut Hotkey PDF: https://drive.google.com/file/d/1q3znfSQct1hoT4DEU371pj4MQDhthf9g/view?usp=drive_link Google Doc version: https://docs.google.com/document/d/1zPBgZAdftWa6WVa7UIFUqW_7EcqOYE0X743RqFuJL3o/edit?usp=sharing Join my free email newsletter: https://mailchi.mp/blenderguru/weekly
Watch Part 2: https://youtu.be/imdYIdv8F4w
Chapters: 0:00 Intro 1:15 The basics 2:45 Moving objects 4:04 Axis snapping 5:08 Rotate and Scale 6:20 Orbiting 7:18 Scaling the interface 8:31 Panning 9:01 Zooming 9:24 Focus on object 10:14 Align View to Axis 11:21 Orthographic/Perspective View 13:00 Properties 14:12 The outliner 14:55 Camera view 15:28 Keyboard shortcut PDF
-----------------------------------------------
Follow me:
Twitter: https://twitter.com/andrewpprice Instagram: http://instagram.com/andrewpprice Facebook: http://facebook.com/blenderguru ArtStation: http://artstation.com/artist/andrewprice
Blender Guru: http://www.blenderguru.com Poliigon: https://www.poliigon.com/?utm_campaign=desc&utm_source=youtube&utm_medium=bg
[Source](https://www.youtube.com/watch?v=nIoXOplUvAw)