DIY Perks Repurposes Broken TV Optics to Replicate Natural Daylight
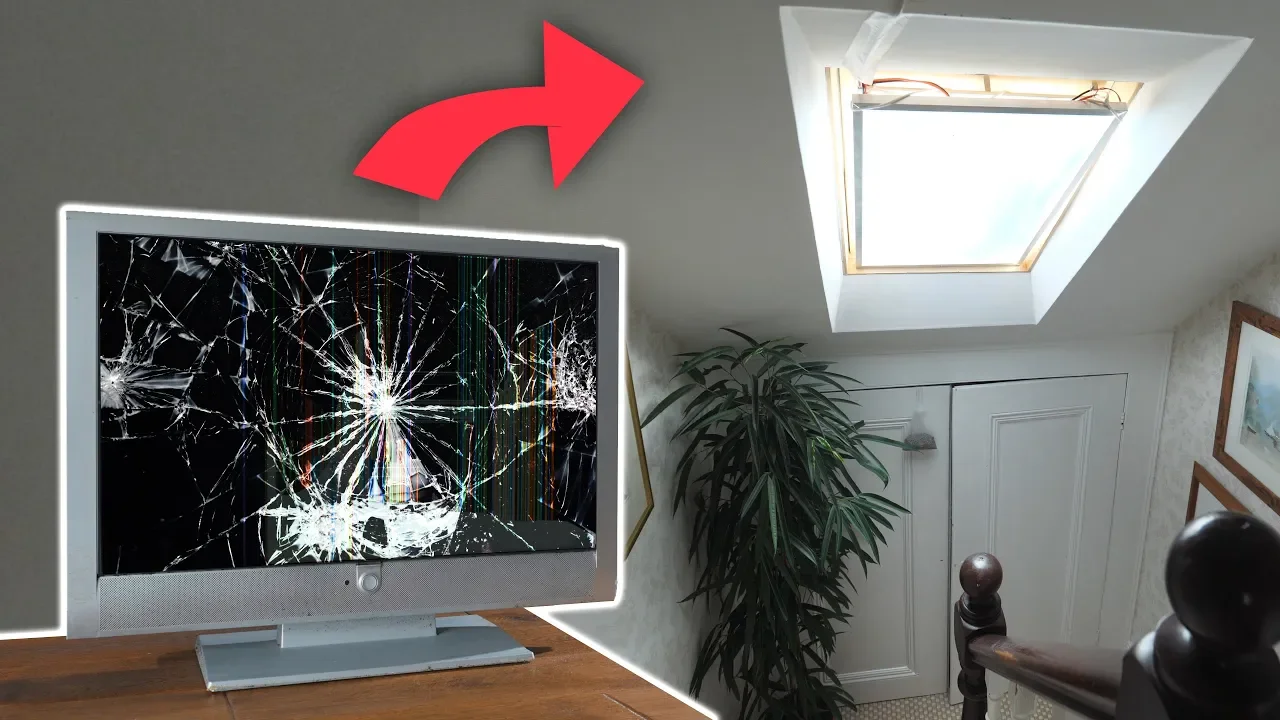
Turning Smashed TVs into Realistic Artificial Daylight — DIY Perks

DIY Perks

Salvaging an LCD display's internal Fresnel lens collimates LED output and suppresses inverse-square fall-off, tricking human vision into perceiving artificial light as distant sunshine.

AI-assisted summary of Turning Smashed TVs into Realistic Artificial Daylight — original source. Check the original for full context.

Source published:

Key ideas

  • Broken LCD monitors and TVs can be upcycled into realistic artificial daylight panels by salvaging their internal optical layers rather than sending them to landfills. (0:00)
  • The panel's built-in Fresnel lens pushes the light's apparent origin far behind the screen, minimizing perceived light fall-off and tricking the human brain into perceiving natural sky illumination. (1:14)
  • Native display backlights often require dangerously high driving voltages (around 76V) and have poor color spectrums, making 12V high-CRI LED strips a safer and better-performing replacement. (5:44)
  • Omitting the outermost factory diffusion sheet during reassembly preserves the directional collimation of the Fresnel lens, maintaining the realism of the artificial window effect. (8:28)

Detailed notes

## Background Published on YouTube by DIY Perks on August 9, 2019, this video demonstrates how to salvage broken or discarded TVs and computer monitors to build realistic artificial window lights. According to the description, the project leverages the unique optical technology inside LCD backlights to produce authentic daylight illumination at any time of day.

## TL;DR Host Matt explains how the internal Fresnel lens and optical layers of discarded LCD displays overcome the inverse square law, collimating light so it mimics distant natural daylight rather than harsh artificial point sources. The guide covers dismantling cracked screens, taking safety precautions around power supply capacitors, and removing inefficient or high-voltage factory light sources in favor of 12V high-CRI LED strips. Rebuilding the optical stack while intentionally omitting the outermost diffusion sheet preserves depth and realistic sky-like quality. The result is an eco-friendly upcycling project that turns bulky electronic waste into low-glare, mood-boosting artificial skylights and windows.

## Atmosphere & style The presentation carries an inventive, calm, and gently enthusiastic tone characteristic of thoughtful workshop tinkering. Watching it feels like a satisfying blend of practical engineering and optical magic, moving methodically from dangerous teardown to a stunning aesthetic payoff. Matt's quiet self-deprecation and sincere environmental ethos give the technical walk-through an accessible, encouraging, and uplifting mood.

## Bulletin - [00:00](https://www.youtube.com/watch?v=8JrqH2oOTK4&t=0s) Broken LCD monitors and TVs can be upcycled into realistic artificial daylight panels by salvaging their internal optical layers rather than sending them to landfills. - [01:14](https://www.youtube.com/watch?v=8JrqH2oOTK4&t=74s) The panel's built-in Fresnel lens pushes the light's apparent origin far behind the screen, minimizing perceived light fall-off and tricking the human brain into perceiving natural sky illumination. - [05:44](https://www.youtube.com/watch?v=8JrqH2oOTK4&t=344s) Native display backlights often require dangerously high driving voltages (around 76V) and have poor color spectrums, making 12V high-CRI LED strips a safer and better-performing replacement. - [08:28](https://www.youtube.com/watch?v=8JrqH2oOTK4&t=508s) Omitting the outermost factory diffusion sheet during reassembly preserves the directional collimation of the Fresnel lens, maintaining the realism of the artificial window effect.

## Key takeaways - [00:00](https://www.youtube.com/watch?v=8JrqH2oOTK4&t=0s) Cracked or discarded LCD displays can be converted into natural daylight simulators ideal for brightening windowless rooms, dark hallways, and winter interiors. - [01:14](https://www.youtube.com/watch?v=8JrqH2oOTK4&t=74s) Standard bare LEDs drop off quickly according to the inverse square law, but an LCD backlight's Fresnel lens collimates light to mimic a distant light source like the sky. - [02:40](https://www.youtube.com/watch?v=8JrqH2oOTK4&t=160s) Disassembly requires caution because large capacitors on the internal power supply boards can hold dangerous electrical charges long after being disconnected from mains power. - [02:40](https://www.youtube.com/watch?v=8JrqH2oOTK4&t=160s) The LCD glass matrix must be peeled away and discarded because the liquid crystal layers block a significant portion of light transmission. - [02:40](https://www.youtube.com/watch?v=8JrqH2oOTK4&t=160s) The core optical stack salvaged from an edge-lit panel includes an acrylic light guide with micro-diffusion pads, diffusion sheets, and a micro-grooved Fresnel lens. - [05:44](https://www.youtube.com/watch?v=8JrqH2oOTK4&t=344s) Older monitors illuminated by CCFL tubes present toxic mercury hazards and require high-voltage inverters, making LED-based displays preferable donor candidates. - [05:44](https://www.youtube.com/watch?v=8JrqH2oOTK4&t=344s) Stock monitor LED arrays are often wired in long series circuits demanding high DC voltages (such as 76V), exceeding the capability of standard consumer boost converters. - [05:44](https://www.youtube.com/watch?v=8JrqH2oOTK4&t=344s) Native backlights are chemically tuned for LCD color filters rather than ambient viewing, producing skewed colors and oversaturated reds if used as room lighting. - [05:44](https://www.youtube.com/watch?v=8JrqH2oOTK4&t=344s) Installing off-the-shelf 12V high-CRI LED strips ensures low-voltage electrical safety, compatibility with standard power bricks, and accurate broad-spectrum color rendering. - [08:28](https://www.youtube.com/watch?v=8JrqH2oOTK4&t=508s) Excluding the outermost diffusion layer during the reassembly process keeps the light directional, preserving the illusion of three-dimensional depth. - [08:28](https://www.youtube.com/watch?v=8JrqH2oOTK4&t=508s) The resulting panel produces low-glare, comfortable illumination that works especially well when installed on angled ceilings to mimic architectural skylights. - [10:48](https://www.youtube.com/watch?v=8JrqH2oOTK4&t=648s) Direct-backlit displays accommodate more LED strips to output greater total brightness, but they sacrifice some of the collimated daylight illusion characteristic of edge-lit panels. - [10:48](https://www.youtube.com/watch?v=8JrqH2oOTK4&t=648s) Converting unsellable, cracked displays into custom light fixtures diverts bulky electronic waste from landfills while creating functional household illumination.

## Detailed walkthrough ### [00:00](https://www.youtube.com/watch?v=8JrqH2oOTK4&t=0s) Repurposing Discarded Screens into Artificial Daylight

A broken television pulled directly out of a skip might seem completely useless, as broken screens typically head straight for the landfill. However, the sophisticated optical engineering hidden inside these displays can be salvaged to build remarkably convincing false window lights. Because of the internal backlight design, the illumination they produce mimics natural daylight with startling accuracy.

These panels are particularly well-suited for brightening dark interior hallways, windowless rooms, or combating dreary winter days when natural sunlight is scarce. Beyond mere illumination, they can provide a genuine lift to energy levels and mood. As Matt from DIY Perks notes: “Because of the technology in the television, the light given off by these looks amazingly close to real daylight, so they're perfect for giving a fresh and light atmosphere to dark rooms or corridors.” The project demonstrates that nearly any LCD television or computer monitor—even one with a shattered front panel—can be transformed into a valuable lighting fixture.

[01:14](https://www.youtube.com/watch?v=8JrqH2oOTK4&t=74s) The Optical Illusion: Beating the Inverse Square Law

Demonstrating a finished light panel built from a 30-inch computer monitor, Matt reveals how a single unit can illuminate an entire hallway to look just like overcast daylight streaming through an exterior window. The optical secret behind this illusion lies in the internal Fresnel lens layer built into LCD backlight assemblies.

In standard bare LED panels, light radiates outward spherically, dropping off rapidly with distance in accordance with the inverse square law—making nearby objects brightly lit while background areas fall into deep shadow. In contrast, the Fresnel lens pushes the apparent point of origin backward beyond the physical rear of the panel, collimating the light and greatly reducing perceived light fall-off over distance. Because objects farther away do not dim anywhere near as rapidly as they would under conventional artificial lighting, human perception is tricked: “Thanks to this reduced light fall-off, it fools your brain into thinking that the light is coming from far away, and thus it looks like daylight.”

```mermaid flowchart LR accTitle: Optical Comparison of Light Fall-off accDescr: Diagram contrasting how standard LEDs disperse light compared to a TV panel with a Fresnel lens.

subgraph Standard["Standard LED Panel"] A1["Bare LED Panel"] -->|"Wide spherical dispersion"| B1["Rapid light fall-off (Inverse Square Law)"] B1 --> C1["Close objects bright, distant objects dim"] end

subgraph Modded["Repurposed Backlight"] A2["LEDs + Optical Stack"] -->|"Fresnel lens collimation"| B2["Focal origin pushed far behind panel"] B2 --> C2["Minimal light fall-off (Simulates distant sky)"] end ```

[02:40](https://www.youtube.com/watch?v=8JrqH2oOTK4&t=160s) Teardown, Safety, and Extracting the Optical Stack

Disassembling a donor display is relatively straightforward, though layouts vary by brand. The display is placed face down on a flat surface to remove the exterior casing screws. When popping the outer plastic housing open, caution is vital: large capacitors on internal power supply boards can retain dangerous electrical charges long after being disconnected from the mains. Matt explicitly warns: “If it has only recently been unplugged from the mains, you definitely need to avoid touching the back of these boards though, as there may be some power still stored in the capacitors which you could still get a nasty shock from.” All dismantled metal brackets, plastics, and circuit boards should be sorted and taken to an electronics recycling center. Computer monitors often require less effort to take apart than large TVs, requiring only a few rear screws to release the casing.

Once the bare panel assembly is exposed, prying up the metal bezel clips with a flathead screwdriver allows the faulty LCD glass panel itself to be lifted off and discarded. Removing the LCD matrix is necessary because liquid crystal layers block a significant portion of light transmission. Beneath it lies the optical stack: - **A top diffusion sheet**, which softens the outgoing beam. - **A Fresnel lens layer**, composed of microscopic concentric ridges that bend light forward and create an eerie optical distortion where items behind it seem magnified or shifted in space. - **A secondary diffusion sheet**, resting beneath the Fresnel film. - **A thick acrylic light guide panel**, dotted with an array of tiny diffusion pads designed to catch edge-lit rays and distribute them forward across the entire surface.

[05:44](https://www.youtube.com/watch?v=8JrqH2oOTK4&t=344s) The Backlight Dilemma: High Voltage vs. Replacement LEDs

Stripping down to the light source itself reveals either a bank of compact fluorescent tubes (CCFL) in older displays or edge-mounted LED arrays in newer models. CCFLs pose an environmental hazard because the delicate glass tubes contain toxic mercury, and powering them requires specialized high-voltage inverters.

Stock LED backlights present their own challenges. Using a multimeter, Matt discovers the native LEDs in his monitor are arranged in two series circuits of 23 LEDs each. Assuming a standard forward voltage of 3.3 volts per diode, the strip demands approximately 76 volts DC: - Readily available boost converters typically max out around 50 volts. - Splitting the circuit traces into smaller, low-voltage parallel chunks is theoretically possible, but requires tedious micro-soldering. - Display backlights are chemically engineered for high brightness through color filters rather than broad-spectrum viewing, which often causes distorted, oversaturated reds and unbalanced color rendering.

To ensure safety and superior light quality, the best solution is to gut the original backlight completely and swap in off-the-shelf 12V high-CRI LED strips. High Color Rendering Index strips produce balanced, pleasant, neutral white light that flatters interior decor rather than skewing room colors.

```mermaid flowchart TD accTitle: Optical Stack Reassembly Sequence accDescr: Step-by-step layer arrangement for building the daylight panel.

A["12V High-CRI LED Strips (Edge-Mounted)"] --> B["Acrylic Light Guide (with micro diffusion pads)"] B --> C["First Diffusion Sheet (Blurs pad pattern)"] C --> D["Fresnel Lens (Directs light and adds 3D depth)"] D --> E["Omit Final Diffusion Sheet (Preserves daylight realism)"] ```

[08:28](https://www.youtube.com/watch?v=8JrqH2oOTK4&t=508s) Custom Reassembly, Framing, and Mounting Considerations

The conversion process concludes with rebuilding the optical stack atop the newly adhered 12V LED strips:

1. **Light Guide Acrylic**: Placed directly over the LEDs to catch edge light and project it outward via its underside diffusion pads. 2. **First Diffusion Sheet**: Positioned over the acrylic to soften and blend the individual dot patterns into a seamless surface. 3. **Fresnel Sheet**: Installed next to collimate the light rays and yield a convincing perception of three-dimensional depth behind the screen. 4. **Discarding the Final Diffuser**: While original factory monitors stack an additional diffusion sheet over the Fresnel lens, Matt advises against it: “After this Fresnel layer, you'd usually have another diffusion layer, but I recommend leaving this off, as it does reduce the daylight effect quite a lot.”

If the factory metal bezel no longer snaps shut over the thicker aftermarket LED wiring, the layers can be taped together along the perimeter. For a clean, modern aesthetic, Matt cuts right-angle aluminum extrusions with mitered corners and secures them with epoxy to create an outer picture frame. The electrical leads are routed through braided sleeving and terminated with a barrel jack for a standard 12V DC power brick.

Because the resulting panel emits low-glare, soft light that can be looked at comfortably without eye strain, it excels when installed on sloped or angled ceilings where its directional output accurately mimics an architectural skylight. In instances where an older or very large screen lacks the micro-grooved Fresnel layer entirely and relies solely on bare fluorescent tubes across the rear, the daylight projection effect will be diminished, though swapping the tubes out for LEDs will still yield a functional general-purpose soft panel.

[10:48](https://www.youtube.com/watch?v=8JrqH2oOTK4&t=648s) Backlight Variations and Eco-Friendly Benefits

When working with displays that feature direct backlighting across the entire chassis rather than edge-lit diffusers, the strips must be wired up in parallel. Matt notes that there is a distinct optical compromise when using this style of panel: because the light source does not bounce through the specialized edge-lit acrylic light-guide plate in the exact same manner, the panel does not exhibit the same dramatic reduction in the inverse square law, diminishing some of the uncanny collimated daylight illusion. However, the trade-off comes with a substantial benefit in total output. Because significantly more LED strips are packed across the back frame, the resulting panel produces a far brighter wash of light that still looks remarkably convincing in a room.

For those looking to build more compact installations, Matt mentions that discarded laptop screens can also be converted into miniature daylight panels using a similar concept, pointing viewers to a dedicated companion tutorial linked in the description. Beyond the aesthetic and psychological perks of bringing natural-looking daylight into windowless rooms, basements, or dark studios, the project serves as an effective form of upcycling. Matt highlights that salvaging broken TVs and computer monitors keeps bulky e-waste out of landfills while turning discarded hardware into valuable lighting fixtures. As Matt frames it, “Not only do you get wonderful daylight illumination to enjoy at any time of day, but you'll be doing your bit for the planet by recycling, which I would say is very productive.”

- **Direct Backlight Trade-off**: Delivers significantly higher overall brightness due to multiple LED strips, but sacrifices some of the edge-lit panel's inverse-square-law reduction. - **Laptop Panel Alternative**: Suitable for smaller desktop or task-sized daylight panels, detailed in a separate DIY Perks guide. - **Environmental Impact**: Upcycles broken, unsellable LCD screens that would otherwise end up as electronic waste.

[11:26](https://www.youtube.com/watch?v=8JrqH2oOTK4&t=686s) Productivity with Skillshare and Closing Thoughts

Pivoting on the idea of productivity, Matt introduces the video's sponsor, Skillshare, an online learning platform tailored for creators across a broad range of creative and technical disciplines. Matt shares that he has personally been working through a productivity class taught by Thomas Frank, which focuses on practical daily systems like managing task lists, organizing actionable notes, and mastering email overload. Self-deprecatingly admitting his own workflow weaknesses, Matt remarks: “Like time management isn't actually one of my fortes, so thanks to Thomas and Skillshare you'll hopefully see more videos from me.”

Matt outlines the promotional offer for viewers, noting that signing up via the custom link in the description provides a free two-month trial to explore Skillshare's entire course catalog. After the trial period ends, continuing an annual membership costs only $10 per month to keep developing skills for personal hobbies, day-to-day life, or creative careers. Concluding the build, Matt signs off with an enthusiastic call to action: “I hope you've enjoyed it and I hope you go out there, find some broken TVs, and put them to some good use.”

- **Sponsored Class**: Thomas Frank's productivity course covering task workflows, note-taking strategies, and email management. - **Trial Terms**: Two-month free trial via the affiliate URL, followed by an ongoing subscription cost of $10 per month. - **Closing Sign-Off**: Matt encourages builders to hunt down cracked screens and repurpose them into practical studio and household lighting.

## Notable quotes > [10:48](https://www.youtube.com/watch?v=8JrqH2oOTK4&t=648s) Not only do you get wonderful daylight illumination to enjoy at any time of day, but you'll be doing your bit for the planet by recycling, which I would say is very productive. — Matt

## Mentioned DIY Perks, Matt, Skillshare, Thomas Frank, AliExpress, eBay

## Video description In this video I'll be showing you how to take old/smashed TVs and computer monitors and turn them into realistic artificial window lights, so that you can have accurate daylight illumination at any time of day. This is all possible because of the technology used inside the backlight mechanism, as I explain in the video. Enjoy!

Visit https://skl.sh/diyperks to get 2 months of Skillshare for FREE

Parts links:

Disclosure: These are affiliate links. If you click them and make a purchase from the various merchants they link to, DIY Perks may earn a commission. Affiliate programs and affiliations include, but are not limited to the eBay Partner Network and Amazon Associates.

Here are the LED strips I recommend: https://www.aliexpress.com/item/33005666342.html

You can also buy them on eBay: https://ebay.us/ow3oaP

And here's how to make them with laptop screens: https://www.youtube.com/watch?v=Y2KK4YiOO1o

OFFICIAL LINKS: Support me on Patreon: https://www.patreon.com/DIYPerks/ Official Website: https://www.diyperks.com/ Discord: https://diyperks.com/discord-server/ Forums: https://diyperks.com/community/ Twitter: https://twitter.com/DIYPerks

[Source](https://www.youtube.com/watch?v=8JrqH2oOTK4)

中文简报

DIY Perks改造废旧电视光学元件模拟自然日光 回收液晶显示屏内部的菲涅尔透镜可准直LED光线并抑制距离平方反比衰减,欺骗人类视觉将人造光感知为遥远的阳光。 主持人Matt解释了废弃液晶显示屏内部的菲涅尔透镜和光学层如何克服平方反比定律,通过准直光线来模拟遥远的自然日光,而非刺眼的人造点光源。该指南涵盖了拆解碎屏、针对电源电容采取安全预防措施,以及移除低效或高压的原厂光源,改用12V高显色指数LED灯带。重新组装光学堆叠层时,特意省去最外层的扩散片,从而保留了景深感和逼真的天空般质感。最终呈现的是一个环保的升级改造项目,将笨重的电子垃圾转变成低眩光、提振心情的人造天窗和窗户。 损坏的液晶显示器和电视机可以通过回收其内部的光学层改造成逼真的人造日光板,而无需送往垃圾填埋场。 (0:00) 面板内置的菲涅尔透镜将视光源推至屏幕后方极远处,最大限度地减少了光线的可感知衰减,从而欺骗人类大脑将其感知为自然的天空照明。 (1:14) 显示屏的原装背光通常需要危险的高驱动电压(约76V)且光谱较差,因此12V高显色指数LED灯带是更安全、性能更好的替代方案。 (5:44) 在重新组装过程中省去最外层的原厂扩散片,可以保留菲涅尔透镜的定向准直效果,从而维持人造窗户效果的逼真度。 (8:28)

Reading summary

According to Matt from DIY Perks, discarded LCD monitors and televisions can be salvaged and modified into realistic artificial daylight panels by repurposing their internal optical assemblies. By replacing inefficient or hazardous factory backlights with low-voltage, high-CRI LEDs, builders can exploit the panel's native Fresnel lens to produce naturalistic, low-falloff illumination while diverting electronic waste from landfills. Overcoming Light Fall-Off with Fresnel Optics (1:14) Standard artificial lights emit spherical radiation that dims rapidly over distance in accordance with the inverse square law, illuminating near objects brightly while leaving backgrounds in deep shadow. In contrast, LCD backlight stacks incorporate a micro-ridged Fresnel lens layer that collimates light and pushes its perceived point of origin far behind the physical panel. Matt demonstrates that this dramatic reduction in apparent light fall-off tricks human perception into believing the illumination originates from an infinite distance. By simulating the behavior of sunlight traveling from far away, a repurposed panel reproduces the visual quality of overcast natural daylight streaming through an exterior window. Safe Teardown and Optical Layer Extraction (2:40) Disassembling donor screens requires navigating distinct electrical hazards. Large power supply capacitors on the internal circuit boards can retain dangerous electrical charges long after being disconnected from mains power, requiring cautious handling to prevent shocks before sorting the electronics for recycling. Once the chassis is opened, the cracked LCD glass matrix must be unclipped and discarded because liquid crystal layers obstruct significant light transmission. Beneath the matrix lies the crucial optical stack: a thick acrylic light-guide panel embedded with micro-diffusion pads, a primary diffusion sheet that blends the pad pattern, and the concentric-grooved Fresnel sheet that directs the light forward. Backlight Electrics and High-CRI Replacement (5:44) Factory display illumination methods present substantial technical and environmental hurdles. Older panels rely on CCFL tubes containing toxic mercury and requiring high-voltage inverters, while modern native LED strips are typically wired in series circuits requiring approximately 76 volts DC. This demands voltage levels beyond the 50-volt ceiling of standard hobby boost converters, making them difficult to power safely. Furthermore, native television LEDs are chemically engineered to project through colored LCD filters rather than provide broad-spectrum lighting, often causing oversaturated reds and poor color rendering. Matt resolves these limitations by completely removing the factory illumination and installing off-the-shelf 12V high-CRI LED strips, which deliver balanced, natural white light compatible with common 12V DC power bricks. Assembly Optimization and Display Architecture Trade-Offs (8:28) Rebuilding the panel requires selective tuning of the optical layers. While factory monitors place a secondary diffusion sheet directly over the Fresnel lens, Matt advises omitting this final layer during reassembly, noting that it noticeably blurs and diminishes the realistic daylight effect. The remaining stack can be secured with perimeter tape and framed with aluminum extrusions to create low-glare fixtures suited for windowless rooms or angled ceilings that mimic architectural skylights. Builders must also account for display architecture variations. Edge-lit screens paired with acrylic light-guide plates maximize collimation and the reduction of the inverse square law. By comparison, direct-lit displays require wiring multiple parallel LED strips across the rear chassis; Matt notes this arrangement sacrifices some optical depth and collimation, but compensates by producing a significantly brighter overall wash of light. While repurposing broken screens turns potential electronic waste into functional lighting fixtures, the realism of the artificial daylight illusion depends heavily on the presence of an edge-lit acrylic guide and the micro-grooved Fresnel lens. Displays lacking these specific optical layers will still function as soft lighting panels, but they lose the collimated, low-falloff characteristics that trick human perception into seeing natural outdoor sky.

精炼阅读摘要

DIY Perks 的 Matt 指出,废弃或碎屏的液晶电视及显示器内部包含精密的光学组件,可通过改装制作成逼真的自然采光面板,在照亮无窗暗室的同时减少电子垃圾填埋。 菲涅尔透镜与人造天光的光学原理 (1:14) 普通裸露 LED 光源向球形空间发散光线,其光强随着距离衰减并严格遵循平方反比定律,导致近处物体过亮而背景迅速变暗。然而液晶背光模组中集成了微型同心棱纹构成的菲涅尔透镜(Fresnel lens),该透镜能够对光线进行准直处理,将视在发光点推移至面板后方更远处,显著降低感知上的距离光强衰减。这种特性使远近物体的明暗反差变小,欺骗大脑产生光线来自遥远天空的错觉,使单块 30 英寸显示器改装面板就能在室内走廊营造出逼真的阴天采光效果。 拆解安全规范与核心光学层提取 (2:40) 改装废旧屏幕需将机身正面朝下拆卸外壳螺丝,但拆开塑料外壳时必须高度警惕电源板上的大容量电容,因为刚断开电源的电容仍存有危险残余电荷,触碰极易引发触电。随后使用平头螺丝刀撬开金属边框卡扣并移除碎裂的液晶玻璃面板(LCD matrix),该液晶层会阻挡大量透光率因此必须彻底丢弃。屏幕内部的光学层叠结构包含顶层柔光扩散片、菲涅尔透镜、第二层扩散片以及布满微型导光点的厚压克力导光板,拆解产生的废旧金属支架与电路板应送往电子回收站处理。 背光改造:高压难题与高显色灯带替代 (5:44) 老旧屏幕采用的冷阴极荧光灯管(CCFL)含有毒汞且需要专用高压逆变器驱动,属于环保与安全隐患。原装 LED 背光同样存在改装阻碍:例如测试的一台显示器内部由两条各 23 颗 LED 的串联支路构成,工作电压高达约 76V 直流电,而市售升压转换器通常上限仅为 50V,且原装 LED 在化学设计上是为匹配彩色滤光片而非广谱照明,直接用于照明会导致显色失真和红光过度饱和。彻底拆除原生背光并更换为市售 12V 高显色指数(High-CRI)LED 灯带是最佳方案,不仅工作电压安全,还能提供均衡悦目的中性白光。 光学重组技巧、外框制作与安装应用 (8:28) 重组时需将压克力导光板紧贴新贴附的 12V 侧入式 LED 灯带,上方放置第一层扩散片以抹除导光点图案,再覆上菲涅尔透镜以汇聚光线并产生三维景深感。Matt 特别建议舍弃原厂最外层的扩散片,因为该层会明显削弱逼真的日光直射错觉。若外边框无法容纳加粗的电线,可用胶带固定光学层边缘,再以环氧树脂固定带 45 度切角的直角铝型材制作极简画框,并接出编织网包裹的 12V 直流电源接口。由于该面板发出柔和且不刺眼的低眩光光线,安装在斜屋顶上可极佳地模拟真实建筑天窗。 背光结构差异、尺寸变化与环保价值 (10:48) 针对采用直下式背光(Direct Backlight)的屏幕,大量 LED 灯带需采用并联方式排布于背板。这种结构因缺少侧入式压克力导光板的折射机制,无法有效削减平方反比定律的衰减效应,削弱了深层准直采光的幻觉;但其优势在于容纳了更多 LED,总光输出更强,能提供更充沛的室内照明。此外,报废笔记本电脑屏幕也能按类似原理制作成小型桌面采光板。Matt 指出,该方案不仅改善了暗室和地下室的采光与居住心理状态,更重要的是将废弃的大件电子垃圾升级再造为长久耐用的高价值灯具。 该项目证实利用废弃液晶屏幕可低成本自制高拟真度天窗,但效果很大程度上依赖于侧入式导光板与菲涅尔透镜的完整保留,直下式或无透镜的老旧屏幕在准直效果上存在一定妥协。

Detailed notes — zh

## Background 该视频由知名创客频道 DIY Perks 的主持人 Matt 于 2019 年 8 月 9 日发布在 YouTube 平台上。视频简介指出,本期内容旨在向观众展示如何将废旧或碎屏的电视及电脑显示器改造为逼真的拟成人造日光窗,利用其内置的背光光学技术在一天中的任何时刻提供自然的日照采光。 ## TL;DR Matt 深入剖析了液晶电视背光模组中菲涅耳透镜与亚克力导光板的巧妙配合,解释了它们如何弱化平方反比定律、将视在光源推向无穷远以欺骗人眼大脑。随后,他逐步演示了拆解破损屏幕、安全剥除液晶玻璃与有毒或高压原装背光、并植入 12V 高显色(CRI)LED 灯带的全过程。最终通过精简顶层扩散片与定制铝合金外框,成功将电子垃圾改造成了柔和且极具纵深感的仿真天窗采光面板。 ## Atmosphere & style 整个视频洋溢着 DIY Perks 标志性的沉静、专注与极客巧思,Matt 温和细腻的英音解说与条理清晰的镜头特写相得益彰。从垃圾堆中捡回废弃屏幕的遗憾,到层层拆解揭开精密光学结构时的惊叹,再到点亮仿若真实天窗倾泻阳光时的成就感,观感极其治愈且充满启发性。它不仅是一场硬核的电子改装教学,更带给人一种化腐朽为神奇、为冰冷电子垃圾重注温暖生机的宁静满足感。 ## Bulletin - [00:00](https://www.youtube.com/watch?v=8JrqH2oOTK4&t=0s) 废弃或碎屏的液晶电视及显示器内部包含高度精密的背光光学系统,拆除液晶面板后可将其改造成极具真实感的伪窗日光照明面板。 - [01:14](https://www.youtube.com/watch?v=8JrqH2oOTK4&t=74s) 液晶背光模组中的菲涅耳透镜可将发散光重新准直,在光学上将视在发光点推向无穷远处,从而削弱平方反比定律的光衰效果,欺骗大脑误以为光线来自户外天空。 - [05:46](https://www.youtube.com/watch?v=8JrqH2oOTK4&t=346s) 原装 CCFL 灯管含汞且需高压逆变器,原厂 LED 走线往往需要高达 76V 电压且显色失真;改用标准 12V 高显色指数(CRI)商业 LED 灯带是更安全且还原度更高的方案。 - [08:28](https://www.youtube.com/watch?v=8JrqH2oOTK4&t=508s) 重新组装光学层时需舍弃顶层的第二张扩散膜,以避免打散出射光的方向性、破坏光源深邃的 3D 纵深感与日光拟真效果。 ## Key takeaways - [00:00](https://www.youtube.com/watch?v=8JrqH2oOTK4&t=0s) 绝大多数报废或液晶碎裂的电视与显示器均可变废为宝,改造成用于改善暗室采光的高品质人造日光面板。 - [01:14](https://www.youtube.com/watch?v=8JrqH2oOTK4&t=74s) 普通 LED 面板受制于平方反比定律,近处过亮而远处衰减极快,易被人眼识破为室内近距光源。 - [01:14](https://www.youtube.com/watch?v=8JrqH2oOTK4&t=74s) 背光模组内部由菲涅耳透镜、微触点亚克力导光板和扩散片协同作用,将光束收拢准直以模拟自然日光天窗。 - [02:40](https://www.youtube.com/watch?v=8JrqH2oOTK4&t=160s) 拆解刚断电的旧电视时需警惕电容器残存电荷引发的电击风险,严禁直接触摸电路板背面。 - [04:11](https://www.youtube.com/watch?v=8JrqH2oOTK4&t=251s) 改装首要步骤是彻底移除已损坏且大幅阻碍光线透过的顶层 LCD 液晶玻璃面板。 - [05:46](https://www.youtube.com/watch?v=8JrqH2oOTK4&t=346s) 老式显示器的 CCFL 灯管易碎且含汞,原装 LED 背光串联电压过高(如 76V),均不适合直接作为 DIY 驱动源。 - [05:46](https://www.youtube.com/watch?v=8JrqH2oOTK4&t=346s) 采用 12V 高 CRI 商业 LED 灯带不仅便于低压安全驱动,还能避免原厂背光针对液晶滤光调校所致的偏色与红光过饱和。 - [08:28](https://www.youtube.com/watch?v=8JrqH2oOTK4&t=508s) 光学层重组建议保留亚克力导光板、底层扩散片和菲涅耳透镜,但必须舍弃顶层扩散片以保持光束准直性。 - [08:28](https://www.youtube.com/watch?v=8JrqH2oOTK4&t=508s) 利用 45 度倒角切断的 L 型直角铝型材与环氧树脂胶水,可制作出适配加厚背光模组的定制金属外框。 - [08:28](https://www.youtube.com/watch?v=8JrqH2oOTK4&t=508s) 将改造好的单向直射伪窗面板斜置安装于斜顶天花板上,能够呈现出最佳的天窗射光视觉错觉。 - [10:48](https://www.youtube.com/watch?v=8JrqH2oOTK4&t=648s) 直下式背光方案虽在削弱平方反比定律上略逊于侧入式,但可容纳更多 LED 灯带,提供显著更高的总亮度。 - [10:48](https://www.youtube.com/watch?v=8JrqH2oOTK4&t=648s) 废旧笔记本电脑屏幕也可按照相同的光学原理制作成小尺寸的桌面级日光补光灯。 ## Detailed walkthrough ### [00:00](https://www.youtube.com/watch?v=8JrqH2oOTK4&t=0s) 废弃电视与拟真日光窗户的改造潜力 Matt 从垃圾箱里捡回了一台坏掉的电视机。对于大多数人来说,电视一旦停止工作就成了占地方的无用废品,扔进垃圾桶似乎是唯一的归宿。然而,液晶电视内部其实蕴藏着非常不可思议的光学技术,只要经过适当改造,就能将其转变为极其逼真的“人造天窗/伪窗光面板”(false window lights)。 这种灯板发出的光线与真实的自然白昼光惊人地接近。它们非常适合用来照亮采光不足的阴暗房间或走廊,带来清爽明亮的室内氛围。在漫长昏暗的冬日里,这种全光谱般的日照效果还能有效提升人的精力和情绪,具有极高的实用价值与改造意义。除了极少数特殊机型,绝大多数废旧甚至液晶破裂(smashed)的电视和电脑显示器都可以用来制作这种灯板。 ### [01:14](https://www.youtube.com/watch?v=8JrqH2oOTK4&t=74s) 视觉欺骗的秘密:菲涅耳透镜与平方反比定律 为了展示这种伪窗灯的效果,Matt 展示了一条完全由一台 30 英寸废旧电脑显示器改装而成的窗光照明的走廊。即使是身处现场的肉眼观察,其照明效果也令人信服,完全就像是多云天气透进室内的自然光。 ```mermaid flowchart LR accTitle: 自然日光模拟原理 accDescr: 对比普通LED漫射光与带有菲涅耳透镜背光模组的光路差异 subgraph Normal["普通 LED 面板"] A["裸光源发散光"] -->|"符合平方反比定律"| B["近处过亮 / 远处极暗\n(衰减极其显著)"] end subgraph Modded["液晶电视背光模组"] C["LED 光源"] --> D["亚克力导光板\n(微扩散触点)"] D --> E["菲涅耳透镜层\n(微观沟槽准直光线)"] E -->|"视在光源推向无穷远"| F["衰减极低 / 均匀漫射\n(模拟真实日光体验)"] end ``` 这种逼真效果背后存在核心的光学原理: - **普通面板的光衰缺陷**:普通无聚焦结构的 LED 面板发射的是发散光,严格受限于光的“平方反比定律”(inverse square law),导致靠近灯板的物体极亮,而稍远处的物体迅速变暗,人眼能轻易识破光源就在近处。 - **菲涅耳透镜(Fresnel lens)的作用**:电视背光组件中包含微观沟槽构成的菲涅耳层,能够将发散光重新准直并向前投射,在光学上将光源的视在发光点(origin)推移到了面板后方极远的位置。 - **大脑的视觉错觉**:由于远近物体的光照强度衰减变得微乎其微,大脑便会被欺骗,误认为光线来自遥远的室外天空,从而产生置身于自然采光下的真实感。 ### [02:40](https://www.youtube.com/watch?v=8JrqH2oOTK4&t=160s) 拆解外壳与分离光学核心组件 拆解旧电视和显示器的难度因品牌与型号而异,但基本步骤相似。拆解时必须先拔掉电源插头,将机器屏幕朝下平放,拧开背壳上的所有固定螺丝,随后撬开塑料卡扣取下外壳。 露出内部电路后,需要逐一拆除固定金属支架与电路板的螺丝。Matt 特别提醒了电气安全隐患:“如果电视才刚拔掉电源不久,绝对要避免触摸这些电路板的背面,因为电容器中可能仍储存有电荷,可能会让你遭受严重的电击。” 拆除下来的废旧部件应按塑料、金属和电路板严格分类,送往当地回收站进行正规环保处置。 相比电视,电脑显示器的拆解结构通常简单得多。以 Matt 手中的显示器为例,仅需卸下背面 4 颗螺丝,撬开卡扣并取出未被螺丝锁死的少量内部电路,即可取出核心的背光显示面板单元。接着用一字螺丝刀向上撬开屏幕四周金属边框的卡扣,取下金属外框。 ### [04:11](https://www.youtube.com/watch?v=8JrqH2oOTK4&t=251s) 内部结构详解:液晶层、菲涅耳层与亚克力导光板 拆掉金属边框后,首要步骤是揭下最上层的 LCD 液晶玻璃面板。该面板平时负责成像,但在改装项目中由于其已损坏且会大幅阻碍光线透过,必须彻底移除以获得最高的光效。 液晶屏下方就是整个改装最具价值的核心光学层: 1. **顶层扩散片(Diffusion Layer)**:通常位于最上方,用于柔化光线。 2. **菲涅耳透镜层(Fresnel Layer)**:由微观棱镜沟槽构成,能够折射光线并使其向前平行投射。拿起该层观察时,会发现它能奇妙地弯曲光线,甚至产生“物体还没真正移到其后方就能提前在透镜中看到其影像”的奇特折射现象。 3. **第二层扩散片**:垫在菲涅耳层下方,提供进一步的光学匀化。 4. **亚克力导光背板(Acrylic Back Panel)**:厚实的透明有机玻璃板,底部印有致密的微型扩散触点(diffusion pads),能够将边缘射入的光线均匀打散并发射出来。 正是这套极其复杂且难以自行低成本制造的光学系统,让废弃电视具备了极高的重用价值。正如 Matt 所感叹的那样:“这就是为什么这东西实际上非常有价值,否则只会被直接扔进垃圾堆,这在我看来实在不可思议。” ### [05:46](https://www.youtube.com/watch?v=8JrqH2oOTK4&t=346s) 原装背光源的弊端与 12V 高显色 LED 灯带改造 移开导光板后即可看到电视的原装发光元件。老式显示器通常采用冷阴极荧光灯管(CCFL),这种细玻璃管极其脆弱且内含剧毒的水银(汞),破裂风险极大,且驱动需要高压逆变器,存在严重安全隐患。 现代显示屏虽然多数采用 LED 灯条,但原厂走线方式五花八门。Matt 使用万用表测量发现,手头显示器的原装灯条为两组 23 颗 LED 串联结构。按单颗 LED 导通压降 3.3V 计算,驱动它们需要高达 76V 的直流电压;而市面上常见的普通升压模块通常只能达到 50V 左右。重新改接低压串并联不仅极其繁琐,也容易出错。 ```mermaid flowchart TD accTitle: 背光源方案选择逻辑 accDescr: 放弃原装CCFL与原厂LED高压方案,选用12V高显色LED灯带的原因 Start["屏幕原装背光类型"] --> CCFL["老式 CCFL 荧光灯管"] Start --> OEMLED["原厂 LED 背光条"] CCFL --> CCFL_Cons["含汞有毒 / 易碎\n需危险高压逆变板"] OEMLED --> OEM_Cons["特殊串联走线 (如23串/76V)\n升压模块难匹配 / 改线极繁琐"] CCFL_Cons --> BestWay["最佳替代方案:12V 高显色指数 (CRI) 商业 LED 灯带"] OEM_Cons --> BestWay BestWay --> Advantages["即撕即贴 / 安全低压 12V 易驱动\n显色中性逼真 (避免原厂背光红光过饱和偏色)"] end ``` 最安全、简单且效果最佳的方案是彻底弃用原装光源,换用标准的高显色指数(CRI)LED 灯带: - **安全与便利**:灯带背面自带背胶,撕下保护纸即可直接粘贴在原本背光模组的铝槽边缘,通过普通 12V 直流电源适配器即可驱动点亮。 - **色彩还原度**:显示器原厂背光针对 LCD 滤光片调校,直接作为照明时会导致红色过饱和、整体色彩怪异;而优质的高 CRI 照明灯带发光光谱中性,色彩还原更加真实自然。 ### [08:28](https://www.youtube.com/watch?v=8JrqH2oOTK4&t=508s) 光学层重组、铝合金外框制作与安装技巧 更换好 LED 灯带后,需要按优化后的顺序重新装回光学层。首先放回底部印有微扩散触点的亚克力导光板,此时点亮即可看到光线被极为均匀地铺满整块面板;接着盖上一层扩散片,将微小光点柔化相融;随后放上核心的菲涅耳透镜层。这层透镜会将光束向前收拢,营造出一种仿佛光源位于面板后方极深处的 3D 纵深感。 需要特别注意的是光学层的取舍: - **省去顶层第二张扩散片**:原机在菲涅耳透镜外通常还有一层扩散膜,但 Matt 强烈建议“将其舍弃不装”,因为多加这层外扩散膜会严重打散出射光的方向性,削弱光源推向远处的纵深感,从而大幅降低逼真的日光视觉欺骗效果。 由于加装的 LED 灯带厚度可能导致原装金属卡框无法原样扣合,固定和美化工艺如下: - **胶带临时固定**:先用胶带将各光学层和底槽整体缠绕定位。 - **定制铝合金外框**:用锯子将 L 型直角铝型材端头裁切成 45 度斜角,拼接成规整的直角边框,再使用环氧树脂(Epoxy)胶水直接粘在面板边缘。 - **电源线美化**:在引出的 12V 供电线上套上编织避震网管(braided sleeving),并在尾端焊接标准直流电源插座。 最终制成的伪窗面板发光极其均匀柔和,即使直视也不会感到刺眼。由于其光线具有较强的单向直射感,将这种面板倾斜安装在倾斜的斜顶天花板上,能够最完美地还原日光天窗倾泻而入的视觉冲击。此外,针对某些完全缺失菲涅耳层、仅依靠 CCFL 灯管排直接打光的极老或极大型号面板,也可以通过拆除灯管、在底壳密集铺设 LED 灯带的方式进行类似的基础发光面板改造。 ### [10:48](https://www.youtube.com/watch?v=8JrqH2oOTK4&t=648s) 直下式背光方案的权衡与笔记本屏幕的替代应用 在并联连接背光 LED 灯带的讨论中,Matt 分析了不同显示器背光类型的实际效果与利弊权衡。对于使用直下式背光(Direct-lit)的面板,其主要缺点在于无法像侧入式背光搭配特殊导光板那样显著削弱平方反比定律(inverse-square law)的影响,因此在模拟真实自然采光的效果上会打一些折扣。然而,这种结构的优势也十分显著:由于内部可以铺设更多条 LED 灯带同时发光,整个面板的最终亮度会高出许多,整体视觉效果依然非常令人满意。 对于希望制作更小尺寸补光灯的观众,Matt 指出废旧的笔记本电脑屏幕同样是极佳的原材料。他在简介中附上了专门制作笔记本屏幕采光面板的视频链接供大家参考。Matt 总结道,通过这种 DIY 改造,人们不仅能在一天中的任何时刻享受到极其逼真的日光照明,更重要的是将废弃电子垃圾变废为宝,为环保贡献了一份力量。正如 Matt 所评价的那样:“Not only do you get wonderful daylight illumination to enjoy at any time of day, but you'll be doing your bit for the planet by recycling, which I would say is very productive.” - 直下式背光虽然失去了侧入式导光板带来的平方反比定律弱化特性,削弱了部分日光模拟感,但发光总亮度更高。 - 笔记本电脑屏幕同样可以按类似原理改造成小型的桌面级日光面板。 - 回收废旧电视和屏幕兼具实用价值与环保意义。 ### [11:26](https://www.youtube.com/watch?v=8JrqH2oOTK4&t=686s) 提高个人生产力与 Skillshare 赞助推荐 借由“变废为宝的高生产力”这一话题,Matt 将内容自然过渡到了本期视频的赞助商——在线学习社区 Skillshare。他坦言时间管理从来都不是自己的强项,但通过在平台上学习创作者 Thomas Frank 的生产力课程,自己收获颇丰。这套课程系统地讲解了任务管理、高效笔记技巧以及电子邮件处理等实用方法,帮助他在日常生活中大幅提高了工作效率。Matt 幽默地表示,多亏了这门课程,观众们有望在频道上看到他更频繁地更新视频。 Matt 邀请观众通过视频简介中的专属链接注册 Skillshare,即可获得为期两个月的免费试用期,畅看平台上的所有课程资源;试用期结束后,订阅费用也仅为每月 10 美元左右,非常适合用于个人技能提升、培养业余爱好或助力职业发展。他在最后向大家号召:“If you sign up using the link in the description, you'll get, as I said, a two-month free trial for you to explore Skillshare's entire library of courses.” - Skillshare 为创作者提供了海量领域的技能学习课程。 - Matt 个人推荐了 Thomas Frank 讲授的生产力管理课程,涵盖任务规划、笔记与邮件处理。 - 专属链接提供 2 个月免费试用,后续常规订阅费用约为每月 10 美元。 ### [12:25](https://www.youtube.com/watch?v=8JrqH2oOTK4&t=745s) 结语与动手呼吁 在视频的尾声,Matt 进行了简短而热情的总结。他向所有观看视频的观众致谢,并由衷鼓励大家亲自去寻找一些被遗弃或屏幕碎裂的废旧电视,利用背光模组将它们改造成真正实用的日光光源,赋予这些废旧电器第二次生命。正如他在告别时所说:“I hope you've enjoyed it, and I hope you go out there, find some broken TVs, and put them to some good use.” 随后他以标志性的结束语“I'm Matt, you've been watching DIY Perks, and I hope to see you next time. Goodbye for now!”为整期教程画上了句号。 ## Notable quotes > [10:48](https://www.youtube.com/watch?v=8JrqH2oOTK4&t=648s) Not only do you get wonderful daylight illumination to enjoy at any time of day, but you'll be doing your bit for the planet by recycling, which I would say is very productive. — Matt > [02:40](https://www.youtube.com/watch?v=8JrqH2oOTK4&t=160s) 如果电视才刚拔掉电源不久,绝对要避免触摸这些电路板的背面,因为电容器中可能仍储存有电荷,可能会让你遭受严重的电击。 — Matt ## Mentioned Matt, DIY Perks, Skillshare, Thomas Frank, eBay, AliExpress, YouTube ## Video description In this video I'll be showing you how to take old/smashed TVs and computer monitors and turn them into realistic artificial window lights, so that you can have accurate daylight illumination at any time of day. This is all possible because of the technology used inside the backlight mechanism, as I explain in the video. Enjoy! Visit https://skl.sh/diyperks to get 2 months of Skillshare for FREE Parts links: Disclosure: These are affiliate links. If you click them and make a purchase from the various merchants they link to, DIY Perks may earn a commission. Affiliate programs and affiliations include, but are not limited to the eBay Partner Network and Amazon Associates. Here are the LED strips I recommend: https://www.aliexpress.com/item/33005666342.html You can also buy them on eBay: https://ebay.us/ow3oaP And here's how to make them with laptop screens: https://www.youtube.com/watch?v=Y2KK4YiOO1o OFFICIAL LINKS: Support me on Patreon: https://www.patreon.com/DIYPerks/ Official Website: https://www.diyperks.com/ Discord: https://diyperks.com/discord-server/ Forums: https://diyperks.com/community/ Twitter: https://twitter.com/DIYPerks [Source](https://www.youtube.com/watch?v=8JrqH2oOTK4)

Source quotes

[10:48] Matt: Not only do you get wonderful daylight illumination to enjoy at any time of day, but you'll be doing your bit for the planet by recycling, which I would say is very productive. [2:40] Matt: 如果电视才刚拔掉电源不久,绝对要避免触摸这些电路板的背面,因为电容器中可能仍储存有电荷,可能会让你遭受严重的电击。

Source quotes

[10:48] Matt: Not only do you get wonderful daylight illumination to enjoy at any time of day, but you'll be doing your bit for the planet by recycling, which I would say is very productive.

Original transcript

[0:00] this television is broken and I actually [0:03] got it out of the skip which is where [0:05] most people would put a television if it [0:07] stops working because it's essentially [0:09] useless from then on or is it well it [0:13] turns out there's some incredible [0:14] technology inside a television that can [0:17] be repurposed and turned into false [0:21] window lights now because of the [0:23] technology in the television the light [0:26] given off by these looks amazingly close [0:28] to real daylight so they're perfect for [0:31] giving a fresh and light atmosphere to [0:33] dark rooms or corridors they're also [0:36] great for long dark winter days and can [0:39] give you a boost in energy and your [0:41] overall mood which makes them incredibly [0:43] unique and I would say somewhat valuable [0:47] so sit back as I show you how to [0:50] dismantle a television to make one of [0:53] these let's get to it [0:58] this video is sponsored by skill share [1:01] the online learning community with over [1:02] 25,000 classes ranging from design [1:05] business art and more sign up for a free [1:08] two months unlimited access trial by [1:10] visiting the link in the description and [1:11] start learning a new skill today so with [1:14] only a few exceptions the vast majority [1:16] of TVs and monitors should be able to be [1:19] turned into light panels even ones that [1:21] are smashed but before we begin I'll [1:24] just explain the trick behind how the [1:26] final lights fool you into thinking that [1:29] the light coming from them is actually [1:31] real daylight so as I've already implied [1:34] this hallway is lit entirely by a single [1:39] false window light that has been made [1:41] out of a 30-inch computer monitor now [1:45] even for me here in person it looks [1:48] remarkably convincing it just looks like [1:50] real daylight on a cloudy day and there [1:53] are several reasons why this is the case [1:55] but the primary one is that because the [1:58] back lights panels in TVs feature a [2:00] friend lens layer the light cast from [2:03] them after a little modification appears [2:05] to be coming from much further away as [2:07] the origin is pushed back beyond the [2:10] rear [2:11] the panel this reduces the effect of [2:14] what's known as the inverse square law [2:16] so objects further away from the panel [2:19] aren't that much dimmer than objects [2:21] close at hand compared to a basic LED [2:24] panel which features no focusing layers [2:26] you can see that the light drop off is [2:29] much less apparent in comparison thanks [2:32] to this reduced light fall-off it fools [2:35] your brain into thinking that the light [2:36] is coming from far away and thus it [2:39] looks like daylight now getting the back [2:41] lights panels out of old TVs and [2:43] monitors is actually quite [2:45] straightforward but it does vary [2:47] depending on the type and brand [2:49] typically however it's just a case of [2:51] unplugging it from the mains and lying [2:53] it down flat so that you can unscrew any [2:55] screws on the back once this is done the [2:58] plastics should separate and you can [3:00] access the internals here again you'll [3:03] have to unscrew anything you can find [3:05] and strip out any metal brackets and [3:07] electronics if it has only recently been [3:10] unplugged from the mains you definitely [3:11] need to avoid touching the back of these [3:13] boards though as there may be some power [3:15] still stored in the capacitors which you [3:17] could still get a nasty shock from as [3:19] you strip out the components make sure [3:22] to separate them into groups of [3:23] electronics plastics and metals and then [3:27] take them to your local recycling center [3:29] to be disposed off properly now computer [3:31] monitors as opposed to TVs tend to be [3:34] much simpler to disassemble as all I had [3:36] to do with this one was remove four [3:37] screws on the back unclip the plastics [3:40] and then lift out the few internals [3:42] which won't even screw it in place so [3:45] with that done you should just have the [3:47] panel itself and it's with this that [3:49] we're going to make the lightweight but [3:52] before we do that we need to actually [3:53] again continue to disassemble it and [3:56] remove the metal border now usually [4:00] these have some clips at the side which [4:03] can just be removed by inserting a [4:05] screwdriver [4:06] and pushing upwards with it [4:11] we can now remove the LCD panel itself [4:15] which is what usually generates the [4:17] image but in this case it's faulty so it [4:20] needs to be removed for better light [4:22] efficiency we can now see the backlight [4:26] itself and there's actually a lot going [4:28] on here which is why it's so useful for [4:31] faking daylight because it's got a lot [4:33] of friend layers and reflectors inside [4:36] to help push the light forwards out of [4:39] it and that's why this is actually quite [4:42] a valuable thing that would just [4:44] otherwise be thrown away and that's to [4:47] me unbelievable so going through these [4:50] different layers you usually find first [4:52] a diffusion layer and then underneath [4:55] you'll find the friend layer and this [4:58] has a lot of microscopic grooves in it [5:01] that cause the light to be reflected [5:03] forwards and it's a really interesting [5:05] panel actually like if you take it out [5:07] you can see this is bending the light so [5:09] you can see things that are behind it [5:11] before they actually get behind it is [5:14] quite strange stuff and then after that [5:17] you'll generally find another diffusion [5:20] sheet and then the acrylic back panel [5:24] now this is quite interesting as well [5:26] because they usually have lots of [5:27] diffusion pads on them these are very [5:30] small and they spread the light so again [5:33] this is why these things are actually [5:36] pretty useful and would be otherwise [5:39] hard to build if you were to build it [5:41] out of separate components with these [5:44] parts put to one side we should now be [5:46] able to see the backlight itself in the [5:49] case of this monitor it's actually a [5:51] bank of LEDs which is much more common [5:54] on newer displays but if it's an older [5:57] type display you're likely to come [5:59] across a couple of CCFL or compact [6:03] fluorescent tubes these are very [6:05] delicate and are made out of glass so [6:08] make sure that you don't crack them as [6:10] they do contain mercury which is of [6:12] course toxic less care doesn't need to [6:15] be taken with LEDs however as they are [6:17] pretty safe in either case neither [6:20] backlight type is particularly [6:21] straightforward to power [6:23] the compact fluorescents though you can [6:25] buy a separate power inverter board [6:27] which is a great way of hooking them off [6:29] quickly and easily but it is dealing [6:32] with fairly high voltages and that's [6:34] potentially unsafe if you don't know [6:36] what you're doing so it's not something [6:37] that I'd personally recommend however [6:40] with the LED variety they often wide up [6:43] in completely different ways so it's [6:45] going to be quite hard for me to convey [6:47] you know how to wive more properly and [6:49] they still deal with fairly high [6:51] voltages for example probing around with [6:54] a multimeter I discovered that the LED [6:56] backlights from my monitor were wired up [6:59] in two series sets of 23 LEDs assuming [7:03] each LED has a Ford voltage of 3.3 volts [7:06] that means that we'd need 76 volts to [7:09] power it which is a bit difficult to [7:11] achieve as readily available voltage [7:13] boosters only go up to about 50 volts or [7:16] so this does of course vary depending on [7:18] the display so you may have better look [7:20] another alternative would be to split [7:23] the series up and power it in low [7:25] voltage chunks which is certainly doable [7:28] but it's very fiddly work so again I [7:30] don't really recommend it so the safest [7:33] and easiest thing to do regardless of [7:35] the backlight type is to replace it with [7:37] something else and if you're familiar [7:40] with this channel it'll come as no [7:41] surprise to know that we're going to use [7:43] any these strips right so these [7:46] basically can just be stuck in place as [7:48] they have an adhesive on the back that [7:50] can just be peeled away and this allows [7:52] them to be stuck firmly where the [7:53] previous back lights used to be for [7:56] testing purposes you can hook it up to a [7:58] 12 volt power adapter to see it light up [8:01] now a big advantage of using LED strips [8:04] like this is that they are intended to [8:06] be a light source and not typically [8:08] battle i'ts so one thing you'll notice [8:11] with the white light coming off a [8:12] monitor is that it tends to make Reds [8:15] look oversaturated and the colors can [8:17] look a bit weird but with this they're [8:19] much more neutral as long as you go with [8:21] a decent CRI rating for the LED strips [8:24] and I've got a link in the description [8:25] to a set that I recommend so now that [8:28] they are wired up it's time to put back [8:31] the original layers so we'll start with [8:34] the acrylic and with this in place you [8:37] can see [8:37] how evenly it spreads the light out from [8:39] the LEDs thanks to the tiny diffusion [8:42] pads on its underside when one of the [8:45] diffusion sheets is placed on top of [8:47] this it blurs the pants together and [8:49] gives it a very soft appearance usually [8:52] the frontal layer gets put back next [8:54] which focuses the light forwards and [8:57] because of this it gives the impression [8:59] of 3d space behind the panel this is [9:02] actually a really interesting effect and [9:05] is the reason why the panel's look so [9:07] much like real daylight as the light [9:09] appears to be coming from far away after [9:12] this friendly you'd usually have another [9:14] diffusion layer but I recommend leaving [9:16] this off as it does reduce the daylight [9:18] effect quite a lot now if you find that [9:21] the original frame doesn't fit properly [9:23] due to the LED strips just use tape [9:26] instead while reasonably presentable it [9:29] isn't particularly smooth or even so to [9:32] neaten it up we can use a few right [9:34] angle aluminum lengths that have been [9:36] cut at an angle with a saw this makes a [9:40] really neat frame and hold them in place [9:42] we can simply glue them down using epoxy [9:48] whilst that's drying we can extend the [9:51] power wise and make the wire look neater [9:53] by sliding on some stylish braided [9:56] sleeving on the other end of this we can [9:59] simply add a power socket so as you can [10:03] see they emit a decent amount of light [10:05] and they do so in a very soft manner [10:08] which means that you can look at them [10:10] directly and that it's actually really [10:13] Pleasant on your eyes which makes for a [10:15] really nice soft illumination in a room [10:18] though because they project the light [10:20] outwards fairly directly having them [10:22] mounted on angled ceilings really helps [10:25] to sell the daylight effect even more [10:27] now one thing to be aware of is that [10:29] some very old or very large flat screen [10:32] panels skimp out on the frontal layer [10:35] that makes the daylight effect possible [10:37] and instead that they just feature a [10:39] Bank of compact fluorescent tubes if [10:41] this is the case with your screen you [10:43] can just carefully remove them and [10:45] replace them with LED strips wiring them [10:48] up in parallel the downside to this kind [10:50] of display is that you won't get the [10:51] same reduction in the inverse square law [10:54] so it loses out on a lot of the daylight [10:56] effects but on the flip side you will [10:58] have a much brighter panel as there'll [11:00] be more LED strips giving off the light [11:02] it still looks good at any rate another [11:05] thing to note is that you can also use [11:07] old laptop screens for making smaller [11:09] daylight panels and I have a dedicated [11:11] video on this which you can find a link [11:13] to in the description [11:14] at any rate not only do you get [11:17] wonderful daylight illumination to enjoy [11:19] at any time of day but you'll be doing [11:21] your bit for the planet by recycling [11:23] which I would say is very productive [11:26] speaking of which if you want to [11:28] increase your own productivity then why [11:30] not sign up for a free two month trial [11:32] at Skillshare the online learning [11:35] community for creators where you can [11:37] learn new skills on a huge variety of [11:39] topics I've personally been following a [11:42] Productivity course by Thomas Frank [11:44] where he goes through managing tasks [11:47] taking helpful notes getting better at [11:49] email and a whole lot in addition and [11:51] it's been super useful in getting far [11:53] more done in a day like time management [11:56] isn't actually one of my Forte's so [11:57] thanks to Thomas and skill share you'll [12:00] hopefully see more videos from me [12:01] if you sign up using the link in the [12:03] description you'll get as I said a [12:05] two-month free trial for you to explore [12:08] skill shares entire library of courses [12:10] and they're on after it's only $10 a [12:12] month to keep learning new skills to [12:14] advance your life hobby or career so [12:17] what are you waiting for get signed up [12:19] to skill show using the link below and [12:20] start learning today so that's it for [12:25] this video I hope you've enjoyed it and [12:27] I hope you go out there find some broken [12:30] TVs and put them to some good use but [12:33] other than that I'm Matt you've been [12:35] watching DIY perks and I hope to see you [12:38] next time good bye for now