GitHub Debuts Custom Keyboard Kit With Unreleased Hawk Switches
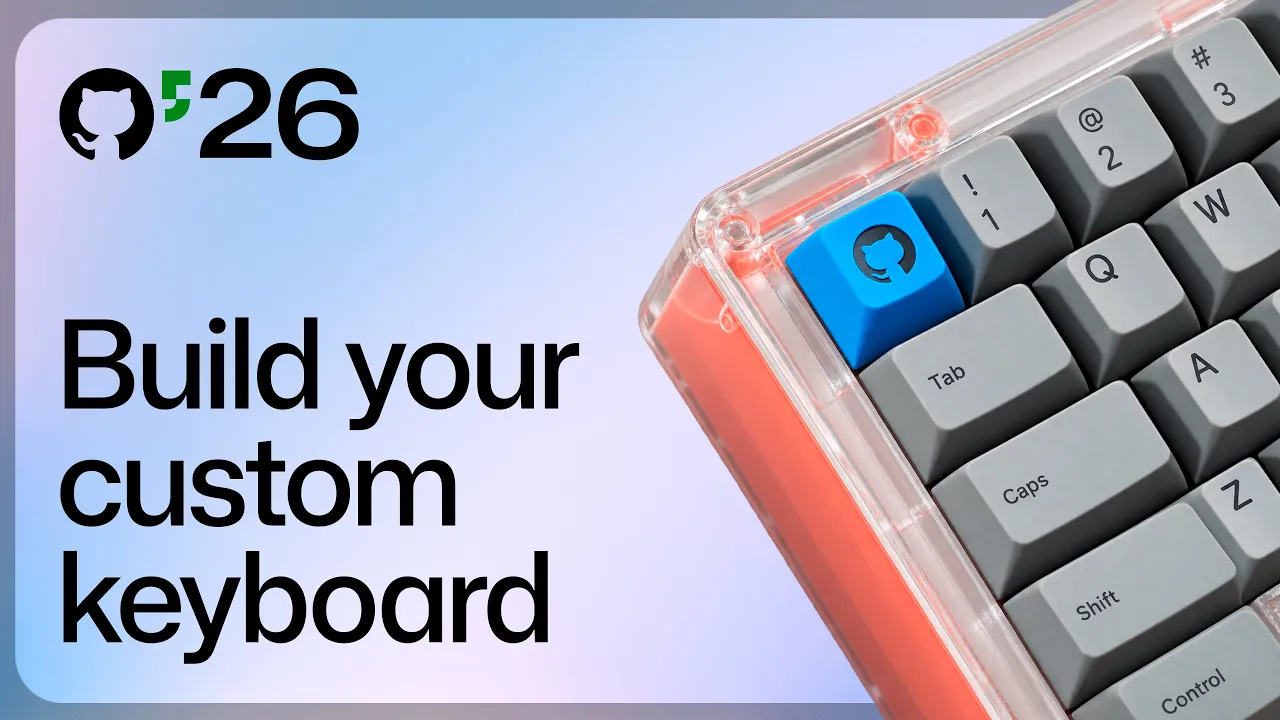
GitHub
The modular blind-box kit combines hot-swappable acoustic dampeners with fully programmable firmware that allows developers to bind hardware keys to GitHub Copilot commands.
AI-assisted summary of Inside the GitHub Universe keyboard kit: unboxing and assembly — original source. Check the original for full context.
Source published:
Key ideas
- GitHub introduced an exclusive custom mechanical keyboard kit for GitHub Universe attendees packaged as a blind box with randomized component colors and layouts. (0:00)
- The build debuts proprietary Hawk linear switches developed specifically for the conference and never previously released to the public. (0:00)
- The keyboard employs a comprehensive acoustic dampening system featuring an internal dampener sheet, adhesive perimeter strips, top-housing donut bumpers, and switch plate taco bumpers. (6:10)
- The assembled board is fully programmable with custom firmware, allowing users to configure custom macros and automation like triggering GitHub Copilot prompts. (15:10)
Detailed notes
## Background Published by GitHub on YouTube on October 16, 2026, this video serves as a step-by-step assembly guide for the custom mechanical keyboard kit created for GitHub Universe attendees. The accompanying description explains that the tutorial demonstrates how to assemble the randomized blind box kit from scratch, covering stabilizer installation, exclusive Hawk linear switches, case dampening, keycap mapping, and custom macro programming.
## TL;DR The host unboxes the randomized components of the GitHub Universe blind box kit, revealing custom Hawk linear switches, dampening materials, mounting plates, and varied case parts. Assembly begins directly on the bare PCB with modifying and screwing in stabilizers, followed by layering the acoustic foam, switch plate, and hot-swappable linear switches. After outfitting the top and bottom cases with silicone donut and strip dampeners and securing the USB-C daughterboard, the internal sandwich is cabled together and snapped into the enclosure. The build wraps up with keycap placement, layout configuration tips for custom macros or Copilot prompts, and a concluding sound test demonstrating the board's deep, smooth typing profile.
## Atmosphere & style The presentation has an encouraging, hands-on maker vibe that makes custom hardware assembly feel approachable rather than intimidating. The host speaks in an upbeat, conversational tone, openly validating the tedious or nerve-wracking parts of the build—such as popping out stabilizer bars—before reassuring builders that the rest goes smoothly. Watching the guide feels like attending a focused convention workshop, with satisfying tactile milestones along the way that culminate in the proud excitement of the final, buttery typing test.
## Bulletin - [00:00](https://www.youtube.com/watch?v=q3Jod8Xu8BY&t=0s) GitHub introduced an exclusive custom mechanical keyboard kit for GitHub Universe attendees packaged as a blind box with randomized component colors and layouts. - [00:00](https://www.youtube.com/watch?v=q3Jod8Xu8BY&t=0s) The build debuts proprietary Hawk linear switches developed specifically for the conference and never previously released to the public. - [06:10](https://www.youtube.com/watch?v=q3Jod8Xu8BY&t=370s) The keyboard employs a comprehensive acoustic dampening system featuring an internal dampener sheet, adhesive perimeter strips, top-housing donut bumpers, and switch plate taco bumpers. - [15:10](https://www.youtube.com/watch?v=q3Jod8Xu8BY&t=910s) The assembled board is fully programmable with custom firmware, allowing users to configure custom macros and automation like triggering GitHub Copilot prompts.
## Key takeaways - [00:00](https://www.youtube.com/watch?v=q3Jod8Xu8BY&t=0s) The GitHub Universe keyboard kit is distributed as a blind box with randomized keycaps, plate colors, and housing variants to give each builder a unique board. - [00:00](https://www.youtube.com/watch?v=q3Jod8Xu8BY&t=0s) Each kit includes exclusive unreleased Hawk linear switches designed specifically for the GitHub Universe event. - [01:42](https://www.youtube.com/watch?v=q3Jod8Xu8BY&t=102s) Keycap stabilization begins directly on the bare PCB, requiring builders to swap in an extra-wide steel wire specifically for the spacebar. - [01:42](https://www.youtube.com/watch?v=q3Jod8Xu8BY&t=102s) Stabilizer orientation alternates across the board, with the spacebar wire along the top edge and secondary stabilizer wires along the bottom. - [01:42](https://www.youtube.com/watch?v=q3Jod8Xu8BY&t=102s) The default GitHub Universe conference layout adopts a short or split backspace, removing the need for a backspace stabilizer during the standard build. - [06:10](https://www.youtube.com/watch?v=q3Jod8Xu8BY&t=370s) A custom sound dampener sheet sits between the PCB and the switch mounting plate to optimize the acoustic profile and maintain tight switch seating tolerances. - [06:10](https://www.youtube.com/watch?v=q3Jod8Xu8BY&t=370s) Hot-swap PCB sockets allow Hawk switches to be press-fit directly without soldering, though certain upper-row and caps-lock sockets are inverted by design. - [10:00](https://www.youtube.com/watch?v=q3Jod8Xu8BY&t=600s) Eight silicone donut bumpers (six top, two bottom) are set into designated top housing recesses using tweezers to isolate internal vibrations. - [10:00](https://www.youtube.com/watch?v=q3Jod8Xu8BY&t=600s) The bottom chassis requires six adhesive dampener strips and houses the breakout daughterboard, which secures the USB-C port with two screws. - [10:00](https://www.youtube.com/watch?v=q3Jod8Xu8BY&t=600s) Right-angle silicone taco bumpers slip over the switch plate tabs and corners to prevent harsh metal-on-plastic vibration transfer. - [13:29](https://www.youtube.com/watch?v=q3Jod8Xu8BY&t=809s) Final case closure involves connecting the breakout ribbon cable to the PCB, snapping the housing perimeter tabs flush, driving four corner screws, and adding rubber desk feet. - [15:10](https://www.youtube.com/watch?v=q3Jod8Xu8BY&t=910s) Keycaps support flexible modifier rows and split layouts, and the board firmware can be reprogrammed to trigger custom shortcuts or GitHub Copilot commands.
## Detailed walkthrough ### [00:00](https://www.youtube.com/watch?v=q3Jod8Xu8BY&t=0s) Unboxing the GitHub Universe Blind Box Kit
The host introduces a custom mechanical keyboard kit produced specifically for GitHub Universe. The kit comes packaged as a blind box featuring randomized component colors and options, giving builders an individualized experience as they construct their board from scratch. Opening the main packaging reveals the core keyboard housing, a randomized set of keycaps (the host pulls a dark set rather than the alternate light variant), and an accent keycap pack in blue. Also included are exclusive "Hawk" linear switches developed specifically for GitHub Universe that have never been released to the public before.
Inside the primary box, the components are systematically labeled. Builders will find the top housing, bottom housing, a switch mounting plate (which comes in randomized colors; the host receives a blue plate), and a separate white box. This white box contains a printed instruction manual for anyone who prefers following written documentation, along with the board's electronics, sound dampening materials, case accessories, and the assembly tools required to complete the build.
```mermaid flowchart TD accTitle: Core Keyboard Internal Assembly Stack accDescr: Step-by-step layering of the internal mechanical keyboard components from the PCB base up to switch installation. subgraph Base ["Base Layer"] PCB["Printed Circuit Board (PCB)"] Stabs["Stabilizers & Gold Screws"] end subgraph Structural ["Acoustic & Plate Assembly"] Damp["Sound Dampener Sheet"] Plate["Switch Plate"] end subgraph Actuation ["Switches"] Switches["Hawk Linear Switches"] end
PCB --> Stabs Stabs --> Damp Damp --> Plate Plate --> Switches ```
- The kit includes a printed circuit board (PCB) described as the core "brains" of the keyboard. - Included accessories feature custom Hawk linear switches, keycap accent kits, a dampener sheet for tuning acoustics, and dedicated assembly tools. - Speaking about the excitement of the unboxing experience, the host notes: “It's a blind box, meaning the parts are randomized and you get to build this mechanical keyboard from the ground up completely custom and I am thrilled to show it to you today.”
[01:42](https://www.youtube.com/watch?v=q3Jod8Xu8BY&t=102s) Installing and Screwing in the Stabilizers
Assembly starts directly on the bare PCB with the installation of the key stabilizers, which prevent wider keys such as the spacebar from wobbling during typing. The host cautions builders to keep track of all small screws and plastic parts when unbagging. Setting up the spacebar stabilizer requires swapping out its default wire for the included extra-wide steel bar. Removing the original wire requires firmly twisting the plastic housings to pop the bar out—a maneuver the host acknowledges can feel slightly alarming—before snapping the wider bar into place until it produces an audible click on both sides.
Once the wide spacebar stabilizer is prepped, it must be mounted specifically on the left side of the board with the metal wire oriented along the top edge. Builders must flip the PCB over to secure the stabilizer housings using two small gold screws fastened through the gold contact rings on the underside. Moving across the board, stabilizers are inserted for the remaining wide keys, with the orientation flipping so that the metal crossbars sit along the bottom of the housings rather than the top. The host highlights that attendees assembling the kit on-site at GitHub Universe will use a layout with a shorter backspace key, eliminating the need for a backspace stabilizer.
- Stabilizers must be positioned with the spacebar wire along the top edge and the secondary stabilizer wires along the bottom edge. - Each stabilizer is secured from the rear of the PCB using dedicated small gold screws. - The standard GitHub Universe conference build uses a split/short backspace layout, meaning builders do not need to install a stabilizer in that location unless choosing a custom layout at home. - Acknowledging the tedious nature of mounting small hardware, the host encourages builders by stating: “This part is the slowest part and the most annoying part, everything else I promise is way easier.”
[06:10](https://www.youtube.com/watch?v=q3Jod8Xu8BY&t=370s) Installing the Sound Dampener, Plate, and Hawk Switches
After securing all stabilizers, the next phase builds the internal acoustic and switch layer. The custom sound dampener sheet is laid directly across the top surface of the PCB. This dampening layer improves the board's sound profile while simultaneously holding tolerances tight so the switches seat firmly. The colored mounting plate is positioned squarely on top of the dampener, ensuring all rectangular cutouts align flush against the dampening material and PCB sockets below.
With the plate seated, the Hawk linear switches can be inserted into the assembly. The host demonstrates the anatomy of the switch, showing the spring-loaded mechanical stem, the top keycap mount, and the metal contact pins extending from the base. Inserting a switch simply requires lining up the bottom pins and central plastic guide post with the corresponding sockets on the PCB and pressing down firmly until it clicks into place.
The installation requires attention to orientation quirks depending on the chosen layout. At the upper section of the GitHub Universe conference layout, certain switch sockets are inverted, requiring switches to be inserted upside-down. Similarly, the caps lock position offers options: while custom home builders might offset the switch for a stepped caps lock key, the standard Universe build mounts the switch upside-down in the central position. The switches seat cleanly directly between the stabilizer housings for all stabilized keys.
- Hawk switches are brand-new, linear mechanical switches custom-manufactured exclusively for GitHub Universe. - Switches fit directly through the plate and sound dampener into the hot-swap sockets on the PCB without requiring soldering. - Builders may have spare switches remaining once every socket is filled, which can be saved as backups. - Calming any confusion about inverted PCB sockets, the host explains: “Don't be concerned, that is normal.”
[09:30](https://www.youtube.com/watch?v=q3Jod8Xu8BY&t=570s) Preparing the Top Housing and Donut Bumpers
The build transitions from the internal electronics assembly to preparing the structural enclosure, starting with the keyboard's top housing. Builders retrieve the top housing frame along with the included pair of tweezers and small silicone "donut bumpers" stored in a small accessory case.
These donut bumpers sit within designated recesses on the housing to isolate vibrations and provide a cushioned mounting interface for the internal assembly. To make the placement easily distinguishable on camera, the host swaps out the standard black bumpers included in commercial kits for high-contrast red bumpers.
- The tweezers included in the accessory kit assist in grabbing and placing small hardware like the donut bumpers. - Standard attendee kits ship with black donut bumpers, though the host uses red variants for demonstration visibility. - Clarifying the visual difference on stream, the host remarks: “Now for this tutorial I specifically got myself some red ones purely so you can see a little bit better, but you'll have black ones you can” use to finish the installation.
[10:00](https://www.youtube.com/watch?v=q3Jod8Xu8BY&t=600s) Preparing the Top and Bottom Housings and Installing Dampeners
The build shifts focus toward prepping the exterior enclosures and dampening hardware. The presenter unpacks their top housing from its bag, revealing a clear chassis, though attendees may find different case colors in their own kits. Flipping the top housing upside down, the next step is placing the small circular donut bumpers into their designated cutouts. While the retail attendee kits include black bumpers, the host uses bright red ones specifically so they show up cleanly on camera. Tweezers make this step significantly easier to manage: “You don't necessarily have to, but it is a nice thing to be able to use the tools that you have.” Using the tweezers, the bumpers are nested directly into the small dampener recesses rather than the screw holes, requiring six placed along the top edge and two along the bottom for an even distribution across eight mounting points.
Moving to the bottom housing—which turns out to be a vibrant red piece in the host’s unboxing—long dampening strips must be adhered to the interior mounting shelves. These adhesive strips correspond to specific sizes molded into the case perimeter, with four strips positioned across the top edge and two along the bottom. Once those strips are laid down, the breakout PCB is installed. This dedicated daughterboard handles the physical USB-C port that links the keyboard to a computer. The breakout board is oriented face down so the USB-C jack sits flush through the case cutout, then secured firmly into two round threaded standoffs using two screws driven with the included hex wrench tool.
Finally, the assembly returns to the switch plate to affix the corner isolation pads known as taco bumpers. These right-angle silicone sleeves slip directly over the tabs along the edges and outer corners of the switch plate, preventing direct plastic-on-metal or plastic-on-plastic vibrations once the sandwich is fully encased.
- **Donut bumpers:** 8 total placed inside the top housing (6 along the upper rim, 2 along the lower rim). - **Bottom housing strips:** 6 total adhesive dampener strips (4 across the top shelf, 2 across the bottom). - **Breakout daughterboard:** Fitted face-down into the bottom case cutout and fastened with 2 screws via the provided mini wrench. - **Taco bumpers:** Right-angle silicone sleeves slipped over the plate tabs and corner edges to cushion the mounting points.
---
[13:29](https://www.youtube.com/watch?v=q3Jod8Xu8BY&t=809s) Final Case Assembly and Hardware Fastening
With the separate structural assemblies prepared, the keyboard sandwich is ready for final integration. The workspace is arranged systematically with the top housing at the upper edge, the bottom case nearby, and the switch-populated PCB oriented with the switches pointing downward and the USB-C header aligned toward the case's rear port opening. The ribbon cable extending from the breakout daughterboard in the bottom housing is carefully plugged into the main PCB socket, oriented with the small plastic tab facing upward so the connector slides into position smoothly.
```mermaid flowchart TD accTitle: Keyboard Final Assembly Flow accDescr: Sequence of connecting the breakout daughterboard, seating the plate assembly, snapping the chassis, and fastening the base. subgraph Electrical["Electrical Connection"] A["Align breakout board ribbon cable"] B["Plug connector into main PCB receptacle"] end subgraph Alignment["Housing Integration"] C["Seat PCB & plate sandwich into top housing"] D["Align bottom housing & snap retention tabs"] end subgraph Fastening["Case Closure"] E["Drive 4 case screws through bottom plate"] F["Adhere rubber feet over base corners"] end A --> B B --> C C --> D D --> E E --> F ```
Once the electrical connection is made, the main PCB and plate assembly are lowered into the top housing cavity until seated flush against the internal bumpers. The bottom case is inverted, lowered over the inverted plate stack, and aligned with the perimeter tabs. Ensuring an even fit requires gentle tactile adjustment across the seams: “Now, it looks nice but what you want to do is make sure that everything is fully flushed.” The integrated plastic retention tabs along the edges snap into place with a distinct feel once properly seated. To finish sealing the enclosure, four case screws are driven into the corner screw recesses and torqued down snugly. The exterior assembly concludes by pressing adhesive rubber feet into the recesses on the underside of the case, preventing the board from sliding across a desk.
---
[15:10](https://www.youtube.com/watch?v=q3Jod8Xu8BY&t=910s) Keycap Mapping, Custom Layouts, and Final Sound Test
The final phase transforms the assembled board into a functional typing tool. Kits include either dark or light keycaps along with accent novelties depending on the blind-box draw. The host places the packaging card nearby to reference the included layout diagram, joking about keyboard topography: “Alright y'all, I'm going to put my map of keycaps over here because no matter how much I type, I always forget the layout of a keyboard.” Keys equipped with stabilizers, such as the Enter key, feature three mounting stems underneath that must be pressed simultaneously onto the central switch stem and the two outer stabilizer sliders.
The kit provides layout modularity, featuring both short and wide Backspace keycaps to accommodate different user preferences and stabilizer arrangements. The bottom modifier row can likewise be tailored to individual workflow habits: the host opts for standard Control and Alt placements on the left, reserving adjacent positions for Function or Super keys. Because the board supports programmable firmware, builders can configure every key to trigger custom actions: “You can program this thing to your heart's content. You could add custom firmware, you could add macros, you can make it run prompts in the GitHub Copilot app.”
With the full set mounted, the host wraps up by tapping across the rows, demonstrating the deep acoustic profile of the lubricated linear Hawk switches cushioned by the silicone dampeners: “Seriously, listen to this. Do you hear how buttery that is? That's amazing. I love it.” With the assembly complete, builders are encouraged to explore the online documentation, flash custom keymaps, and celebrate their custom builds at GitHub Universe.
## Mentioned GitHub, GitHub Universe, Hawk linear switches, GitHub Copilot, USB-C
## Video description Building your custom mechanical keyboard from GitHub Universe? Follow this step-by-step assembly guide to put together your randomized blind box kit from the ground up. We cover everything from installing stabilizers and exclusive Hawk linear switches to seating the plate, assembling the housing, and mapping keycaps. Learn how to tune your board, program custom macros, and get your keyboard ready for typing.
Grab your pass, and we'll see you October 28-29: https://githubuniverse.com/?utm_source=YouTube&utm_medium=Social&utm_campaign=keyboard
#GitHubUniverse #Keyboard #GitHub
— CHAPTERS —
00:00 Introduction & unboxing the kit 01:42 Preparing the PCB & stabilizers 06:10 Installing the dampener, plate & switches 09:30 Preparing top & bottom housing 13:29 Final keyboard case assembly 15:10 Adding keycaps & final review
Stay up-to-date on all things GitHub by connecting with us:
YouTube: https://gh.io/subgithub Blog: https://github.blog X: https://twitter.com/github LinkedIn: https://linkedin.com/company/github Insider newsletter: https://resources.github.com/newsletter/ Instagram: https://www.instagram.com/github TikTok: https://www.tiktok.com/@github
About GitHub It’s where over 180 million developers create, share, and ship the best code possible. It’s a place for anyone, from anywhere, to build anything—it’s where the world builds software. https://github.com
[Source](https://www.youtube.com/watch?v=q3Jod8Xu8BY)